How to Add a Bathroom: Planning, Permits, and Cost for a New Half or Full Bath
A complete planning guide for adding a half bath or full bathroom to your home — covering location, permits, rough-in plumbing, electrical, cost, and what to DIY vs. hire out.
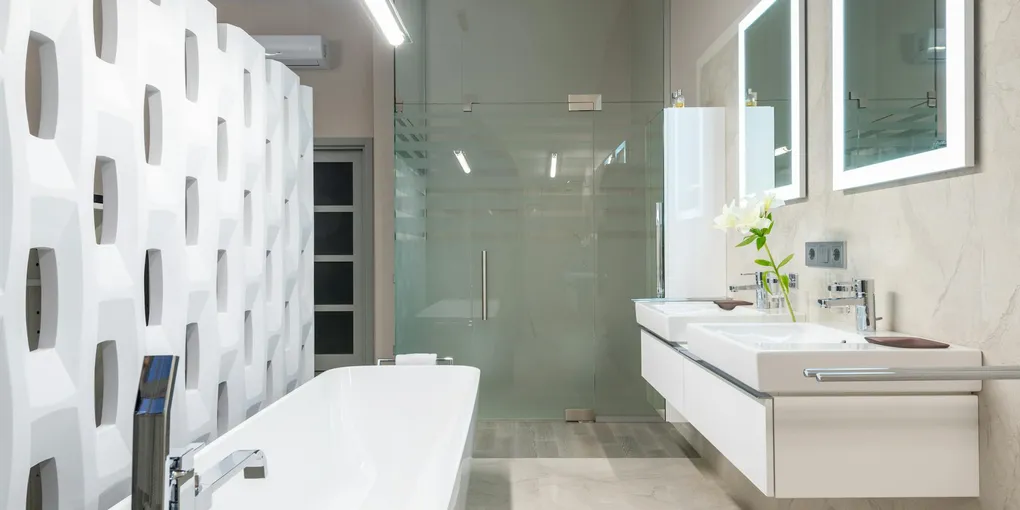
Adding a bathroom is one of the highest-return projects a homeowner can make. According to Remodeling Magazine’s Cost vs.
Adding a bathroom is one of the highest-return projects a homeowner can make. According to Remodeling Magazine’s Cost vs. Value report, a mid-range bathroom addition recoups roughly 54–63% of project cost at resale — and in homes with only one bathroom, adding a second frequently recoups 80–100% or more. More practically, it eliminates the morning bottleneck, adds livability, and makes a home marketable to a wider pool of buyers.
This guide is not a step-by-step build article. Adding a bathroom is a multi-trade project — plumbing, framing, electrical, tile, and finish work — that unfolds over weeks. What this guide covers is the planning phase: how to choose a location, what permits to pull, what the rough-in involves, what it costs, and where the line between DIY and licensed work should fall.
What to Budget and Plan For
Before the first wall opens, you need to source the right materials. Here’s what to evaluate and price out early — these items have long lead times or are frequently backordered at big-box stores.
- Bathroom rough-in plumbing kit — drain, P-trap, and supply stub-out components
- 12-inch rough-in toilet — standard rough-in distance; measure before buying
- 50 CFM bathroom exhaust fan — minimum code requirement for enclosed bathrooms without operable windows
- Shower valve rough-in kit — needed if adding a three-quarter or full bath; brand must match trim kit
- Cement board for bathroom walls — required substrate behind any tile in wet areas
- 18-inch small bathroom vanity — compact option for tight half-bath spaces
Order rough-in fixtures before framing begins so dimensions can be confirmed against the actual units.
Half Bath vs. Full Bath vs. Three-Quarter Bath
Understanding the distinction upfront determines your budget, your space requirement, and the complexity of rough-in.
Half Bath (Powder Room)
- Fixtures: toilet + sink only
- Space needed: 11–30 sq ft (minimum 11 sq ft per IRC)
- No shower or tub drain required
- Cost range: $5,000–$15,000 DIY-finish / $12,000–$25,000 full hire
- Best for: high-traffic areas, main floors, under stairs
Three-Quarter Bath
- Fixtures: toilet + sink + shower (no tub)
- Space needed: 36–50 sq ft minimum
- Requires shower drain and vent, shower valve rough-in
- Cost range: $10,000–$20,000 DIY-finish / $18,000–$35,000 full hire
- Best for: basement, guest room, master suite addition
Full Bath
- Fixtures: toilet + sink + shower + tub
- Space needed: 50–80 sq ft minimum (5×8 is the historic standard)
- Most complex rough-in; requires tub drain, overflow, shower valve, and separate vent stack sizing
- Cost range: $15,000–$30,000 DIY-finish / $25,000–$50,000+ full hire
- Best for: primary bathrooms, new additions, homes with one existing bathroom
A three-quarter bath — toilet, vanity, and a walk-in shower — delivers most of the functional value of a full bath at lower cost and in less floor area. It is frequently the better choice when space is constrained.
Where to Add a Bathroom
Location drives cost more than any other variable. Plumbing runs downhill; drain lines must slope 1/4 inch per foot toward the main stack. Every foot of horizontal drain run that requires opening walls or cutting concrete adds cost and complexity.
The best locations, in order of cost efficiency:
1. Closet adjacent to an existing bathroom The ideal scenario. The plumbing wall is already there. In many cases, the new bathroom shares the existing vent stack with minimal new piping. A 4×6 or 5×6 closet converts into a workable half bath without major structural changes.
2. Space directly below an existing bathroom Gravity is your friend here. Drain lines can drop straight down to tie into existing drain runs below. Basement bathrooms benefit most from this configuration. The main challenge is that concrete floors require cutting, which adds $500–$2,000 to the project.
3. Under a staircase Often underutilized space that is already partially enclosed. Ceiling height varies, so confirm clearances before planning full fixtures. Works best for half baths. Plumbing must still route to the stack, so map the path before committing.
4. Corner of a bedroom or hallway Requires framing a new room within the existing footprint. Plumbing may need to run inside new walls to reach the stack, which adds both material and labor. This is the most expensive option if the stack is more than 10 feet away.
What to avoid: Locations that require pumping waste uphill (unless using a macerating system), locations requiring a new or extended vent stack to penetrate the roof, and locations on exterior walls in cold climates where supply line freeze risk is high.
Proximity to the stack is the key question. Before committing to a location, have a plumber confirm the drain path and vent routing. A $200–$400 planning consultation before demo starts can save $3,000–$8,000 in unexpected rough-in costs.
Permit Requirements
Every jurisdiction in the United States requires permits for a bathroom addition. There are no exceptions for small projects, for bathrooms that “already have rough-in,” or for work done entirely by the homeowner. Unpermitted bathroom additions are a material defect that must be disclosed in a real estate transaction and can force costly rework.
What permits you’ll need:
- Building/structural permit (for framing changes)
- Plumbing permit (for drain, vent, and supply work)
- Electrical permit (for GFCI, exhaust fan, and lighting circuits)
- Mechanical permit (sometimes required for exhaust fan ducting, depending on jurisdiction)
What to expect from inspections:
| Inspection | When | What They Check |
|---|---|---|
| Rough-in plumbing | After drain, vent, supply run — before walls close | Slope, vent sizing, pressure test |
| Rough-in electrical | After wiring run — before walls close | Wire gauge, box placement, GFCI |
| Framing | After rough-in, before drywall | Structural adequacy, fire blocking |
| Final plumbing | After fixtures installed | No leaks, correct fixture installation |
| Final electrical | After fixtures and devices installed | GFCI function, fan operation |
| Final building | Project complete | Code compliance, ventilation, access |
Pull permits yourself or confirm your contractor is pulling them in their name. Never let a contractor tell you permits “aren’t necessary for this type of work” — that contractor is not one you want doing your plumbing.
The Rough-In Plumbing Phase
This is the hardest, most expensive, and most consequential phase of adding a bathroom. Rough-in plumbing means installing the drain lines, vent lines, and supply lines before walls are closed. Done correctly, it’s invisible and works for decades. Done incorrectly, it causes slow leaks, sewer gas intrusion, and drain backup.
Drain lines run from each fixture to the main stack. Minimum slope is 1/4 inch per foot. For a half bath, you need two drains: a 3-inch line for the toilet and a 1.5-inch line for the sink. These tie into the main 3- or 4-inch stack at an appropriate fitting (a wye or sanitary tee, never a straight tee).
Vent lines are the part most homeowners underestimate. Every fixture drain must be vented — either with a dedicated vent line to the roof, a wet vent shared with another fixture, or an air admittance valve (AAV) where local code permits. Improper venting causes slow drains, gurgling, and sewer gas. It is the single most common inspection failure.
Supply lines (hot and cold) are far simpler. Most bathrooms tap into an existing supply branch. If the new bathroom is close to an existing bathroom, supply runs are typically short. PEX is the standard for new supply runs — it’s flexible, fast to install, and freeze-resistant.
Hire a licensed plumber for rough-in. This is the one phase that is not appropriate for most DIYers. The drain slope math, the vent sizing calculations, and the code-compliant tie-in to the stack require experience. A plumber who pulls their own permit and passes inspection is worth every dollar. Rough-in plumbing typically runs $1,500–$5,000 for a half bath and $3,000–$8,000 for a full bath with shower.
Electrical Requirements
Bathroom electrical work requires a licensed electrician in most jurisdictions. The NEC and local codes mandate:
GFCI protection on all outlets within 6 feet of a water source. A half bath needs at least one GFCI outlet. A full bath typically needs two. GFCI outlets or a GFCI breaker upstream protects all downstream receptacles.
Exhaust fan is required by code in any enclosed bathroom without an operable window. The minimum is 50 CFM for a half bath; 110 CFM for a full bath with shower or tub. The fan must duct to the exterior — not into the attic or wall cavity. Combo fan/light units simplify wiring and are a reasonable upgrade at $80–$250.
Lighting circuit must be on a dedicated circuit or share with other bathroom lighting — not with kitchen appliances or general living space circuits. A 15-amp circuit with 14-gauge wire handles typical bathroom lighting loads.
What a licensed electrician will install:
- New 20-amp circuit for outlets (required for bathroom receptacles per NEC 210.11)
- GFCI-protected outlets
- Exhaust fan with exterior duct run
- Vanity lighting
- Optional: radiant floor heating thermostat circuit
Electrical rough-in for a new bathroom runs $500–$1,500 with a licensed electrician pulling their own permit.
Cost Breakdown
These figures assume you are converting existing interior space (closet, unused room, or basement) — not building an addition. Addition costs are 2–3x higher.
Half Bath (Toilet + Sink)
| Item | DIY Cost | Hired Cost |
|---|---|---|
| Permits and fees | $200–$600 | $200–$600 |
| Demo and rough framing | $100–$300 | $500–$1,500 |
| Rough-in plumbing | Not recommended | $1,500–$4,000 |
| Rough-in electrical | $200–$500 (if licensed) | $500–$1,200 |
| Drywall / cement board | $200–$500 | $500–$1,200 |
| Tile floor (50 sq ft) | $300–$600 | $800–$2,000 |
| Toilet | $150–$500 | $150–$500 + $100–$200 install |
| Vanity + faucet + sink | $200–$800 | $200–$800 + $100–$300 install |
| Exhaust fan + light | $100–$300 | $100–$300 + $150–$300 install |
| Paint and trim | $50–$150 | $200–$600 |
| Total | $5,000–$9,000 | $10,000–$18,000 |
Full Bath (Toilet + Sink + Shower + Tub)
| Item | DIY Cost | Hired Cost |
|---|---|---|
| Permits and fees | $300–$900 | $300–$900 |
| Demo and rough framing | $200–$600 | $800–$2,500 |
| Rough-in plumbing | Not recommended | $3,000–$8,000 |
| Rough-in electrical | $300–$700 | $700–$1,800 |
| Drywall / cement board | $400–$900 | $900–$2,000 |
| Tile: floor + shower walls | $800–$2,000 | $2,500–$6,000 |
| Tub / shower unit | $400–$2,000 | $400–$2,000 + $300–$800 install |
| Shower valve + trim | $150–$500 | $150–$500 + $200–$400 install |
| Toilet | $150–$600 | $150–$600 + $100–$250 install |
| Vanity + faucet + sink | $300–$1,200 | $300–$1,200 + $200–$500 install |
| Exhaust fan + light | $150–$400 | $150–$400 + $200–$400 install |
| Paint and trim | $100–$300 | $300–$900 |
| Glass shower door | $200–$800 | $200–$800 + $200–$600 install |
| Total | $14,000–$22,000 | $22,000–$40,000+ |
Costs vary significantly by region. Labor in coastal metros runs 30–50% higher than the figures above. Material-only costs for a well-planned DIY project on the low end of the range assume competitive bidding for rough trades and owner-performed finish work.
What to DIY vs. What to Hire Out
Not all phases of adding a bathroom carry equal risk or require equal skill. Here is a realistic division of labor:
Hire out without question:
- Rough-in plumbing (drain, vent, supply tie-in) — requires a licensed plumber in most states; the permit requires a licensed trade to sign off
- Rough-in electrical (new circuit from panel) — requires a licensed electrician; GFCI code and circuit sizing have zero tolerance for error
- Any concrete cutting for below-grade drain lines — specialized equipment and structural risk
- Vent stack penetration through the roof — involves roofing and structural work simultaneously
DIY with confidence if you have the skills:
- Demolition of existing walls, ceilings, and flooring
- Rough framing of new partition walls
- Installing cement board in wet areas after rough-in inspection passes
- Setting tile on floors and walls (time-consuming but learnable)
- Hanging and finishing drywall in dry areas
- Installing the toilet (straightforward after rough-in is done)
- Installing the vanity, faucet, and supply connections
- Painting and trim work
- Installing the exhaust fan (if the electrical rough-in is already run to the box)
Know your limits:
- The rough-in phase determines whether the project passes inspection and whether fixtures will drain and vent correctly for the next 30 years. This is not the phase to experiment with YouTube plumbing. Hire a licensed plumber, watch everything they do, and save your DIY hours for the finish work where mistakes are cheap to fix.
What to Hire, What to DIY at a Glance
| Phase | DIY? | Notes |
|---|---|---|
| Demo | Yes | Save $500–$1,500; haul fees still apply |
| Framing | Yes | Basic partition walls only |
| Rough-in plumbing | No | License required; permit requires sign-off |
| Rough-in electrical | No | License required in most states |
| Cement board installation | Yes | After inspections pass |
| Tile work | Yes | Allow extra time; rent a tile saw |
| Toilet install | Yes | 30-minute job after rough-in |
| Vanity install | Yes | See full guide linked below |
| Exhaust fan install | Yes | If wire is already run to box |
| Paint and trim | Yes | Always DIY |
Related Reading
- Bathroom Addition Cost — full pricing by scope, plumbing access savings, and component cost breakdown
- Bathroom Remodel Cost Breakdown
- How to Install a Toilet
- How to Install a Bathroom Exhaust Fan
- How to Install a Bathroom Vanity
- How to Tile a Bathroom Floor
- How to Fix a Floor Tile That Is Loose — reattach any tiles that loosen after the new bathroom settles
- Where to Add a Bathroom
Location drives cost more than any other variable. Plumbing runs downhill; drain lines must slope 1/4 inch per foot toward the main stack. Every foot of horizontal drain run that requires opening walls or cutting concrete adds cost and complexity.
- The Rough-In Plumbing Phase
This is the hardest, most expensive, and most consequential phase of adding a bathroom. Rough-in plumbing means installing the drain lines, vent lines, and supply lines before walls are closed. Done correctly, it's invisible and works for decades.
- Electrical Requirements
Bathroom electrical work requires a licensed electrician in most jurisdictions. The NEC and local codes mandate:
Free: 10-Point Home Maintenance Checklist
Prevent costly repairs with this seasonal checklist. Save hundreds every year by catching problems early.
Your checklist is ready!
Open Checklist →Something went wrong. View the checklist here.