How to Fix a Broken Closet Rod in 15 Minutes ($5–$20 Replacement)
Repair or replace a sagging or snapped closet rod and its bracket supports in 15 minutes. Replacement steel rods and brackets cost $5–$20 and require no special tools.
Fixing a closet rod that sags or collapsed: (1) First determine why it failed: bracket pulled from the wall (anchors stripped), rod bent under too much weight, or center support missing on a long span. (2) Bracket in drywall with no stud: replace with a toggle bolt anchor or find the stud. A closet rod under load can pull 100+ lbs — it must hit a stud or use a quality toggle anchor. (3) Bent rod: replace with a 1-3/8 inch chrome steel rod (stronger than aluminum). A 6-foot rod unsupported will sag — add a center support bracket on spans over 4 feet. (4) For a 6+ foot rod: mount a center flange to a wood block screwed into the back wall, or add a vertical support board from a shelf above. (5) Closet systems with double hanging rods and shelves distribute weight more effectively than a single rod and reduce sag.
Frequently Asked Questions
Why do closet rods sag or break?
The most common causes are overloading the rod beyond its rated weight capacity, bracket screws that have pulled out of drywall without hitting a stud, and using a hollow closet rod that is too long without a center support bracket. A standard 1-3/8-inch hollow steel rod spanning more than 4 feet needs a center support to prevent sagging.
How do I find studs in a closet wall to anchor brackets properly?
Use a stud finder and run it horizontally along the wall at bracket height. Closet walls are often plaster over lath, which can confuse some stud finders — if in doubt, probe with a thin finish nail to confirm a stud before driving screws. Studs in closets are typically on the same 16-inch centers as the rest of the house.
What is the standard height for a closet rod?
For a single rod holding full-length garments, the standard height is 68 to 72 inches from the floor. For a double-rod setup with two shorter rods stacked, the upper rod is typically 80 to 82 inches and the lower rod is at 40 to 42 inches from the floor. Adjust based on the longest items you need to hang.
What closet rod material is strongest?
Solid steel rods are the strongest option and are recommended for heavy loads such as winter coats and suits. Hollow steel rods are adequate for standard loads if properly supported. Wooden dowel rods look attractive but are prone to sagging and are not recommended for spans over 3 feet without a center support.
Can I install a closet rod in drywall without hitting a stud?
Yes, using heavy-duty toggle bolts or snap-toggle anchors rated for the expected load. However, anchoring into studs is always the preferred and more reliable method. If you cannot hit studs at the needed bracket locations, install a 1x4 or 1x6 board horizontally across both studs and mount the brackets to the board.
How much weight can a closet rod hold?
A properly installed 1-3/8-inch steel closet rod anchored into studs at both ends can typically hold 40 to 45 pounds per linear foot. A 4-foot rod can therefore handle roughly 160 to 180 pounds of clothing if the brackets are correctly fastened to studs. Overloading and poor anchorage are the primary failure points.
How do I set up a double-rod closet system for more hanging space?
A double-rod system (two rods stacked vertically) is the most effective way to double hanging capacity in a standard reach-in closet. Position the upper rod at 80–82 inches from the floor for jackets, button-ups, and shorter items. Position the lower rod at 40–42 inches for shorter items. This leaves 38–42 inches of clear hang space on each rod — enough for most shirts, blouses, and folded pants. Hardware: two sets of wall brackets ($8–$15 per bracket), plus a center support bracket on any span over 4 feet. Measure your available wall space and choose a rod length that fits with 2–3 inches of clearance to each side wall. Most full-width double-rod kits ($30–$80) include all hardware and both rods for a standard 5–6 foot closet width.
How do I upgrade from a single rod to a full closet organization system?
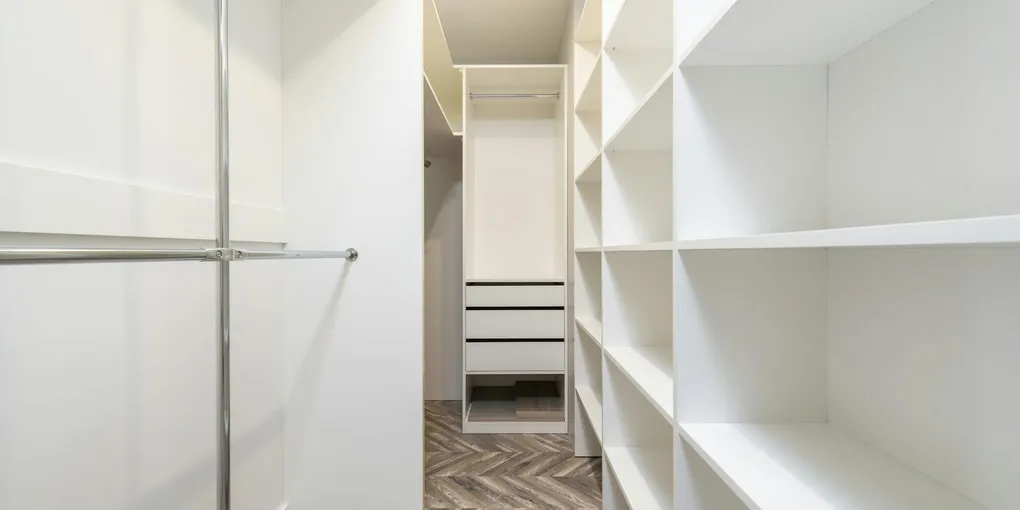
The most efficient closet upgrade is a modular shelving system (Elfa, IKEA PAX, ClosetMaid, or Rubbermaid Configurations) that adds shelves, drawers, and double-hang rods in one installation. Start by measuring your closet width and depth and mapping out how many long-hang items (dresses, suits) vs. short-hang items you have. Most systems use vertical wall panels (standard or track-mounted) that support horizontal components at any height. Installation sequence: (1) Remove the existing rod and shelf. (2) Locate all studs in the closet walls. (3) Mount vertical tracks or panels to studs. (4) Add brackets, shelves, and rods. Budget: $150–$400 for a full reach-in closet in IKEA or ClosetMaid; $400–$1,200 for Elfa or Container Store systems. All systems can be installed in a weekend without professional help.
Fixing a closet rod that sags or collapsed: (1) First determine why it failed: bracket pulled from the wall (anchors stripped), rod bent under too much weight, or center support missing on a long span. (2) Bracket in drywall with no stud: replace with a toggle bolt anchor or find the stud.
A fallen closet rod is one of those repairs that looks daunting until you understand the cause. In most cases, the rod itself is fine — the problem is that the bracket screws have pulled out of drywall, or the rod is spanning too great a distance without center support. This guide covers every scenario: tightening loose brackets, reanchoring into studs, adding center support, and fully replacing a bent or broken rod.
What You Need
- Closet rod replacement and bracket set
- Center support bracket — essential for rods over 4 feet
- Heavy-duty drywall anchors or toggle bolts
- Stud finder
- Level
- Drill and drill bits
- Phillips screwdriver
- Measuring tape
- Pencil
- Hacksaw or pipe cutter (if cutting rod to length)
Step 1 — Diagnose the Failure
Before buying parts, determine exactly what failed so you fix the right thing.
Remove all clothing from the closet and set it aside. Look at the rod, the end brackets, and the wall behind each bracket:
- Brackets pulled out of wall: The screw holes have enlarged or the drywall is torn. This is the most common failure. The fix is to relocate the bracket to a stud or use proper anchors.
- Rod is bent or cracked: A hollow rod that was overloaded beyond its capacity may be bent at the center. Replacement is the fix.
- Bracket itself cracked or broke: Cheap plastic brackets fail under heavy loads. Replace with steel brackets.
- No center support on a long span: If the rod is over 4 feet and has no center bracket, sagging is inevitable. Adding a center support may be the only fix needed.
Step 2 — Remove the Old Hardware
Take down the rod and remove the old brackets. Inspect each screw hole in the wall. If the screw holes are in drywall and have not hit studs, you will see small screw-sized holes with torn drywall edges. If they hit studs, the holes will feel solid when you insert a screwdriver.
Fill any holes you will not reuse with spackling paste. Let dry and sand flush.
Step 3 — Locate Your Studs and Mark Bracket Positions
Use a stud finder to locate studs in each closet wall where brackets will go. Mark the stud centerlines with a pencil at the height you want the rod — typically 68 to 72 inches from the floor for a single-rod closet.
If your desired bracket position falls between studs, you have two options:
- Shift the bracket position slightly so it hits a stud.
- Install a horizontal mounting board (a 1x6 or 1x4) spanning two studs, then mount the bracket to the board anywhere along its length.
For a standard reach-in closet, the end brackets go against the side walls, as close to the studs as possible. Mark both bracket positions and use a level to confirm they are at the same height on both sides — even a quarter-inch discrepancy will cause the rod to slope and clothes to bunch to one end.
Step 4 — Install the End Brackets
Drill pilot holes at your marked positions using a drill bit slightly smaller than your screw diameter. Drive the bracket mounting screws firmly into the studs — they should feel solid and draw the bracket tight against the wall without the wall flexing.
If you are using drywall anchors rather than studs, follow the anchor manufacturer’s instructions. For closet rod brackets, use toggle bolts or snap-toggle anchors rated for at least 50 pounds each. Plastic expansion anchors are not adequate for closet rod bracket loads.
Once both end brackets are mounted, check that the bracket cups (the curved portion that holds the rod) are both facing upward and aligned.
Step 5 — Install a Center Support if Needed
For any rod spanning 4 feet or more, install a center support bracket. This bracket typically mounts to the closet shelf above the rod and drops a vertical support down to a cup that cradles the rod at its midpoint.
Measure the center of the rod span and mark it on the underside of the shelf. The center support bracket screws directly into the shelf from below — most closet shelves are thick enough to hold screws without hitting studs, but if the shelf is wire shelving, use a purpose-made wire shelf bracket. Position the bracket so the cup aligns with the rod height.
Step 6 — Cut and Install the Rod
Measure the distance between the two end bracket cups. If your rod needs to be cut to length, use a hacksaw or tube cutter for a clean cut. Deburr the cut end with a file so it does not snag clothing.
Lift the rod and set one end into the bracket cup on one side wall. Flex the rod slightly inward and seat the other end into the bracket cup on the opposite wall. The rod should sit securely in both cups. If the center support is installed, lower the rod into the center cup as well.
On some bracket styles, the cup has a locking tab or a small set screw to hold the rod in place — engage this now.
Step 7 — Load Test and Final Check
Before rehanging clothing, push down firmly on the center of the rod with both hands. The rod and brackets should not flex or move. If you feel any give, check that all bracket screws are fully tightened and that the center support is properly seated.
Hang clothing back in the closet, distributing weight evenly. As a rule, heavy items like coats and suits should be placed closest to the support brackets, not concentrated at the center of the span.
Related Reading
- How to Organize a Small Garage
- Walk-In Closet Cost — if recurring rod failures signal a deeper organization problem, a custom walk-in runs $3,000–$15,000
- How to Build a Closet Shelf
- How to Install a Closet System
- How to Fix a Broken Closet Shelf — repair a sagging or snapped shelf while you have the closet cleared out
- How to Fix a Broken Closet Door Track — repair a derailed or damaged sliding closet door track while the closet is cleared
- How to Fix a Broken Laundry Room Shelf — reinforce or replace a laundry shelf using the same bracket and rod support techniques
- Step 1 — Diagnose the Failure
Before buying parts, determine exactly what failed so you fix the right thing.
- Step 2 — Remove the Old Hardware
Take down the rod and remove the old brackets. Inspect each screw hole in the wall. If the screw holes are in drywall and have not hit studs, you will see small screw-sized holes with torn drywall edges.
- Step 3 — Locate Your Studs and Mark Bracket Positions
Use a stud finder to locate studs in each closet wall where brackets will go. Mark the stud centerlines with a pencil at the height you want the rod — typically 68 to 72 inches from the floor for a single-rod closet.
- Step 4 — Install the End Brackets
Drill pilot holes at your marked positions using a drill bit slightly smaller than your screw diameter.
- Step 5 — Install a Center Support if Needed
For any rod spanning 4 feet or more, install a center support bracket. This bracket typically mounts to the closet shelf above the rod and drops a vertical support down to a cup that cradles the rod at its midpoint.
- Step 6 — Cut and Install the Rod
Measure the distance between the two end bracket cups. If your rod needs to be cut to length, use a hacksaw or tube cutter for a clean cut. Deburr the cut end with a file so it does not snag clothing.
Free: 10-Point Home Maintenance Checklist
Prevent costly repairs with this seasonal checklist. Save hundreds every year by catching problems early.
Your checklist is ready!
Open Checklist →Something went wrong. View the checklist here.