How to Fix a Broken Closet Shelf in 15 Minutes ($0–$20 Bracket or Pin Fix)
Repair a sagging or collapsed closet shelf in 15 minutes by replacing shelf pins, installing wall anchors, or sistering a weak board. Parts cost $0–$20.
Fixing a sagging or broken closet shelf: (1) Shelf sagging in the middle: the span is too long for the shelf thickness. Add a center bracket screwed into a stud (or use a toggle anchor). For particle board shelves over 30 inches: install 3/4-inch plywood instead — far stronger for the same cost. (2) Wall bracket pulling out: the anchor is in drywall with no stud. Replace with a quality toggle bolt anchor rated for 75+ lbs, or find the stud and move the bracket. (3) Pin-in-hole system where pins keep falling out: fill stripped holes with a toothpick and wood glue, let dry, re-drill; or switch to metal shelf standards (slotted wall tracks) for a much sturdier system. (4) Wire shelf sagging (closet organizer system): wire shelves need a support bracket every 12 inches on the wall clip line and every 24 inches on the back wall. Add the missing clips and brackets.
Frequently Asked Questions
Why do closet shelves sag or collapse?
Closet shelves most often fail because they are overloaded, the shelf pins pulled out of the side panels, the wall anchors holding a bracket gave way in drywall, or the shelf board itself bowed from bearing too much weight over a long span without center support. Wire shelving can also pull away from the wall when the drywall anchors were never installed in studs.
How do I fix shelf pin holes that are stripped out?
Stripped or enlarged shelf pin holes in particleboard or MDF side panels can be repaired by filling the hole with toothpicks and wood glue, letting it cure overnight, then re-drilling to the correct diameter. Alternatively, move all pins to the next row of holes up or down. For a permanent fix, fill the damaged holes with two-part wood epoxy and re-drill once cured.
Can I anchor a closet shelf bracket into drywall without hitting a stud?
Yes, using toggle bolts or snap toggle anchors rated for the load. Standard plastic expansion anchors are not adequate for shelf brackets that will hold significant weight. A snap toggle rated for 50 lbs per anchor is the minimum for any shelf you plan to load with folded clothes or shoes. Better yet, locate the stud with a stud finder and drive 2.5-inch screws directly into framing.
How do I sister a sagging closet shelf?
Cut a piece of 1x4 or 1x6 lumber to the same length as the sagging shelf, apply construction adhesive to one face, and clamp it to the underside of the existing shelf with the grain running the same direction. Secure with 1-5/8-inch screws driven up through the sister board every 8 inches. The combined thickness nearly eliminates flex on spans up to 48 inches.
Should I use wood or wire shelving for a closet repair?
Wood shelving (MDF, plywood, or solid wood) is better for folded items and anything that would fall through wire. Wire shelving allows air circulation and is lighter, but requires more wall anchors and has less surface area for small items. For a repair, match whatever system is already in place to avoid reframing the entire closet.
How do I stop a wire closet shelf from pulling away from the wall?
Wire shelving clips into wall brackets that are screwed into the wall. If the brackets have pulled free from drywall, replace the standard plastic anchors with toggle bolts or, better, relocate the bracket slightly to hit a stud. Also add a center support bracket on any wire shelf span longer than 36 inches — this is the single most common cause of sagging wire shelving.
Fixing a sagging or broken closet shelf: (1) Shelf sagging in the middle: the span is too long for the shelf thickness. Add a center bracket screwed into a stud (or use a toggle anchor).
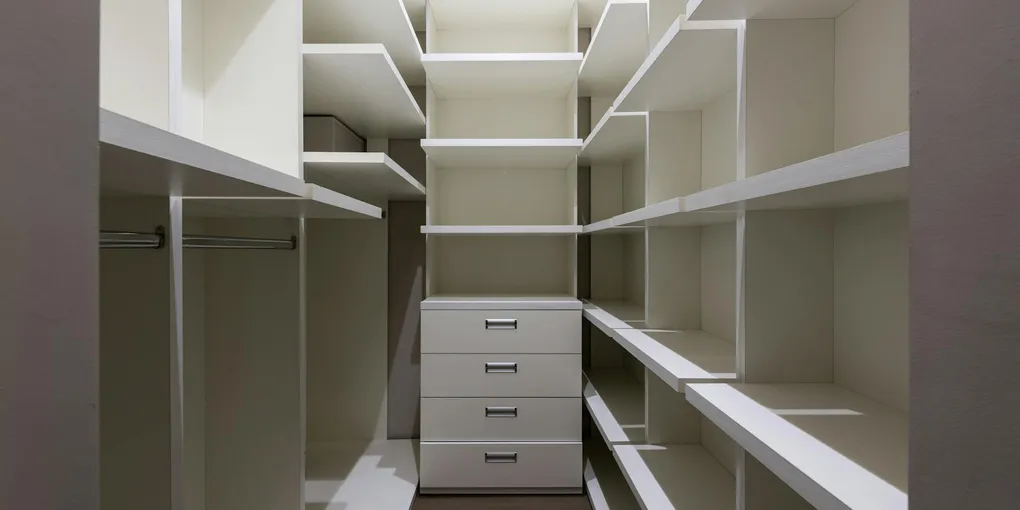
A closet shelf that sags, tilts, or collapses dumps everything onto the floor and makes every morning harder than it needs to be. Whether you are dealing with a single shelf pin that pulled out, a plywood board bowing under winter coats, or a full wire shelf that has separated from the wall, there is a repair strategy that does not require rebuilding the entire closet.
This guide covers four levels of repair in order of complexity: replacing shelf pins, re-anchoring wall brackets, sistering a sagging board for more strength, and doing a full shelf replacement when the board itself is beyond saving. Work through the level that matches your situation and you will have a solid, level shelf by the end of the afternoon.
What You Need
- Shelf pin replacement set — 5mm is the most common size for closet organizer systems
- Snap toggle wall anchors — rated for real loads in drywall, far better than plastic expansion anchors
- Stud finder — locate framing before drilling bracket holes
- Wood glue — for reinforcing stripped pin holes and sistering boards
- 1x4 or 1x6 pine board — for sistering a sagging shelf
- Cordless drill and bit set — needed for anchors, screws, and pilot holes
Step 1 — Assess the Damage
Empty the shelf completely and remove it from its support points. Lay it on a flat surface or hold it up to a light source and examine it from the side.
What to look for:
- Shelf pins pulled out: Holes in the side panel are enlarged, cracked, or the pins themselves are bent. The shelf board is usually fine; the pin locations are the problem.
- Wall bracket anchor failure: The bracket is loose or has pulled away from the wall, often leaving a visible crater in the drywall where the anchor was.
- Sagging board: The shelf itself is bowed downward, typically visible as a curve of 1/4 inch or more over a 36-inch span.
- Snapped or cracked board: A clean break or a V-shaped crack across the width of the shelf means the board needs replacement.
- Wire shelving separation: The wire shelf is intact but the wall clips or mounting brackets have pulled free.
Identify which problem you have before buying materials — a shelf pin repair and a full replacement require completely different parts.
Step 2 — Fix Stripped Shelf Pin Holes
Shelf pins seat in 5mm holes drilled into the side panels of a closet organizer. In particleboard and MDF (the material used in most factory closet systems), these holes can strip out under heavy loads.
Option A — Shift to adjacent holes: Most closet systems have rows of holes spaced every inch. If only one or two holes are damaged, simply move all four pins up or down one position. Use the same height on both side panels.
Option B — Repair the hole with toothpicks and glue:
- Dip 3–4 wooden toothpicks in wood glue and push them into the stripped hole.
- Snap them flush with the surface.
- Let the glue cure for at least four hours.
- Use a 5mm bit to re-drill the hole to the correct diameter through the hardened glue-and-wood plug.
- Test the pin — it should seat snugly with no wobble.
Option C — Wood epoxy fill: For a stronger repair, pack the hole with two-part wood filler epoxy, let it cure fully (typically 30–60 minutes), then re-drill. Wood epoxy is harder than the surrounding particleboard and holds pins well even under heavy loads.
After repairing the holes, distribute the load on the shelf more evenly — do not stack dense items like books or shoes at the center of a long span without adding a center pin support.
Step 3 — Re-Anchor a Loose Wall Bracket
Closet shelf brackets mount to the wall with screws. In a perfect installation those screws hit studs and hold indefinitely. In many real-world closets they were driven into drywall alone, held by plastic expansion anchors — or no anchors at all.
Diagnosing anchor failure: Grip the bracket and pull it firmly toward you. If it moves even slightly, the anchor has failed. Remove the screws and pull the bracket off the wall. Look at the hole: a plastic anchor that has spun or pulled through the drywall needs to be replaced with something better.
Stud location: Use an electronic stud finder to scan the wall behind the bracket location. Studs are typically 16 inches apart. If you can relocate the bracket by 1–3 inches to hit a stud, do so — a 2.5-inch #8 screw driven into a stud holds far more than any drywall anchor.
Installing snap toggles (when studs are not accessible):
- Drill the bolt hole size specified on the snap toggle package (usually 1/2 inch for standard toggles).
- Thread the toggle onto the bolt, fold the wings flat, and push the assembly through the hole until the wings snap open behind the drywall.
- Pull the bolt outward while tightening — this draws the wings flat against the back face of the drywall and locks the anchor.
- Remove the bolt, position the bracket over the hole, and reinsert the bolt through the bracket and into the anchor.
Use at least two anchors per bracket, and space them on the same stud or at anchor points where you have confirmed adequate drywall thickness.
Step 4 — Sister a Sagging Shelf
Sistering means fastening a second board to the underside of the existing shelf to add rigidity. It works well when the shelf board is bowed from overloading but is not cracked or structurally compromised. It is faster and cheaper than a full replacement.
Materials: A length of 1x4 pine cut to match the shelf depth (front to back), and construction adhesive or wood glue.
Process:
- Sand or plane any high spots on the bottom face of the existing shelf so the sister board will sit flat.
- Cut the sister board to the exact same length as the shelf. For sagging shelves longer than 48 inches, also cut a center support cleat.
- Apply a bead of construction adhesive to the top face of the sister board.
- Press it against the bottom of the existing shelf, aligning the front and back edges.
- Clamp every 12 inches or weigh the assembly down on a flat surface for 30 minutes.
- While the adhesive is still clamped, drive 1-5/8-inch screws up through the sister board into the shelf above, every 8–10 inches.
- Allow the adhesive to cure per the manufacturer’s instructions before reloading the shelf.
A sistered shelf on spans up to 48 inches will show almost no deflection even under heavy loads. For spans beyond 48 inches, also add a center wall bracket to provide mid-span support.
Step 5 — Full Shelf Replacement
When the shelf board is cracked, waterlogged, or so severely bowed that sistering is not practical, replacement is the right call.
Measure first: Remove the old shelf and measure the span between the side panels (or between brackets), the depth (front to back), and the thickness of the existing shelf. Note whether the shelf has a finished front edge.
Material choices:
- 3/4-inch plywood: Best strength-to-cost ratio for spans over 36 inches. Edge with iron-on veneer tape for a clean look.
- 3/4-inch MDF: Heavy but very flat. Good for painted finishes. Avoid in humid closets (bathrooms) as it swells when wet.
- 1x12 pine: Works well for spans under 36 inches. Economical and easy to cut.
- Pre-cut melamine boards: Available in standard closet depths (12, 16, 20 inches) with pre-finished surfaces. Fastest option if the size matches.
Installation:
- Cut the new shelf to length, leaving 1/16 inch of clearance at each end so it can be lifted in and out without binding.
- Sand the cut edges and apply edge banding or paint as desired.
- Set the shelf pins at equal heights on both side panels.
- Set the shelf on the pins. Check level with a 4-foot level.
- For long shelves (over 48 inches), add a center wall bracket for mid-span support.
Step 6 — Repair Wire Shelving
Wire closet shelves (like ClosetMaid and Rubbermaid systems) fail almost exclusively at the wall clips and mounting brackets, not at the wire grid itself.
Wall clip replacement:
- Note the clip style — most systems use a locking clip that snaps into a slot on the bracket.
- Remove the wire shelf from the clip (lift the front edge of the shelf to disengage).
- Unscrew the old clip and relocate it to hit a stud if possible, or install a snap toggle anchor.
- Reinstall the clip, snap the wire shelf back in, and test the connection by pressing down firmly.
Adding a center support: On any wire shelf span over 36 inches that was not previously supported at the center, add a mid-span wall bracket. This single addition resolves most wire shelf sagging problems and prevents re-failure after a repair.
Tightening front lip hooks: Wire shelving also attaches at the front via hooks that clip over a wall-mounted front rail. If the front rail is loose, re-anchor it to the wall the same way you would a bracket — hit studs whenever possible.
Tips for Preventing Future Shelf Failures
- Distribute heavy items (books, toolboxes, shoes) toward the ends of shelves near the supports, not at the center.
- Add a center support bracket to any shelf longer than 36 inches.
- Use 3/4-inch plywood or solid wood for high-load applications — never rely on 1/2-inch MDF for anything heavier than light clothing.
- Inspect shelf pin tightness annually and replace any pins that have developed visible wobble.
Related Reading
- Step 1 — Assess the Damage
Empty the shelf completely and remove it from its support points. Lay it on a flat surface or hold it up to a light source and examine it from the side.
- Step 2 — Fix Stripped Shelf Pin Holes
Shelf pins seat in 5mm holes drilled into the side panels of a closet organizer. In particleboard and MDF (the material used in most factory closet systems), these holes can strip out under heavy loads.
- Step 3 — Re-Anchor a Loose Wall Bracket
Closet shelf brackets mount to the wall with screws. In a perfect installation those screws hit studs and hold indefinitely. In many real-world closets they were driven into drywall alone, held by plastic expansion anchors — or no anchors at all.
- Step 4 — Sister a Sagging Shelf
Sistering means fastening a second board to the underside of the existing shelf to add rigidity. It works well when the shelf board is bowed from overloading but is not cracked or structurally compromised.
- Step 5 — Full Shelf Replacement
When the shelf board is cracked, waterlogged, or so severely bowed that sistering is not practical, replacement is the right call.
- Step 6 — Repair Wire Shelving
Wire closet shelves (like ClosetMaid and Rubbermaid systems) fail almost exclusively at the wall clips and mounting brackets, not at the wire grid itself.
Free: 10-Point Home Maintenance Checklist
Prevent costly repairs with this seasonal checklist. Save hundreds every year by catching problems early.
Your checklist is ready!
Open Checklist →Something went wrong. View the checklist here.