How to Strip Paint: Chemical Strippers, Heat Guns, and Sanding Compared
A comprehensive guide to stripping paint from wood surfaces including trim, cabinets, and furniture using chemical strippers, heat guns, and sanding — with safety guidance for lead paint.
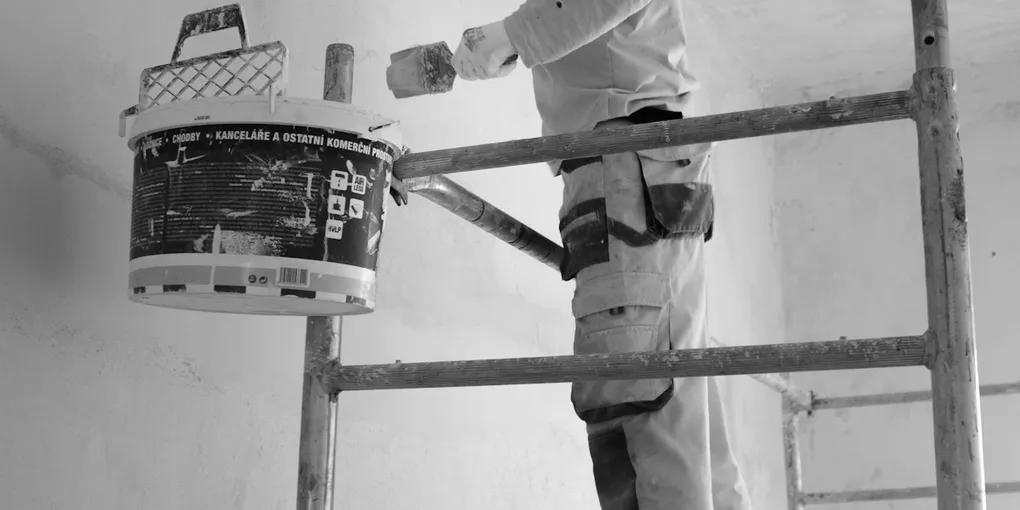
Stripping paint: (1) Test for lead paint first if the surface is pre-1978 — use a lead test swab ($5). Lead paint requires a respirator and safe disposal. (2) Chemical stripper (best for intricate wood): brush on gel stripper, wait 15 to 30 minutes until paint bubbles, scrape with a plastic scraper. Reapply for multiple layers. (3) Heat gun (fast for flat surfaces): hold 2 to 4 inches from surface, move constantly — paint softens in seconds. Scrape immediately with a putty knife. Do NOT use on lead paint — heating lead releases toxic fumes. (4) Sanding (for thin paint or flat surfaces): 60 to 80-grit on an orbital sander for bulk removal, 120-grit to smooth. Dusty and slow for thick paint. (5) After stripping: neutralize with mineral spirits, sand smooth, and prime before repainting.
Frequently Asked Questions
What is the best paint stripper for wood?
Citristrip is the top choice for most homeowners. It is water-based, low-odor, and safe enough to use indoors with adequate ventilation. It stays wet on the surface for up to 24 hours, giving you a long working window and allowing it to penetrate multiple layers. For faster results on intact, non-peeling paint, Klean-Strip or Dumond Peel Away are stronger solvent-based options. For detailed trim with intricate profiles, a gel formula clings to vertical surfaces without running.
How do I strip paint from trim without damaging the wood?
Apply a thick coat of gel stripper, cover with plastic wrap to slow drying, and let it work for the full dwell time (usually 4-24 hours depending on the product). Use plastic scrapers rather than metal ones to avoid gouging. For detailed profiles, use brass bristle brushes, wooden skewers, and toothbrushes to work the stripper out of crevices. Work slowly and reapply stripper to any spots that dry out before you scrape. Finish with fine steel wool (0000 grade) to clean up residue without scratching.
Is it safe to strip old paint that might contain lead?
Stripping lead paint is a serious hazard. Lead paint was commonly used in homes built before 1978. Before stripping any paint in an older home, use a lead test kit (swab-style kits cost $10-15 at hardware stores). If lead is present, chemical stripping is the safest DIY method because it minimizes dust — but you must wear an N100 respirator (not N95), nitrile gloves, and eye protection, contain all waste in sealed plastic bags, and dispose of it as hazardous material. Sanding and heat guns are not recommended for lead paint because they create dust and fumes that are extremely hazardous. For large areas, hire a certified lead abatement contractor.
How long do I leave paint stripper on before scraping?
Dwell time varies by product. Citristrip typically needs 30 minutes for thin or peeling paint and up to 24 hours for thick, well-adhered multiple layers. Stronger solvent-based strippers like Klean-Strip work in 15-30 minutes. The best indicator is not the clock but the paint itself: check a small area by lifting an edge with a plastic scraper. If the paint lifts cleanly in sheets, it is ready. If it is still rubbery and resistant, let it work longer. Applying plastic wrap over the stripper extends the working time significantly.
Can I use a heat gun to strip paint?
Yes. A heat gun is fast and effective on flat surfaces like wide boards, door panels, and cabinet faces. Hold the gun 2-4 inches from the surface, keep it moving in slow passes, and scrape the softened paint immediately with a pull scraper or putty knife. Do not let the wood scorch — if you see smoke or smell burning, the gun is too close or too slow. Never use a heat gun on paint that may contain lead because it vaporizes lead particles, creating airborne hazards. Heat guns are not ideal for detailed trim because they can scorch the thin wood in profiles.
How many coats of old paint can a stripper remove at once?
A single application of gel stripper can typically remove 3-7 layers of paint in one pass, provided you give it enough dwell time and apply it thickly enough. Solvent-based strippers with longer dwell times may penetrate even more layers. After scraping, inspect the wood — if old paint remains, apply a second coat. In practice, a 100-year-old piece of trim with 15+ layers may need 2-3 applications. A thick initial application and keeping the surface covered with plastic will maximize penetration.
Stripping paint: (1) Test for lead paint first if the surface is pre-1978 — use a lead test swab ($5). Lead paint requires a respirator and safe disposal.
Stripping paint is the right move when you need a truly clean surface — when multiple layers are causing fine details to disappear on trim, when peeling paint is too far gone to patch, when you are restoring wood furniture to its natural finish, or when you need to make a proper repair to a painted surface. It is not necessary just because you want a new color. Painting over existing paint in good condition is faster and cheaper.
This guide covers the three main methods — chemical strippers, heat guns, and sanding — with the information you need to choose the right one and execute it safely.
Lead Paint Warning
If your home was built before 1978, treat any paint as potentially lead-based until you test it. Lead paint was the standard in residential construction before the Consumer Products Safety Commission banned it, and it shows up everywhere: trim, cabinets, walls, doors, and window sashes.
Use a swab-based lead test kit before you start any stripping work. Tests cost $10-15 at any hardware store and take five minutes. Swipe the test swab on bare paint or a fresh scratch, and the swab changes color if lead is present.
If lead is present:
- Chemical stripping is the safest DIY method because it dissolves paint without generating dust
- Wear an N100 respirator (not a standard dust mask or N95), nitrile gloves, and goggles
- Contain all waste — scraped paint, rags, and stripper — in sealed heavy-duty plastic bags
- Dispose of lead paint waste as hazardous material at your local HHW facility
- Do not sand lead paint — it creates fine dust that contaminates the entire space
- Do not use a heat gun on lead paint — it vaporizes lead, creating airborne hazards that are nearly impossible to contain
- For large-scale work in an older home, hire a certified RRP (Renovation, Repair, and Painting) contractor
Method Comparison
| Method | Best For | Time | Difficulty | Main Risk |
|---|---|---|---|---|
| Chemical stripper | Detailed trim, furniture, multiple layers, indoors | 1-24 hours dwell + scraping | Low | Fumes, skin contact, lead |
| Heat gun | Flat wood surfaces, large panels, exterior work | Fast (seconds per area) | Medium | Scorching, fire, lead fumes |
| Hand sanding | Final cleanup, thin layers, bare wood prep | Variable | Low | Dust, slow on thick paint |
| Orbital sander | Large flat surfaces, final smoothing | Fast | Low-Medium | Dust, removes too much on thin stock |
What You Need
Before starting, gather your materials. Everything below ships on Amazon:
- Citristrip paint stripper gel — best all-around choice for indoor use
- Rust-Oleum paint stripper for wood — stronger solvent-based option for tough jobs
- Heat gun for paint stripping — variable-temperature models give better control
- Plastic scrapers and putty knives — plastic blades protect wood surfaces
- Lead paint test kit — essential for pre-1978 homes before any stripping
- Chemical-resistant nitrile gloves — standard latex tears with solvent-based strippers
Additional supplies you will need:
- Drop cloths or plastic sheeting
- Painter’s plastic wrap (to cover stripper and extend dwell time)
- Old paintbrushes to apply stripper
- Brass wire brush and wooden skewers for profiles
- 0000-grade steel wool for final cleanup
- Mineral spirits or water (depending on stripper type) for neutralizing
- Clean rags
- N95 or N100 respirator depending on lead risk
- Safety glasses
Method 1: Chemical Stripper
Chemical stripping is the most versatile approach. It works on curved and carved surfaces that a heat gun or sander cannot reach, and it is the only method suitable for surfaces with suspected lead paint.
Step 1: Prepare the area
Work outdoors when possible, or open all windows and run a fan to exhaust air. Lay plastic sheeting on the floor. Remove hardware from the piece. For cabinets or doors, remove them from their frames and lay them flat — horizontal surfaces hold the stripper better than vertical ones.
Step 2: Apply the stripper
Use an old paintbrush to apply a generous, thick coat of stripper — at least 1/8 inch deep. Do not brush back and forth like paint; lay it on in one direction and leave it. Thin applications dry out before penetrating.
For vertical surfaces or long dwell times, cover the freshly applied stripper with plastic wrap. Press it gently against the surface to prevent air drying. This can extend effective dwell time from 30 minutes to several hours and significantly improves results on thick paint.
Step 3: Wait
This is where most DIYers rush and regret it. Check the product’s recommended dwell time, then check the surface. Lift a corner of the paint with a plastic scraper. If it comes away cleanly, it is ready. If it is gummy and difficult to lift, wait longer and re-cover with plastic if it is drying out.
Step 4: Scrape
Use a plastic scraper held at a low angle (15-30 degrees) and push or pull it across the surface. The paint should come off in sheets or rolls. Work with the grain where possible. Drop scraped material directly onto plastic sheeting — do not let it pile up on the work surface.
For intricate profiles, use a brass wire brush to work stripper into crevices. Wooden skewers, shaped pieces of wood, and even chopsticks are useful for tight corners. Toothbrushes work well on rope profiles and small carvings.
Step 5: Neutralize and clean
Remove all stripper residue before it dries. Most water-based strippers (Citristrip) can be wiped off with water and a rag, then the surface wiped with mineral spirits. Solvent-based strippers are removed with mineral spirits entirely. Follow the product’s instructions exactly — leftover stripper residue prevents paint or stain from adhering.
After wiping, go over the surface with 0000-grade steel wool to lift any final residue and smooth the grain. Let the wood dry completely before finishing.
Step 6: Inspect and repeat if needed
In good light, look for any spots where old paint remains in the grain or crevices. For heavily painted surfaces, a second pass with stripper on problem areas is normal. On 100-year-old trim, you may need two or three applications to get to bare wood.
Method 2: Heat Gun
A heat gun softens paint by heating it until it bubbles and releases from the wood. This is faster than chemical stripping on flat surfaces and leaves no chemical residue, but requires more skill to avoid scorching.
Setup
Use a variable-temperature heat gun set between 600-750°F for most paints. Have a pull scraper or putty knife in the other hand before you start — the window between soft paint and scorched wood is short.
Technique
Hold the gun 2-4 inches from the surface. Keep it moving in slow, overlapping passes rather than stopping in one spot. Watch the paint surface: when it starts to soften and slightly bubble or wrinkle, it is ready. Move the gun slightly ahead and scrape the softened area immediately with your other hand.
Work in manageable sections — roughly 6-12 inches at a time. The paint cools and re-hardens quickly, so scrape immediately after heating each section.
Distance and angle
At 2 inches, heat transfers fast — good for thick paint, but scorching risk is high. At 4 inches, heat transfer is gentler — safer for thinner stock and softer woods. Keep the gun moving regardless of distance. Never hold it still.
What to watch for
- Smoke or burning smell means the wood is scorching — move faster or increase distance
- Charring turns the wood dark and can raise grain permanently
- On thin wood pieces like screen mold or small casing details, use lower heat settings and greater distance — thin wood scorches easily
- Around glass (windows), shield the glass with cardboard — the heat can crack glass panes
Limitations
Heat guns struggle with carved or highly detailed profiles because the hot air does not concentrate well in tight crevices. They are most effective on wide, flat surfaces: door panels, drawer fronts, wide baseboards, exterior siding, and furniture tops. For detail work, switch to chemical stripping.
Method 3: Sanding
Sanding alone is rarely efficient for removing heavy paint buildup, but it is the right choice in specific situations: final cleanup after chemical or heat stripping, removing a thin single coat of peeling paint, and preparing bare wood after stripping for a new finish.
When to use sanding as the primary method
- Removing one thin coat of old paint on a piece of raw furniture
- Smoothing rough grain after chemical stripping
- Blending a repaired area into surrounding wood
- Small spot repairs
Grit progression
Start with the coarsest grit that gets the job done without destroying the surface. A typical progression:
| Stage | Grit | Purpose |
|---|---|---|
| Heavy removal | 60-80 | Removing thick or well-adhered paint on flat surfaces |
| Medium smoothing | 100-120 | Following coarse pass, removing scratches |
| Fine smoothing | 150-180 | Preparing grain for stain or primer |
| Final prep | 220 | Smoothing before first finish coat |
Do not skip grits. Going from 80-grit directly to 220-grit leaves deep scratches that show through a clear finish.
Hand sanding vs orbital sander
An orbital (random-orbit) sander removes material fast on flat surfaces and is the right tool for large, flat areas. Hand sanding gives more control on edges, corners, and thin stock where an orbital could quickly cut through to raw wood. Always sand with the grain when finishing by hand.
Dust control
Sanding paint creates significant dust. Wear an N95 respirator, eye protection, and work outdoors or with a shop vac connected to the sander. For pre-1978 paint, do not sand without first testing for lead.
Dealing with Detailed Profiles and Trim
Trim with complex profiles — rope molding, coves, ogees, dentil work, fluted columns — is the hardest to strip. Chemical stripping is the only method that works in tight spaces, but application and removal requires patience.
Getting into crevices
- Wrap sandpaper around a dowel or piece of PVC pipe sized to fit the profile
- Shape a piece of wood or thick cardboard to fit a specific profile and use it as a custom scraper
- Use brass wire brushes in two or three different shapes — wide flat brush, narrow detail brush, and a round acid brush for concave areas
- Toothbrushes and old paintbrushes work for loose residue
- Wooden skewers and chopsticks reach into the tightest corners without scratching
Multiple applications
On old trim with 10+ coats, expect to do two or three stripper applications to reach bare wood in all areas. Between applications, dry the surface and identify where paint remains before re-applying.
Accepting imperfection
On very fine carved details, a thin layer of paint may simply be impossible to remove without damaging the detail. In these cases, some restorers leave the final thin layer and prime over it rather than destroying the profile trying to get the last bit off. Use your judgment based on what the piece is and how it will be finished.
Cleanup and Disposal
Chemical stripper waste
Stripper saturated with paint is hazardous waste in most jurisdictions. Do not pour it down the drain or throw it in the trash. Let the scraped material dry on newspaper or cardboard, then bag it in sealed plastic bags. Take it to your local household hazardous waste (HHW) facility. Check earth911.com to find your nearest location.
Rinsing water from cleanup should not be poured down storm drains. Collect it in a bucket, let solids settle, decant the clear liquid, and check local regulations on disposal.
Heat gun cleanup
The main cleanup from heat gun work is scraped paint chips. Collect them off drop cloths and bag them. If the original paint may contain lead, treat all debris as hazardous waste.
Sanding dust
Collect dust with a shop vac. If there is any chance of lead, seal the filter bag and dispose of it as hazardous waste. Do not blow dust out of the shop vac or clean the filter indoors.
Tools
Clean scrapers and brushes with mineral spirits (solvent-based stripper) or water (water-based stripper) before the residue hardens. Cured stripper on a tool is very difficult to remove.
Related Reading
- How to Paint a Room
- How to Paint Kitchen Cabinets
- How to Fix Peeling Paint on Interior Walls
- How to Prep a Room for Painting
- Lead Paint Warning
If your home was built before 1978, treat any paint as potentially lead-based until you test it. Lead paint was the standard in residential construction before the Consumer Products Safety Commission banned it, and it shows up everywhere: trim, cabin...
- Method Comparison
| Method | Best For | Time | Difficulty | Main Risk | |---
- Method 1: Chemical Stripper
Chemical stripping is the most versatile approach. It works on curved and carved surfaces that a heat gun or sander cannot reach, and it is the only method suitable for surfaces with suspected lead paint.
- Method 2: Heat Gun
A heat gun softens paint by heating it until it bubbles and releases from the wood. This is faster than chemical stripping on flat surfaces and leaves no chemical residue, but requires more skill to avoid scorching.
- Method 3: Sanding
Sanding alone is rarely efficient for removing heavy paint buildup, but it is the right choice in specific situations: final cleanup after chemical or heat stripping, removing a thin single coat of peeling paint, and preparing bare wood after strippi...
- Dealing with Detailed Profiles and Trim
Trim with complex profiles — rope molding, coves, ogees, dentil work, fluted columns — is the hardest to strip. Chemical stripping is the only method that works in tight spaces, but application and removal requires patience.
Free: 10-Point Home Maintenance Checklist
Prevent costly repairs with this seasonal checklist. Save hundreds every year by catching problems early.
Your checklist is ready!
Open Checklist →Something went wrong. View the checklist here.