How to Paint a Room: Step-by-Step Guide for a Professional Finish
Everything you need to paint a room yourself — prep, primer, cutting in, rolling technique, and how to avoid the 7 most common mistakes that cause visible lap lines and streaks.
Painting a room: (1) Prep — patch holes, clean walls with TSP substitute, tape trim and outlet covers. (2) Prime if switching colors dramatically, over repaired patches, or on new drywall. (3) Cut in with a 2.5-inch angled brush along ceilings and trim. (4) Roll in full-height strips with a 3/8-inch nap roller — maintain a wet edge on each strip to prevent lap lines. (5) Two coats minimum; drying time between coats is 2–4 hours for latex. Total time for a bedroom: 4–6 hours of active work over 2 days. Best paints: Benjamin Moore Regal (premium) or Behr Premium Plus (budget).
Frequently Asked Questions
Do I need to prime before painting a room?
Prime when: you are painting over a dark color with a lighter one, the walls have been patched or repaired, the surface is new drywall, or you are switching paint sheens significantly. Skip primer when: you are repainting with the same or similar color and the existing paint is in good condition. Modern paint-and-primer-in-one products work for recoats but are not a substitute for a true primer on bare drywall or drastic color changes.
How long does it take to paint a room?
A standard bedroom takes a skilled DIYer 4-6 hours of actual work time, spread across 2 days: prep and first coat day one, second coat day two. The 'drying' time between coats (2-4 hours for latex) is not working time. A full room with trim and ceiling adds 2-3 more hours. The prep work — taping, patching, cleaning — takes longer than most people expect and is where quality is won or lost.
What sheen should I use for bedroom vs. bathroom walls?
Bedrooms: eggshell or satin. Both are washable and hide minor wall imperfections. Flat finishes show marks. High gloss looks like a bowling alley. Bathrooms and kitchens: satin or semi-gloss. The higher sheen resists moisture and is easy to wipe down. Ceilings: flat white only — any sheen shows every imperfection because ceiling light hits at a raking angle.
How do I avoid lap lines when painting?
Lap lines appear when you paint over partially-dried paint. The fix: maintain a wet edge at all times. Roll in full-height strips from floor to ceiling, overlapping each strip by 20-30% while the previous strip is still wet. Work fast enough that you're always overlapping wet paint. One roller load per vertical strip is the standard. Cutting in (brush work) should be done one wall at a time, not the entire room — then roll that wall while the cut-in edge is still wet.
How many coats of paint does a room need?
Two coats almost always. One coat looks fine when wet and disappointing when dry — thin spots, streaks, and underlying color show through. The second coat is what makes the color look intentional and even. Drastic color changes (white to navy) sometimes need three coats. Using a tinted primer in the new color for the first coat reduces this to two.
How do I get clean paint lines at the ceiling and trim?
Use a 2.5-inch angled sash brush. Load it about 1 inch up the bristles. Start 1-2 inches away from the edge, then work the bristle tips toward the line using slow, controlled strokes. Pull the brush along the line, don't dab. Remove painter's tape while the paint is still slightly wet (30-60 minutes after application), not after it dries — dried paint seals to the tape and tears when removed.
What is the best paint brand for interior walls in 2026?
The best interior paint brands in 2026 ranked by category: Best overall: Benjamin Moore Regal Select ($65–$80/gallon) — excellent hide, self-leveling formula that minimizes brush marks, durable finish, and consistent color accuracy. Worth the premium if you want the job to look professional. Best mid-range: Sherwin-Williams Emerald Interior ($75–$90/gallon) — durable, washable, and good hide in one coat over similar colors. Available at Sherwin-Williams stores and easy to color-match. Best budget: Behr Premium Plus Ultra ($35–$50/gallon at Home Depot) — best value for everyday rooms where you want a durable paint without premium pricing. Good hide and scrubbable finish. Best ceiling paint: Zinsser Bulls Eye Zero ($25–$35/gallon) or Benjamin Moore Waterborne Ceiling White — flat finish, zero-VOC, designed for splatter resistance. For bedrooms: eggshell sheen (easiest to clean while hiding imperfections). For bathrooms and kitchens: satin or semi-gloss (moisture-resistant). For trim and doors: semi-gloss (stands up to handling). Key tip: cheap brushes and rollers cause more problems than cheap paint. Invest in a quality roller cover (Wooster or Purdy 3/8-inch nap) even if you use a budget paint.
How much does it cost to paint a room yourself vs. hiring a painter in 2026?
DIY room painting cost: $50–$200 in materials for a standard 12×12 bedroom (paint, primer, roller, brushes, tape, drop cloths). Paint is the biggest variable: $30–$80 per gallon, and a bedroom needs 2–3 gallons for two coats. Time: 4–6 hours of active work over 2 days. Hiring a professional painter cost in 2026: $300–$800 for a standard bedroom (walls only). $500–$1,200 including trim and ceiling. $1,500–$3,500 for a full interior house paint job (1,500 sq ft, typical 3-bedroom home, walls only). Painters typically charge $1.50–$3.50 per square foot for walls, or $25–$50/hour. What professionals do better: prep work (sanding, caulking, skim-coating), cutting in tight lines, fast and even coverage with commercial sprayers, and not leaving roller texture marks. When it's worth hiring out: large rooms or whole houses, vaulted ceilings, rooms needing significant prep work, or when your time is worth more than the savings. The paint itself is typically not included in labor quotes — expect to supply the paint or pay a markup of 10–20% over retail.
Painting a room is one of the highest-impact DIY projects and one of the most commonly done wrong. The professional look comes entirely from prep and process — not from expensive paint. A $30 can of paint applied over clean, properly primed walls with a quality roller produces better results than a $70 can slapped over greasy walls with a cheap foam roller.
What You Need
Paint and primer:
- Interior latex paint (1 gallon covers ~400 sq ft; most bedrooms need 2 gallons for 2 coats)
- Primer (if needed — see FAQ above)
Tools:
- 9-inch roller frame + covers (3/8” nap for smooth walls; 1/2” for textured)
- Roller extension pole
- 2.5-inch angled sash brush (cutting in)
- Paint tray + liner
- Painter’s tape (3M ScotchBlue 2080 for delicate surfaces)
- Drop cloths (canvas, not plastic — plastic is slippery)
- Putty knife and spackling paste (for holes)
- Sandpaper (120-grit for patches, 220-grit for sanding between coats)
Amazon picks:
- Purdy Colossus 9-inch roller cover — best nap for smooth walls, holds paint well
- Wooster Brush Alpha roller frame — no-slip grip, works with extension poles
- Purdy XL brush 2.5 inch angled — professional cut-in brush, holds a sharp line
- 3M ScotchBlue 2080 painter’s tape — delicate surface tape, clean removal
- Canvas drop cloth — stays in place, absorbs drips
- DAP DryDex spackling paste — turns pink when wet, white when dry = no guessing
- Wooster roller extension pole — reaches ceiling without a ladder
- Zinsser Bulls Eye primer — best all-purpose primer for drastic color changes
Step-by-Step
Step 1: Prep the Room
Move furniture to the center of the room and cover it with drop cloths. Remove switch plates and outlet covers (store the screws in a zip-lock bag taped to the plate). Take down curtain rods and any wall hangings.
Fill holes: Apply spackling paste to nail holes and cracks with a putty knife. Overfill slightly — it shrinks as it dries. Let dry completely (DryDex turns white when ready), then sand flush with 120-grit sandpaper. Wipe with a damp cloth to remove dust.
Tape: Run painter’s tape along the ceiling line, trim, and any surfaces you’re protecting. Press the tape edge firmly with a putty knife to seal it — loose tape is the most common cause of paint bleeding under the line.
Clean the walls: Wipe walls with a damp cloth or a TSP substitute solution. Grease, cooking residue (especially near kitchens), and fingerprints cause paint adhesion problems. Let dry completely before painting.
Step 2: Prime (When Needed)
If priming, apply the same way as paint — cut in first, then roll. Let dry to the manufacturer’s spec (usually 1-2 hours for latex primer, 30 minutes for shellac). Lightly sand any raised grain with 220-grit after drying.
Tint the primer to within 2-3 shades of your topcoat color. A gray primer under navy blue paint means you need fewer coats than priming with white.
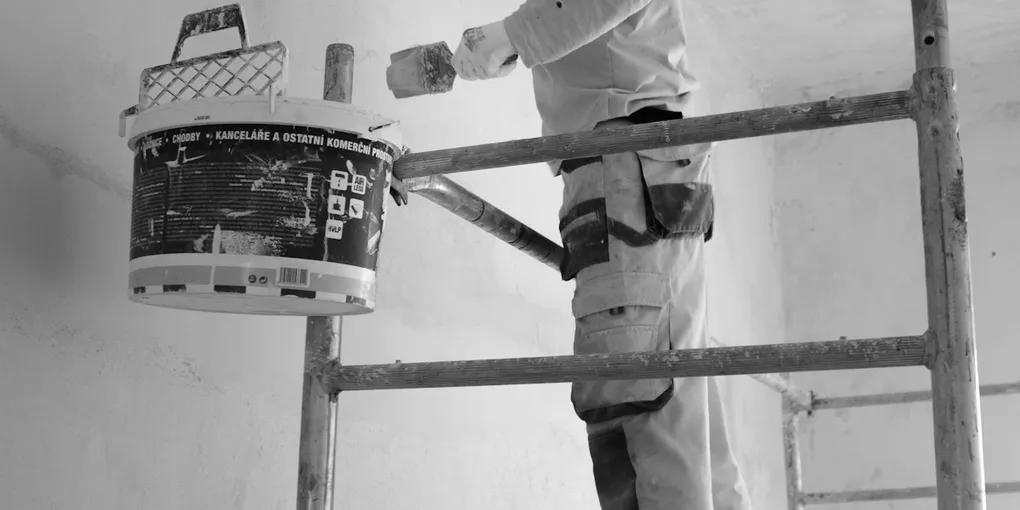
Step 3: Cut In (Brush Work)
Cut in before you roll. Cutting in means painting a 2-3 inch strip along all edges where the roller can’t reach — ceiling line, baseboards, door frames, window frames, and corners.
Technique:
- Load the brush about 1 inch up the bristles (not all the way to the ferrule)
- Start 2 inches from the edge, then work the bristle tips toward the line
- Pull the brush along the edge in slow, smooth strokes
- Keep a straight line by flexing your arm from the shoulder, not the wrist
Cut in one wall at a time — not all four walls. You want to roll each wall while the cut-in edge is still wet. If the cut-in dries before you roll, you’ll see a visible brush line where the two applications meet (the lap line everybody complains about).
Step 4: Roll the Walls
Load the roller by rolling it in the paint tray until it’s evenly loaded but not dripping. A roller that drips is overloaded.
Rolling technique:
- Apply paint in a large W or M pattern on the wall (covers area fast without dripping)
- Fill in the pattern with horizontal strokes
- Finish with light vertical strokes from floor to ceiling (these even out the texture)
- Work in vertical strips about 3 feet wide
- Overlap each strip by 6-8 inches while still wet — this is how you avoid lap lines
Maintain a wet edge: The most important rule. You must overlap wet paint with wet paint. Never let a section dry before rolling adjacent to it. This means not stopping mid-wall for breaks.
Roll as close to the cut-in edge as you can without touching it. The roller will blend with the brush work invisibly when both are wet.
Step 5: First Coat Dry Time
Let the first coat dry 2-4 hours (for most latex paints). The paint will look thin and uneven — that’s normal. Don’t try to fix it by adding more paint to wet areas.
Inspect the first coat after drying. Note thin spots or streaks for the second coat.
Step 6: Second Coat
Repeat the cut-in and roll process. The second coat goes on faster because the first coat seals the surface, so the roller doesn’t drag.
Sand lightly between coats (optional but professional): 220-grit sandpaper removes any raised grain or dried drips. Wipe dust before applying second coat.
Step 7: Remove Tape
Remove painter’s tape while the second coat is still slightly tacky (30-60 minutes after finishing, before it fully cures). Score along the tape edge with a razor blade if paint has bridged across it. Pull the tape at a 45-degree angle, back toward itself.
If you wait until the paint is fully dry, the tape tears the paint edge when removed.
Step 8: Touch-Ups and Cleanup
After removing tape, inspect for bleed-through or spots where the brush line is visible. Touch up with a small brush.
Cleanup: For latex paint, wash brushes and rollers immediately with warm water and soap. Store brushes wrapped in foil or a brush keeper if reusing the next day (don’t wash between same-day coats — wrap in plastic wrap).
The 7 Mistakes That Ruin Paint Jobs
1. Skipping prep. Grease and dirt cause adhesion failure. Holes left unfilled show through paint. Time spent prepping is time saved fixing.
2. Using a cheap roller. Foam rollers leave bubbles. Cheap synthetic rollers shed fuzz. A quality cover (Purdy, Wooster) applies paint evenly and leaves a consistent texture.
3. Cutting in the whole room before rolling. The cut-in dries, and when you roll next to it, you get a visible seam. Cut in one wall, roll that wall, move on.
4. Overloading the roller. More paint on the roller ≠ better coverage. An overloaded roller drips and spatters. A properly loaded roller covers more area with better control.
5. Removing tape after the paint cures. Dried paint bonds to the tape. When you pull, it tears. Remove tape slightly tacky.
6. Painting in poor lighting. Raking light reveals every missed spot and texture issue that looks fine in flat overhead light. Use a work light or open blinds to see what you’re actually doing.
7. One coat. One coat always looks wrong in the end. Budget for two.
How Much Paint Do You Need?
Measure the perimeter of the room and multiply by the ceiling height for total square footage. Subtract roughly 20 sq ft per door and 15 sq ft per window. Divide by 350-400 (paint coverage per gallon).
Most bedrooms need 2 gallons for two coats. Add a quart for touch-ups.
For exact cost: How Much Does It Cost to Paint a Room?
Related Reading
- How Much Does It Cost to Paint a Room? — full cost breakdown with pro vs DIY comparison
- How to Paint Kitchen Cabinets — cabinet-specific technique and prep
- Best Paint for Bathroom Walls — moisture-resistant paint picks
- How to Patch Drywall — fix the holes before you paint
- How to Remove Wallpaper — prep step before painting wallpapered rooms
Free: 10-Point Home Maintenance Checklist
Prevent costly repairs with this seasonal checklist. Save hundreds every year by catching problems early.
Your checklist is ready!
Open Checklist →Something went wrong. View the checklist here.