Wallpaper Removal: How to Remove It Without Damaging Drywall
Score, soak, scrape — without gouging drywall. Works on strippable, vinyl, and painted-over wallpaper. The fabric softener ratio that beats expensive strippers.
To remove wallpaper, first test whether it's strippable by peeling a corner — if it comes off cleanly, just pull it down. For non-strippable wallpaper, score the surface with a perforating tool, then soak with hot water and fabric softener (1:1) or enzyme-based wallpaper stripper. Let it sit 15-20 minutes, then scrape off with a 4-inch putty knife. Budget 4-8 hours per average-sized room. The adhesive residue left behind is the hardest part — plan for a full cleanup and wall prep before painting.
Frequently Asked Questions
Can I paint over wallpaper instead of removing it?
You can, but it's rarely a good idea. Paint traps moisture under the wallpaper, which can cause bubbling, mold, and eventual peeling of both the paint and wallpaper. If you absolutely must, prime first with an oil-based primer and seal all seams with caulk. Long-term, removal is almost always better.
What is the easiest way to remove wallpaper?
Modern strippable wallpaper comes off dry with just a pull on the corner. For older wallpaper, the easiest method is hot water mixed 1:1 with fabric softener, applied with a sponge or spray bottle, combined with scoring the paper first with a perforating tool. Steam works for stubborn adhesive.
Do I need to score wallpaper before removing it?
Yes, for vinyl-faced, painted, or waterproof wallpaper. Scoring creates small holes that let water or stripper penetrate to the adhesive underneath. Use a scoring tool with small teeth — not a utility knife, which damages the drywall below.
How do I remove wallpaper from drywall without damaging it?
Keep the drywall wet (but not soaking) during removal. Work slowly with a putty knife held at a low angle (15-20 degrees). Avoid steel scrapers or aggressive tools that gouge. When adhesive residue remains, use warm soapy water and a sponge — not sanding, which tears the drywall paper.
Will a steamer damage walls when removing wallpaper?
A steamer is safe when used properly. Hold the steam plate flat against the wall for 15-30 seconds per spot, then move on. Don't leave it in one spot too long (causes drywall to soften). Don't use steamers on plaster walls without testing first — prolonged heat can crack plaster.
Remove wallpaper by scoring the surface with a wallpaper scorer, applying hot water mixed with fabric softener or DIF solution, and peeling in large sheets starting from seams. Let the solution soak 5–10 minutes before peeling. Two-layer wallpaper (top vinyl layer + paper backing) must be removed in two passes. Test a small section first — some walls have unprimed drywall underneath that tears when wet, requiring skim coating after removal.
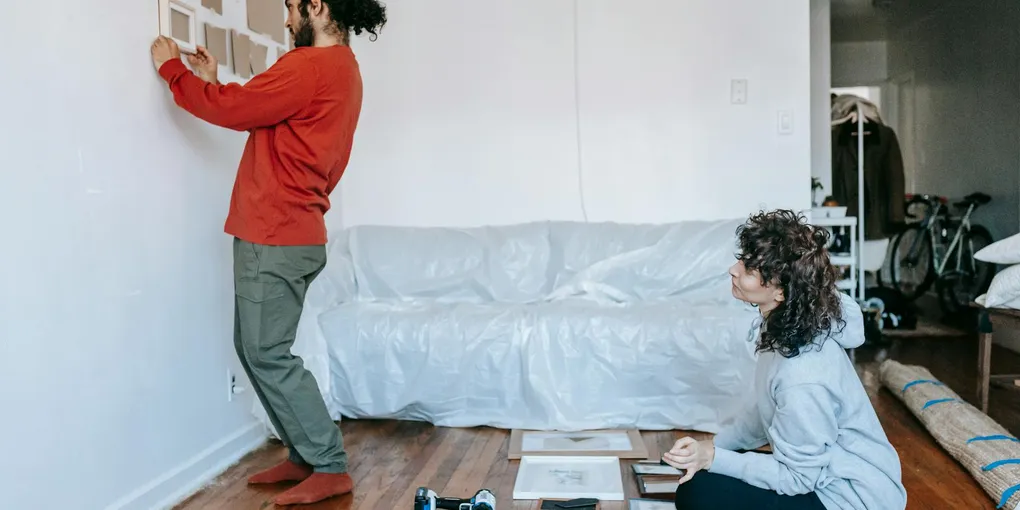
Removing wallpaper is one of those projects everyone dreads — and with good reason. Done wrong, it tears up drywall and leaves you with a worse mess than the wallpaper itself. Done right, it’s a straightforward weekend project that pays off with a fresh, modern room.
This guide covers every major removal method, which to use when, and the wall prep that separates a good paint job from a bad one.
Step 1: Figure Out What Kind of Wallpaper You Have
Before you buy supplies, do a quick test in a corner. Use a putty knife to lift an edge and pull.
Result 1: The wallpaper peels off in a single layer, cleanly, dry. You have strippable wallpaper — the modern standard. Just pull it all down dry. Skip to Step 5 (cleaning adhesive residue).
Result 2: The top layer peels off but a paper backing stays on the wall. You have peelable wallpaper. The top layer comes off dry, but you still need to remove the backing with water and a scraper.
Result 3: The wallpaper won’t peel at all — it’s stuck firmly. You have traditional paste-applied wallpaper. You’ll need to score, soak, and scrape. This is the standard process for most older wallpaper.
Result 4: It’s vinyl, painted, or waterproof. You must score first — water can’t penetrate the waterproof surface. Vinyl is common in kitchens and bathrooms. Painted wallpaper is common in older homes where someone painted over rather than removed it.
Step 2: Prep the Room
Wallpaper removal is messy. Strip adhesive runs down walls, paper scraps stick to everything, and water gets everywhere.
Cover the floor:
- Canvas drop cloths along the wall edges (absorbs drips)
- Plastic sheeting under the canvas if you have flooring you want to protect
Remove or cover:
- Outlet covers, light switch plates, and register vents — unscrew and set aside
- Baseboards — tape off the tops
- Furniture — move out or cover with plastic sheeting
Turn off electricity to the room’s outlets at the breaker. You’ll be spraying water near outlets, and there’s no reason to risk it.
Open windows for ventilation, especially if using chemical strippers.
Step 3: Score the Wallpaper (If Needed)
Scoring creates tiny perforations that let water or stripper get to the adhesive behind the paper.
You need to score if:
- The paper doesn’t peel up at all
- It’s vinyl, washable, or has a plastic coating
- Someone painted over it
Tool: A wallpaper scoring tool ($8-15) — Paper Tiger is the common brand. It has small teeth on a rolling head that make holes without gouging drywall.
Technique:
- Roll the tool over the wall in circular or overlapping patterns.
- Light pressure — you want holes in the wallpaper, not the drywall.
- Cover the entire surface. Missed spots won’t strip well.
Do not use a utility knife. It creates deep straight cuts that damage drywall underneath.
Step 4: Apply Water or Stripper
This is where most of the work happens. You have three main approaches:
Method A: Hot Water + Fabric Softener (Cheapest)
The DIY hack that actually works well.
- Mix: 1 part liquid fabric softener, 1 part hot water
- Apply with: sponge, garden sprayer, or spray bottle
- Cost: $5-10 for a whole house
The softener breaks down wallpaper paste. Hot water softens the paper.
- Spray or sponge the solution onto the wall in 4x4 ft sections.
- Let it soak for 15-20 minutes.
- Re-apply if the wall dries out before you scrape.
- Scrape with a 4-inch or 6-inch putty knife held at 15-20 degrees.
Method B: Commercial Wallpaper Stripper (Strongest)
Enzyme-based strippers like DIF (Zinsser) or Piranha dissolve wallpaper paste more aggressively than the DIY solution.
- Cost: $10-20 per quart
- Concentrate: mix with hot water per label instructions
- Also comes as a gel for vertical surfaces (won’t run down walls)
Same process as Method A — apply, wait, scrape. Better for stubborn old glue.
Method C: Steamer (Heavy-Duty)
For the toughest jobs — vintage wallpaper, multiple layers, plaster walls that should stay dry.
- Rent from hardware store: $25-40/day
- Buy a wallpaper steamer: $40-80
Technique:
- Fill the steamer with water and let it heat up (5-10 minutes).
- Hold the steam plate flat against the wall for 15-30 seconds per spot.
- Move to the next spot; scrape the steamed area while it’s still hot.
- Work top-down — steam rises and pre-softens the sections above.
Safety:
- Steam burns. Wear long sleeves and gloves.
- Don’t use on plaster without testing — too much heat cracks plaster.
- Keep the water tank full — running dry damages the steamer.
Step 5: Scrape and Remove
Regardless of which method you used, the scraping technique is the same.
- Start at a seam or corner where paper has started to lift.
- Slide the putty knife under the paper at a low angle (15-20 degrees).
- Push forward, keeping the knife flat against the wall.
- Pull off large pieces when possible — smaller pieces mean more work.
- If paper tears, re-wet and try again — don’t force it.
Use the right scraper:
- 4” putty knife — best all-around choice, flexible enough to conform to walls
- 6” wide taping knife — faster for large wall areas
- Razor scraper — for vinyl or painted wallpaper only; dulls fast
Do not use:
- Steel wool (shreds paper, scratches drywall)
- Aggressive metal scrapers with hard edges
- Utility knives (gouge drywall)
Step 6: Clean Adhesive Residue
This is where most DIY jobs fail. Even after all the paper is off, a thin layer of glue remains on the wall. Paint over it and you’ll see texture, streaks, and eventual peeling.
Test first: Run your hand over the wall. If it feels sticky, tacky, or has visible glossy streaks, residue is still there.
Method 1: Warm soapy water
- Dish soap + warm water in a bucket
- Sponge the walls to dissolve remaining glue
- Rinse with clean water
- Let dry completely
Method 2: Enzyme cleaner
- Use the same wallpaper stripper at light dilution
- Sponge on, wait 5 minutes, wipe off
- Works faster than soapy water for heavy residue
Method 3: TSP (trisodium phosphate)
- For heavy, old adhesive
- Follow label directions — it’s a strong cleaner
- Wear gloves and eye protection
Wait 24-48 hours for walls to fully dry before proceeding.
Step 7: Repair the Walls
Wallpaper removal often reveals damage underneath that was hidden. Common issues:
Torn Drywall Paper
If the drywall’s paper face tore during removal, you’ll see fuzzy brown patches.
- Sand lightly with 120-grit sandpaper.
- Apply oil-based primer or Gardz primer (specifically for damaged drywall).
- Skim coat with joint compound to level.
- Sand smooth, then prime again.
Gouges and Holes
Fill with spackle or joint compound — see our drywall patch guide.
Rough Texture from Old Adhesive
Skim coat the entire wall with joint compound if residue can’t be fully removed. Two thin coats with sanding between each.
Old Paint Under Wallpaper
If the wall was painted (then wallpapered), you may find glossy paint that needs to be dulled before new paint sticks. Sand lightly or use a deglosser.
Step 8: Prime Before Painting
Never skip primer on walls that had wallpaper. You need it because:
- Seals any remaining adhesive (prevents yellowing and peel)
- Covers paper repair areas (patches show through paint otherwise)
- Gives new paint a consistent, absorbent surface
Best primers for post-wallpaper walls:
- Zinsser Gardz — seals damaged drywall and residual adhesive
- Oil-based primer — best blocker if glue residue remains
- Shellac-based primer (BIN) — for stains or odors
Apply one coat primer, let dry 24 hours, then paint. See our painting a room guide for technique tips.
Time and Cost Estimate
For a typical 12x12 ft room:
| Phase | Time | Cost |
|---|---|---|
| Prep (cover floors, remove switches) | 30 min | $10-25 (drop cloth if needed) |
| Score | 20-30 min | $10-15 (scoring tool) |
| Water/stripper application + wait | 30 min + 20 min soak | $10-20 (stripper) |
| Scraping | 2-4 hours | — |
| Cleaning residue | 1-2 hours | $5-10 (TSP or soap) |
| Wall repair | 1-3 hours (if needed) | $10-30 (compound + primer) |
| Primer before paint | 1 hour | $25-40 (1 gallon) |
| Total | 6-10 hours | $70-140 |
Professional cost: $1-3 per square foot of wallpaper = $150-500 per room.
DIY saves a lot but takes a full day or weekend. Whether it’s worth it depends on your time.
Mistakes to Avoid
Painting over wallpaper. Traps moisture, causes peeling, always a short-term fix.
Using a utility knife to score. Gouges drywall. Use a proper scoring tool.
Not scoring vinyl or painted wallpaper. Water can’t penetrate; nothing happens.
Forcing dry removal of stubborn paper. Tears drywall. Re-wet and wait.
Skipping adhesive cleanup. New paint will show texture, peel, or yellow.
Painting over damp walls. Paint won’t adhere. Wait 24-48 hours after cleaning.
Skipping primer. Residual adhesive shows through paint over time.
When to Hire a Pro
Consider hiring out if:
- The wallpaper has been there 30+ years and is firmly adhered
- There are multiple layers of wallpaper stacked on top of each other
- The walls are plaster, not drywall (requires gentler technique)
- You’ve tried DIY and damaged the walls
- You need the room done fast and can’t commit a weekend
Cost: $150-500 per room depending on complexity.
Related Reading
- Wallpaper Removal Cost — professional pricing, per-layer cost, and drywall repair estimates after removal
- How to Paint Kitchen Cabinets — related prep/painting skills
- How to Patch a Drywall Hole — wall repair after wallpaper damage
- How Much Does It Cost to Paint a Room — next step after wallpaper removal
- How Much Does Drywall Repair Cost — major damage from removal
- Handyman Cost — wallpaper removal is a common handyman job; know fair rates before hiring
- Figure Out What Kind of Wallpaper You Have
Before you buy supplies, do a quick test in a corner. Use a putty knife to lift an edge and pull.
- Prep the Room
Wallpaper removal is messy. Strip adhesive runs down walls, paper scraps stick to everything, and water gets everywhere.
- Score the Wallpaper (If Needed)
Scoring creates tiny perforations that let water or stripper get to the adhesive behind the paper.
- Apply Water or Stripper
This is where most of the work happens. You have three main approaches:
- Scrape and Remove
Regardless of which method you used, the scraping technique is the same.
- Clean Adhesive Residue
This is where most DIY jobs fail. Even after all the paper is off, a thin layer of glue remains on the wall. Paint over it and you'll see texture, streaks, and eventual peeling.
Free: 10-Point Home Maintenance Checklist
Prevent costly repairs with this seasonal checklist. Save hundreds every year by catching problems early.
Your checklist is ready!
Open Checklist →Something went wrong. View the checklist here.