How to Organize a Garage: Zone Planning, Wall Storage, and Overhead Systems
A step-by-step approach to garage organization using zone planning, wall panels, overhead racks, and specialty storage for bikes and long items — so everything has a place and stays there.
The most common garage organization mistake is buying storage before deciding where things go.
The most common garage organization mistake is buying storage before deciding where things go. You end up with shelves in the wrong spots, hooks for the wrong items, and a garage that’s technically organized but still unusable.
Zone planning first, storage second. Once you know which activities happen in the garage and where, the right storage choices become obvious.
Step 1: Zone Planning
A functional garage is divided into activity zones. Everything in the garage belongs to one of five zones. Your job is to decide where each zone lives before purchasing a single hook or shelf.
Zone 1: Lawn and Garden. Mowers, string trimmers, blowers, shovels, rakes, fertilizer, and pots. These items need floor space for larger equipment and wall space for long-handled tools. Place this zone near the garage door so you’re not hauling a mower through the car bay.
Zone 2: Workshop and Tools. Power tools, hand tools, hardware, fasteners, workbench. This zone benefits from good lighting and a dedicated wall. Keep it away from high-traffic paths where you’d knock things over.
Zone 3: Auto and Sports. Car care products, jumper cables, sports equipment, bikes, balls, and helmets. Sports equipment sees frequent access, so position this zone where you can grab items without moving other things first.
Zone 4: Seasonal. Holiday decorations, seasonal clothing, camping gear used once or twice a year. This is your prime candidate for overhead storage — it’s out of the way and acceptable to retrieve with a step ladder.
Zone 5: Utility. Cleaning supplies, extension cords, batteries, light bulbs, trash and recycling staging. This zone often goes near the door to the house for convenience.
Sketch your garage with zones marked before doing anything else. Most garages can accommodate all five, though small single-car garages may need to combine workshop and utility, or assign one wall to multiple zones stacked vertically.
Step 2: Vertical Wall Storage
Walls are the highest-value storage real estate in a garage. A standard 2-car garage has 60-80 linear feet of wall space. Most garages use less than 20% of it.
The three wall storage approaches, in order of flexibility:
Track and slatwall systems. Products like Gladiator GearWall panels attach to the studs and create a horizontal channel system. You hang baskets, hooks, and bins anywhere along the channel without drilling new holes. Best for zones where your storage needs change frequently, like sports equipment. More expensive than pegboard but far more adjustable.
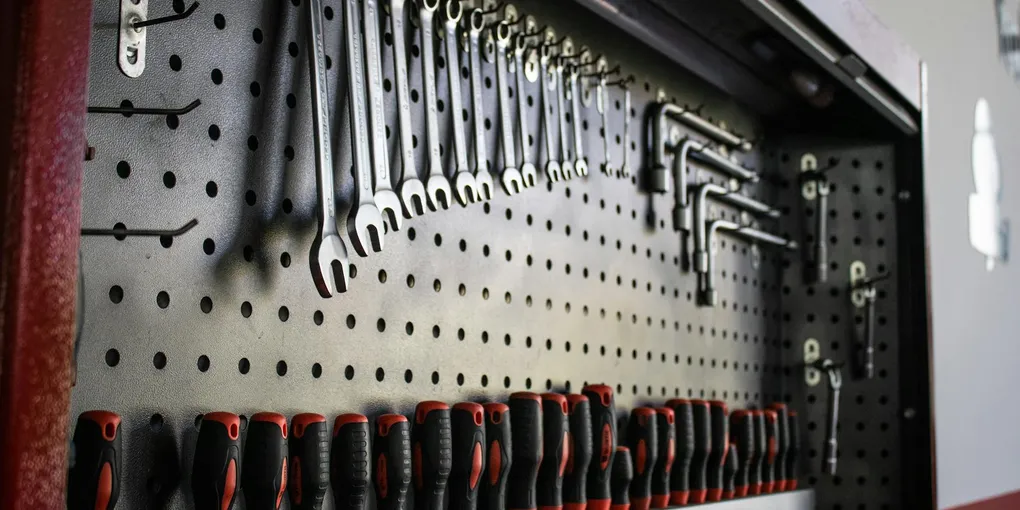
Pegboard. A sheet of pegboard mounted 1/2 inch off the wall with standoffs lets you hang standard pegboard hooks in any configuration. Pegboard with a full hook kit is the classic workshop wall setup — you can see all your tools at once and rearrange them whenever your workflow changes. Cheap and effective, but the 1/4-inch standard pegboard deflects under heavy items. Use 3/16-inch tempered hardboard or 1/2-inch pegboard for anything heavier than hand tools.
Fixed shelving. For heavy items — power tools, hardware bins, paint cans, automotive fluids — nothing beats fixed shelving mounted directly to studs. Use 2x4 ledger boards with plywood shelves, or metal bracket shelving rated for at least 200 pounds per shelf. Position fixed shelves based on item frequency: head height for daily-use items, higher or lower for less frequent access.
What goes where by height on the wall:
- Floor to 18 inches: Avoid storing anything here. This space is for mower access, trash cans, and rolling equipment. Cluttering it makes the garage feel cramped immediately.
- 18 inches to 5 feet: Prime storage space. Frequent-access items live here — tools, sports gear, cleaning supplies.
- 5 feet to 8 feet: Good for items used weekly or monthly. Upper shelves for large bins, seasonal items that don’t go in overhead racks.
- Above 8 feet: Transition to overhead storage rather than wall storage at this height.
Step 3: Overhead Storage
Ceiling storage reclaims otherwise unused space and is ideal for Zone 4 (seasonal) items. Done right, it’s stable, accessible with a step ladder, and invisible from eye level.
Before installing anything overhead, establish clearance. Open your garage door and measure from the floor to the lowest point of the open door’s track and hardware. Your ceiling storage must clear this by at least 12 inches. In many garages, this means your overhead racks sit 8-12 inches below the ceiling — which still provides 6-10 inches of usable storage depth.
Overhead ceiling storage racks mount to ceiling joists with threaded rod hardware. The platform sits horizontally below the ceiling. Standard rack dimensions are 4x8 feet, matching plywood sheet dimensions.
Weight limits matter here. Most overhead racks are rated for 100-600 pounds depending on the product, but that’s the rack’s rating — not your joist capacity. Standard 2x6 ceiling joists in a residential garage can typically support 10 pounds per square foot of storage. A 4x8 rack (32 square feet) can support about 320 pounds of evenly distributed load. Don’t stack everything in one corner.
What works on overhead racks:
- Holiday decorations in labeled totes
- Camping gear (tents, sleeping bags, camp chairs)
- Luggage and duffel bags
- Off-season sporting goods (skis, snowboards, patio cushions)
- Flat, stackable items in bins
What doesn’t work:
- Heavy items (engine parts, full paint cans, concrete bags)
- Items you need frequently — the step ladder tax adds up fast
- Anything that needs to stay dry in an uninsulated garage where condensation is a risk
Label every bin stored overhead. You will not remember what’s in a plastic tote six months later.
Step 4: Specialty Storage
Some items need purpose-built solutions.
Bikes. Wall-mounted bike hooks are the most common solution. A single hook holds the front or rear wheel and keeps the bike vertical against the wall. For horizontal storage (bike parallel to wall), you need two hooks — one for each wheel — and the bike needs about 6 feet of wall width. Vertical storage needs about 30 inches of wall width but the bike sticks out 5-6 feet from the wall.
For households with kids’ bikes that need to grow with them, a freestanding floor rack lets you adjust spacing without putting new holes in the wall. For two or more adult bikes in a tight garage, ceiling pulley hoists can stack bikes at two heights.
Ladders. Store ladders horizontally on wall hooks or vertically on specialized ladder hooks that cradle the rails. Horizontal storage is more accessible; vertical storage takes less wall width. Keep the heaviest ladder (extension ladder) closest to the floor level or where it can slide off hooks without lifting it over your head.
Long items. PVC pipe, lumber, conduit, and trim pieces store best in a ceiling rack made from two parallel 2x4s mounted horizontally below the ceiling joists. Items slide in from one end. This keeps long items off the floor and out of traffic paths without dedicated hardware. Limit to items under 20 pounds per linear foot.
Garden hoses. A wall-mounted hose reel next to the spigot keeps hoses from tangling on the floor and extends hose life. Budget reels work fine. Position it at a height where you can crank the reel without crouching.
Step 5: Flooring
Most garages have bare concrete floors. Bare concrete is hard to clean, cold in winter, and rough on dropped tools. Two upgrades make it dramatically better.
Epoxy coating creates a sealed, continuous surface that resists oil, chemicals, and water. A properly applied epoxy floor is easy to hose down, looks clean, and lasts 5-10 years with normal use. The trade-off is prep work: the concrete must be acid-etched or ground clean before application, and the process takes a weekend plus 72 hours of cure time before you can drive on it. Epoxy is the right choice if you want a permanent upgrade and are willing to do the prep correctly. Garage floor epoxy kits are available for DIY, or see our full guide to how to apply garage floor epoxy.
Interlocking floor tiles are PVC or polypropylene panels that snap together on top of the concrete without adhesive. Installation takes two to four hours and requires no prep beyond sweeping the floor. They’re easier to clean than bare concrete, provide cushioning underfoot, and can be rearranged or expanded. The downside: water and debris can get under the tiles if they’re not fully sealed at the perimeter, and the tiles lift at the edges over time in high-traffic paths.
For a workshop area where you’ll be standing for hours, interlocking tiles with anti-fatigue properties are worth the cost. For the car bay, either epoxy or heavy-duty PVC tiles work well. Tiles are the right choice if you rent, if you want to DIY without a weekend of prep, or if you need a solution you can take with you when you move.
Maintaining Organization
Garage organization degrades when items get set down “just for now” and stay there for six months. Two practices prevent this:
One-in-one-out. Before adding a new item to the garage, identify what will leave to make room for it. This rule prevents gradual accumulation from refilling the space you just cleared.
Annual review. Once a year — spring works well — pull everything out of each zone and evaluate what’s been used. A rule of thumb: if you haven’t touched it in 12 months and it’s not purely seasonal, it probably doesn’t belong in the garage. Donate, sell, or discard it. This one practice keeps most organized garages functional indefinitely.
Label storage bins clearly on all visible sides, not just the top. When bins are stacked, you need to read the label from the front without lifting the top bin to see what’s underneath.
Assign every item to a zone and every zone to a specific location. Vague zones fail. “Sports equipment lives on the left wall between the door and the window” is specific enough to survive six months of family use. “Sports equipment is on the left side” is not.
Related Reading
- How to Clean a Garage
- How to Apply Garage Floor Epoxy
- How to Insulate a Garage
- How to Fix a Broken Garage Shelf — repair a failing shelf bracket or board before reorganizing the space
- How to Fix a Broken Garage Ceiling Light — replace a failing ceiling light while the garage is reorganized
- Zone Planning
A functional garage is divided into activity zones. Everything in the garage belongs to one of five zones. Your job is to decide where each zone lives before purchasing a single hook or shelf.
- Vertical Wall Storage
Walls are the highest-value storage real estate in a garage. A standard 2-car garage has 60-80 linear feet of wall space. Most garages use less than 20% of it.
- Overhead Storage
Ceiling storage reclaims otherwise unused space and is ideal for Zone 4 (seasonal) items. Done right, it's stable, accessible with a step ladder, and invisible from eye level.
- Specialty Storage
Some items need purpose-built solutions.
- Flooring
Most garages have bare concrete floors. Bare concrete is hard to clean, cold in winter, and rough on dropped tools. Two upgrades make it dramatically better.
Free: 10-Point Home Maintenance Checklist
Prevent costly repairs with this seasonal checklist. Save hundreds every year by catching problems early.
Your checklist is ready!
Open Checklist →Something went wrong. View the checklist here.