How to Clean a Garage: Decluttering, Floor Cleaning, and Organization
A complete guide to cleaning and organizing your garage in three phases — decluttering, deep cleaning the floor and walls, and setting up storage systems that last.
Cleaning a garage: (1) Declutter first — sort into keep, donate, trash, and relocate piles. A clean garage starts with less stuff. (2) Clear the floor completely. (3) Sweep from back to front, then blow out corners with a leaf blower. (4) Degrease oil stains: absorb fresh oil with cat litter, let sit 2–3 hours, sweep. For set stains, apply a concrete degreaser, scrub with a stiff brush, and rinse. (5) Pressure wash the floor if it's heavily soiled (optional). (6) Let dry fully, then reinstall items in zones: lawn/garden, tools, auto, sports/seasonal. Wall shelving and ceiling racks keep the floor clear. A 2-car garage takes 4–6 hours for a full clean-and-organize.
Frequently Asked Questions
How do I remove oil stains from a concrete garage floor?
For fresh stains, absorb as much oil as possible with cat litter, sawdust, or baking soda. Let it sit for a few hours, then sweep and dispose. For set stains, apply a concrete degreaser like Oil Eater, scrub with a stiff-bristle brush, and rinse thoroughly. Repeat if needed. Stubborn old stains may need a poultice paste left overnight or a pressure washer follow-up.
What is the best way to organize a garage?
Zone the garage by activity — lawn and garden, tools, auto, sports, and seasonal storage. Mount wall shelving and pegboard to keep items off the floor. Use overhead ceiling racks for seasonal items accessed only a few times per year. Label every bin so everything has a home and can be put back in the right place.
How do I get rid of garage pests (mice, spiders)?
Seal every gap larger than a quarter-inch where walls meet the floor and around pipes, conduit, and door frames. Remove food sources — birdseed, pet food, and grass seed are common attractants. Snap traps placed along walls are the most effective and least toxic option for mice. For spiders, regular sweeping of webs and keeping clutter to a minimum eliminates harborage.
How often should I deep clean a garage?
Deep clean and re-sort the garage once per year, typically in spring. A monthly 15-minute sweep keeps debris, dust, and cobwebs from building up between annual cleanings. After any large project or seasonal change-out, do a quick reset before putting the car back in.
What should I throw away when decluttering a garage?
Throw out broken tools with no repair value, dried-out paint and adhesives, expired chemicals and pesticides, duplicate items, sporting equipment nobody has used in two years, boxes from your last move you never opened, and anything cracked, rusted, or missing parts. Take paint and chemicals to a household hazardous waste drop-off — do not put them in the trash.
How do I stop my garage from smelling musty?
Musty garage odors come from moisture, mildew, or animal activity. Improve ventilation by cracking the door periodically or adding a through-wall vent. Check for water intrusion at the floor perimeter, door threshold, and wall base. Clean any mildewed surfaces with a diluted bleach solution. Check for rodent nesting material behind stored items. A moisture-absorbing product like DampRid can help in humid climates.
Should I coat or seal my concrete garage floor?
Yes — an uncoated concrete garage floor absorbs oil, stains easily, and gets harder to clean every year. Two main options: (1) Penetrating sealer ($50–$150 DIY, lasts 3–5 years) — soaks into the concrete and repels moisture and oil without changing the appearance. Easiest DIY application, just roll it on. Good for functional floors you don't want to change visually. (2) Epoxy coating ($150–$600 DIY, $1,500–$3,500 professional, lasts 10–20 years) — a hard decorative surface in gray or flake/chip finish. Requires acid-etching the floor first, careful humidity monitoring during application, and 24–48 hours of cure time. Dramatically easier to clean and more durable. The main DIY mistake with epoxy is applying it when floor temperature or humidity is out of range — the coating peels within a year. Follow the manufacturer's conditions precisely or hire a pro.
How do I permanently get rid of mice in a garage?
Elimination and exclusion together — one without the other fails. Elimination: set snap traps every 6–10 feet along the walls (mice hug walls, not open floor). Bait with peanut butter, check daily, and replace bait weekly. Mice avoid new objects for 1–2 days — don't move traps if you don't see immediate activity. Exclusion: seal every gap larger than a quarter inch. Common entry points: where the wall meets the concrete floor (use steel wool and foam backer before caulking), door sweeps (garage doors rarely seal tightly), and conduit/pipe penetrations. Remove attractants: move birdseed, pet food, and grass seed to sealed metal or plastic containers. Once you've been mouse-free for 2 consecutive weeks, seal all confirmed entry points permanently with hardware cloth or steel mesh — mice can chew through foam and thin plastic.
Cleaning a garage: (1) Declutter first — sort into keep, donate, trash, and relocate piles. A clean garage starts with less stuff.
A garage clean-out has three phases — declutter, deep clean, organize — and they must happen in that order. Skipping straight to buying shelving with a garage full of junk produces an organized mess. Do the phases in sequence and the work compounds: cleaning is faster when the floor is clear, and organizing is faster when you only own what you’re keeping.
Plan for a full weekend. Most garages can be decluttered and cleaned in one day, with organization installed the next.
What You Need
Before you start, gather your supplies. Most of these earn their cost back in time saved.
- Wall-mounted shelving system — the backbone of floor-to-ceiling storage
- Oil Eater degreaser for concrete — cuts through set-in oil stains
- Overhead ceiling storage rack — best use of otherwise wasted ceiling space
- Pegboard tool organizer — keeps hand tools visible and accessible
- Wet/dry shop vac — essential for floor cleaning and general debris
- Snap traps for mice — the most effective, lowest-cost pest control option
Additional supplies: stiff-bristle push broom, stiff-bristle scrub brush, garden hose or pressure washer, mop bucket, concrete degreaser, rubber gloves, garbage bags, cardboard boxes for donation items, and a marker for labeling.
Phase 1: Declutter
Pull Everything Out
Take every item out of the garage and put it on the driveway. This is non-negotiable. You cannot properly sweep, clean, or plan storage around items still sitting on the floor.
It takes about an hour for a typical two-car garage. Use tarps or cardboard to protect items from ground moisture if you expect to work across two days.
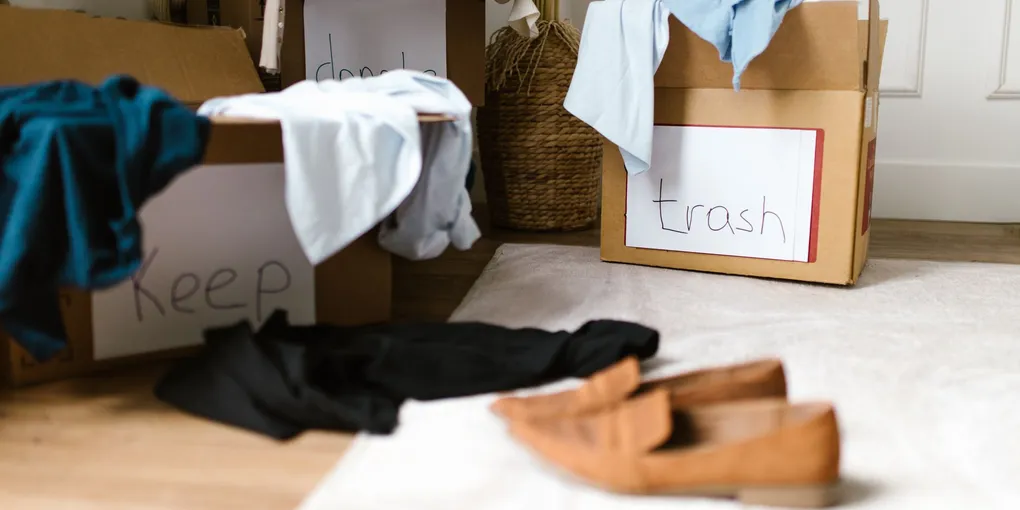
Sort Into Four Categories
Set up four areas on the driveway:
Keep — Items used within the past 12 months, or genuinely seasonal items you’ll reach for again.
Donate/Sell — Items in working condition that you haven’t used in over a year. Larger items go on Facebook Marketplace. Boxes go to Goodwill or Habitat for Humanity ReStore, which takes tools and building materials.
Trash — Broken items with no repair value, expired or dried-out chemicals and paint, mystery boxes from your last move.
Relocate — Things that belong elsewhere in the house: tools in the kitchen junk drawer, extra lightbulbs, holiday decorations that belong in a closet.
Be Ruthless
Most garages contain 30-50% more than the household actually needs. Apply these criteria when making calls:
- Has anyone touched this in two years? If no, it goes.
- Is there a duplicate? Keep the better one, donate the other.
- Is it broken? Can it be fixed in the next 30 days? If not, trash it.
- Is it an expired chemical, dried paint, or old pesticide? Household hazardous waste drop-off only — never regular trash.
- Does it belong in the garage, or did it migrate here because there was nowhere else to put it?
Load the trash into bags, load donations into boxes, and have them out of the driveway before you start cleaning.
Phase 2: Clean the Garage
With the floor clear, cleaning is straightforward. Work top to bottom: ceiling first, then walls, then floor.
Sweep Cobwebs and Dust Down from the Ceiling
Use a long-handled broom or extension duster to knock cobwebs from corners, ceiling joists, and light fixtures. Work from the far wall toward the garage door so debris falls where you’ll sweep it out. Don’t skip this — cobwebs swept after floor cleaning means you’re cleaning the floor twice.
Sweep the Floor
Do a thorough sweep with a stiff push broom. Push debris toward the garage door and out. Get into corners and along the wall perimeter. Follow with a shop vac to pick up fine dust and corner debris the broom missed.
Clean the Walls and Door
Wipe down garage walls with a damp cloth or sponge mop and a mild all-purpose cleaner. Focus on the areas where stored items were touching the wall — these collect grime and spider webs. Wipe the interior face of the garage door panels, the weather stripping, and the tracks.
Clean the Floor Drain
If your garage has a floor drain, remove the cover and flush the drain with a bucket of water. Pour a diluted bleach solution down the drain to kill odor-causing bacteria. Replace the cover. A dried-out drain trap is a common source of garage odor.
Wash the Floor
Mix a concrete cleaner or diluted dish soap with water in a bucket. Mop the floor in sections, working toward the drain or garage door. For a deeper clean, use a scrub brush on heavily soiled areas. Rinse with clean water and let the floor dry completely before moving anything back in. Good ventilation speeds drying significantly — leave the garage door open.
Cleaning Oil Stains from Concrete
Oil stains need targeted treatment before a general floor wash.
Fresh Oil Stains
Act fast. The longer oil sits, the deeper it penetrates into concrete.
- Cover the stain completely with an absorbent material — cat litter, sawdust, or baking soda all work.
- Let it sit for at least 2 hours, or overnight for a significant spill.
- Sweep up the absorbent and dispose of it.
- Scrub the remaining stain with dish soap and hot water using a stiff brush.
- Rinse clean.
Set-In Oil Stains
Old oil stains require a concrete degreaser.
- Pre-wet the stained area with water.
- Apply a concrete degreaser like Oil Eater full-strength to the stain.
- Scrub aggressively with a stiff-bristle brush — work the degreaser into the concrete pores.
- Let it dwell for 10-15 minutes.
- Rinse thoroughly with a hose. For stubborn stains, a pressure washer at 1,500-3,000 PSI cuts through what a hose won’t.
- Repeat the application if the stain is still visible after drying.
For very old or deep stains, a poultice paste made from degreaser and an absorbent powder (diatomaceous earth or talc) can draw out oil that’s penetrated deeply. Apply the paste, cover with plastic wrap, let sit overnight, then scrub and rinse.
One honest note: some stains won’t come fully clean. If the stain is old enough and deep enough, a garage floor coating or epoxy is the most practical solution. See How to Apply Garage Floor Epoxy for a full DIY walkthrough.
Phase 3: Organize
Zone the Garage First
Before buying a single storage product, draw a rough layout and assign zones. Walk the space and decide what goes where based on how frequently you use it and where it makes sense to access it.
Common zones for a two-car garage:
Lawn and garden — Mower, rakes, shovels, hoses, fertilizer, and seed. Position this near the garage door for easy roll-out access.
Tools and workbench — Hand tools, power tools, and a work surface. Anchor this to one wall near an outlet. Pegboard goes here.
Auto — Motor oil, fluids, filters, jumper cables, and a tire inflator. Near the car, ideally in a closed cabinet to prevent spills from reaching other items.
Sports and recreation — Bikes, balls, helmets, golf clubs, and outdoor gear. Near the garage door for grab-and-go access.
Seasonal storage — Holiday decorations, camping gear, and suitcases. These get the overhead space since you only touch them a few times per year.
Wall Storage Hierarchy
Put the most frequently used items at the most accessible heights — between knee and shoulder level. Reserve below-knee and above-shoulder for items used less often.
Pegboard is the best tool storage for the money. A 4x8-foot sheet and a hook kit runs $40-60 and holds most of a typical tool collection in plain sight. Mount it to the wall with 1-inch standoffs so hooks engage properly.
Heavy-duty wall shelves get bins, boxes, and supplies off the floor. Mount them into studs, not just drywall. Space shelves to match the height of your containers — wasted vertical space inside a shelf bay is wasted wall space. Keep the bottom shelf at least 18-24 inches off the floor to stay above splash range and leave clearance for tall items underneath.
Track and rail systems let you mount multiple accessories — hooks, bins, shelves — to a single wall-mounted rail. These cost more than standalone shelves but allow easy rearrangement without new holes.
Label every bin. Use a label maker or masking tape and marker. Unlabeled bins slowly become catch-all bins, and catch-all bins become the clutter problem that started this whole project.
Overhead Storage for Seasonal Items
Ceiling-mounted overhead racks use space that is otherwise completely wasted. Install them above the car hood, where there is no useful wall or floor space below. Most racks mount to ceiling joists with lag bolts and hold 250-500 lbs.
Use overhead space for items you need 1-3 times per year: holiday decorations, camping gear, luggage, and off-season sporting equipment. Anything heavier than you can safely carry up a step stool does not belong overhead.
Always mount into joists — never drywall alone. Use a stud finder to locate them, and use lag bolts rated for the load.
Pest Prevention
A clean garage is a less hospitable garage for pests, but it’s not pest-proof on its own.
Seal Entry Points
Mice can squeeze through a gap the diameter of a pencil. Common entry points in a garage:
- The gap where the wall meets the concrete floor
- Around pipes, conduit, and wire penetrations through the wall
- The side gaps on the garage door if the weather stripping is worn
- The door threshold if it doesn’t seal flat to the floor
Fill small gaps with steel wool packed tightly, then cover with spray foam. Use metal flashing or hardware cloth for larger gaps. Replace weatherstripping on the door sides and bottom seal on the garage door if either shows visible light or gaps.
Remove Food Sources
Rodents are attracted to food stored in the garage. Common offenders:
- Birdseed and wild animal feed in paper or thin plastic bags
- Dog food and cat food stored in original bags
- Grass seed and bulbs
- Unsealed garbage cans
Move food to airtight metal or heavy-duty plastic containers. If you feed birds, keep seed in the house or a dedicated sealed container.
Traps
Snap traps placed along walls (not in the open center of the floor) are the most effective and least toxic option for mice. Place them perpendicular to the wall with the trigger end touching the wall. Check them every few days. Bait with peanut butter.
For spiders, regular sweeping to remove webs eliminates habitat. A garage with fewer insects to eat will attract fewer spiders. Sticky glue traps placed in corners show you what’s present and catch crawling pests.
Keeping It Clean
Cleaning a garage once is not a system. The garage returns to chaos without a maintenance habit.
Monthly: 15-minute sweep of the floor, knock down any new cobwebs, and put anything sitting on the floor back where it belongs. This is faster than it sounds once the storage system is in place.
Annually: Full sort-out. Pull items from shelves, review what hasn’t been touched, donate or trash accordingly. This is the time to catch the slow accumulation of items that drift back to the garage over the year.
Dedicated parking spots: If you’re parking in the garage, assign specific spots for bikes, the mower, sports equipment — anything that otherwise migrates into car territory. Mark them with paint, tape, or hooks. When the parking spot is occupied by the car, everything else has a home.
The garage stays clean when everything has a place and putting things back is as easy as taking them out. That’s what the storage system makes possible.
Related Reading
- How to Apply Garage Floor Epoxy
- How to Fix a Garage Floor Crack
- How to Insulate a Garage
- Best Wet-Dry Shop Vacuums
- Phase 1: Declutter
Has anyone touched this in two years? If no, it goes. Is there a duplicate? Keep the better one, donate the other.
- Phase 2: Clean the Garage
With the floor clear, cleaning is straightforward. Work top to bottom: ceiling first, then walls, then floor.
- Cleaning Oil Stains from Concrete
Oil stains need targeted treatment before a general floor wash.
- Pest Prevention
A clean garage is a less hospitable garage for pests, but it's not pest-proof on its own.
- Keeping It Clean
Cleaning a garage once is not a system. The garage returns to chaos without a maintenance habit.
Free: 10-Point Home Maintenance Checklist
Prevent costly repairs with this seasonal checklist. Save hundreds every year by catching problems early.
Your checklist is ready!
Open Checklist →Something went wrong. View the checklist here.