How to Fix Low Water Pressure in a Shower: Causes and Fixes (2026)
Low shower pressure is usually caused by a clogged shower head, a flow restrictor, or a partially closed valve. This guide covers all causes from easiest to hardest fix, including whole-house vs. single-fixture pressure problems.
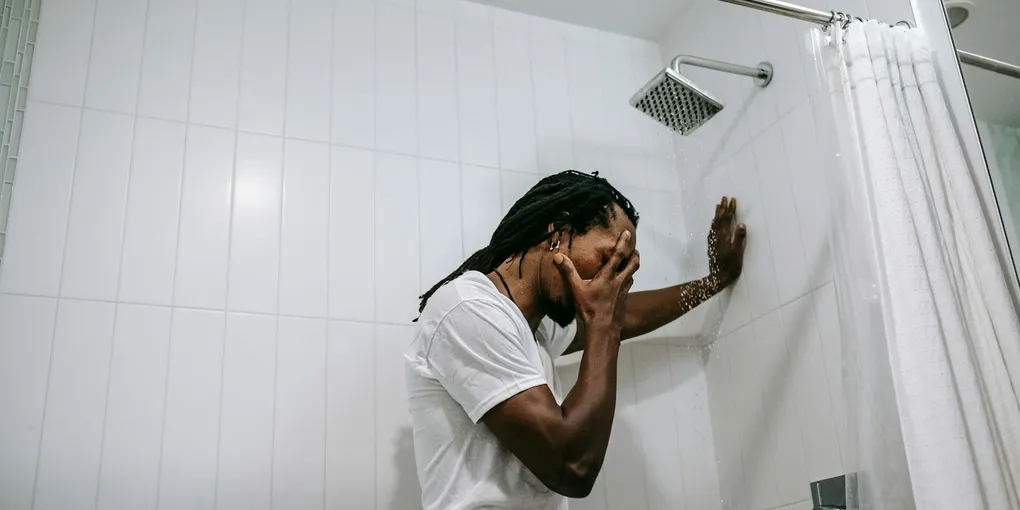
If only one shower has low pressure: start with the shower head. Unscrew it and soak it in vinegar overnight — mineral buildup (scale) clogs the spray holes and reduces flow significantly. Also check for a flow restrictor inside the shower head and remove it if water conservation is not a concern. If multiple fixtures have low pressure: the problem is upstream — a partially closed main valve, PRV (pressure reducing valve) out of adjustment, or supply pipe issues. Diagnose which fixtures are affected before assuming it is a shower head problem.
Frequently Asked Questions
How do I tell if the problem is the shower head or the supply pressure?
Test isolation: remove the shower head and turn on the water briefly with the pipe open. If the flow from the bare pipe is strong, the problem is the shower head (clog or restrictor). If the bare pipe also has weak flow, the problem is upstream — check nearby sinks and fixtures. If all hot water is weak: the water heater shutoff valve may be partially closed. If only cold is weak: check the main shutoff or a branch valve. If all fixtures in one area are weak: a supply valve in that zone is partially closed.
What is a flow restrictor and should I remove it?
A flow restrictor is a small plastic disk inside the shower head inlet designed to limit flow to 2.5 GPM or less (federal standard). It looks like a small disk with a hole in the center. It reduces water use but also reduces pressure. To remove: unscrew the shower head from the arm, find the plastic insert at the inlet (often pink or green), and pry it out with a flat-head screwdriver. Note: in drought-restricted areas or communities with tiered water pricing, removing the restrictor increases your water use.
What is a PRV and how does it affect shower pressure?
A pressure reducing valve (PRV) is installed on the main water supply line to limit incoming municipal pressure (which can be 100–150 PSI) to a safe household level (45–80 PSI). PRVs are usually located near the main shutoff valve. If the PRV is set too low or has failed, all fixtures will have low pressure. To check: attach a pressure gauge to an outdoor hose bib and read the static pressure. If below 45 PSI: adjust the PRV (a screw under the cap) or replace it if it's failed. PRV replacement is a 2-hour project for a confident DIYer or a plumber.
My shower was fine and then suddenly lost pressure. What happened?
Sudden pressure loss in a single shower points to: (1) a shut-off valve that was inadvertently partially closed — check under the sink or near the shower for any valve that was recently touched, (2) a broken cartridge or worn seal in the shower valve — a worn seal can collapse and restrict flow, (3) a small object or debris that dislodged in the line and is lodged in the shower head or cartridge screen. Gradual pressure loss over months usually indicates mineral scale buildup or a slowly failing PRV.
My hot water pressure is lower than cold in the shower. What is causing that?
Hot-only pressure issues narrow the cause to the hot water side: (1) The water heater shutoff valve is partially closed — check the valve on the hot water supply line coming out of the top of the water heater. (2) Mineral scale inside the water heater supply line. (3) Cartridge issue in the shower valve — some shower cartridges have separate hot and cold passages that can fail independently. (4) Cross-connection — if a check valve is installed backward.
If only one shower has low pressure: start with the shower head. Unscrew it and soak it in vinegar overnight — mineral buildup (scale) clogs the spray holes and reduces flow significantly.
Low shower pressure has a short list of causes. Work through them in order.
Step 1: Diagnose the scope
Only this shower? The problem is the shower head or shower valve.
All showers and fixtures? System pressure issue — main shutoff, PRV, or municipal supply.
Hot side only? Water heater shutoff or hot supply line.
Cold side only? Main shutoff or cold branch valve.
Fix 1: Clean the shower head (mineral scale)
Mineral scale buildup is the most common cause of reduced shower pressure in hard-water areas.
- Unscrew the shower head from the arm (usually hand-tighten; use pliers with a cloth to protect the finish if needed).
- Remove any filter screen from the inlet — rinse it clean.
- Submerge the shower head in white vinegar for 2–8 hours (overnight for heavy scale).
- Scrub the spray holes with an old toothbrush. Use a toothpick to clear stubborn blocked holes.
- Rinse, reinstall, and test.
For continuous scale problems: install an inline shower filter.
Fix 2: Remove the flow restrictor
- Unscrew the shower head.
- Look inside the inlet opening for a small disk with a hole — usually colored plastic (pink, green, or white).
- Pry it out with a small flat-head screwdriver or pick tool.
- Reinstall the shower head and test.
Some modern shower heads have the restrictor built into the head body and cannot be easily removed without disassembly.
Fix 3: Check and open supply valves
Locate the shutoff valve for the shower supply (sometimes in an access panel on the opposite wall, sometimes under a nearby sink). Confirm the valve is fully open — turn counterclockwise until it stops.
Also check: the main shutoff valve near the water meter or where supply enters the house. Partially closed mains reduce pressure throughout the house.
Fix 4: Replace the shower cartridge
If the shower head is clean and valves are open but pressure is still low on the hot side: the shower valve cartridge may be worn or partially clogged.
The cartridge is a replaceable component inside the shower valve body. Replacing it requires:
- Turning off water at the shower shutoff or main.
- Removing the shower handle (set screw under the handle).
- Removing the cartridge retaining clip.
- Pulling the cartridge and replacing it with the matching model.
Cartridge model numbers are usually printed on the old cartridge or available by searching the shower valve manufacturer.
Fix 5: Adjust or replace the PRV
If all fixtures have low pressure (below 45 PSI): locate the PRV on the main supply line.
Adjusting: The PRV has an adjustment screw or nut under a cap. Turn it clockwise (typically) to increase pressure. Check with a water pressure gauge attached to an outdoor hose bib. Target 50–65 PSI.
Replacing: If the PRV has failed (no response to adjustment, or pressure fluctuates widely), replace it. PRVs are available at plumbing suppliers. Shut off the main, cut out the old PRV, and solder or use push-fit connections for the new one.
Related guides
- How to Fix Low Water Pressure — whole-house pressure troubleshooting
- How to Replace a Shower Head — if the old head needs replacement
- How to Fix a Leaky Shower — if low pressure reveals other shower valve issues
- Plumber Cost Guide — when to call a pro for PRV or cartridge work
- Diagnose the scope
Remove the shower head and briefly turn on the bare pipe. If flow is strong from the bare pipe, the problem is in the shower head. If the bare pipe also has weak flow, check nearby sinks — if they are also weak, the problem is upstream (main valve, PRV). Narrow down whether the issue is one shower, all hot fixtures, or all fixtures.
- Clean the shower head
Unscrew the shower head from the arm (counterclockwise). Submerge it in undiluted white vinegar overnight or for at least 2 hours. Scrub the spray holes with an old toothbrush and a pin to clear individual clogged holes. Reinstall and test.
- Remove the flow restrictor
Look inside the shower head inlet for a small plastic disk (often pink, green, or white) with a hole in the center. Pry it out with a flathead screwdriver. This removes the 2.5-GPM flow limit and restores full pressure from the supply.
- Check and fully open supply valves
Check the supply shutoff for the shower (if present) and the main shutoff valve at the meter — confirm both are fully open by turning counterclockwise until they stop. A valve turned even 1/4 turn from fully open can reduce pressure significantly.
- Replace the shower cartridge (if still low)
If cleaning and valve checks don't resolve it, the cartridge inside the shower valve is restricting flow. Turn off the water supply. Remove the shower handle and cartridge. Order a replacement matched to the valve brand and model. Install in the same orientation.
Free: 10-Point Home Maintenance Checklist
Prevent costly repairs with this seasonal checklist. Save hundreds every year by catching problems early.
Your checklist is ready!
Open Checklist →Something went wrong. View the checklist here.