How to Fix a Loose Handrail in 20 Minutes ($5–$25, No Carpenter Needed)
A loose stair handrail is a fall hazard — tighten wall brackets into studs, use toggle anchors for hollow walls, or stabilize a wobbly newel post in 20 minutes. Parts cost $5–$25.
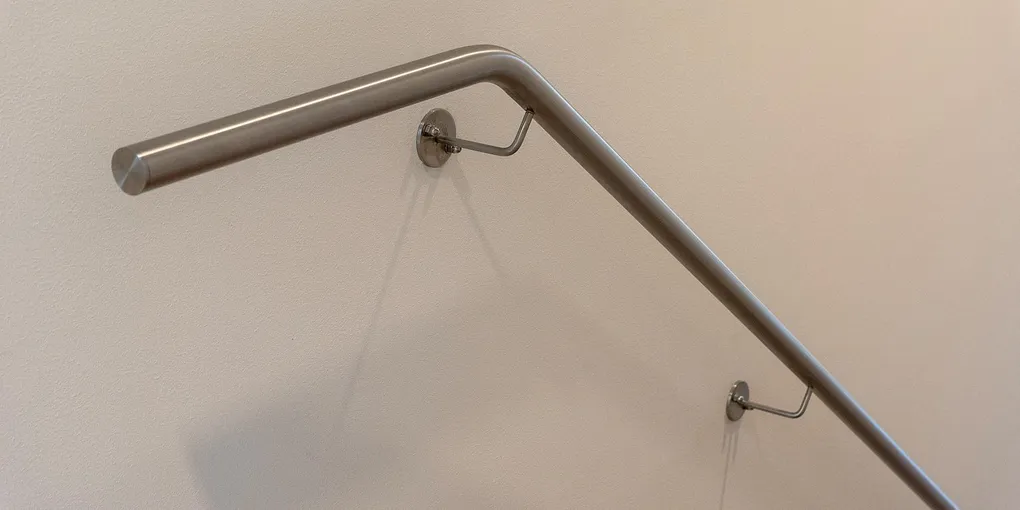
A wobbly handrail is more than just irritating — it’s a code violation and a genuine safety hazard. Stairs are the site of more home injuries than almost any other feature, and a handrail that gives way under load is a serious liability.
A wobbly handrail is more than just irritating — it’s a code violation and a genuine safety hazard. Stairs are the site of more home injuries than almost any other feature, and a handrail that gives way under load is a serious liability. The good news is that most loose handrails can be fixed in an afternoon with basic tools, no carpentry experience required.
This guide covers the four most common failure points: wall-mounted brackets pulling out of drywall, newel posts rocking at the base, stripped screw holes in wood connections, and damaged rail sections that need replacement or splicing.
What You Need
- TOGGLER SNAP TOGGLE Bolt Anchors — For brackets that must be mounted between studs. These bolt-style anchors hold 265 lbs in 1/2-inch drywall — far stronger than plastic expansion anchors.
- Newel Post Bolt and Washer Kit — A long threaded rod with a steel washer and nut that cinches the post to the floor framing from below. The single most effective fix for a rocking newel.
- 3M 5-Minute Epoxy Syringe — Fast-cure two-part epoxy for filling stripped holes and gluing loose tenons. Stronger than the surrounding wood once cured.
- Spax Multi-Material Construction Screws 3-inch — For lag-style reinforcement into studs or blocking behind bracket locations.
- Elmer’s Carpenter’s Wood Glue Max — For regluing mortise-and-tenon joints in older newel post or baluster connections.
- Stud Finder with AC Warning — Essential for locating studs behind wall paneling or drywall before drilling bracket pilot holes.
Understanding the Handrail System
A stair handrail assembly has three main structural members:
The handrail is the graspable element — the piece your hand runs along. It’s usually a routed wood profile (oak, pine, or poplar in older homes) sitting in a groove or atop a post cap fitting.
The wall rail brackets are the L-shaped or U-shaped metal supports that anchor the handrail to the wall on closed stringer stairs. They’re only as strong as their connection to the framing behind the drywall.
The newel post is the large vertical post at the bottom (and sometimes top and landing) of the stair. It’s the primary anchor for the entire system. A solid newel post makes everything else easier to stabilize; a rocking newel undermines all other repairs.
The balusters (spindles) run between the treads and the underside of the rail. They add lateral stability but are secondary to the post and bracket connections.
Step 1: Diagnose Where the Looseness Originates
Grab the handrail firmly and apply force in four directions: up, down, toward the wall, and away from the wall. Then push side to side along the rail’s length.
If the rail flexes away from the wall: The brackets are loose or the rail is not properly seated in the brackets. Examine each bracket individually — you’ll often find one or two that have pulled out of the drywall while others are still solid.
If the rail wobbles along its entire length: The newel post at the base is rocking. All the flex you feel in the rail is amplified from the post. Fix the post first.
If the rail is solid at the ends but sags or flexes in the middle: The rail itself may be cracked, notched, or undersized for the span. This is common on long stair runs with brackets spaced too far apart (maximum 48 inches on center is code; 36 inches is better practice).
If individual sections twist or clunk: A rail bolt connecting two sections may have worked loose, or a baluster is detached and creating a false sense of looseness in the rail above it.
Step 2: Tighten or Relocate Wall Brackets
Test each bracket before assuming it’s the problem. Push on the bracket base (the part screwed to the wall). If it doesn’t move, that bracket is fine. Focus on the ones that rock or pull away.
Find the stud. Use your stud finder along the wall at the bracket height. Mark the stud centerline with a pencil. In most homes, studs run 16 inches on center, so once you find one, the next is predictable. Wall rail brackets should always be anchored to studs — never to drywall alone.
If the bracket is over a stud and the screws stripped: Remove the bracket, fill the stripped holes with toothpick-and-glue method (see Step 4), let cure, and re-drive the screws. Use 3-inch construction screws instead of the original short drywall screws for much stronger engagement.
If the bracket falls between studs: You have two options. Option A: Relocate the bracket slightly along the rail to align with a stud. Rails have enough flex to tolerate moving a bracket 2 to 4 inches without visible effect. Option B: Install a toggle bolt anchor. TOGGLER SNAP TOGGLEs are bolt-style anchors, not plastic wings — they pull a steel bar flat against the back of the drywall and will hold the rated load indefinitely.
Reinstalling the bracket. If your bracket is the through-post type (a threaded rod that passes through the rail), snug the rail down firmly before tightening the wall fasteners so the rail doesn’t bow upward.
Step 3: Fix a Rocking Newel Post
Newel post repairs depend on how the post was originally installed.
Through-floor newels run through the tread and are bolted to the stringer or floor joist below. If the bolt worked loose, you simply need access from below — a basement or crawl space, or the underside of a finished ceiling — to re-tighten the nut. Tighten to snug plus a quarter turn; over-tightening can split the post.
Surface-mounted newels sit on top of the tread or floor and are typically toe-nailed or face-screwed. These are the most likely to rock.
The newel post bolt method (no demo required): Drill a 1-inch diameter access hole in the side of the newel post, about 8 to 10 inches up from the floor. Angle a long 3/8-inch bit through the post and through the tread or floor into the framing below. Thread a long carriage bolt or allthread rod down through this channel. From below (basement ceiling, crawl space, or an access hole in the finished ceiling), place a large fender washer and nut on the rod end and tighten until the post is rock-solid. Fill the access hole in the post side with a 1-inch wooden plug and finish to match.
Gluing and blocking a surface newel. If the base of the post sits in a routed slot in the bottom tread (a “box newel”), inject construction adhesive or epoxy into the gap around the tenon while it’s racked open, then clamp or brace it plumb until the adhesive cures. Add corner brackets on the inside of the newel cap if the post is hollow (common on box newels).
Step 4: Repair Stripped Screw Holes
Stripped screw holes are the number one reason handrail brackets fail repeatedly. The original screws get tightened until they stop biting, more force gets applied, and the wood fibers give way. Re-driving into the same hole produces the same result unless you restore the wood fiber.
Toothpick method. Dip three or four round wooden toothpicks in wood glue. Pack them tightly into the stripped hole until they fill it completely. Snap the toothpicks flush with the surface and let the glue cure for at least two hours (overnight is better). Drill a new pilot hole through the filled center and drive the screw. The toothpick wood gives the screw threads something to bite.
Epoxy method. For larger holes or structural connections, mix two-part epoxy and pack it into the hole. While still soft (within the first 2 minutes of pot life for 5-minute epoxy), insert the screw and let the epoxy cure around it in place. The screw will be permanently anchored — only use this when you’re certain you don’t need to remove it later.
Use longer screws. After filling and re-drilling, step up to a screw 1 inch longer than the original. Getting deeper into solid wood is the simplest way to prevent future stripping.
Step 5: Stabilize Loose Balusters
A single loose baluster won’t make the handrail dangerous on its own, but multiple loose balusters add up to real slop in the system.
Wood dowel balusters. The bottom of the baluster typically fits into a drilled hole in the tread. If it’s loose, inject wood glue into the hole, re-seat the baluster plumb, and let it cure. A rubber band or tape holds it upright while the glue sets.
Metal pin balusters. Many newer stairs use hollow metal balusters with metal shoes at the bottom. If the shoe screw stripped, fill the hole and re-drive as above. If the shoe bracket is cracked, replacement shoes are available at stair-parts suppliers and are a 10-minute swap.
Over-width balusters. Sometimes a baluster wobbles because the hole drilled for it is oversized. Wrap the base of the baluster with a thin layer of fiberglass mesh tape (the kind used for drywall) and glue it in place — the tape adds just enough bulk to fill the gap.
Step 6: Splice or Replace a Damaged Rail Section
If a section of handrail is cracked through, notched too deeply, or heavily damaged, splice in a replacement rather than replacing the entire run.
Source matching profile. Measure the rail profile width and height, then take a cross-section photo to your local lumber yard or stair-parts supplier. Most standard profiles (such as 6210 colonial, 6000 contemporary) are widely stocked. If the profile is discontinued, a router table can often reproduce it from a template.
Cut the damaged section out. Make square cuts on each side of the damage with a miter saw or circular saw. Cut back far enough to reach a solid bracket location on each side — your splice joints should land within 2 inches of a bracket.
Install a rail bolt at each joint. A rail bolt (handrail fastener) works like a cabinetmaking joiner: drill a horizontal hole in the end of each piece for the bolt head, drill a cross hole from the underside for the hex nut, and tighten. The two rail ends pull together tightly with no exposed hardware. Fill the nut access holes in the bottom of the rail with grain-matched wood plugs.
Finish to match. Sand through 80, 120, and 180 grit, feathering into the existing finish at the splice. Apply stain to match, then finish coats. The color will be slightly different on new wood until the finish fully oxidizes — two to three months of normal use.
Step 7: Test to Code
Once repairs are complete, perform a load test that approximates code requirements:
Grip the rail firmly and apply your full body weight laterally (toward and away from the wall). The rail should not deflect more than about 1 inch under this load. Push up and down as well. Walk up and down the stairs using only the rail to steady yourself.
Check that brackets are not visibly rotating or pulling away from the wall under load. If anything moves noticeably, find that connection and reinforce it before considering the job done.
When to Call a Pro
DIY handrail repairs are appropriate for loose brackets, rocking posts, and cosmetic damage. Call a licensed contractor or stair specialist if:
- The stringer (the diagonal structural board supporting the treads) is cracked or pulling away from the wall — that’s a structural issue beyond handrail repair.
- The entire stair frame rocks or sways when you walk on it.
- The newel post is rotted at its base and the rot extends into the floor framing.
- You need a permit-required modification (adding a rail where none exists, or altering the stair geometry).
Related Reading
- How to Fix Squeaky Floors — Squeaky treads often travel with loose handrails; fix both in the same project.
- How to Patch Drywall — Patch the wall after relocating a bracket into a stud position.
- Home Safety Checklist — Full inspection checklist including stair and railing safety items.
- How to Fix a Broken Exterior Step — repair crumbling or rotted outdoor steps while you’re already working on the stair system
- How to Fix a Broken Handrail Bracket — repair or replace a loose or damaged wall bracket holding the handrail
- How to Fix a Broken Outdoor Step — repair crumbling or rotted outdoor steps while you’re already working on the handrail
- How to Fix a Broken Stair Tread — repair a cracked or creaking stair tread while you have the stair system open
- How to Fix a Broken Outdoor Step Handrail — repair or replace a handrail on outdoor steps while you have the tools and hardware out
- How to Fix a Broken Stair Railing Post — repair or replace a railing post while the stair system is open
- Diagnose Where the Looseness Originates
Grab the handrail firmly and apply force in four directions: up, down, toward the wall, and away from the wall. Then push side to side along the rail's length.
- Tighten or Relocate Wall Brackets
Test each bracket before assuming it's the problem. Push on the bracket base (the part screwed to the wall). If it doesn't move, that bracket is fine. Focus on the ones that rock or pull away.
- Fix a Rocking Newel Post
Newel post repairs depend on how the post was originally installed.
- Repair Stripped Screw Holes
Stripped screw holes are the number one reason handrail brackets fail repeatedly. The original screws get tightened until they stop biting, more force gets applied, and the wood fibers give way.
- Stabilize Loose Balusters
A single loose baluster won't make the handrail dangerous on its own, but multiple loose balusters add up to real slop in the system.
- Splice or Replace a Damaged Rail Section
If a section of handrail is cracked through, notched too deeply, or heavily damaged, splice in a replacement rather than replacing the entire run.
Free: 10-Point Home Maintenance Checklist
Prevent costly repairs with this seasonal checklist. Save hundreds every year by catching problems early.
Your checklist is ready!
Open Checklist →Something went wrong. View the checklist here.