How to Fix a Broken Handrail Bracket: Secure It in 20 Minutes
A broken handrail bracket is a safety hazard — secure it in 20 minutes with longer screws into a stud, toggle anchors for drywall, or a $5–$15 replacement bracket.
Fixing a loose handrail bracket: (1) Code requires stair handrails to withstand 200 lbs of force — a loose bracket is a safety failure. (2) Bracket screws into drywall with no stud: this is the most common failure. Replace with toggle bolt anchors (Toggler SNAPTOGGLE) rated for 100+ lbs, or use a longer screw that hits the wall stud behind the drywall. Studs are typically at 16-inch centers — use a stud finder to locate. (3) Bracket screws are stripped in a wood stud: fill holes with hardwood toothpicks and wood glue, let cure, re-drive longer screws. (4) Wall is concrete or masonry: use hammer drill with concrete anchor bolts and washers. (5) Full bracket replacement: remove old bracket, bring to hardware store for exact profile match, reinstall. Newel post brackets for newell caps are different from wall brackets — match the style. Apply thread-locking compound to bracket screws to prevent future loosening.
Frequently Asked Questions
How do I know if my handrail bracket needs replacing versus just tightening?
If the bracket wobbles after tightening all screws, or if the bracket itself is cracked or bent, replacement is the better fix. Loose screws alone usually mean you just need longer screws or wall anchors.
What size screws should I use for a handrail bracket?
Use at least 2.5-inch wood screws when anchoring into a stud, or toggle bolts rated for at least 50 pounds when anchoring into drywall between studs.
Can I install a handrail bracket without hitting a stud?
Yes, use heavy-duty toggle bolts or snap toggles rated for the load. However, a stud mount is always stronger and preferred for a safety-critical fixture like a handrail.
How tight should a handrail feel?
A properly secured handrail should have zero lateral play. Grab it firmly and push side to side — there should be no detectable movement.
Do I need a special drill bit for masonry walls on stairs?
Yes, if your stair wall is brick or concrete, you need a masonry drill bit and masonry anchors. Standard wood screws will not hold in masonry without anchors.
How many brackets does a handrail need?
Building codes generally require a bracket at each end and one every 48 inches along the run. Check your local code, but a bracket every 4 feet is the common standard.
Fixing a loose handrail bracket: (1) Code requires stair handrails to withstand 200 lbs of force — a loose bracket is a safety failure. (2) Bracket screws into drywall with no stud: this is the most common failure.
A wobbly handrail is more than an annoyance — it is a genuine safety hazard. Whether the bracket is stripped, cracked, or simply came loose over years of use, fixing it is a straightforward afternoon project that requires only basic tools. This guide walks you through diagnosing the problem, tightening what can be tightened, and replacing what cannot.
Tools and Materials You Will Need
- Drill and drill bits (standard and masonry if needed)
- Phillips and flathead screwdrivers
- Stud finder
- Level
- Replacement handrail bracket (if needed)
- 2.5-inch or 3-inch wood screws
- Toggle bolts or wall anchors (if no stud is present)
- Wood filler or toothpicks (for stripped holes)
A quality replacement bracket, such as the Stanley National Hardware Handrail Bracket, is available in multiple finishes to match your existing hardware.
Step 1: Diagnose the Problem
Grip the handrail firmly and test for movement in all directions — up, down, left, and right. Then examine the bracket itself:
- Loose screws: The bracket is fine but the screws have stripped out of the wall or stud.
- Cracked bracket: The metal or plastic bracket itself has failed.
- Pulled-away wall anchor: The anchor behind the wall has spun or collapsed.
If screws are stripped, you can often fix the issue without buying anything new. If the bracket is cracked or bent, plan on replacing it.
Step 2: Tighten Stripped Screws
For screws that spin without gripping, remove the screw completely. Dip two or three wooden toothpicks in wood glue, pack them into the hole, and snap them off flush. Let the glue cure for at least one hour, then re-drive the original screw. The wood filler gives the threads something new to bite into.
If the hole is in drywall between studs, switch to toggle bolts instead of relying on anchors. Remove the old anchor, drill to the toggle bolt’s specified diameter, and install a snap toggle rated for at least 50 lbs. These pull flush against the back of the drywall and will not spin out.
Step 3: Replace the Bracket
If the bracket itself is damaged, remove all screws and pull the old bracket off the wall. Take it to the hardware store to match the profile, or measure the center-to-center mounting hole spacing and order a replacement online.
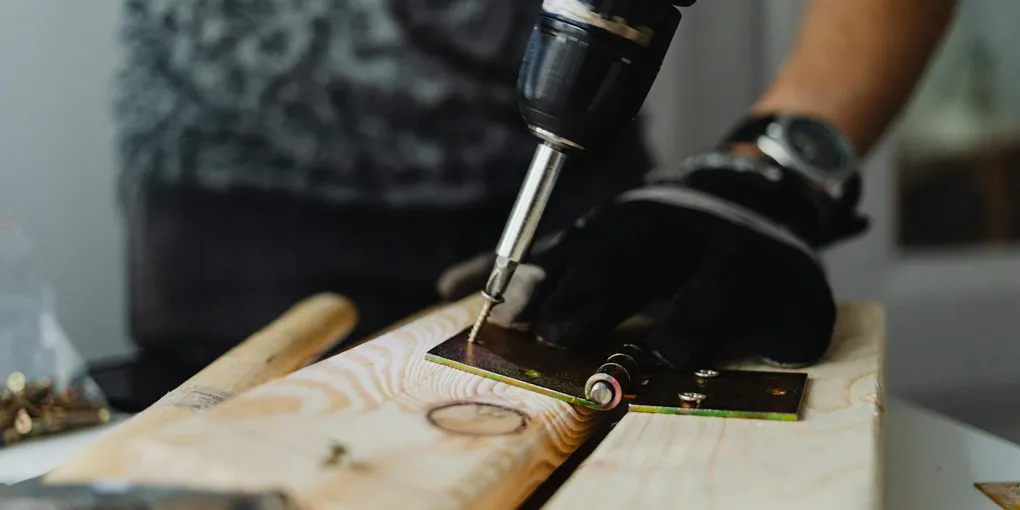
Use your stud finder to locate the nearest stud. Ideally, at least one screw goes into solid wood. Hold the new bracket in position, use a level to confirm it is plumb, and mark the hole locations with a pencil.
Drill pilot holes slightly smaller than your screw diameter to prevent the stud from splitting. Drive 2.5-inch screws into studs, or install toggle bolts in drywall locations. A reliable option is the TOGGLER Snap Toggle Bolt Kit for any off-stud mounting.
Step 4: Reattach the Handrail
With the bracket secured to the wall, set the handrail into the bracket saddle. Most brackets have a set screw on the underside or a clamp bolt on the side. Tighten until the rail does not rotate or shift. Do not overtighten to the point of crushing or denting the rail.
Give the entire assembly a firm tug in multiple directions. There should be zero movement.
Step 5: Inspect All Other Brackets
While you have your tools out, check every bracket along the run. It is common for adjacent brackets to be starting to loosen even if they have not failed yet. Tighten any loose screws you find and address stripped holes the same way you handled the primary bracket.
When to Call a Professional
If the stair stringer itself (the angled board the stairs are built into) is rotted or cracked, no bracket fix will hold long-term. In that case, structural repair or replacement is needed before reinstalling any hardware. Similarly, if your stairs are historic or covered in lead paint, consult a professional before drilling.
For most homes, though, a broken handrail bracket is a quick fix. A stud finder and combination tool is worth keeping in your toolbox for jobs like this and dozens of others around the house.
Restore the rail today — it takes less than an hour and makes your staircase safe again for everyone in the home.
- Diagnose the Problem
Grip the handrail firmly and test for movement in all directions — up, down, left, and right. Then examine the bracket itself:
- Tighten Stripped Screws
For screws that spin without gripping, remove the screw completely. Dip two or three wooden toothpicks in wood glue, pack them into the hole, and snap them off flush. Let the glue cure for at least one hour, then re-drive the original screw.
- Replace the Bracket
If the bracket itself is damaged, remove all screws and pull the old bracket off the wall. Take it to the hardware store to match the profile, or measure the center-to-center mounting hole spacing and order a replacement online.
- Reattach the Handrail
With the bracket secured to the wall, set the handrail into the bracket saddle. Most brackets have a set screw on the underside or a clamp bolt on the side. Tighten until the rail does not rotate or shift.
- Inspect All Other Brackets
While you have your tools out, check every bracket along the run. It is common for adjacent brackets to be starting to loosen even if they have not failed yet.
Free: 10-Point Home Maintenance Checklist
Prevent costly repairs with this seasonal checklist. Save hundreds every year by catching problems early.
Your checklist is ready!
Open Checklist →Something went wrong. View the checklist here.