How to Fix a Cracked Ceramic Bathroom Tile
Learn how to repair or replace a cracked ceramic bathroom tile without removing surrounding tiles, using basic tools and materials available at any hardware store.
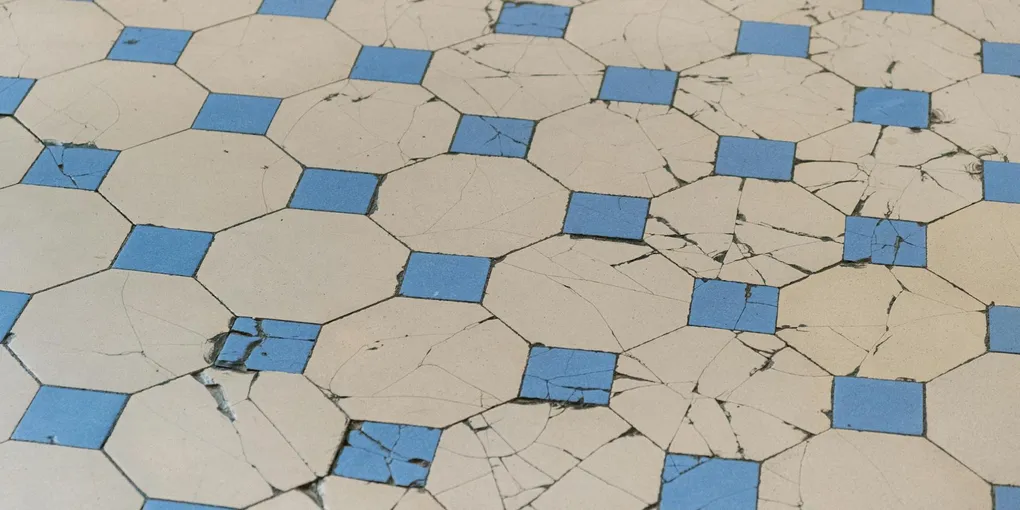
A cracked ceramic bathroom tile is a common problem that worsens over time if left alone. Water works into the crack, the adhesive behind the tile softens, and eventually the tile loosens completely.
A cracked ceramic bathroom tile is a common problem that worsens over time if left alone. Water works into the crack, the adhesive behind the tile softens, and eventually the tile loosens completely. Catching a cracked tile early and repairing or replacing it is a straightforward weekend project that costs under $30 for most single-tile repairs.
What You Need
- Carbide-tipped tile drill bit (3/16 inch)
- Grout saw or oscillating multi-tool with grout blade
- Cold chisel and hammer
- Putty knife or margin trowel
- Polymer-modified white thinset mortar
- Replacement tile (bring the cracked tile or a photo to the store to match size and finish)
- Tile grout to match existing color
- Grout float
- Sponge and bucket
- Safety glasses and work gloves
- Tile spacers to maintain even grout joints
- Masking tape
Step 1: Assess the Damage
Before reaching for tools, determine what type of repair you need.
Hairline surface cracks — The tile surface is cracked but the tile is still firmly bonded and no pieces are missing. These can be filled with clear epoxy tile repair filler or colored grout pen matched to the tile. If the crack is very fine and in a low-visibility area, this is a perfectly acceptable cosmetic fix.
Broken tile with loose pieces — The tile has cracked into two or more pieces. If it is still firmly stuck to the wall, you may be able to rebond the pieces with clear epoxy and then fill the joint. However, if any piece is missing or the tile has popped loose, full replacement is the right approach.
Tile popped off the wall — The crack caused the tile or a section of it to detach. Replacement is required.
Tap the tiles around the cracked tile with a coin or your knuckle. A hollow sound means the adhesive behind those tiles has also failed — you may need to replace more than one tile.
Step 2: Remove the Grout Around the Damaged Tile
Put on your safety glasses before starting — ceramic tile fragments are sharp and fly unpredictably.
Use a grout saw or an oscillating tool with a grout removal blade to cut out the grout in all four joints surrounding the cracked tile. Cut to the full depth of the grout joint — typically 1/8 to 1/4 inch. Remove all the grout around the perimeter; if any grout remains, it will prevent the new tile from sitting flush.
Apply masking tape to the adjacent tiles along the grout lines. This protects the surrounding tiles when you chisel out the broken one.
Step 3: Break Out the Cracked Tile
Drill a grid of holes across the face of the cracked tile using a carbide-tipped drill bit. Space the holes about 2 inches apart. The holes weaken the tile and give the chisel somewhere to start.
Place the cold chisel in the center of the tile at one of the drilled holes. Strike firmly with the hammer to break the tile. Work from the center outward toward the edges — never start at the edges, or you risk cracking the adjacent tiles. Break the tile into several pieces and carefully pry them out with the putty knife.
Once the tile pieces are removed, chip away the old thinset adhesive from the substrate behind. The wall surface needs to be flat and clean for the new tile to bond correctly. Use the putty knife or a stiff scraper to remove all the old adhesive. If the substrate (cement board or drywall) is soft, wet, or crumbling, let it dry fully and apply a coat of waterproofing membrane before proceeding.
Step 4: Set the New Tile
Mix the thinset mortar according to the manufacturer’s directions. The consistency should resemble peanut butter — it should hold a ridge when you drag a notched trowel through it.
Apply thinset to the back of the new tile (back-buttering) and to the substrate using a notched trowel. Hold the trowel at a 45-degree angle to create ridges in the adhesive. This ensures full coverage and a strong bond.
Press the new tile into position. Wiggle it slightly to collapse the ridges and achieve full contact. Check that the tile face is flush with the surrounding tiles by running your hand across the joint — a lip or low spot will be obvious. Place tile spacers in the grout joints on all four sides to maintain even spacing.
Use a level to verify the tile is flat. Press with steady, even pressure for 30 seconds. Do not let go abruptly or the tile may slide slightly before the thinset grabs.
Let the thinset cure for a minimum of 24 hours. Do not apply any pressure or grout during this time.
Step 5: Grout the Joints
Remove the tile spacers after the thinset has cured. Mix the grout to a smooth consistency according to the package instructions. For joints narrower than 1/8 inch, use unsanded grout. For wider joints, use sanded grout.
Apply grout with the grout float, pressing it firmly into the joints at a 45-degree angle to pack the joints fully. Sweep off excess grout diagonally across the tile face — going straight across will pull grout out of the joints.
Wait 10 to 15 minutes until the grout becomes hazy on the tile surface. Then wipe the tile face with a damp (not soaking wet) sponge in a circular motion. Rinse the sponge frequently. After the first wipe-down, let the grout firm up for another 10 minutes, then do a final wipe with a clean, lightly damp sponge to remove the haze.
Allow the grout to cure for 72 hours before exposing the repair to water.
Step 6: Apply Caulk at Corners and Transitions
Do not grout the corners where the tile meets the tub, shower base, or adjacent wall — these joints need flexible caulk, not rigid grout. Grout in corners cracks from the slight movement between surfaces and allows water infiltration behind the tile.
Apply a thin, continuous bead of 100% silicone caulk in all corner joints and at the junction of the tile and tub or shower pan. Tool the caulk smooth with a wet finger or caulk tool, then let it cure for 24 hours before use.
Preventing Future Cracks
Most ceramic tile cracks result from one of three causes: impact (something dropped on or thrown against the tile), substrate movement (the wall flexing behind the tile), or inadequate adhesive coverage (hollow spots that leave the tile unsupported).
When replacing a single cracked tile, press firmly and check for hollow spots by tapping the installed tile immediately after setting — a hollow sound means you need more adhesive. Use the full back-buttering method described above rather than spot-dolloping adhesive at the corners.
In high-traffic areas or anywhere you expect impact, consider replacing cracked ceramic with a porcelain tile, which is denser and significantly more resistant to cracking.
Related Reading
- How to Regrout Bathroom Tile — refreshing old or stained grout joints without removing tile
- How to Caulk a Bathtub — sealing the joint between tub and tile
- How to Fix a Leaky Shower — diagnosing and stopping water intrusion behind tile
- How to Fix a Floor Tile That Is Loose — reattach hollow tiles before they crack
- Assess the Damage
Before reaching for tools, determine what type of repair you need.
- Remove the Grout Around the Damaged Tile
Put on your safety glasses before starting — ceramic tile fragments are sharp and fly unpredictably.
- Break Out the Cracked Tile
Drill a grid of holes across the face of the cracked tile using a carbide-tipped drill bit. Space the holes about 2 inches apart. The holes weaken the tile and give the chisel somewhere to start.
- Set the New Tile
Mix the thinset mortar according to the manufacturer's directions. The consistency should resemble peanut butter — it should hold a ridge when you drag a notched trowel through it.
- Grout the Joints
Remove the tile spacers after the thinset has cured. Mix the grout to a smooth consistency according to the package instructions. For joints narrower than 1/8 inch, use unsanded grout. For wider joints, use sanded grout.
- Apply Caulk at Corners and Transitions
Do not grout the corners where the tile meets the tub, shower base, or adjacent wall — these joints need flexible caulk, not rigid grout. Grout in corners cracks from the slight movement between surfaces and allows water infiltration behind the tile.
Free: 10-Point Home Maintenance Checklist
Prevent costly repairs with this seasonal checklist. Save hundreds every year by catching problems early.
Your checklist is ready!
Open Checklist →Something went wrong. View the checklist here.