All Guides
963 practical guides for homeowners. Search, filter, or sort to find what you need.
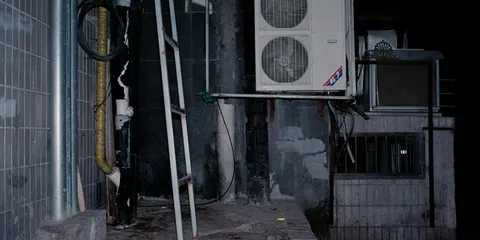
AC Repair Cost 2026: $150–$650 by Problem Type
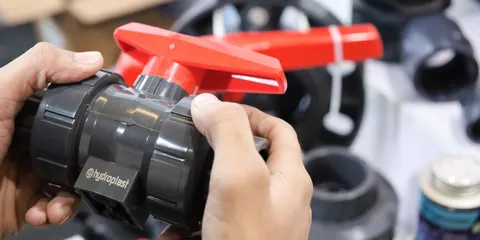
AC repair costs $150–$650 for most fixes. Diagnostic call: $75–$150. Refrigerant recharge (R-410A/Freon): $150–$400. Capacitor: $150–$300. Contactor: $150–$250. Compressor: $1,200–$2,800. Summer emergency service adds $100–$200. Repair vs. replace decision guide.

Appliance Repair Cost 2026: $100–$500 by Appliance Type
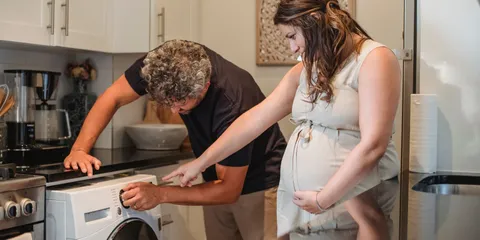
Appliance repair costs $100–$500 for most issues — refrigerator ($150–$400), washer ($150–$350), dryer ($100–$300). When to repair vs. replace based on age and cost.

Attic Insulation Cost 2026: $1,500–$4,500 Professionally Installed
Attic insulation: $1,500–$3,500 blown-in professionally installed. IRA 25C tax credit: 30% back, up to $1,200. DIY: $300–$600. R-49 for northern climates, R-38 for southern. Blown-in vs. spray foam compared.
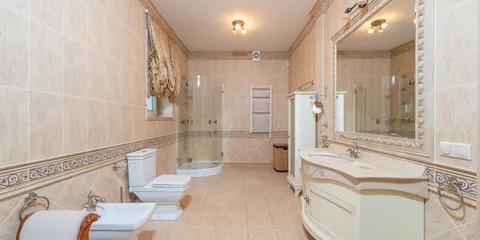
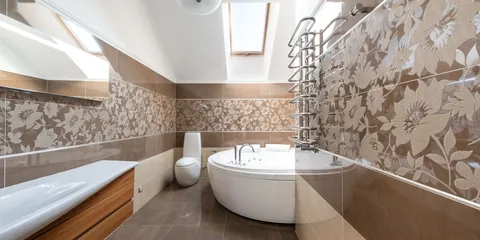
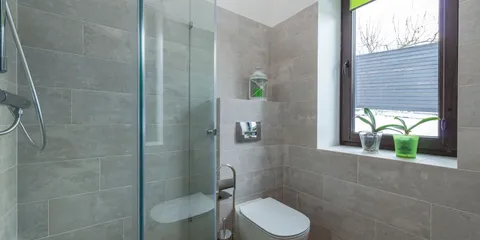
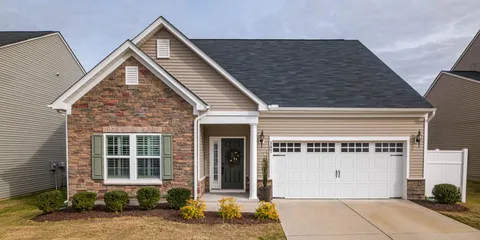
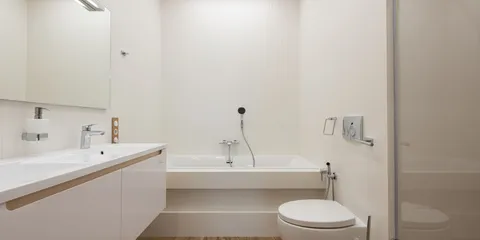
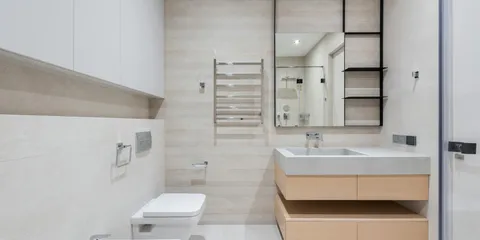
Bathroom Addition Cost 2026: $5,000–$50,000 by Type
Bathroom addition costs $5,000–$15,000 for a half bath, $15,000–$30,000 for a full bath, and $25,000–$50,000+ for a primary suite. Pricing by type, size, and plumbing distance.
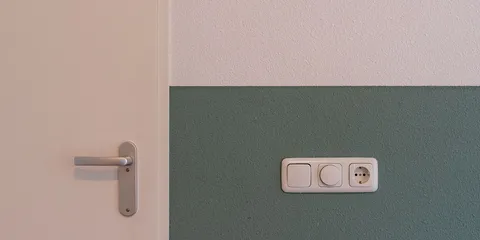
Bathroom Exhaust Fan Installation Cost 2026: $150–$400 Installed
Bathroom exhaust fan installation costs $150–$400 for a standard replacement. New installation with wiring runs $200–$500. Combo units (fan + light + heat) cost $250–$600 installed.
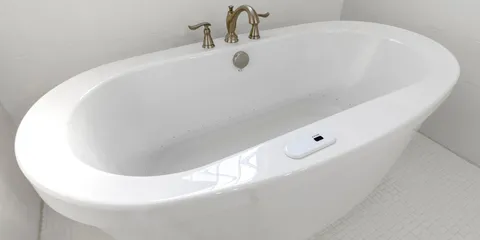
Bathtub Refinishing Cost 2026: $300–$650 Professionally
Bathtub refinishing costs $300–$650 professionally — a fraction of $3,000–$8,000 for replacement. How long it lasts, when it makes sense, and what DIY kits actually deliver.
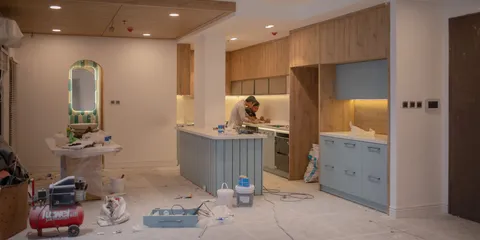
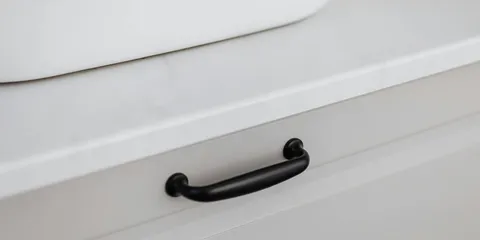
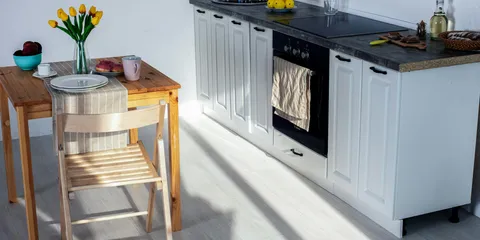
Cabinet Refacing Cost 2026: $4,000–$12,000 Kitchen
Kitchen cabinet refacing cost: $4,000–$12,000 for a medium kitchen — new doors ($50–$400/door), drawer fronts, and veneer on existing boxes. Cost of refacing vs. painting ($1,200–$4,000) vs. full replacement ($8,000–$30,000+): which delivers the best value?
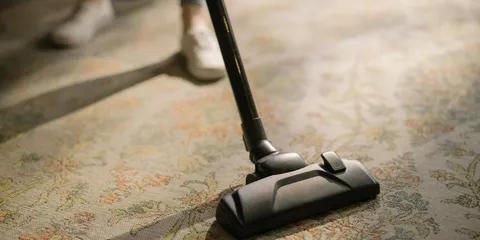
Carpet Cleaning Cost 2026: $25–$75/Room or $150–$300 Whole House
Professional carpet cleaning costs $25–$75 per room or $150–$300 for a whole house (3BR + living room). Truck-mounted steam vs. dry cleaning pricing and what to expect.
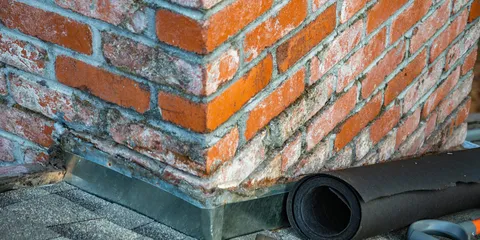
Chimney Repair Cost 2026: $200–$10,000 by Damage Type
Chimney repair costs $200–$700 for tuckpointing, $300–$1,500 for crown repair, $2,500–$7,000 for liner replacement, and $4,000–$10,000+ for major structural work. Pricing by damage type.
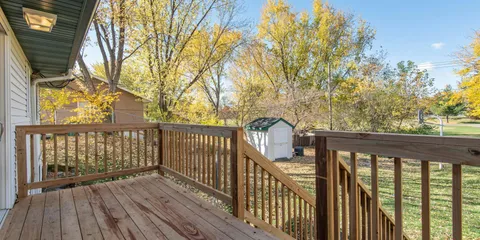
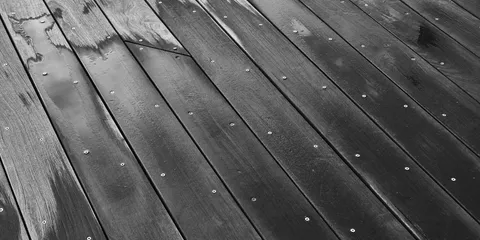
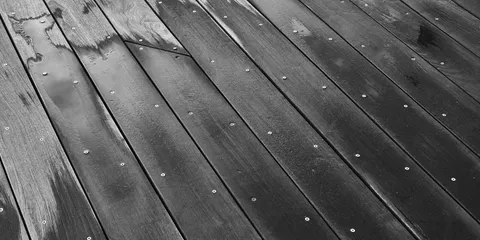
Deck Repair Cost 2026: $150–$2,000 by Damage Type
Deck repair costs $150–$500 for minor repairs (boards, loose posts), $500–$2,000 for moderate damage. Full deck rebuild $5,000–$15,000. Pricing by damage type and material.
Deck Staining Cost 2026: $1–$3/sq ft ($300–$900 for 300 sq ft)
Deck staining costs $1–$3/sq ft professionally — a 300 sq ft deck runs $300–$900. DIY costs $100–$200. Deck cleaning adds $150–$350. How often to restain by wood type.
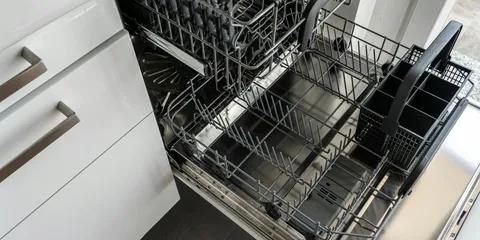
Dishwasher Installation Cost 2026: $150–$700 Labor or All-In
Dishwasher installation costs $150–$350 for standard replacement (labor only), $300–$700 when adding new plumbing. All-in with appliance: $500–$1,200. When to hire a plumber.
Driveway Repair Cost 2026: $100–$2,000 by Damage Type
Driveway repair costs $100–$600 for minor patching, $300–$2,000 for moderate damage (resurfacing, section repair). Full replacement $3,500–$7,800. Pricing by material and damage type.
Driveway Sealing Cost 2026: $80–$400 by Surface Type
Driveway sealing costs $80–$300 professionally for a 2-car asphalt driveway. Concrete sealing $100–$400. DIY asphalt sealer costs $20–$60. How often to seal and what quality means.
Dryer Vent Cleaning Cost 2026: $80–$300 by Vent Length
Dryer vent cleaning costs $80–$185 for a standard vent, $150–$300 for long or complex vents. DIY cleaning tools $20–$60. Why clogged vents cause 15,000 house fires annually.
Egress Window Installation Cost 2026: $2,500–$5,500 Per Window
Egress window installation costs $2,500–$5,500 per window in a basement — including excavation, new window well, and framing. Required by code to convert a basement bedroom.
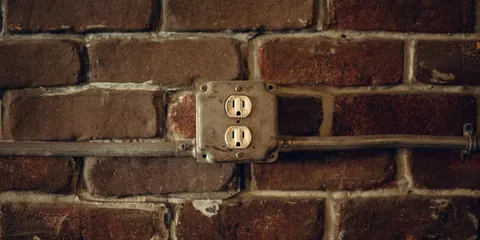
Electrical Panel Upgrade Cost 2026: $1,500–$4,000 — Signs, Permits & Getting Bids
Panel upgrade 100A→200A: $1,500–$4,000 installed. Full replacement $1,200–$2,500. Subpanel add-on $500–$1,500. 5 signs you need an upgrade now (flickering lights, tripping breakers, 2-prong outlets). Permit costs, how to find a licensed electrician, and bid comparison guide.
Epoxy Garage Floor Cost 2026: $3–$12/sq ft ($1,200–$6,000 Two-Car)
Epoxy garage floor coating costs $3–$12/sq ft professionally — a 2-car garage runs $1,200–$6,000. DIY kits $100–$400. Polyurea vs. polyaspartic vs. epoxy pricing compared.
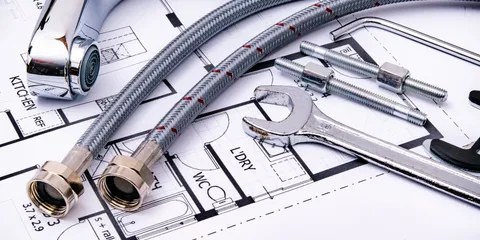
Faucet Installation Cost 2026: $100–$350 Labor or $200–$600 All-In
Faucet installation costs $100–$350 for labor only, $200–$600 all-in for kitchen or bathroom. Plumbers charge $45–$150/hr; most jobs take 1–2 hours. Kitchen vs. bathroom pricing.
Fence Repair Cost 2026: $150–$1,500 by Damage Type
Fence repair costs $150–$600 for minor repairs (boards, one post), $500–$1,500 for moderate damage (sections, gate overhaul). Pricing by fence material and damage extent.
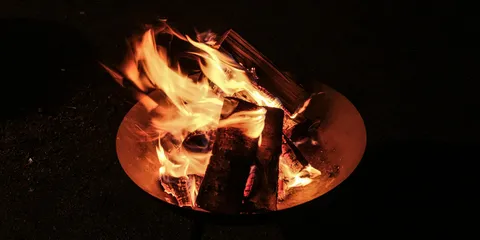
Fire Pit Installation Cost 2026: $300–$6,000 Wood or Gas
Fire pit installation costs $300–$700 for a basic wood-burning kit, $800–$3,000 for a custom masonry build, and $1,500–$6,000 for a gas fire pit with dedicated line. Pricing by type.
Floor Joist Repair Cost 2026: $500–$5,000 by Extent
Floor joist repair costs $500–$1,500 for sistering a few joists, $2,000–$5,000 for partial replacement, and $5,000–$15,000+ for extensive structural work. Signs you need repair now.
Garage Door Opener Installation Cost 2026: $150–$550 Installed
Garage door opener installation costs $150–$550 installed. Chain drive $150–$350, belt drive $200–$400, smart/WiFi openers $250–$550. Unit $80–$300; labor $70–$150.

Garage Door Repair Cost 2026: $100–$350 by Problem Type
Garage door repair costs by type: broken spring ($150–$350), cable replacement ($100–$200), off-track door ($125–$175), opener repair ($75–$300). What affects the price.

Garbage Disposal Installation Cost 2026: $150–$750 Installed
Garbage disposal installation costs $150–$350 for labor on a standard replacement. The unit costs $80–$400; all-in with disposal runs $230–$750. When to hire a plumber.
Gas Line Installation Cost 2026: $300–$800 Hookup or $15–$25/ft
Gas line: $300–$800 hookup, $15–$25/ft new run. Stove $200–$450, dryer $275–$500, generator feed $500–$1,500. Licensed plumber only — permit and pressure test included in most quotes.
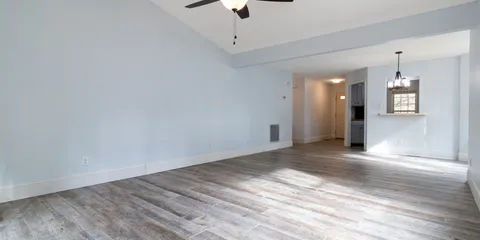
Hardwood Floor Installation Cost 2026: $4–$12/sq ft Installed
Hardwood floor installation costs $4–$8/sq ft for engineered and $6–$12/sq ft for solid hardwood, fully installed. A 500 sq ft room runs $2,000–$6,000. Pricing by species and install method.
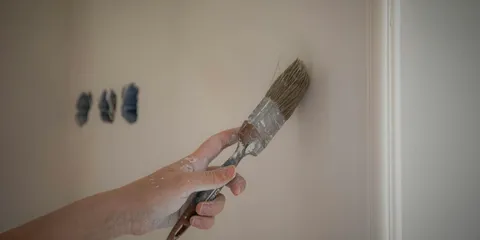
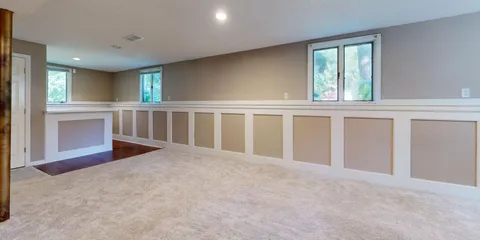
Interior Painting Cost 2026: $200–$800/Room Pro Installed
How much does interior painting cost? Average prices to paint a room, whole house, or just ceilings and trim — by room size, paint quality, and whether you hire a pro.

Kitchen Cabinet Painting Cost 2026: $1,200–$7,000 Full Kitchen
Kitchen cabinet painting costs $1,200–$7,000 for a full kitchen professionally. DIY materials run $200–$600. Compare painting vs. refacing vs. replacing before committing.

Landscaping Cost 2026: $2,000–$10,000 Yard Refresh
How much does landscaping cost? Average prices for lawn care, garden design, sod installation, tree planting, mulching, and full landscape renovation by project scope.

Light Fixture Installation Cost 2026: $50–$200 Swap
Light fixture installation costs $50–$200 labor for a simple swap on an existing junction box. Ceiling fans, chandeliers, and pendant lights run $75–$300 installed. Pricing by fixture type.
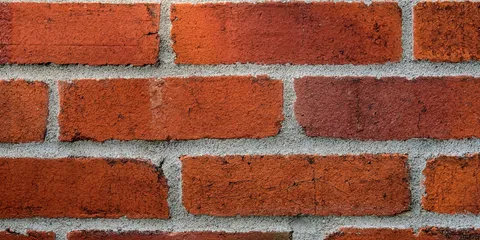
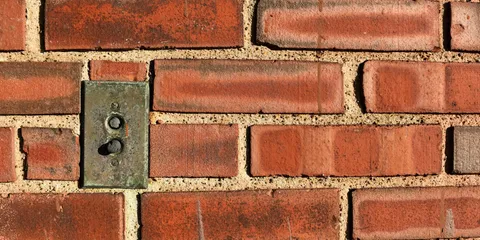
Masonry Repair Cost 2026: $500–$3,000 by Project Type
Masonry repair costs $500–$3,000 for typical projects. Tuckpointing $8–$25/linear ft, brick replacement $15–$30/sq ft, retaining wall repair $1,500–$5,000. Pricing by project type.

Mini Split Installation Cost 2026: $2,000–$5,500 Single-Zone
How much does a mini split cost to install? Average prices for single-zone and multi-zone ductless systems by BTU capacity — plus DIY mini split kits and federal tax credits.

Outdoor Lighting Installation Cost 2026: $100–$8,000 by Scope
Outdoor lighting costs $100–$400 for DIY low-voltage path lights, $800–$3,000 for a professional landscape system, and $2,000–$8,000+ for hardwired security and accent lighting. Pricing by scope.

Patio Installation Cost 2026: $6–$25/sq ft by Material
How much does a patio cost? Average prices for concrete, pavers, flagstone, brick, and stamped concrete patios — by size, material, and what affects the total.

Pergola Installation Cost 2026: $3,000–$10,000 Installed
Pergola installation costs $3,000–$7,000 for wood and $4,000–$10,000 for aluminum or vinyl, professionally installed. DIY kit pergolas run $1,500–$4,000 in materials. Pricing by size and material.
Plumbing Leak Repair Cost 2026: $150–$600 by Pipe Type
Plumbing leak repair costs $150–$350 for an accessible pipe repair, $300–$600 for a concealed or crawlspace leak, and $2,000–$7,000 for a slab leak. Emergency rates add 25–50%.
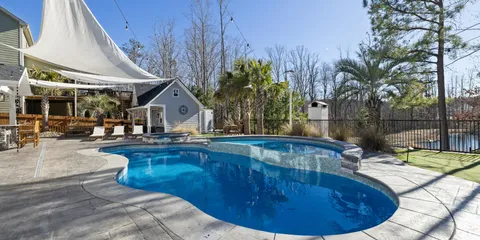
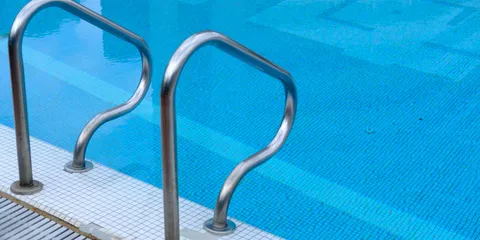
Pool Maintenance Cost 2026: $80–$200/Month Service
Pool maintenance costs $80–$200/month for professional weekly service. Annual cost with chemicals, cleaning, and seasonal open/close runs $1,500–$4,000. Full breakdown by service type.

Popcorn Ceiling Removal Cost 2026: $1–$3/sq ft Pro ($300–$4,500)
How much does popcorn ceiling removal cost? Average prices by room, square footage, and asbestos testing — plus when to DIY vs. hire a pro.
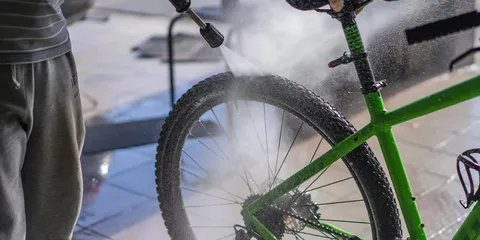
Pressure Washing Cost 2026: $100–$500 by Surface Type
Pressure washing costs $100–$500 for a house exterior, $80–$200 for a driveway, $100–$300 for a deck. Most pros charge $0.10–$0.50/sq ft. Pricing by surface and size.

Recessed Lighting Installation Cost 2026: $125–$300 Per Light
Recessed lighting installation costs $125–$200 per light in existing wiring, $200–$300 in new construction. A 6-light living room installation runs $750–$1,800. Pricing by access and circuit distance.
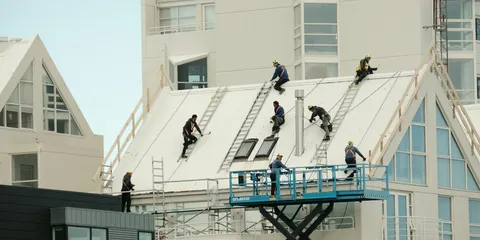
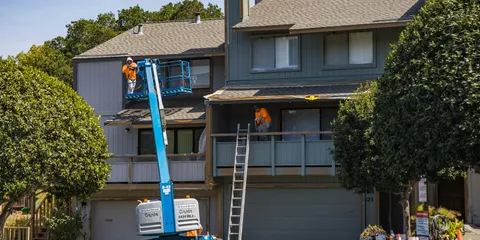
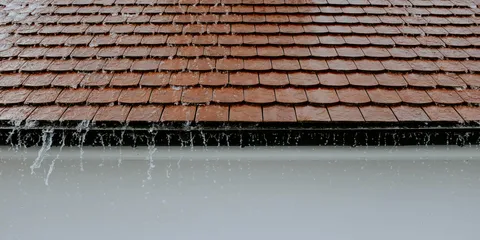
Roof Repair Cost 2026: $150–$3,500 by Damage Type
How much does roof repair cost? Average prices for fixing leaks, replacing shingles, repairing flashing, and patching damage — plus when repair makes more sense than replacement.

Screened Porch Cost 2026: $3,000–$50,000 by Scope
Screened porch costs $3,000–$8,000 for a basic screen enclosure conversion, $10,000–$25,000 for a built addition, and $25,000–$50,000+ for a four-season room. Pricing by size and scope.
Shower Remodel Cost 2026: $1,500–$20,000 by Scope
Shower remodel costs $1,500–$5,000 for a prefab surround swap, $3,500–$10,000 for a tiled renovation, and $8,000–$20,000+ for a custom tile shower with frameless glass.
Siding Repair Cost 2026: $300–$1,500 by Material and Damage
Siding repair costs $300–$700 for minor vinyl repair, $500–$1,500 for fiber cement or wood, and $1,500–$4,000 for extensive rot damage. Pricing by material and damage extent.
Skylight Installation Cost 2026: $900–$2,500 Standard Fixed
Skylight installation costs $900–$2,500 for a standard fixed skylight installed — unit plus labor. Venting skylights run $1,500–$3,500. Tubular skylights $750–$1,500. Pricing by type.
Soffit and Fascia Repair Cost 2026: $300–$6,000 by Scope
Soffit & fascia repair 2026: $8–$20/lin ft aluminum, $12–$30 wood. 30-ft section: $300–$900. Full home: $2,000–$6,000. Rot inspection checklist + when to patch vs. replace everything.
Spray Foam Insulation Cost 2026: $1–$4.50/sq ft by Type
Spray foam insulation costs $1–$2/sq ft for open-cell and $2–$4.50/sq ft for closed-cell, installed. A 1,000 sq ft attic runs $1,500–$4,500. Higher R-value and air sealing justify the premium.
Sump Pump Installation Cost 2026: $300–$2,500 Installed
Sump pump installation costs $800–$2,500 for a new install (pit + pump). Replacement in an existing pit runs $300–$700. Battery backup adds $150–$500. Submersible vs. pedestal pricing.
Toilet Installation Cost 2026: $150–$400 Labor or $300–$800 All-In
Toilet installation costs $150–$400 for labor on a standard replacement. The toilet itself costs $100–$600; all-in runs $300–$800 for most projects. New rough-in work adds $200–$500.
Tree Trimming Cost 2026: $200–$2,500 by Tree Size
How much does tree trimming cost? Average prices for pruning by tree size, species, and complexity — plus when trimming prevents the much higher cost of tree removal.
Vinyl Siding Installation Cost 2026: $7,000–$20,000 Installed
How much does vinyl siding cost to install? Average prices per square foot, by house size, siding grade, and labor — plus what affects the final quote.

Walk-In Closet Cost 2026: $500–$2,500 Modular or Custom
Walk-in closet systems cost $500–$1,500 for modular wire or laminate, $1,500–$4,000 for professional installation, and $5,000–$15,000+ for custom built-ins. Pricing by scope and material.
Wallpaper Removal Cost 2026: $1–$3/sq ft ($480–$1,440/Room)
Wallpaper removal costs $1–$3 per sq ft professionally — a 12×12 room runs $480–$1,440. DIY feasible with scoring tool + gel stripper. Drywall repair after removal adds $200–$800.

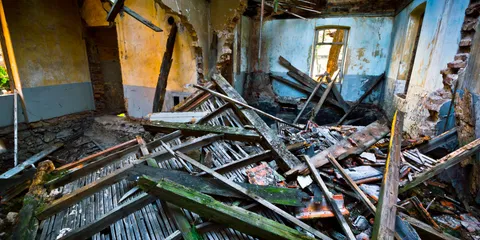
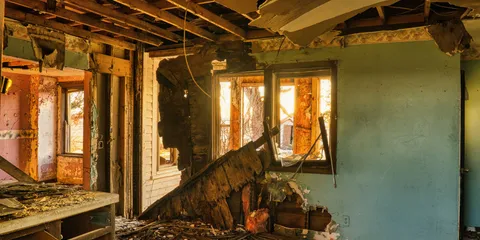
Water Damage Restoration Cost 2026: $1,500–$50,000 by Category
Water damage restoration costs $1,500–$5,000 for minor damage, $5,000–$15,000 moderate, $15,000–$50,000+ severe. Pricing by damage category, square footage, and drying timeline.
Water Heater Repair Cost 2026: $150–$700 by Problem Type
Water heater repair costs $150–$300 for a thermostat or element swap, $200–$500 for pressure valve or anode rod, and $400–$700 for sediment flush plus full inspection. When to repair vs. replace.

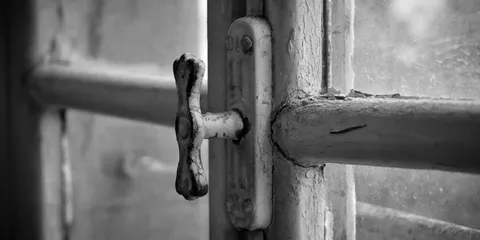
Window Repair Cost 2026: $75–$400 by Problem Type
Window repair costs $75–$150 for hardware replacement, $150–$350 for foggy glass resealing, $200–$400 for sash replacement, and $300–$600 for frame rot repair. Repair vs. replace guide.
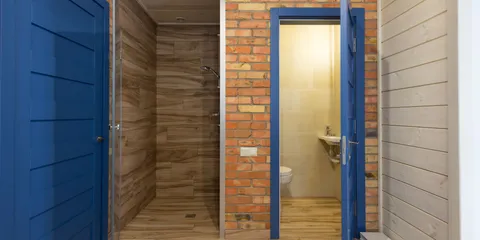
How to Clean Mold in a Shower: Grout, Caulk, and Tile Treatment
Remove black mold from shower grout, caulk, and tile — bleach vs. enzyme cleaners, when to re-caulk instead of clean, and ventilation to prevent recurrence.
How to Fix a Broken Storm Door Closer
Learn how to adjust, repair, or replace a storm door closer that slams, won't close, or hangs open — with step-by-step instructions for pneumatic and hydraulic closers.

How to Fix a Broken Window Balancer
Replace a failed double-hung window balance spring so your window stays open, closes smoothly, and operates the way it should.

How to Fix a Cracked Window: Temporary Seals, DIY Glass Replacement, and Glazing
Learn how to seal a cracked window temporarily, replace single-pane glass yourself, apply glazing compound, and know when it's time to call a professional.
How to Fix a Gas Stove Igniter That Keeps Clicking (2026)
A gas stove igniter that clicks constantly — even when burners are off — usually has a wet or dirty igniter cap. This guide covers cleaning the burner cap and electrode, and replacing an igniter switch when cleaning doesn't stop the clicking.
How to Fix a Bathroom Exhaust Fan Duct
Learn how to repair or replace a disconnected or poorly routed bathroom exhaust fan duct to stop moisture damage, mold growth, and attic humidity problems.
How to Fix a Broken Medicine Cabinet Door
Learn how to repair or replace a medicine cabinet door that is sagging, off its hinges, or damaged with simple tools and inexpensive parts.
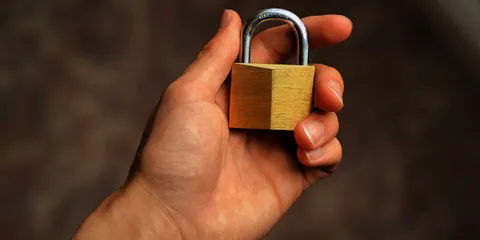
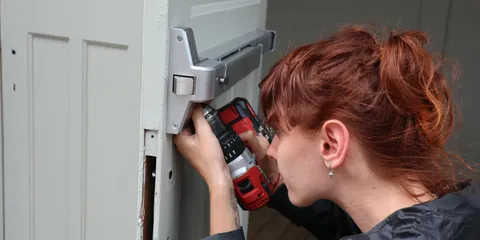
How to Rekey a Lock: DIY Guide Without Replacing the Hardware (2026)
Rekey a deadbolt or doorknob lock yourself using a rekeying kit — no locksmith needed. Takes 15 minutes and costs $15–$25 for the kit. Covers Kwikset and Schlage step-by-step.
How to Fish a Wire Through a Wall: Running Cables Without Opening Drywall (2026)
Fishing wire through walls lets you add an outlet, move a cable, or run speaker wire without tearing out drywall. This guide covers drilling through fire blocks, using fish tape and glow rods, and navigating insulated walls.
How to Fix a Broken Kitchen Drawer Front
Reattach or replace a broken kitchen drawer front panel using the right hardware and techniques for a clean, solid result that looks factory-installed.
How to Fix a Stiff Door Lock
Learn how to diagnose and fix a stiff, sticky, or hard-to-turn door lock using lubrication, key blank cleaning, and alignment adjustments.
How to Fix a Leaking Pipe Under the Sink: P-Trap, Supply Lines, and More
Step-by-step guide to fixing under-sink pipe leaks—diagnose and repair p-traps, slip joints, supply lines, compression fittings, and when to use pipe dope.
How to Replace a Circuit Breaker: Safe Panel Work for Homeowners
Learn how to identify a failed circuit breaker, buy the correct replacement, and safely swap it in your panel — with clear guidance on when to call an electrician instead.
How to Fix Cracked, Dented, or Broken Vinyl Siding
Replace damaged vinyl siding panels yourself using a zip tool, snap-lock punch, and matching replacement panels — no contractor required.
How to Fix a Noisy Toilet Fill Valve: Hissing, Whistling, and Foghorn Sounds (2026)
A noisy toilet fill valve is often a worn fill valve or debris in the valve seat — both are inexpensive DIY fixes. This guide covers diagnosing hissing, whistling, and foghorn sounds from the tank and replacing the fill valve in 15 minutes.
How to Fix a Broken Gutter Downspout (2026): Reconnect, Replace, or Extend
Separated sections, bent straps, or downspout dumping water at the foundation? Fix it in 30 minutes with basic tools. Reconnect with sheet metal screws, replace bent straps, add a flex extension or splash block, or connect to an underground drain.
How to Fix a Stained Concrete Floor
Remove oil, rust, paint, and other stubborn stains from concrete floors using the right cleaners and techniques for a clean, restored surface.
How to Unclog a Kitchen Sink: 5 Methods That Work (2026)
Kitchen sink draining slowly or completely clogged? This guide covers plunging, baking soda + vinegar, P-trap cleaning, hand auger, and when to call a plumber — with and without a garbage disposal.

How to Fix a Broken Window Operator (Crank)
Learn how to replace a broken casement window operator or crank mechanism to restore smooth one-handed operation of your casement windows.
How to Fix a Cracked Concrete Block Wall
Diagnose and repair cracks in concrete block (CMU) walls using hydraulic cement, masonry caulk, or epoxy injection for a durable, waterproof fix.
How to Fix a Cracked Vinyl Window Sill
Learn how to repair a cracked vinyl window sill using filler, caulk, and paint to restore a clean, weatherproof finish without replacing the entire unit.
How to Fix a Fence Gate: Sagging, Latch Problems, and Hinge Repair (2026)
A fence gate that sags, drags the ground, won't latch, or swings open on its own can be fixed by adjusting hinges, adding a tension rod, or replacing the latch hardware. This guide covers each repair in order of complexity.

How to Fix a Leaking Roof Flashing
Learn how to identify and repair leaking roof flashing, including step flashing, valley flashing, and chimney flashing, to stop water intrusion for good.
How to Install a Ceiling Fan Light Kit: Adding Lights to an Existing Fan
Step-by-step guide to adding a light kit to a ceiling fan that does not have one — buying compatible kits, wiring, and installing a light kit without rewiring the ceiling.
How to Repair Scratched Hardwood Floors: Light Scratches, Deep Gouges, and Finish Repairs (2026)
Scratches in hardwood floors range from surface finish scuffs (easy fix) to deep gouges into the wood fiber (harder). This guide covers matching the repair to the scratch depth, filling with wood filler or stain markers, and blending with the existing finish.

How to Fix a Broken Concrete Stoop
Repair cracked, spalled, or crumbling front stoop concrete yourself with the right patching materials and a few hours of work.

How to Fix a Cracked Hardwood Floor Board
Repair cracks, gaps, and splits in individual hardwood floorboards using wood filler, epoxy, or board replacement techniques to restore a seamless finish.
How to Fix a Cracked Utility Sink in 30 Minutes ($0–$30 Epoxy or Patch)
Repair a cracked laundry or utility sink with epoxy or a fiberglass patch in 30 minutes to stop leaks before replacement is needed. Materials cost $0–$30.

How to Fix a Chimney Cap: Mesh vs. Solid, Sizing, Mortar, and Rust Repair (2026)
A damaged or missing chimney cap lets rain, animals, and debris into your flue. This guide covers inspecting your existing cap, choosing between mesh and solid caps, sizing a replacement, setting it with mortar or self-flashing, and treating rust before it spreads.

How to Fix a Cracked Window Glazing Compound
Learn how to remove failed glazing compound and reglaze a single-pane window to stop drafts, moisture, and heat loss.
How to Fix a Hot Water Heater Anode Rod
Extend the life of your water heater by inspecting and replacing the sacrificial anode rod before it depletes and allows tank corrosion to begin.
How to Fix a Squeaky Hardwood Floor
Stop squeaky hardwood floors permanently using screws from above, screws from below through floor joists, graphite powder for quick fixes, or the Squeeeeek No More kit for a clean finish.
How to Fix a Broken Interior Shutter
Learn how to repair plantation shutter louvers, tilt rods, hinges, and frames so your interior shutters open, close, and look their best again.

How to Fix a Broken Screen Door
Fix torn screen mesh, a bent frame, a broken latch, and a screen door closer that slams or won't close — complete DIY guide with step-by-step instructions.
How to Fix a Cracked Asphalt Driveway
Learn how to clean, fill, and seal cracks in an asphalt driveway to stop water damage from spreading and restore your driveway's appearance and structural life.
How to Fix a Leaky Pipe: Emergency Stops and Permanent Repairs (2026)
Pipe leaking right now? Stop it fast with a pipe clamp or repair tape, then do the permanent fix. This guide covers every pipe leak type — pinhole, joint, compression fitting, and cracked pipe.
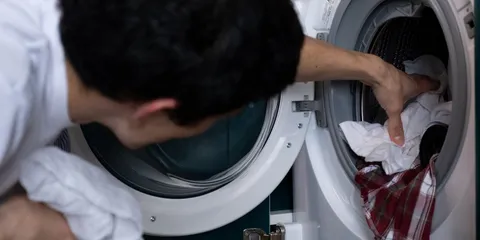
How to Fix a Washing Machine Leak: Hoses, Door Gasket, and Pump (2026)
A washing machine leak comes from the fill hoses, the door gasket (front-load), the pump, or a loose internal hose connection. This guide covers finding and fixing the leak source for both top-load and front-load washers.
How to Unclog a Kitchen Drain: Grease Clogs, Garbage Disposal, and P-Trap
Fix a clogged or slow kitchen drain — clearing grease buildup with boiling water and dish soap, removing a garbage disposal clog, and cleaning the P-trap.
How to Fix a Broken Attic Ventilation Fan
Learn how to diagnose and repair a failed attic exhaust fan by replacing a burned-out motor or faulty thermostat to restore proper attic airflow.

How to Fix a Cracked Driveway in 30 Minutes (Asphalt & Concrete)
Fix a cracked driveway in 30 minutes: hairline (under 1/4") — rubberized filler ($8–$15 at Home Depot). Medium cracks (1/4"–1") — foam backer rod + cold patch ($20–$45). Heaved slabs or alligator cracking — resurfacing ($3–$5/sq ft) or contractor. Crack-width decision chart, asphalt vs concrete product picks, and seal coat timing.
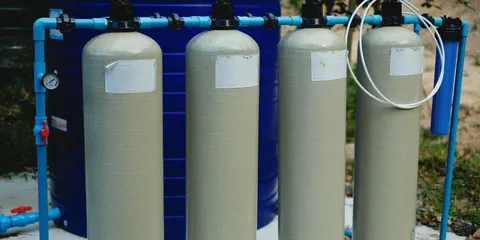
How to Fix a Leaking Whole-House Water Filter
Diagnose and repair a leaking whole-house water filter housing by replacing the O-ring and sump, stopping drips without calling a plumber.

How to Fix a GFCI Outlet That Won't Reset: 4-Step Fix in 10 Minutes (Most Are $0 to Fix)
GFCI outlet won't reset? The reset button works only when the fault is cleared. Unplug everything on the circuit, press RESET firmly for 3 seconds. If it trips again immediately, there's a wiring fault or the GFCI has failed. New GFCI outlets cost $12–$18 and install in 15 minutes.

How to Fix a Broken Window AC Drain Pan
Learn how to inspect, seal, and replace a cracked or leaking window air conditioner condensate drain pan to stop water damage before it starts.
How to Fix a Leaking Roof Vent: Pipe Boot, Flashing, and Collar Repair
Fix a roof vent that is leaking — replacing a cracked or deteriorated pipe boot, resealing flashing, and installing a universal rubber collar over an old boot.
How to Fix a Leaking Washing Machine Lid Seal
Learn how to diagnose and replace a worn or torn top-loader lid gasket to stop your washing machine from leaking around the lid.
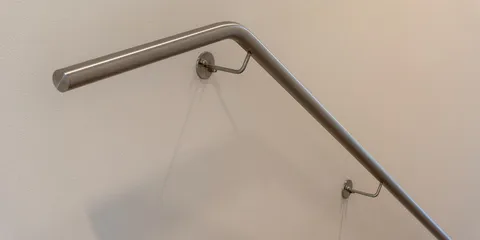
How to Fix a Loose Handrail in 20 Minutes ($5–$25, No Carpenter Needed)
A loose stair handrail is a fall hazard — tighten wall brackets into studs, use toggle anchors for hollow walls, or stabilize a wobbly newel post in 20 minutes. Parts cost $5–$25.
How to Fix a Peeling Bathroom Ceiling: Moisture, Mold Primer, and Mold-Resistant Paint
Bathroom ceiling paint peels when moisture has nowhere to go. This guide covers finding the moisture source, proper scraping, mold primer application, mold-resistant paint, and fixing a failing exhaust fan.
How to Remove Moss from a Roof: Step-by-Step Guide
Kill and remove roof moss safely using proven cleaning solutions and prevention strips to protect shingles and extend roof life.

How to Fix a Patio Umbrella Base That Tips in 15 Minutes
Fix a tippy patio umbrella base in 15 minutes: fill with sand or water (free), patch cracks with epoxy ($8), or upgrade to a weighted cross base. No tools needed.
How to Fix a Faulty Dimmer Switch
Learn how to diagnose and fix a dimmer switch that buzzes, flickers, does not dim correctly, or fails to turn on by replacing it with a compatible LED-rated dimmer.
How to Fix a Broken Dimmer Switch
A dimmer switch that flickers, buzzes, or stops responding can usually be replaced in under 30 minutes — this guide covers diagnosis, wiring, and choosing a compatible replacement.
How to Fix a Storm Window: Glass, Screen, Frame, Hardware, and Weatherstripping (2026)
Storm windows extend the life of single-pane windows and reduce heating bills — but their glass cracks, screens tear, frames corrode, and weatherstripping compresses over time. This guide covers every common storm window repair: replacing glass, patching or replacing screens, re-sealing frames, and fixing stuck or broken lift hardware.
How to Fix a Wet Basement: Interior and Exterior Waterproofing Solutions
Stop water from entering your basement with these proven DIY waterproofing methods including window well drains, interior drain tile, sump pit upgrades, and exterior waterproofing.

How to Landscape a Backyard: Planning, Grading, and Planting for Beginners
A step-by-step guide for homeowners who want to plan, grade, and plant a backyard landscape from scratch — including zone layout, soil prep, hardscape sequencing, and a phased approach for tight budgets.

How to Patch Concrete: Cracks, Spalling, and Surface Repair (2026)
Concrete cracks and surface damage are repairable with the right materials. This guide covers cleaning and preparing the patch area, choosing between hydraulic cement, mortar, and concrete repair caulk, and getting repairs to bond and cure correctly.

How to Seal Leaky Ductwork (2026): Mastic vs. Foil Tape + Where Leaks Hide
Leaky ducts waste 20–30% of your heating and cooling. Fix it with mastic sealant on joints and seams (foil tape for straight runs, mastic for irregular gaps). Find leaks with a smoke pencil or feel test. Covers flex duct, metal duct, and when it's time to call an HVAC tech.
How to Fix a Broken Window Crank
Learn how to diagnose and replace a faulty casement window crank operator so your window opens and closes smoothly again.
How to Fix a Leaking Basement Wall: Crack Injection, Hydraulic Cement, and Waterproofing Guide
Basement wall leaks can be fixed with DIY crack injection, hydraulic cement, or waterproofing membrane depending on the source — this guide shows you how to identify the leak type and apply the right repair.
How to Fix a Noisy Refrigerator Compressor
Learn how to diagnose and fix a noisy refrigerator compressor with these simple DIY steps.
How to Fix a Broken Bathroom Floor Tile
Replace a single cracked or broken bathroom floor tile without disturbing surrounding tiles using basic tools and matching grout for a seamless repair.

How to Fix a Broken Fence Post: Repair vs. Replace (2026)
A leaning or broken fence post doesn't always mean replacing the entire post. This guide covers using a metal post repair spike to straighten a leaning post, splicing a broken post above ground, and full post replacement when repair isn't enough.
How to Insulate Basement Walls: Rigid Foam, Fiberglass, and Spray Foam
Insulating your basement walls cuts heating and cooling costs, stops moisture problems, and makes the space comfortable year-round — here is how to do it right.
How to Fix a Broken Floor Register Vent Cover
Learn how to remove, repair, or replace a broken floor register vent cover to restore proper airflow and keep your HVAC system running efficiently.

How to Fix a Broken Kitchen Drain Basket
Learn how to replace a leaking or broken kitchen sink strainer basket with basic tools in under an hour, no plumber required.
How to Fix a Cracked Exterior Stucco
Repair hairline and structural cracks in exterior stucco yourself using the right patching compound, bonding agent, and finish coat to restore a weatherproof and matched surface.
How to Fix a Loose Stair Railing: Tightening Balusters, Newel Posts, and Wall-Mounted Rails (2026)
A loose stair railing is a safety hazard. This guide covers diagnosing whether the newel post, balusters, or wall-mounted rail bracket is the loose point, and the repair methods for each — from lag screws to epoxy.
How to Fix a Loose Window Crank Handle
Learn how to tighten, repair, or replace a loose or stripped casement window crank handle so your window opens and closes smoothly again.

How to Fix a Broken Outdoor Spigot
Learn how to replace a frost-free outdoor spigot yourself, including shutting off water, removing the old hose bib, and installing a new anti-siphon model.
How to Fix a Broken Window Screen: Replace Spline, Screen Mesh, and Bent Frames
A torn or bent window screen is a weekend repair you can complete for under $20 — this guide covers patching small holes, replacing full screen mesh with new spline, and straightening or rebuilding a bent frame.
How to Fix a Cabinet Hinge: Adjust, Repair, and Replace (2026)
Cabinet doors that sag, won't close, or hit the frame usually need hinge adjustment, not replacement. This guide covers adjusting European cup hinges, fixing stripped screw holes, and replacing broken hinges.
How to Fix a Leaking Basement Floor Drain: P-Trap, Primer, and Backwater Valve
A basement floor drain that smells, backs up, or lets sewer gas into the home usually has a dry P-trap or a failing backwater valve. This guide covers refilling the trap, primer application, drain cleaning, and installing a backwater valve.

How to Winterize a Sprinkler System: Blow Out vs. Manual Drain (2026)
Winterizing a sprinkler system before the first hard freeze prevents burst pipes and broken valves. This guide covers the compressed-air blow-out method, manual drain, and automatic drain — with zone-by-zone steps.
How to Fix a Broken Exterior Door Frame
Repair a rotted or damaged exterior door frame by removing the bad wood, treating the framing, and installing new casing and jamb material for a weathertight result.
How to Fix a Broken Kitchen Drawer Slide
Learn how to diagnose, remove, and replace a broken or sagging kitchen drawer slide so your drawers open and close smoothly again.
How to Fix a Loose Electrical Outlet Box
Learn how to stabilize a loose or wobbly electrical outlet box in drywall or plaster using outlet box clips, new-work boxes, or shimming techniques.
How to Fix a Water Damaged Wall: Drywall Repair After a Leak
Dry out, cut out, treat for mold, and patch water-damaged drywall — with texture matching tips so the repair disappears.
How to Fix Roof Drip Edge: Replace, Resecure, and Seal Properly
A missing or damaged drip edge lets water wick under your shingles and rot your fascia board. Learn how to identify failed drip edge, remove damaged sections, install replacement metal, and seal the gutter-to-roof junction correctly.

How to Fix a Broken Window Stop
Learn how to repair or replace a damaged window stop bead to keep your window sash seated, sealed, and operating correctly.
How to Fix a Foggy Double-Pane Window
Learn what causes double-pane window fogging, whether to repair or replace the insulated glass unit, and how to do it yourself to restore clarity and energy efficiency.
How to Fix a Motion Sensor Light That Won't Turn On or Won't Turn Off (2026)
Motion sensor lights that don't trigger or stay on permanently are almost always misadjusted or dirty — not broken. This guide covers adjusting sensitivity, range, and time settings, cleaning the sensor, and resetting the switch.
How to Fix a Noisy Refrigerator: Compressor, Fan, and Ice Maker Sounds Explained
Diagnose and fix unusual refrigerator noises — identifying compressor hum, fan rattle, ice maker clicking, and condenser coil buzz by sound type.
How to Fix a Toilet That Keeps Running
Stop a constantly running toilet by replacing the flapper, adjusting the float, fixing the fill valve, or trimming the overflow tube — all DIY repairs under $25.
How to Paint the Exterior of a House (Step-by-Step Guide, 2026)
Exterior house painting done right: prep the surface, prime bare wood, choose the right exterior paint, and apply two coats for a finish that lasts 8-12 years. Avoid the mistakes that cause peeling in year two.
How to Repair a Fence Gate: Step-by-Step Guide
Learn how to fix a sagging, sticking, or broken fence gate by adjusting hinges, adding a diagonal brace, or replacing damaged hardware.

How to Repair Stucco: Cracks, Holes, and Delaminated Sections (2026)
Stucco cracks from normal house movement, water damage, or impact. This guide covers hairline crack sealing with elastomeric caulk, patching holes with premixed stucco, and matching the existing texture.
Smart Home Setup Guide: What to Buy First and How to Start (2026)
Start building a smart home without wasting money on devices that do not work together. This guide covers the right order, the best hubs, and which upgrades pay for themselves.
How to Fix a Cracked Stone Veneer Wall
Learn how to repair cracks in manufactured stone veneer siding or interior accent walls using mortar, color-matched caulk, and simple hand tools.
How to Fix a Garage Door Opener: Remote, Wall Button, and Safety Sensor Issues (2026)
A garage door opener that won't respond has a dead remote battery, a misaligned safety sensor, or a failed wall button. This guide covers diagnosing and fixing each failure mode without calling a technician.
How to Fix a Garage Door That Won't Close: Sensor, Limit, and Track Issues (2026)
A garage door that reverses before closing, stops partway, or won't close at all is usually a safety sensor alignment problem. This guide covers aligning photo-eye sensors, adjusting close limit switches, and checking for physical obstructions.
How to Fix a Broken Crawl Space Access Door
Learn how to repair or replace a damaged crawl space access door or hatch to keep moisture, pests, and cold air out of your home.

How to Fix a Crack in an Asphalt Driveway
Step-by-step guide to repairing cracked asphalt driveways using crack filler, cold patch, and sealer. Learn the difference between linear cracks and alligator cracking and which repair method to use.
How to Fix a Leaking Pipe Joint in 5 Minutes Without Cutting Pipe
Stop a leaking pipe joint in 5 minutes with repair tape or epoxy putty — no pipe cutting needed. Then follow the permanent fix guide for PVC, copper, or threaded joints.
How to Fix a Window Air Conditioner That's Not Cooling (2026)
A window AC that runs but doesn't cool is usually a clogged filter, frozen coil, or dirty condenser — not a refrigerant failure. This guide covers the common causes and fixes for window air conditioners.
How to Fix a Cracked Floor Joist
Learn how to repair cracked or damaged floor joists using sistering and bridging techniques to restore structural integrity to your floor.
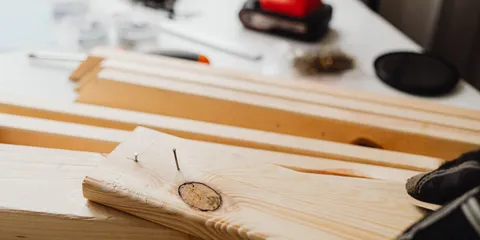
How to Fix a Stripped Screw Hole in Wood: Toothpick Method, Golf Tee, and Epoxy (2026)
A stripped screw hole in wood no longer grips the screw — the screw spins freely. This guide covers the toothpick-and-glue method, the golf tee method for larger holes, and when to use wood epoxy filler for the most permanent fix.

How to Fix a Broken Driveway Gate Hinge in 30 Minutes ($10–$40 Replacement)
Repair or replace a sagging or broken driveway gate hinge in 30 minutes so the gate swings properly and latches securely. Replacement hinges cost $10–$40.
How to Fix a Damaged Drywall Corner Bead
Learn how to replace or repair bent, cracked, and loose drywall corner bead on wall corners using metal or vinyl bead and joint compound.
How to Fix a Cracked Tile Backsplash
Repair cracked or chipped kitchen backsplash tiles yourself with this complete guide covering crack filling, single tile replacement, and regrouting for a like-new finish.
How to Fix a Leaking Kitchen Sink in 30 Minutes (Find the Source First)
Kitchen sink dripping? Find the exact source — drain gasket, supply line, P-trap, or disposal connection — then make the $5–$15 repair before the cabinet floor warps.
How to Fix a Broken Thermostat Wire in 20 Minutes ($0–$15, No HVAC Tech)
Diagnose and repair a broken, shorted, or disconnected thermostat wire in 20 minutes to restore heating and cooling control. Wire repairs cost $0–$15 without an HVAC technician.
How to Fix a Cracked Tile: Replace One Tile Without Wrecking the Rest (2026)
A cracked tile can be replaced without tearing out the entire floor or wall. This guide covers removing a single tile, replacing it, and matching grout color — with the tools and technique to avoid damaging adjacent tiles.
How to Fix a Squeaky Door: Hinge Lubrication and Pin Replacement
Stop a squeaky door by lubricating or replacing the hinge pin, tightening loose hinge screws, and choosing the right lubricant for lasting results.
How to Fix a Shower Door Seal: Replacing Bottom Sweeps and Frame Gaskets (2026)
A leaking shower door is usually caused by a worn bottom seal sweep, a damaged side frame gasket, or a misaligned door. This guide covers replacing shower door seals on framed, frameless, and sliding glass shower doors.
How to Fix a Sticky or Lifting Vinyl Floor in 30 Minutes ($5–$20 Adhesive Fix)
Remove adhesive residue, re-glue lifting vinyl floor tiles, or use a heat gun for stubborn spots in 30 minutes. Adhesive and primer cost $5–$20; full tile replacement runs $10–$30.
How to Fix Leaking Gutters: Sealing Seams, End Caps, and Holes (2026)
Gutter leaks typically occur at seams, end caps, or holes from corrosion — all are DIY repairs costing under $20. This guide covers the correct sealant, cleaning prep, and when to replace a section versus sealing it.
How to Fix a Cracked Tile Hearth
Learn how to repair cracked hearth tiles or replace damaged ones entirely so your fireplace surround looks great and stays structurally sound.
How to Fix a Dryer Timer That Won't Advance
Learn how to diagnose and fix a dryer timer that won't advance so your dryer completes cycles and shuts off automatically again.
How to Fix a Frozen Boiler Pipe
Learn how to safely thaw a frozen boiler pipe, restore heat to your home, and prevent pipes from freezing again in cold weather.
Garage Door Spring Replacement: When to DIY vs. Hire (2026)
Broken garage door springs are one of the most dangerous DIY repairs. This guide explains the difference between torsion and extension springs, why torsion spring replacement requires a professional, and what is safe to DIY.
How to Fix a Sticking Pocket Door
Repair a pocket door that sticks, drags, or falls off track by adjusting rollers, cleaning the track, replacing the floor guide, and realigning the frame.
How to Fix a Wet Basement Floor
Diagnose the source of basement floor moisture and fix it permanently — from sealing cracks and improving drainage to installing a sump pump and applying waterproof coatings.
How to Replace a Toilet Wax Ring: Fixing a Rocking or Leaking Toilet Base (2026)
A failed wax ring causes water to seep out at the base of the toilet with each flush. This guide covers removing the toilet, replacing the wax ring, and reinstalling it correctly — a two-hour repair that stops floor damage.
How to Fix a Broken Door Closer
Diagnose and fix a door closer that slams, won't latch, or leaks fluid — including adjustment, fluid replenishment, and full replacement.
How to Power Wash a Deck: PSI Settings and Technique Without Damaging Wood
Guide to power washing a wood or composite deck safely — the right PSI for each material, nozzle selection, distance, and direction to avoid raised grain and splintering.
Kitchen Countertop Cost 2026: $1,500–$8,000 All Materials
Kitchen countertops cost $1,500–$8,000 installed for a typical kitchen. Laminate $15–$40/sq ft, quartz $50–$120/sq ft, granite $40–$100/sq ft. Full material comparison with installed pricing.
How to Fix a Broken Garage Shelf
Repair a sagging or collapsed garage shelf by reinforcing brackets, sistering broken supports, and reattaching shelving to studs for a strong, lasting hold.
How to Fix Peeling or Cracked Driveway Sealer
Repair peeling, cracked, or bubbling driveway sealer the right way — strip the old coating, prep the concrete surface, apply fresh sealer, and follow cure times for a lasting finish.
How to Fix a Running Toilet Flapper: Replacement and Adjustment in 10 Minutes
The most common cause of a running toilet is a worn or misaligned flapper — here is how to diagnose it, choose the right replacement, and fix it in under 10 minutes.
How to Fix a Broken Drawer Slide: Repair and Replacement for Cabinet and Desk Drawers
Fix a drawer that sticks, falls out, or will not close fully — adjusting or replacing side-mount and undermount drawer slides on kitchen cabinets and furniture.
How to Fix a Broken Porch Light
Learn how to safely replace or repair an outdoor porch light fixture yourself, from shutting off power to installing a new fixture.

How to Fix Window Flashing: Stop Leaks at the Sill, Head, and Sides
Window flashing failures let water into the wall framing and cause rot that can go undetected for years. This guide covers diagnosing and repairing sill pan flashing, head flashing, and side flashing on both new and existing windows.
How to Install a Deadbolt Lock (New Door or Replacing Old) 2026
Install a deadbolt on a new door or replace an old one in under an hour. Step-by-step guide covering hole drilling, strike plate reinforcement, and alignment troubleshooting.
How to Fix a Broken Light Fixture: Wiring, Sockets, and Flush Mount Swaps
Diagnose and repair common light fixture problems including loose wire connections, failed sockets, broken chandelier chains, and full flush mount replacements.
How to Fix a Broken Wall Thermostat
Learn how to troubleshoot and replace a wall thermostat by checking wiring, replacing batteries, and installing a new unit without calling an HVAC tech.
How to Fix a Sagging Subfloor
Diagnose and repair a soft or sagging subfloor with this complete guide covering sistering floor joists, injecting adhesive, adding blocking, and replacing damaged panels.
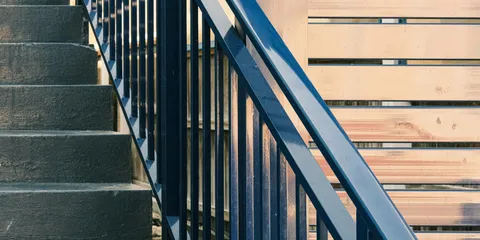
How to Fix a Broken Stair Railing Post
Tighten or replace a wobbly newel post and loose balusters using the right hardware so your stair railing is solid, safe, and code-compliant again.
How to Fix a Peeling Deck Stain
Learn how to strip peeling deck stain, properly prepare the wood surface, and apply a fresh coat of penetrating stain that lasts for years without peeling again.
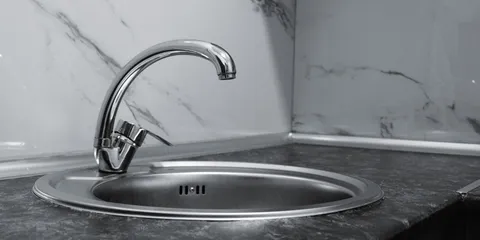
How to Caulk a Kitchen Sink: Re-Sealing Drop-In and Undermount Sinks (2026)
A failed caulk joint around a kitchen sink lets water seep under the rim and into the cabinet, rotting the countertop substrate. This guide covers removing old caulk, choosing the right sealant, and applying a clean bead for drop-in and undermount sinks.

How to Fix a Broken Drawer Bottom
Repair a sagging, cracked, or fallen drawer bottom panel with simple tools and a few dollars in materials — no need to replace the whole drawer.

How to Fix Recessed Light Trim That Keeps Falling Down (2 Spring Clips, 5 Minutes)
Recessed light trim falling or sagging? The spring clips lost tension. Replace them for $3–$5 or re-bend the existing clips — takes 5 minutes with no tools. Works on all standard 4-inch and 6-inch Halo and Juno fixtures.
How to Fix a Cracked Porcelain Sink
Learn how to repair chips and hairline cracks in a porcelain sink using an epoxy repair kit for a clean, lasting finish.
How to Change a Recessed Light Bulb: BR30, PAR30, and LED Retrofit (2026)
Replacing bulbs in recessed can lights is simple once you know the right bulb type. This guide covers identifying your trim type, choosing the right BR30 vs PAR30 vs GU10, and installing LED retrofit kits to upgrade old fixtures.
How to Fix a Range Hood Vent That Will Not Open
Learn how to diagnose and fix a stuck or broken range hood vent damper so your kitchen exhaust system works properly again.
How to Fix a Wobbling Toilet Seat: Tighten the Seat Bolts (2026)
A wobbling or sliding toilet seat is almost always loose seat bolts. This guide covers tightening plastic wing nuts, accessing hidden bolt covers, and replacing seats with corroded or broken mounting hardware.
How to Fix a Leaking Outdoor Faucet Cartridge in 20 Minutes ($8–$20 Replacement)
Replace a worn outdoor faucet cartridge to stop drips and restore full flow in 20 minutes. Replacement cartridges cost $8–$20 and work on most brands without a plumber.
How to Fix a Broken Window Crank Operator
Learn how to replace a broken casement or awning window crank operator yourself, restoring smooth operation without hiring a window repair company.
How to Fix a Corroded Copper Pipe
Learn how to identify copper pipe corrosion, cut out the damaged section, and repair it with a push-fit fitting or sweat solder without calling a plumber.

How to Fix a Stuck Sliding Door
Learn how to diagnose and fix a sliding door that is hard to open, jumps off track, or drags along the floor with simple tools and no special skills.
How to Install a Ceiling Light Fixture (Step-by-Step, 2026)
Replace or install a ceiling light fixture yourself in under an hour. Step-by-step guide covering junction box prep, wiring connections, and fixture mounting — no electrician needed.

How to Unclog a Bathtub Drain: From Hair Clogs to Full Blockages
Learn how to unclog a bathtub drain yourself using a drain snake, plunger, or chemical cleaner — and find out when the clog is serious enough to call a plumber.
How to Waterproof and Seal a Deck: Products, Timing, and Application (2026)
Sealing or waterproofing a deck protects wood from UV damage, moisture, and mildew. This guide covers the difference between sealers, stains, and waterproofers, how to prep the deck surface, and application technique.
How to Fix a Broken Outdoor Step
Cracked or crumbling outdoor steps are a safety hazard — this guide covers concrete patching, wood step replacement, and when to rebuild from scratch.
How to Fix a Leaking Bathroom Faucet: Cartridge and Two-Handle Repair
Fix a dripping bathroom sink faucet — replacing the cartridge on single-handle faucets and repairing compression valves on older two-handle models.
How to Hang a Door: Fitting and Hanging a Door Slab in an Existing Frame
Learn how to fit and hang an interior door slab in an existing frame, including trimming the door, cutting hinge mortises, and adjusting for proper gaps and plumb.
How to Fix a Broken Door Hinge Pin
Learn how to remove, replace, or repair a broken or loose door hinge pin to stop a sagging door and restore smooth, quiet operation.

How to Fix a Broken Kitchen Island Outlet
Learn how to diagnose and repair a broken pop-up countertop outlet on a kitchen island, including replacing the module and resetting GFCI protection.

How to Skim Coat a Damaged Wall: Step-by-Step Guide
Restore a rough, textured, or damaged wall surface to a smooth finish using joint compound skim coating techniques any patient DIYer can master.

How to Fix a Noisy Ceiling Fan: Clicking, Humming, and Rattling Solved
Diagnose and fix a ceiling fan that clicks, hums, rattles, or wobbles — loose blades, bad bearings, dimmer switch incompatibility, and blade balancing.
How to Touch Up Paint on Walls: Matching Existing Paint and Blending Scuffs (2026)
Wall touch-ups fail when the new paint doesn't match the original — in color, sheen, or both. This guide covers finding the original paint color, applying touch-up correctly, and why touch-ups sometimes need the entire wall painted to look right.

Bathroom Vanity Cost 2026: $350–$1,400 Single or $600–$3,000 Double
Bathroom vanity installed costs $350–$1,400 for a single vanity ($150–$800 unit + $200–$600 labor). Double vanities run $600–$3,000+ installed. Pricing by size and style.
How to Add a Bathroom: Planning, Permits, and Cost for a New Half or Full Bath
A complete planning guide for adding a half bath or full bathroom to your home — covering location, permits, rough-in plumbing, electrical, cost, and what to DIY vs. hire out.
How to Fix a Broken Toilet Paper Holder
Learn how to re-anchor a loose or broken toilet paper holder in drywall or tile so it stays put and looks clean again.

How to Fix a Broken Window Screen Frame
Learn how to repair a bent or broken window screen frame and replace torn screen mesh using basic tools — including how to rescreen with a spline roller for a tight, professional result.
How to Install Baseboard Trim: Measuring, Cutting Corners, and Finishing
A practical step-by-step guide to installing baseboard trim — covering material selection, measuring, cutting inside and outside corners, nailing, caulking, and painting for a clean professional finish.
How to Clean a Pool: Weekly Maintenance, Shock Treatment, and Water Chemistry
Learn the complete pool cleaning routine — weekly skimming, brushing, vacuuming, water chemistry testing, shock treatment, and seasonal opening and closing basics.

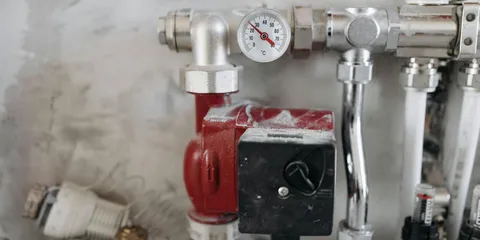
Expansion Tank Repair 2026: Recharge vs. Replace ($0 DIY to $400 Plumber)
Expansion tank repair: bladder recharge is $0 (Schrader valve, 5 min). Full replacement: $100–$250 DIY or $150–$400 with plumber. Tap test tells you which: hollow top = rechargeable, solid throughout = replace. Includes sizing chart and pressure calculations.
How to Fix a Bifold Door: Alignment, Rubbing, Off-Track, and Pivot Pin Issues (2026)
Bifold doors are notorious for falling off their track, rubbing at the top or bottom, and sagging with age. This guide covers adjusting the pivot pin, top guide, and floor bracket to fix all common bifold door problems without removing the door.
How to Fix Cracked Concrete Steps: Patching Hairline Cracks, Chips, and Broken Edges (2026)
Concrete step cracks expand with every freeze-thaw cycle and create a trip hazard over time. This guide covers patching hairline cracks, spalled surfaces, and broken step edges — including the correct repair product for each type.
How to Fix Drywall Butt Joint Tape
Learn how to repair lifted, cracked, or bubbling drywall butt joint tape so your walls look smooth and paint-ready with a lasting finish.

How to Replace a Broken Garage Door Spring: Extension Springs DIY in 1 Hour ($15–$40, Leave Torsion to a Pro)
Broken garage door spring? Extension springs (sides of the door) are DIY-replaceable for $15–$40 in 60 minutes. Torsion springs (above the door) require a pro — stored tension can cause serious injury. This guide covers safe DIY for extension springs and what to tell a service tech for torsion.
How to Fix a Leaking Outdoor Sprinkler Head
Diagnose and repair a leaking or broken sprinkler head yourself to stop water waste, prevent lawn damage, and keep your irrigation system running efficiently.
How to Fix a Leaking Sink Drain (Basket Strainer, P-Trap, and Slip Joints)
Stop water dripping under your sink by resealing the basket strainer, tightening slip-joint nuts, replacing worn washers, and fixing the P-trap — no plumber needed.
How to Fix a Sagging Door: Hinge Screws, Shims, and Strike Plate Adjustment (2026)
A sagging door that drags at the bottom or binds at the top latch corner is almost always a hinge problem. This guide covers tightening hinge screws with longer screws, shimming loose hinges, and adjusting the strike plate after correcting the sag.
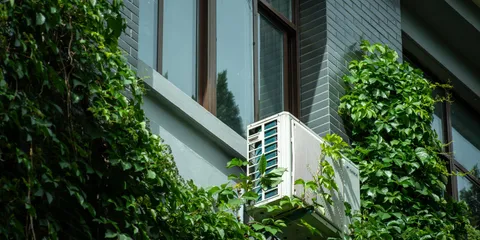
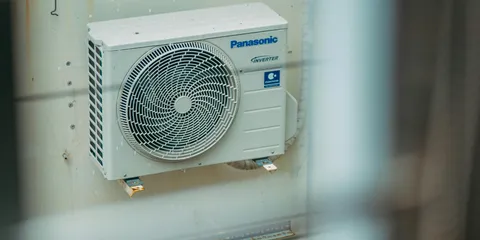
How to Fix an Air Conditioner Not Cooling: Diagnosis and DIY Fixes (2026)
An AC that runs but doesn't cool is one of the most frustrating home problems. This guide covers the DIY-fixable causes: dirty filter, frozen evaporator coil, dirty condenser coils, low refrigerant signs, and when to call a technician.
How to Fix a Broken Drawer Pull
Repair a stripped or broken drawer pull screw hole, replace damaged hardware, and upgrade cabinet pulls with the right tools and a few simple techniques.
How to Fix a Loose Toilet Seat
Learn how to tighten or replace a loose toilet seat in under 10 minutes using basic tools, and stop the annoying shifting and wobbling for good.
How to Fix a Sump Pump That Won't Turn Off
Diagnose and fix a sump pump that runs continuously by checking the float switch, pump capacity, and pit water sources.
How to Fix a Broken Dishwasher Spray Arm
Learn how to clean a clogged dishwasher spray arm and replace a cracked or broken one to get your dishwasher back to cleaning dishes spotlessly.
How to Fix a Broken Dryer Heating Element
Learn how to diagnose and replace a failed electric dryer heating element yourself to restore heat and save hundreds on repair costs.
How to Replace a Broken Garage Door Cable: $8–$20 DIY Fix (Not the Spring — Know the Difference)
Garage door cable snapped or frayed? Replacement cables cost $8–$20 at any hardware store. Wind the cable on the drum, thread it through the bottom bracket, tension evenly. Takes 45 minutes. Important: this is the cable, not the spring — if the spring is also broken, fix that first.

How to Fix a Broken Patio Umbrella
Repair a broken patio umbrella rib, torn canopy, or stuck tilt mechanism so you can enjoy outdoor shade again without buying a replacement.
How to Fix a Broken Refrigerator Door Gasket
Learn how to replace a worn or torn refrigerator door gasket yourself to stop cold air leaks, reduce energy waste, and keep food properly chilled.

How to Fix a Broken Toilet Seat
Learn how to remove and replace a broken toilet seat in under 30 minutes with basic tools and no plumbing experience required.
How to Fix a Garage Door Bottom Seal
Replace a worn or cracked garage door bottom seal yourself — covering T-slot vs retainer styles, measuring, cutting, and installation steps.

How to Install Smoke and Carbon Monoxide Detectors: Placement and Wiring (2026)
Where to put smoke alarms and CO detectors, how to install battery and hardwired models, and what current code requires for bedroom coverage and interconnected alarms.
How to Replace a Water Heater: Tank Removal and Installation (2026)
Replacing a water heater yourself saves $200–$400 in labor. This guide covers removing the old tank, connecting gas or electric supply, and setting up the new water heater including the T&P valve and expansion tank.
How to Fix a Buckling or Cupping Hardwood Floor
Diagnose and repair buckled or cupped hardwood floors with this step-by-step guide covering moisture testing, re-nailing, drying, sanding, and board replacement.
How to Fix a Window Screen: Replace Mesh and Repair Bent Frames (2026)
A torn or bent window screen is easy to fix — rescreen the frame with spline and screen mesh, or straighten a bent aluminum frame. This guide covers both repairs for standard aluminum frame screens.
How to Fix a Leaky Shower Valve: Cartridge Replacement and Stem Repair (2026)
A shower valve that drips from the shower head or runs cold water through the tub spout has a worn cartridge or stem. This guide covers identifying your valve type, shutting off the supply, and replacing the internal cartridge.
How to Fix a Loose or Wobbly Wall Switch (Electrical Switch Repair)
Tighten a loose wall switch, add spacers to a recessed box, replace a worn switch, and fix a crooked or ill-fitting cover plate — safely and correctly.
How to Install an Outdoor GFCI Outlet: Step-by-Step Guide
Learn how to safely install a weatherproof GFCI outlet on the exterior of your home to add safe outdoor power for tools, lights, and appliances.

How to Fix a Broken or Stripped Drawer Knob (Cabinet Hardware Repair)
Re-secure a wobbly drawer knob, fill a stripped screw hole, and replace cabinet pulls with the right hardware — no cabinet shop required.

How to Fix a Broken Outdoor Light Fixture
Learn how to diagnose and replace a broken outdoor light fixture safely, including wiring connections and weatherproofing for lasting results.

How to Fix a Leaking Crawl Space Vapor Barrier
Learn how to repair tears, gaps, and failed seams in your crawl space vapor barrier to stop moisture intrusion and protect your home's structure.
How to Fix a Noisy Pipe: Banging, Whistling, and Humming Explained
Learn how to diagnose and fix noisy pipes including water hammer, whistling, and humming sounds with DIY solutions that last.
How to Install Wainscoting: Beadboard and Panel-and-Rail Styles (2026)
Wainscoting adds architectural detail to dining rooms, hallways, and bathrooms. This guide covers the two main DIY styles — beadboard and raised panel — with layout, cutting, and installation steps.
How to Repair Vinyl Siding: Cracks, Holes, and Warped Panels (2026)
Cracked, dented, or warped vinyl siding? This guide covers patching small holes, replacing a single panel, and fixing S-shaped warping — without calling a contractor.
How to Fix a Broken Kitchen Cabinet Hinge Cup
Learn how to repair a stripped or blown-out European hinge cup hole in a cabinet door by re-drilling and installing a repair insert.
How to Fix a Broken Cabinet Shelf Pin (And Stop Shelves From Falling)
Missing or broken shelf pins let cabinet shelves sag and crash — here's how to repair them, drill replacement holes, and upgrade to a more reliable shelf support system.
How to Fix a Cracked or Crumbling Concrete Step
Cracked and spalling concrete steps are a safety hazard and get worse every winter — here's how to patch, resurface, and seal them yourself with the right materials.

How to Replace a Door Peephole in 15 Minutes (No Drilling Needed)
Swap a broken or foggy door peephole in under 15 minutes — just a screwdriver, no new drilling. Wide-angle 200° viewers cost $5–$15 and double your field of view.
How to Fix a Broken Medicine Cabinet Hinge
Learn how to repair or replace a broken medicine cabinet hinge so your bathroom cabinet door swings smoothly and stays closed.

How to Fix a Cracked Heat Exchanger
Learn how to identify a cracked heat exchanger in your furnace, understand when repair is possible, and take the right steps to keep your home safe.

How to Fix a Broken Patio Door Roller
Learn how to diagnose, remove, and replace sliding patio door rollers to restore smooth, effortless operation to your sliding glass door.

How to Fix a Cabinet Door That Won't Close (2026)
A cabinet door that won't close or stay shut is almost always a hinge adjustment problem. This guide covers European hinge adjustment, overlay correction, warped doors, and magnetic catch replacement so your cabinets close cleanly.

How to Fix a Cracked Wooden Garden Bed
Learn how to repair split and rotting raised garden bed planks with the right wood treatment, hardware, and sealing technique to extend the life of your bed.
How to Fix a Hole in the Wall: Nail Holes, Medium Holes, and Large Patches
Choose the right drywall repair method based on hole size — from 10-minute spackling fixes for nail holes to full patch repairs for fist-sized and larger damage.
How to Fix a Leaking Washing Machine Hose
Learn how to identify, remove, and replace a leaking washing machine supply or drain hose to prevent water damage before it becomes a flood.
How to Fix a Sagging Deck: Joists, Posts, Ledger, and Joist Hangers
Diagnose and repair a sagging or spongy deck by sistering damaged joists, replacing rotted posts, re-lagging the ledger board, and securing joist hangers.
How to Remove Old Caulk: From Tubs, Showers, Windows, and Countertops (2026)
Old caulk has to come out completely before recaulking — new caulk over old caulk fails within months. This guide covers the fastest removal methods for silicone, latex, and polyurethane caulk on all surfaces.

How to Reseed a Lawn: Overseeding and Full Reseeding (2026)
Thin, patchy, or bare lawn areas can be fixed with overseeding or full reseeding. This guide covers soil prep, seed selection, seeding technique, starter fertilizer, and keeping seed moist until germination.

How to Fix a Broken Exterior Step: Concrete Patch, Full Replacement, and Safety Nosing
A crumbling or cracked exterior step is a trip hazard and a liability. Learn how to patch spalling concrete, replace a badly damaged step, and install safety nosing to protect the edge long-term.
How to Fix a Wobbly Toilet: Tighten Bolts, Shim the Base, and Check the Wax Ring
A rocking toilet damages the wax ring seal and eventually leaks at the floor — fix it now by tightening tee bolts, shimming the base level, and inspecting the toilet flange before water damage sets in.

How to Fix Ice Dams: Preventing and Removing Ice Dams Without Damaging Your Roof
Learn what causes ice dams, how to safely remove them using a roof rake and calcium chloride, and how to prevent them from forming with better attic insulation and ventilation.
How to Fix Water Damaged Floor: Assessing, Drying, and Replacing Damaged Sections
Guide to identifying and repairing water-damaged hardwood, laminate, and subfloor — from surface warping to complete board replacement.
How to Build a Retaining Wall: Block, Timber, and Stone Options for DIYers
Step-by-step guide to building a DIY retaining wall using concrete block, timber, or natural stone — with full coverage of drainage, base prep, and permit requirements.

How to Fix a Leaking Basement Window: Window Wells, Caulking, and Sill Flashing (2026)
A leaking basement window lets in water through the frame, well drain, or sill flashing. This guide covers cleaning and relining the window well drain, recaulking the frame, replacing sill flashing, and installing a window well cover to stop water intrusion for good.

How to Replace Window Weatherstripping: Step-by-Step Guide
Replace worn or missing window weatherstripping to stop drafts, lower energy bills, and keep moisture out of your home.
How to Fix a Cracked Basement Floor: Epoxy, Foam Injection, and Concrete Resurfacer
Learn how to repair cracked concrete basement floors — from identifying structural vs. cosmetic cracks to using epoxy injection, polyurethane foam, and resurfacer for a lasting fix.
How to Fix a Loose Electrical Junction Box
Learn how to secure a loose or sagging electrical junction box in walls or ceilings safely and correctly to protect your wiring connections.

How to Fix a Window That Falls Closed (or Won't Stay Up): Replacing Sash Balances (2026)
A double-hung window that falls closed has a broken or failed sash balance — the spring or cord mechanism that counterweights the sash. This guide covers identifying your balance type, replacing spiral balances, and adjusting tension.
How to Fix a Clogged Outdoor Drain
Learn how to clear a clogged yard drain, channel drain, or area drain using the right tools and techniques to restore proper drainage and prevent yard flooding.
How to Install Overhead Garage Storage Racks: Step-by-Step Guide
Reclaim your garage floor by mounting ceiling storage racks yourself with this complete guide covering joist finding, mounting hardware, weight limits, and safe loading.

How to Insulate a Garage: Door, Walls, and Ceiling for Year-Round Comfort
Learn how to insulate your garage door, walls, and ceiling with the right materials and R-values — whether it's attached or detached, heated or not.

How to Remove a Stripped Screw: 7 Methods That Work (2026)
Stripped screw head that your screwdriver just spins in? This guide covers 7 techniques from easiest to most destructive — rubber band trick, screw extractor, drill-out — and when to use each one.
How to Clean a Deck: Power Wash vs. Scrub, and What to Do Next (2026)
Clean a wood or composite deck before sealing, staining, or painting. This guide covers power washing technique, deck cleaners vs. brighteners, and how to tell if your deck needs more than cleaning.

How to Fix a Dishwasher That Won't Start: Door Latch, Control Lock, and Thermal Fuse (2026)
A dishwasher that won't start usually has a failed door latch switch, an engaged control lock, or a tripped thermal fuse — not a major electrical failure. This guide covers diagnosing no-start conditions and fixing the most common causes.
How to Fix a Wobbly Ceiling Fan in 10 Minutes (No Electrician Needed)
A wobbling ceiling fan is almost always a blade weight imbalance — fix it in 10 minutes with a $3 blade balancing kit. No wiring, no electrician needed.
How to Fix Popped Drywall Screws and Nails
Eliminate those small round bumps on your walls for good by driving a new screw, dimpling the old fastener, and applying two coats of joint compound for an invisible repair.
How to Fix a Broken Kitchen Sink Basket Strainer
Learn how to replace a leaking or broken kitchen sink basket strainer and drain assembly with simple tools in under two hours.

How to Repair Soffit and Fascia (2026): Wood Rot, Holes + Vinyl Replacement
Soffit and fascia repair: probe for rot with a screwdriver, treat small spots with two-part epoxy filler, replace boards rotted through. Vinyl soffit panels slide out of J-channels in minutes. Covers all repair types — wood rot, holes, full panel replacement.
How to Fix a Broken Outdoor Outlet Cover in 10 Minutes ($4–$8 Weatherproof Replacement)
Broken outdoor outlet cover? Replace it with a weatherproof in-use cover for $4–$8 — snaps on in 10 minutes and keeps moisture out even with cords plugged in. Code-required for all outdoor outlets.
How to Fix a Leaking Tub Overflow Plate
Replace a worn bathtub overflow plate gasket to stop water from seeping behind your tub walls and causing hidden water damage.
How to Fix a Toilet Lift Chain
Learn how to adjust or replace a toilet lift chain that is too long, too short, or tangled so your toilet flushes properly every time.
How to Repair a Loose Floor Tile: Reattaching Hollow Tiles Without Full Removal (2026)
A floor tile that sounds hollow when tapped has lost adhesion to the substrate. This guide covers diagnosing the extent of delamination, injecting adhesive to reattach loose tiles, and when full tile removal is necessary.
How to Fix a Lawn Irrigation Zone Valve: Replace Solenoids, Diaphragms, and Full Valve Bodies
A zone valve that won't open, won't close, or leaks can be repaired in an afternoon — most fixes require only a solenoid swap or new diaphragm kit rather than a full valve replacement.
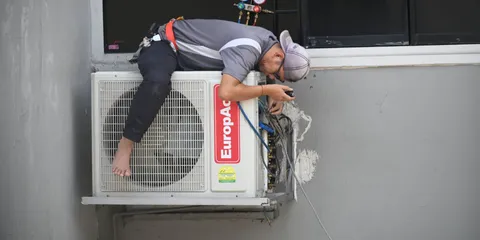
How to Fix a Leaking AC Unit: Condensate Line, Drain Pan, and Refrigerant
Diagnose and fix a leaking AC unit — unclog the condensate drain line, replace a cracked drain pan, and identify when a refrigerant leak requires a technician.
How to Fix a Stuck Window: Painted-Shut, Swollen, or Off-Track
Learn how to free a painted-shut or swollen window, clean the track, lubricate the sash, and replace a broken sash cord — all without calling a contractor.

How to Remove Popcorn Ceiling: Safe Scraping and Finishing
Learn how to safely remove popcorn ceiling texture — from asbestos testing through wet scraping, patching gouges, and finishing to a smooth, paintable surface.

How to Replace a Window: Insert vs. Full-Frame Replacement (2026)
Drafty, fogged, or failed window? This guide covers the two replacement methods — insert (retrofit) and full-frame — with step-by-step instructions, costs, and when to call a pro.
How to Fix a Cracked Plywood Subfloor
Learn how to repair a cracked or damaged plywood subfloor panel using sistering joists and patch panels so your finished floor stays solid and squeak-free.
How to Fix a Sagging or Misaligned Cabinet Door
A cabinet door that gaps, scrapes, or won't close properly is almost always a hinge adjustment — here's how to fix European concealed hinges and traditional wrap hinges in minutes.
How to Remove a Wall: Load-Bearing vs Non-Load-Bearing (2026)
Removing a wall opens up living space but requires identifying whether the wall is load-bearing. This guide covers how to determine if a wall carries load, when to add a beam, the permit process, and demolition sequence.
How to Fix a Broken Outdoor Step Handrail
Diagnose and repair a loose, broken, or rotted outdoor stair handrail mounting with the right fasteners and post anchors for a code-compliant, safe result.
How to Fix a Garage Door Track
Learn how to straighten a bent garage door track, realign a misaligned track, replace worn rollers, and lubricate the system for smooth, safe operation.
How to Fix a Pocket Door That Sticks, Jumps the Track, or Won't Stay Closed
Repair a pocket door that drags, derails, or gaps at the frame by adjusting the track, replacing rollers, fixing the latch, and lubricating the hardware.
How to Fix a Rotting Fence Post: Repair and Replacement Options
Learn how to fix a rotting wood fence post using steel menders for partial repair, or replace it completely with pressure-treated lumber and proper concrete footing.

How to Fix a Broken Hot Tub Jet in 15 Minutes ($5–$40, No Full Drain)
Remove, clean, or replace a broken or stuck spa jet in 15 minutes without draining the entire tub. O-rings cost $5; replacement jets run $15–$40.
How to Fix a Broken Wall-Mounted TV Bracket
Learn how to repair and re-anchor a wall-mounted TV bracket that is loose, cracked, or pulling away from the wall safely and securely.
How to Fix a Leaking Pool Filter Housing
Learn how to stop a pool filter housing leak by replacing O-rings and sealing hairline cracks so your filtration system runs efficiently all season.

How to Fix a Sliding Glass Door Lock: Latch, Handle, and Security Bar (2026)
A sliding glass door lock that won't engage, a handle that spins freely, or a latch that doesn't catch are all common failures. This guide covers latch replacement, handle repair, and adding a security bar.

How to Fix a Tripped Arc Fault Breaker
Learn how to safely reset a tripped AFCI breaker, identify the root cause of nuisance trips, and determine when the breaker itself needs replacement.
How to Fix a Broken Bathroom Vanity Light
Learn how to safely replace a bathroom vanity light bar fixture, from turning off the breaker to making final wiring connections.
How to Fix a Cracked Laundry Room Floor
Learn how to repair cracks in a utility room or laundry room floor using the right filler for concrete, vinyl, or tile surfaces.

How to Fix a Cracked Porch Column
Learn how to repair surface cracks and structural damage on decorative porch columns using the right fillers, caulks, and finishing techniques.
How to Fix a Leaking Outdoor Spigot (Hose Bib Repair Guide)
Stop a dripping or leaking outdoor faucet yourself — covers packing nut tightening, stem washer replacement, and frost-free cartridge swaps.
How to Fix a Baseboard Heater: Electric and Hot Water Baseboard Troubleshooting (2026)
Baseboard heaters that produce no heat, weak heat, or strange noises are usually fixed by cleaning the fins, bleeding air from a hot water system, or replacing a failed thermostat or element. This guide covers both electric and hydronic baseboard heater repairs.
How to Fix a Broken Circuit Breaker
Learn how to diagnose a tripped or faulty circuit breaker, reset it safely, and replace a failed breaker when resetting is no longer enough.
How to Fix a Cold Room in Your House
Learn how to diagnose and fix the most common reasons one room stays cold while the rest of your house stays comfortable.
How to Fix a Damaged Wood Window Frame: Epoxy Repair, Partial Replacement, and Vinyl Capping (2026)
A rotted or damaged wood window frame does not always require full window replacement. This guide covers assessing rot depth, making durable epoxy repairs for minor damage, doing partial wood replacement for larger sections, applying vinyl capping to prevent future rot, and painting for a finished result.

How to Fix a Leaking Radiant Floor Heat Manifold
Learn how to diagnose and repair a leaking radiant floor heating manifold, including fitting replacement, port sealing, and pressure testing.
How to Weatherstrip a Door: Stop Drafts in Under an Hour (2026)
Drafty exterior door? Replace the weatherstripping on the door frame (foam, V-strip, or door sweep) in 30–60 minutes for under $20. This guide covers all weatherstrip types and which to use where.
How to Add an Electrical Outlet (2026): DIY — No Electrician Needed
Add a new outlet anywhere in your home by tapping an existing circuit — no electrician needed for most jobs. Step-by-step: wire routing through walls, new work box installation, wiring connections, and permit tips so it passes inspection.
How to Fix a Basement Leak: Hydraulic Cement Stops Cracks in 1 Hour ($8–$25)
Basement water entry? Diagnose the source first: wall crack, floor crack, or porous seepage. Seal small cracks with hydraulic cement or polyurethane injection ($8–$25 DIY). Interior drainage handles what surface sealing can't — here's when each approach applies.

How to Fix a Broken Cabinet Lazy Susan
Learn how to repair or replace a broken cabinet lazy Susan bearing, shelf, or center pole so your corner cabinet spins smoothly again.
How to Fix a Scuffed Hardwood Floor
Repair surface scuffs, scratches, and worn finish on hardwood floors using the right products and techniques without sanding the entire floor.
How to Fix Paint Drips on a Wall
Learn how to sand out, fill, and repaint dried paint drips on walls so the repair is completely invisible.
How to Fix a Broken Cabinet Shelf in 15 Minutes ($0–$12 with Toothpick Trick)
Fix stripped shelf pin holes with toothpicks and wood glue ($0), add shelf supports for sagging shelves ($5–$12), or reinforce a broken bracket — all in 15 minutes or less.

How to Fix a Broken Mailbox Post
Learn how to replace or repair a broken mailbox post with this practical DIY guide covering tools, materials, and installation steps.
How to Fix a Loose Toilet Tank Lid (And Repair a Cracked Tank)
A rocking toilet tank lid is a noise and breakage hazard — here's how to stabilize or replace the lid, tighten loose tank bolts, repair hairline cracks, and secure the water supply connection.
How to Fix a Sunken Patio Paver
Learn how to lift, re-level, and reset a sunken or heaved patio paver so your outdoor surface is flat, safe, and looks like new again.
How to Paint a Deck: Prep, Priming, and Painting for Lasting Results
A complete step-by-step guide to painting a deck with solid-color deck paint, covering cleaning, priming, application technique, and long-term maintenance.
How to Fix a Broken Exterior Shutter
Learn how to repair a broken exterior shutter hinge, cracked slats, or loose mounting so your home's curb appeal stays sharp.
How to Fix a Broken Interior Door Knob Lock
Learn how to diagnose and repair a stuck, loose, or non-locking interior privacy door knob so your bathroom or bedroom door locks reliably again.
How to Fix a Broken Wall Outlet Cover
Learn how to safely remove and replace a cracked or broken electrical outlet cover plate in minutes with just a screwdriver.
How to Fix a Damaged Laminate Floor
Repair scratches, chips, bubbles, and broken planks in laminate flooring yourself using simple techniques that restore a near-perfect finish.
How to Fix a Leaking Radiator Valve
Learn how to stop a leaking radiator valve by tightening the packing nut, replacing the valve stem packing, or swapping out the entire valve.
How to Fix a Broken Faucet Aerator
Learn how to clean, unclog, or replace a faucet aerator to restore full water pressure and flow in under 30 minutes.
How to Fix a Running Toilet in 10 Minutes: Flapper, Fill Valve, or Float ($3–$25 Fix)
A running toilet wastes up to 200 gallons of water per day. The fix is almost always a $3–$25 part: flapper (most common), fill valve, or float arm. This guide diagnoses which part failed and shows you how to replace it in under 15 minutes — no plumber needed.
How to Fix a Rotted or Loose Deck Post: Post Base, Sistering, Footing, and Surface Rot (2026)
A deck post that has rotted at the base or is loose at the footing is a structural safety issue that needs to be fixed before the deck is used again. This guide covers diagnosing post rot, surface rot treatment, post base hardware replacement, sistering a compromised post, and pouring a new footing.
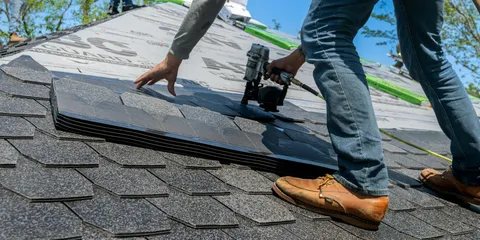
How to Fix a Blown-Off Roof Shingle Before It Leaks ($15–$30 DIY, No Roofer Needed)
Missing shingle? Replace it yourself in 30 minutes with a matching shingle ($5–$15) and roofing nails. Slide the new shingle under the one above, nail it through both layers, then seal the nail heads with roofing cement to prevent leaks.
How to Fix Cracked or Missing Grout in a Shower
Learn how to repair cracked shower grout by removing old grout, deciding between regrouting vs. caulking corners, and applying grout sealer for long-lasting results.
How to Fix a Cracked Wood Fence Post
Learn how to repair a cracked or rotting wood fence post using epoxy consolidant, sister posts, and protective sealers to extend its life for years.
How to Fix a Sticking Deadbolt: Lubrication, Strike Plate, and Frame Alignment
A deadbolt that sticks, won't extend, or refuses to retract is a security and safety problem. This guide covers graphite lubrication, strike plate adjustment, door frame shift correction, and when to replace the lock entirely.
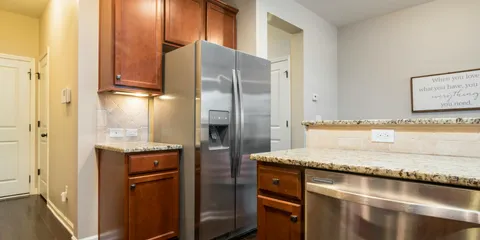
How to Fix a Sticky or Misaligned Cabinet Door: Hinge Adjustment and Leveling
Most cabinet door problems — crooked gaps, rubbing frames, doors that won't close — are fixed in five minutes by adjusting the hinges, not replacing anything.
How to Replace an Electrical Outlet: Step-by-Step Guide (2026)
Replace a dead or damaged electrical outlet yourself in 30 minutes. This guide covers shutting off power safely, wiring a standard outlet, and testing with a circuit tester — no electrician needed.
How to Fix a Broken Bathroom Sink Stopper
Learn how to repair a pop-up drain stopper that will not open, close, or stay in place by adjusting or replacing the pivot rod and lift linkage.
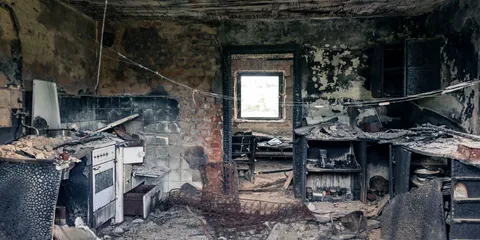
How to Fix a Broken Smoke Detector
Learn how to troubleshoot, repair, and replace a broken smoke detector to keep your home safe.
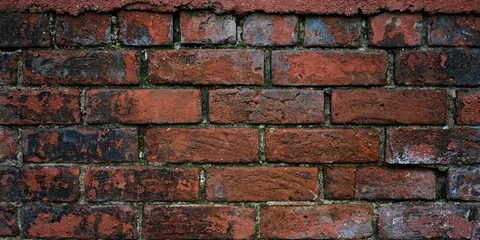
How to Fix Cracked Mortar Between Bricks
Learn how to repoint cracked and crumbling mortar joints using proper tuckpointing techniques to protect your brick walls from water damage.
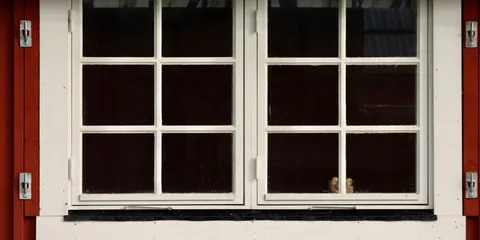
How to Fix a Cracked Window Sash
Learn how to repair a cracked wood window sash using wood filler and epoxy consolidant so the window operates smoothly and looks freshly painted.

How to Fix a Squeaky Bed Frame: Wood, Metal, and Slat Repairs
Diagnose and fix a squeaky bed frame — tightening joints, adding felt pads, lubricating metal frames, and reinforcing loose slats on wood and metal bed frames.

How to Paint a Garage Floor with Epoxy or Floor Paint
A complete guide to cleaning, etching, priming, and applying epoxy or floor paint to a concrete garage floor for a durable, professional finish.

How to Add Drip Irrigation to a Raised Garden Bed
Step-by-step guide to setting up drip irrigation in a raised garden bed — components, layout, timer connection, and emitter placement for vegetables and herbs.
How to Fix a Broken Garage Door Lock
Learn how to repair or replace a manual garage door lock bar that is stuck, misaligned, or no longer latching securely.
How to Fix a Cracked Kitchen Countertop
Learn how to repair cracks in laminate, granite, quartz, and solid-surface kitchen countertops using the right filler, adhesive, or epoxy for each material.
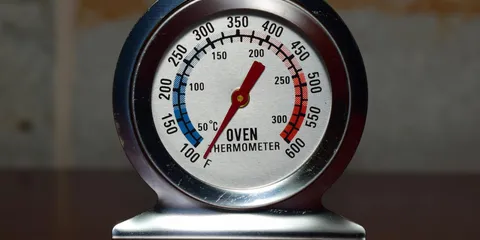
How to Fix an Oven Not Heating: Bake Element, Broil Element, and Igniter Repair (2026)
An oven that won't heat has a failed heating element (electric) or igniter (gas) in most cases. This guide covers diagnosing which component failed, testing with a multimeter, and replacing bake and broil elements as a DIY repair.

How to Fix a Broken Shower Head Arm
Learn how to repair or replace a broken, leaking, or stripped shower head arm in under an hour with basic tools and no plumber needed.
How to Add an Outdoor Water Spigot: Running Pipe and Installing a Frost-Proof Hose Bib
Guide to adding a new outdoor water spigot — tapping into a supply line inside, running pipe through the wall, and installing a frost-proof hose bib.
How to Fix a Cracked Fiberglass or Acrylic Tub (DIY Repair Guide)
Learn how to repair cracks and chips in a fiberglass or acrylic bathtub using a fiberglass repair kit, gelcoat, and color-matching techniques.

How to Fix a Crumbling Brick Wall: Tuckpointing, Spalling Brick Repair, Sealant, and Efflorescence (2026)
Crumbling mortar joints and spalling bricks are not just cosmetic — they allow water into the wall cavity and accelerate structural deterioration. This guide covers diagnosing the problem, raking and tuckpointing failed mortar joints, replacing spalling bricks, removing efflorescence, and when to apply masonry sealant.
How to Fix a Garage Door Cable: When to DIY and When to Call a Pro
Guide to garage door cables — diagnosing a broken or slipped cable, when simple reattachment is safe DIY, and when spring tension makes it a job for a professional.

How to Install a Ceiling Medallion: Upgrade a Light Fixture in 30 Minutes (2026)
A ceiling medallion adds architectural detail around a light fixture or ceiling fan. This guide covers choosing the right size, cutting a center hole, attaching with adhesive, and painting for a professional finish.
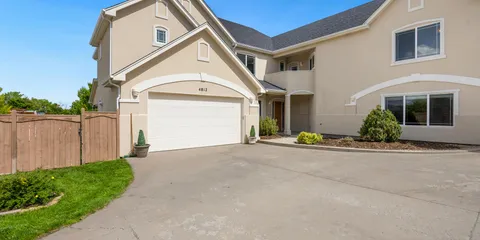
How to Fix a Broken Garage Door Bottom Seal
Replace a cracked or missing garage door bottom weather seal to block drafts, pests, rainwater, and debris from entering under your garage door.

How to Fix a Cracked Concrete Sidewalk Panel
Learn how to repair a cracked concrete sidewalk panel using proper joint and crack filler techniques that last for years.
How to Fix a Cracked Vinyl Fence: Rail Repair, Post Replacement, and Panel Splicing (2026)
Cracked vinyl fence rails, posts, and panels are repairable without replacing entire fence sections. This guide covers using rail splice kits, router inserts for cracked rails, post anchor replacement for damaged posts, and sourcing matching replacement panels.
How to Fix Low Shower Pressure in 5 Minutes ($0–$30 Fix)
Start by soaking the showerhead in white vinegar ($0, 30 min). If pressure stays low: diverter valve, worn cartridge, or closed supply valve — $15–$65 DIY fix covered step by step.
How to Fix a Textured Wall Patch
Learn how to match common wall textures like orange peel, knockdown, and skip trowel when patching drywall so repairs blend in invisibly.
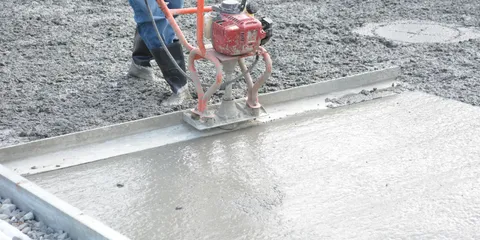
How to Level a Floor: Self-Leveling Compound and Shimming for Tile and Flooring
Guide to leveling an uneven floor before installing tile, hardwood, or vinyl — using self-leveling compound for dips and shims for high spots.

How to Match Wall Texture After a Drywall Repair: Orange Peel, Knockdown, and Smooth (2026)
Matching existing wall texture is the hardest part of a drywall patch — the new compound area stands out as flat against the textured field. This guide covers identifying your texture type, matching it with spray can or a trowel, and feathering into the surrounding area.
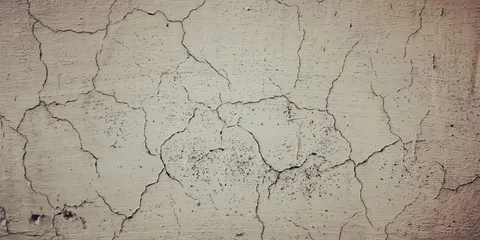
How to Repair Plaster Walls: Hairline Cracks, Loose Plaster, and Large Holes (2026)
Plaster walls in older homes require different repair techniques than drywall. This guide covers diagnosing loose plaster vs. drywall, filling hairline cracks with setting compound, stabilizing loose plaster with plaster washers, and patching holes.
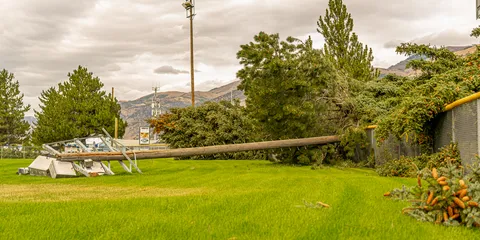
How to Fix a Broken Fence Post Cap
Learn how to repair or replace a cracked or missing fence post cap to protect your posts from rot and keep your fence looking sharp.
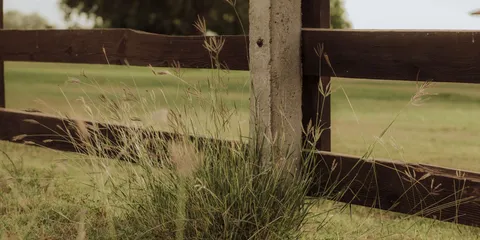
How to Fix a Leaning Fence Post
Learn how to straighten and stabilize a leaning or rotted fence post using a repair spike, concrete collar, or full replacement without removing the entire fence.
How to Fix a Slow Draining Tub: Hair Clogs, Stoppers, and Drain Traps
Clear a slow draining bathtub yourself by removing hair clogs, cleaning the pop-up stopper, and understanding the difference between drum traps and P-traps.
How to Replace a P-Trap Under a Sink (2026)
The P-trap is the U-shaped pipe under every sink that holds water to block sewer gases. If it's leaking, cracked, or the sink is draining slowly, replacement takes 15 minutes and costs under $15.
How to Weatherstrip a Sliding Door: Step-by-Step Guide
Replace worn weatherstripping on a sliding patio door to stop drafts, reduce energy loss, and keep out insects and moisture.
How to Fix a Broken Attic Ladder
Repair a pull-down attic stair with this complete guide covering broken springs, cracked rails, hinge replacement, folding mechanism fixes, and sealing the frame gap.
How to Fix a Broken Wall Anchor in 10 Minutes ($1–$8 Toggle Anchor Fix)
Remove a failed drywall anchor and install the right toggle anchor replacement in 10 minutes so your wall mount holds securely. Anchors cost $1–$8 at any hardware store.
How to Fix a Broken Carbon Monoxide Detector
Learn how to troubleshoot, reset, and replace a malfunctioning carbon monoxide detector to keep your home safe from CO poisoning.

How to Fix a Leaking Shower Arm Flange
Learn how to stop leaks and seal a loose or corroded shower arm escutcheon flange against the wall to prevent water damage behind your tile.

How to Extend a Gutter Downspout Away From the Foundation (2026)
A downspout that dumps water next to the foundation is a major source of basement flooding and foundation damage. This guide covers adding a downspout extension, installing a buried drain pipe, and the correct slope and distance for safe water discharge.

How to Fix a Broken Door Frame: Kick-In Damage Repaired in 1 Hour ($15–$65 in Parts)
Door frame kicked in or split? Secure the weak point with a 3-inch door reinforcement plate ($15–$35) for kick-in damage, or epoxy wood filler for splits and rot. A fully shattered jamb needs a door frame repair kit ($45–$65) — restores full strength in about an hour without removing the door.
How to Fix a Broken Toilet Handle: Chain, Arm, and Flapper Fixes
Repair or replace a toilet flush handle yourself by adjusting the lift chain, swapping out a corroded handle arm, and understanding how the flapper rod connects to it all.

How to Fix a Garage Floor Crack: Filler, Polyurea, and Control Joint Repair (2026)
Garage floor cracks range from cosmetic hairline cracks to structural cracks indicating settlement. This guide covers sealing hairline cracks with polyurea filler, repairing wider cracks with polymer-modified concrete, and recognizing when cracks indicate a larger problem.
How to Fix a Refrigerator Door Seal: Testing, Cleaning, and Replacing the Gasket
Test and fix a refrigerator door seal that is letting cold air escape — cleaning a sticky gasket, realigning the door, and replacing a worn gasket to save energy.
How to Replace Garage Door Weatherstripping: Bottom Seal, Side Seals, and Top Seal (2026)
Worn garage door weatherstripping lets in rain, pests, cold air, and carbon monoxide. This guide covers replacing the bottom door seal, side seals, top seal, and threshold strip so your garage stays dry, energy-efficient, and pest-free.
How to Fix a Dryer That Takes Too Long: Vent Blockage and Airflow Fixes
Fix a dryer that runs multiple cycles but still leaves clothes damp — diagnosing vent blockage, lint screen issues, and reduced airflow as the top causes.
How to Fix a Leaking Basement Sump Pit
Learn how to seal cracks in a basement sump pit liner to stop water intrusion and keep your sump pump working reliably.
Central AC Installation Cost 2026: $3,800–$7,500 Installed
Central AC installation costs $3,800–$7,500 for a 2,000 sq ft home. A 2.5-ton split system runs $4,000–$6,500 installed. Pricing by tonnage, SEER rating, and ductwork needs.
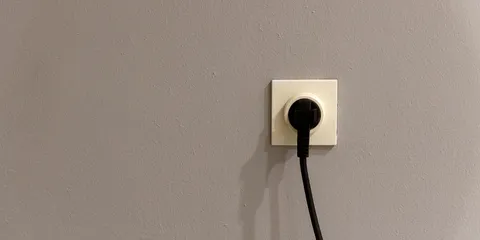
How to Fix a Broken Light Fixture Socket
Replace a burned-out or damaged light fixture socket in a ceiling fixture so your light works reliably and safely without replacing the entire fixture.
How to Install a Towel Bar: Into Studs, Tile, and Drywall (2026)
Installing a towel bar on drywall, tile, or into a stud. This guide covers each mounting method, how to find the right anchor for your wall type, and how to get both ends level without measuring twice.

How to Regrout Tile: Remove Old Grout and Apply Fresh Grout in a Weekend
Regrouting crumbling or discolored tile grout restores the look and waterproofing of your bathroom or kitchen tile without replacing the tile itself. This guide covers grout removal, color matching, and application for a professional-looking result.

How to Repair a Fiberglass Shower: Cracks, Holes, and Gel-Coat Damage (2026)
Fiberglass and acrylic shower bases crack under point loads and develop stress cracks over years of use. This guide covers diagnosing flex cracks vs. structural cracks, applying gel-coat patch kits, and backing unsupported areas that flex.
How to Fix a Leaking Shower Faucet: Single-Handle Cartridge and Two-Handle Repair
Fix a shower faucet that drips from the showerhead or leaks when turned off — replacing cartridge, seat washer, or O-rings depending on faucet type.
How to Fix a Squeaky Stair Tread
Learn how to silence a squeaky stair tread from above or below using screws, construction adhesive, and shims for a permanent, noise-free fix.
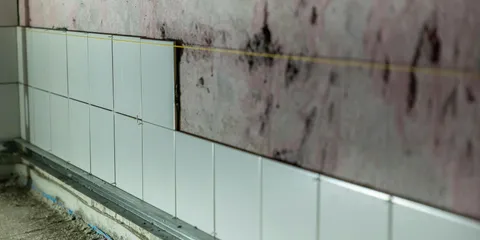
How to Fix a Bathroom Tile That Fell Off (Reattach Without Replacing the Whole Row)
Bathroom tile fell off? Scrape off old mastic, apply mosaics adhesive or thinset ($5–$10), press tile back, let cure 24 hours, then regrout. Costs $5–$25 in materials. Takes 30 minutes of work — most is wait time.

How to Fix a Broken Attic Hatch Seal
Learn how to replace weatherstripping and add insulation to a pull-down attic hatch to stop heat loss and improve energy efficiency.
How to Fix a Broken Window Blind
Learn how to repair the most common window blind problems including broken slats, tangled cords, stuck tilt rods, and broken lift mechanisms.

How to Fix Broken Window Weatherstripping
Learn how to identify failing window weatherstripping and replace it yourself to stop drafts, reduce energy bills, and improve home comfort.
How to Fix a Dented Garage Door Panel
Repair a dented steel garage door panel using a rubber mallet, plunger method, or panel filler to restore your door appearance without full replacement.

How to Fix a Wet Crawl Space
Learn how to diagnose and fix a wet crawl space by improving drainage, sealing vents, and installing a vapor barrier or sump pump.

How to Fix a Broken Outdoor Motion Sensor Light
Learn how to troubleshoot, adjust, and replace a broken outdoor motion sensor light with this practical DIY repair guide.
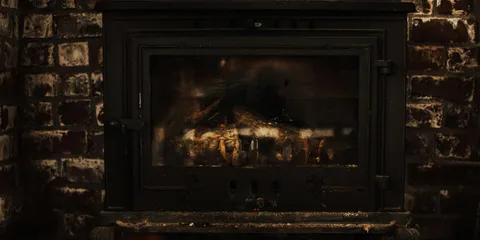
How to Fix a Drafty Fireplace: Damper, Chimney Balloon, Glass Doors, and Flue Cap
Stop cold air pouring in through your fireplace by repairing or replacing the damper, installing a chimney balloon, adding glass doors, fitting a smoke guard, and capping the flue.

How to Fix a Kitchen Sink Sprayer: Low Pressure, Won't Spray, and Stuck in Spray Mode (2026)
A kitchen sink side sprayer that won't spray, has low pressure, or stays in spray mode has a failed diverter valve, clogged spray head, or stuck trigger mechanism. This guide covers diagnosing and fixing each issue.
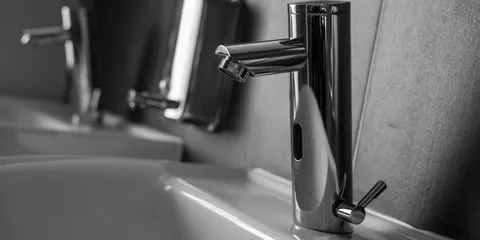
How to Fix a Leaking Bathroom Faucet Base
Replace worn O-rings and deck gaskets on a deck-mount bathroom faucet to stop water from leaking around the base and protect your vanity top.
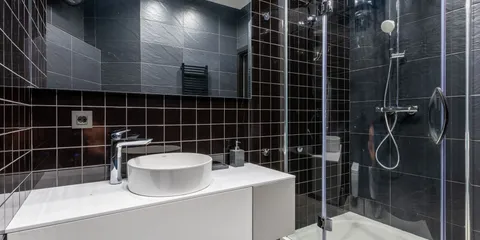
How to Clean a Shower (Tile, Glass, Grout, and Fixtures)
Complete shower cleaning guide — tile walls, glass doors, grout lines, the floor pan, and the showerhead. Includes soap scum removal and mold prevention.
How to Fix a Leaking Hose Bib: Packing Nut, Washer, and Replacement
Diagnose and fix an outdoor faucet that drips from the spout or leaks around the handle — packing nut tightening, washer replacement, and full hose bib replacement steps.

How to Unclog a Drain: Sink, Tub, and Shower Drain Fixes That Actually Work
A clogged drain is almost always a buildup of hair, soap scum, or grease — and most clogs clear without calling a plumber. This guide covers every method from a $5 hair catcher to a drain snake, ranked from easiest to most involved.
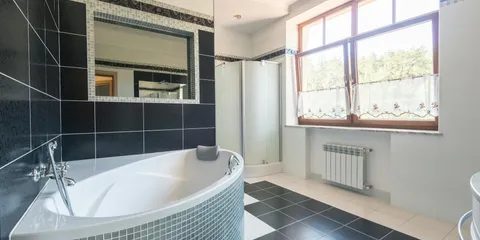
How to Fix a Bathroom Floor Tile
Repair a loose, cracked, or stained bathroom floor tile by safely removing it, applying fresh thinset, setting a replacement tile, grouting, and sealing the finished repair.
How to Fix a Broken Deck Board: Remove, Sister, Fasten, and Seal
A split, rotting, or popped deck board is a trip hazard and a structural starting point for bigger decay. This guide covers prying out old boards, sistering joist support, choosing the right fasteners, and matching stain and sealant.

How to Fix a Dripping Shower Head: Replacing Washers, O-Rings, and Cartridges (2026)
A shower head that drips after shutting off has a worn washer, O-ring, or cartridge in the valve body — not in the shower head itself. This guide covers identifying which valve type you have, replacing the internal seal, and stopping the drip.
How to Fix a Squeaky Staircase: Screws, Shims, and Under-Stair Repairs
Silence squeaky stairs by identifying whether the noise comes from the tread rubbing the riser or stringer, then fixing it with screws, shims, or glue blocks from above or below.
How to Fix a Clogged Main Sewer Line
Learn how to identify, diagnose, and clear a main sewer line clog using a drain snake or hydro-jet, and when to call a professional plumber.
How to Fix a Misaligned Door Strike Plate
Learn how to adjust or reposition a door strike plate so your door latches securely without forcing, rattling, or sticking.

How to Fix a Refrigerator That Isn't Cooling: Diagnose and Fix (2026)
A refrigerator that stops cooling has a short list of causes — most are DIY fixable. This guide covers checking the condenser coils, condenser fan, evaporator fan, and door seals before calling an appliance repair tech.
How to Fix an Attic Air Leak
A complete guide to attic air sealing — finding and fixing air leaks at top plates, can lights, plumbing penetrations, and attic hatches using foam and caulk.
How to Replace a Broken Window Pane: Glass Removal and Installation (2026)
Replacing a single-pane window glass is a DIY-friendly repair. This guide covers safely removing broken glass, measuring for a replacement pane, applying glazing compound, and seating the new glass in a wood sash.
How to Fix a Broken Light Switch in 15 Minutes ($5–$15, No Electrician Needed)
Broken light switch? Replace it in 15 minutes with a $5–$15 switch from any hardware store. Turn off the breaker, swap the wires to the same terminals, done. Covers single-pole, 3-way, and dimmer switches — plus how to tell if it's the switch or a deeper wiring issue.
How to Fix a Cracked Grout in Kitchen Backsplash
Learn how to remove, regrout, and seal cracked backsplash grout lines to restore your kitchen tile and prevent moisture damage behind the wall.

How to Fix a Leaking Pool Skimmer Basket
Stop a leaking pool skimmer by replacing the basket, inspecting the weir door, and sealing the skimmer throat — a straightforward repair any pool owner can handle.
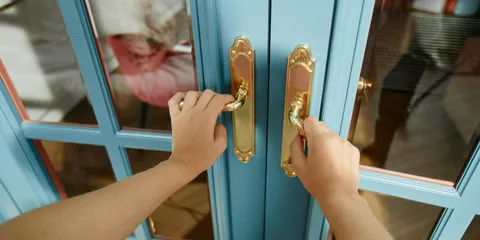
Loose Door Handle? Fix It in Minutes (2026) — 3 Fixes for Every Handle Type
Tighten the set screw with an Allen wrench — usually fixes it in 30 seconds. If that doesn't work: pop the decorative collar and tighten the mounting screws underneath. Last resort: replace the worn spindle. Covers lever handles, knobs, interior, and exterior.

How to Fix Low Water Pressure in a Shower: Causes and Fixes (2026)
Low shower pressure is usually caused by a clogged shower head, a flow restrictor, or a partially closed valve. This guide covers all causes from easiest to hardest fix, including whole-house vs. single-fixture pressure problems.
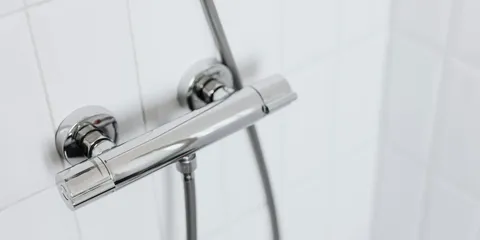
How to Fix a Broken Shower Diverter
Learn how to diagnose and repair a faulty shower diverter valve that won't redirect water from the tub spout to the showerhead — including tub spout diverter replacement and three-way valve repair.
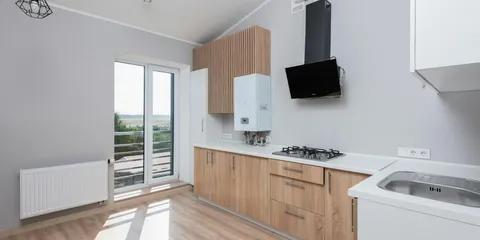
How to Fix a Kitchen Cabinet Soft-Close Hinge
Learn how to adjust, repair, or replace a soft-close cabinet hinge that is slamming, staying open, or failing to close all the way.
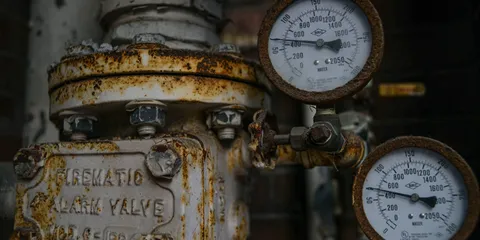
How to Fix a Leaking Basement Pipe
Locate and repair a leaking basement pipe using pipe clamps, epoxy putty, or compression couplings before water damage spreads.

How to Repair a Deck: Fix Boards, Railings, Ledger, and Structure (2026)
Deck boards rotting, railings loose, or ledger sagging? This guide covers every deck repair from single board replacement to structural post and joist fixes — what to DIY and what to escalate.

How to Fix a Tripped Circuit Breaker in 2 Minutes (Reset vs. Replace Guide)
A tripped breaker takes 2 minutes to reset: flip it fully OFF then firmly ON. If it trips again immediately, you have an overloaded circuit or faulty breaker — here's how to tell the difference and when to call an electrician.
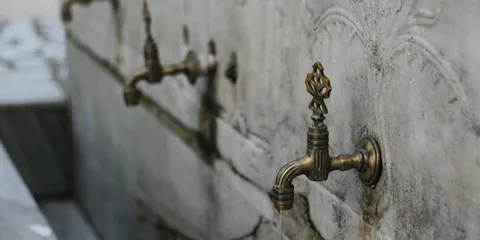
How to Fix a Broken Outdoor Spigot Backflow Preventer
Learn how to test, repair, and replace a failing backflow preventer on an outdoor hose bib to protect your drinking water supply.

How to Fix a Broken Shower Door Hinge in 20 Minutes ($10–$30 Replacement)
Replace a broken frameless shower door hinge in 20 minutes with the right hardware and basic tools. Replacement hinges cost $10–$30 and require no professional.
How to Fix a Cracked Concrete Patio
Learn how to fill and seal hairline cracks, medium cracks, and larger spalled areas in a concrete patio to stop water infiltration and prevent further damage.
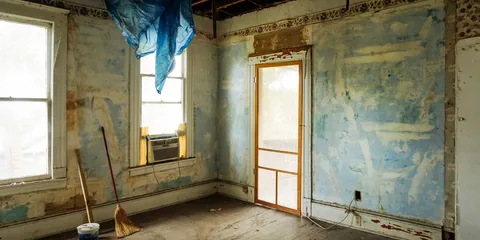
How to Fix a Peeling Paint Ceiling: Scraping, Priming, and Repainting the Right Way
Peeling ceiling paint is caused by moisture, poor adhesion, or incompatible paint layers — learn how to identify the cause, prep the surface properly, and repaint for a lasting finish.
How to Fix a Warped Wood Floor Plank
Learn how to identify the cause of a warped hardwood floor plank and fix it by drying, weighting, re-nailing, or replacing the affected board.

How to Fix Chimney Flashing: Sealing Leaks at the Roof-Chimney Junction (2026)
Chimney flashing is the most common source of roof leaks. Failed sealant and lifted step flashing allow water to enter at the chimney-roof junction. This guide covers inspecting chimney flashing, resealing with roofing caulk, and knowing when flashing needs full replacement.

How to Resurface a Concrete Patio: A Complete DIY Guide
Restore a pitted, stained, or worn concrete patio with resurfacer — no full replacement needed.
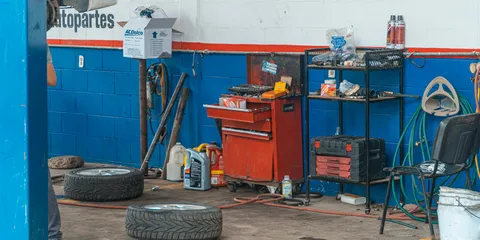
How to Fix a Furnace Blower Wheel: Clean, Balance, or Replace ($0–$75)
Furnace blower wheel making noise or not moving air? Dirty wheel is the most common cause — cleaning takes 30 minutes and is free. A cracked or bent wheel needs replacement ($45–$75 part, 1-hour install). Covers all gas furnace blower types.
How to Fix a Sticking Door Latch: Strike Plate, Hinge Shims, and Sag Repairs
Learn how to fix a door latch that won't catch by adjusting the strike plate, replacing the latch plunger, shimming sagging hinges, and correcting door sag for a smooth, secure close every time.
How to Fix a Broken Ceiling Fan Blade Bracket in 15 Minutes ($3–$12 Replacement)
Ceiling fan blade bracket broken or cracked? Replace it with a matching bracket for $3–$12 — most fans use universal 3-hole brackets. Takes 15 minutes with a screwdriver and no wiring involved.
How to Fix a Broken Toolbox Latch
Repair or replace a broken toolbox latch to keep your tools secure and organized using simple hardware and basic hand tools.

How to Fix a Drafty Exterior Wall
Learn how to find and seal air leaks in exterior walls using insulation, caulk, and weatherstripping to stop cold drafts and lower your energy bills.

How to Fix a Sticking Door: Planing, Sanding, and Adjusting Hinges (2026)
A door that sticks or drags usually has one of three causes: swollen wood from humidity, a hinge that has shifted, or a settling frame. This guide covers diagnosing the cause, planing and sanding the binding edge, and adjusting hinges.
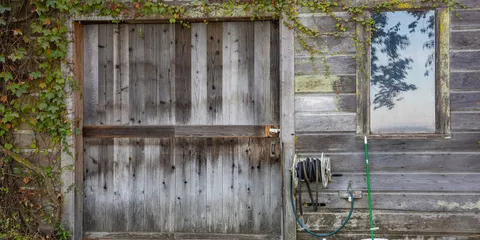
How to Fix a Leaking Garden Hose Reel (2026)
A garden hose reel that drips or sprays water is usually caused by a failed O-ring at the inlet swivel, a cracked outlet fitting, a loose hose coupling, or a stuck internal valve. This guide walks through each leak point and how to fix it.
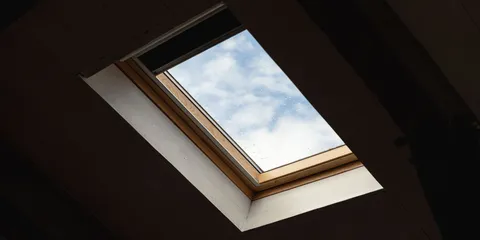
How to Fix a Leaking Skylight: Flashing, Sealant, and Condensation Diagnosis (2026)
A leaking skylight is usually a flashing failure, not a cracked lens — the seal where the skylight curb meets the roof is the most common failure point. This guide covers distinguishing condensation from water intrusion, resealing the skylight flashing, and knowing when to replace.
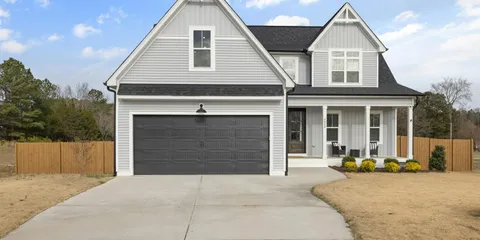
How to Fix a Stuck Garage Door
Diagnose and fix a garage door that will not open or close, covering common causes like misaligned tracks, broken springs, dead openers, and frozen weather seals.
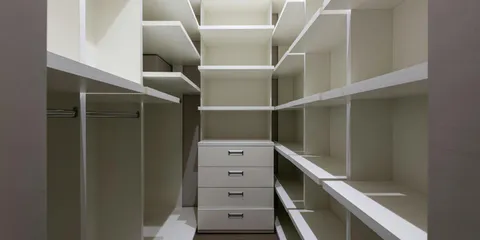
How to Fix a Broken Closet Shelf in 15 Minutes ($0–$20 Bracket or Pin Fix)
Repair a sagging or collapsed closet shelf in 15 minutes by replacing shelf pins, installing wall anchors, or sistering a weak board. Parts cost $0–$20.

How to Fix a Kitchen Cabinet Hinge
Fix broken or misaligned kitchen cabinet hinges yourself — tighten loose screws, adjust European concealed hinges, and replace damaged hinges completely.
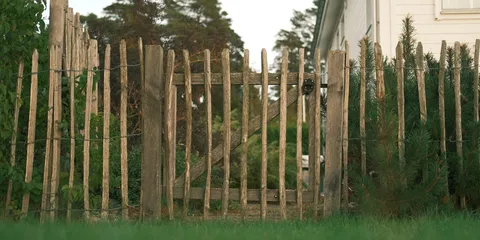
How to Fix a Sagging Fence Gate: Anti-Sag Kits, Hinge Adjustment, and Frame Repair (2026)
A sagging fence gate that drags on the ground or won't latch is a common DIY fix. This guide covers anti-sag cable kits, hinge tightening, gate frame squaring, and post reinforcement to get your gate swinging freely and latching reliably again.
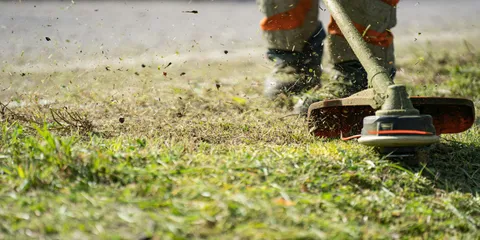
How to Fix an Uneven Lawn: Level Bumps, Fill Low Spots, and Topdress for a Flat Surface
Bumpy or uneven turf is a tripping hazard and makes mowing difficult — fix it with topdressing, core aeration, and targeted low-spot filling using sand and compost blended to your soil type.

How to Fix a Broken Outdoor Timer Outlet
Learn how to diagnose and replace a failed plug-in or hardwired outdoor timer outlet to restore automatic control of lights, pumps, and seasonal decorations.

How to Fix a Broken Sump Pump Float
Learn how to diagnose and repair or replace a faulty sump pump float switch to keep your basement dry and your pump working reliably.
How to Fix a Rotted Porch Floorboard
Learn how to identify, remove, and replace rotted porch floorboards safely so your porch looks great and stays structurally sound for years.
How to Fix Peeling Garage Floor Epoxy: Surface Prep and Recoating
Fix garage floor epoxy that is peeling, bubbling, or flaking — identifying why it failed, proper surface preparation, and how to apply a new coat that bonds correctly.
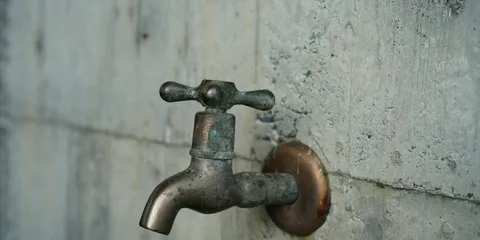
How to Fix a Leaking Outdoor Spigot Stem
Learn how to stop a dripping outdoor faucet by replacing the packing washer or stem packing nut — a 30-minute DIY repair that prevents wasted water and freeze damage.

How to Fix a Leaking Pool Return Jet: O-Ring Replacement in 30 Min ($3–$8 Fix)
Pool return jet leaking or bubbling air? Replace the O-ring for $3–$8 in 30 minutes — no draining needed. Turn off the pump, remove the eyeball fitting, swap the O-ring, done. Also covers cracked fittings that need full replacement ($12–$25).
How to Fix Peeling Exterior Paint: Prep, Prime, and Repaint (2026)
Peeling exterior paint is almost always a prep failure or a moisture problem. This guide covers diagnosing why paint is peeling, removing all failing paint, priming bare wood correctly, and repainting for a lasting finish.
How to Fix a Broken Door Threshold in 30 Minutes ($15–$40 Replacement)
Remove and replace a cracked, warped, or damaged door threshold in 30 minutes — stops drafts, water infiltration, and energy loss. New threshold costs $15–$40 at any hardware store.
How to Fix a Broken Towel Bar That Fell Off the Wall
Reattach a towel bar securely using toggle bolt anchors or studs, repair the drywall damage left behind, and ensure a lasting installation.
How to Fix a Cracked Ceramic Bathroom Tile
Learn how to repair or replace a cracked ceramic bathroom tile without removing surrounding tiles, using basic tools and materials available at any hardware store.

How to Fix a Loose Fence Post
Learn how to stabilize a wobbly or leaning fence post yourself using concrete, post repair spikes, or sister-post techniques without digging it out.
How to Fix a Wobbly Stair Banister
Tighten a loose stair banister by securing newel posts, re-gluing spindles, and reinforcing rail connections so your railing is solid and safe again.
How to Repair Concrete Cracks: Sidewalk, Patio, and Slab Crack Filling (2026)
Cracks in concrete are categorized by width and whether they indicate movement. This guide covers filling hairline and medium cracks with the correct product, sealing for water prevention, and identifying cracks that require professional evaluation.
How to Fix Broken Chimney Flashing
Learn how to diagnose, reseal, and replace damaged chimney flashing to stop roof leaks before they cause serious interior water damage.
How to Fix a Broken Dryer Belt
Learn how to replace a broken or worn dryer drum belt yourself with this step-by-step guide covering most standard electric and gas dryers.

How to Fix a Broken Kitchen Island Leg
Learn how to repair or replace a broken kitchen island leg with the right tools, materials, and techniques to restore stability and appearance.
How to Fix a Broken Solar Panel Mounting Clamp
Replace a failed solar panel mid-clamp or end-clamp on a standard rail mounting system to keep your array secure against wind and weather loads.
How to Fix a Leaking Bathtub Faucet: Stem Washers, Cartridges, and Diverter Valves
Stop a dripping bathtub faucet yourself — learn how to replace stem washers on two-handle faucets, swap a single-handle cartridge, fix a diverter valve, and shut off the water supply safely.
How to Fix a Leaking Hydronic Baseboard Heater
Learn how to diagnose and repair common leaks in hydronic baseboard heating systems, including valve packing, fitting connections, and bleed valve drips.
How to Fix a Squeaky Garage Door: Lubrication, Hardware, and Roller Replacement
Silence a noisy garage door by lubricating hinges, rollers, and springs, tightening loose hardware, and replacing worn rollers before they cause bigger problems.
GFCI Outlet Keeps Tripping? Reset in 2 Min or Replace in 15 (2026)
A GFCI that trips immediately is either failing ($15 part, 15-min swap) or protecting against a real wiring fault. Find out which and fix it safely without an electrician.
How to Fix a Broken Chimney Damper
Learn how to diagnose, repair, or replace a stuck or broken chimney damper plate and rod so your fireplace seals and drafts properly.
How to Fix a Broken Storm Window Latch
Learn how to repair or replace a broken storm window latch and lock so your window seals tightly and stays secure through every season.

How to Fix a Drafty Door: Weatherstripping, Threshold Adjustment, and Door Sweeps
Identify where air is leaking around your door and fix it with weatherstripping, door sweeps, threshold adjustment, or caulk — prioritized by effectiveness.
How to Install Hardwood Floors: Nail-Down, Glue-Down, and Float (2026)
Installing hardwood floors yourself saves $3–$6 per square foot in labor. This guide covers all three installation methods, subfloor prep, acclimation, layout, and finishing the edges.
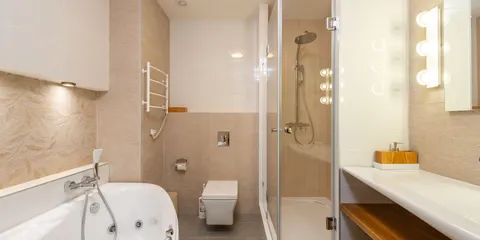
How to Fix a Leaking Bathroom Exhaust Fan
Learn how to diagnose and repair water dripping from a bathroom exhaust fan caused by condensation, a clogged duct, or a failed roof cap.
How to Fix a Leaking Shower Valve
Stop a dripping or leaking shower valve by replacing the cartridge or worn seals without calling a plumber.
How to Fix a Sagging Kitchen Cabinet Shelf
Repair or reinforce a bowing or sagging kitchen cabinet shelf using stronger shelf pins, a center support, or a replacement shelf made from a stiffer material.
How to Fix Frozen Pipes: Thawing, Prevention, and Burst Pipe Emergency Response (2026)
Frozen pipes stop water flow and can burst, causing thousands in water damage. This guide covers locating the frozen section, safely thawing it, and preventing pipes from freezing again — and what to do if a pipe has already burst.
How to Tile a Bathroom Floor: DIY Step-by-Step Guide
Complete guide to laying bathroom floor tile — layout planning, cutting, thinset application, grouting, and sealing. Includes the layout mistake that ruins symmetry.

How to Clean a Wood Deck: Pressure Washing, Deck Cleaner, and Brightener
Guide to cleaning a wood deck properly — choosing between pressure washing and chemical cleaners, using deck brightener before staining, and removing mold and gray weathering.
How to Fix a Broken Closet Rod in 15 Minutes ($5–$20 Replacement)
Repair or replace a sagging or snapped closet rod and its bracket supports in 15 minutes. Replacement steel rods and brackets cost $5–$20 and require no special tools.
How to Set Up a Smart Home Hub: Amazon Echo, Google Home, and Apple HomeKit
Beginner guide to choosing and setting up a smart home hub — comparing Echo, Google Home, and HomeKit, and connecting your first smart devices.
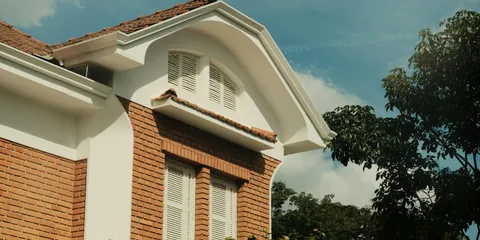
How to Fix a Blocked Attic Soffit Vent
Learn how to clear blocked soffit vents, restore proper attic airflow, and prevent insulation from obstructing your eave vents to stop moisture and heat damage.
How to Fix a Popcorn Ceiling Crack: Patch, Texture, and Paint
Repair cracks in a popcorn ceiling by scraping the texture around the damage, applying joint compound, matching the texture with spray or brush, and painting to blend seamlessly.

How to Fix a Sliding Glass Door That's Hard to Open or Won't Close
A sliding glass door that sticks, jumps the track, or lets in drafts is almost always a roller or track problem — here's how to diagnose, clean, adjust, and replace rollers yourself.
How to Install a Bathroom Grab Bar: Step-by-Step Guide
Learn how to install a bathroom grab bar securely into wall studs or with toggle anchors, choosing the right location for a shower, tub, or toilet.

How to Mount a TV on the Wall: Finding Studs, Choosing a Bracket, and Cable Management (2026)
Wall-mounting a TV requires hitting two studs for a secure anchor. This guide covers selecting the right bracket, locating studs, drilling and mounting, TV height, and hiding cables in the wall or with a raceway.
How to Clean Vinyl Siding: Power Washing vs. Hand Washing and Mildew Removal (2026)
Dirty or mildewed vinyl siding is one of the most impactful exterior cleaning jobs. This guide covers safe cleaning solutions, power washer pressure settings for vinyl, and how to remove mold and mildew without damaging the surface.
How to Fix a Broken Freezer Door Gasket
Replace a torn or stiff refrigerator or freezer door seal yourself to restore an airtight fit and stop wasting energy.

How to Fix a Leaking Condensate Drain Line
Learn how to clear a clogged or leaking AC condensate drain line yourself and prevent water damage, mold, and system shutdowns.
How to Fix a Sliding Screen Door: Rollers, Frame, Screen, and Track (2026)
A sliding screen door that drags, jumps the track, or has a torn screen is a straightforward DIY repair. This guide covers roller replacement, bent frame fixes, screen re-screening, and track cleaning so your door glides smoothly again.
How to Clean a Garage: Decluttering, Floor Cleaning, and Organization
A complete guide to cleaning and organizing your garage in three phases — decluttering, deep cleaning the floor and walls, and setting up storage systems that last.
How to Fix a Broken Doorbell
Learn how to diagnose and repair a broken doorbell by testing and replacing the button, chime, and transformer yourself.

How to Fix a Broken Exterior Window Shutter
Learn how to repair or replace broken louvered shutter slats and damaged hinge hardware so your exterior shutters look great and hang straight.
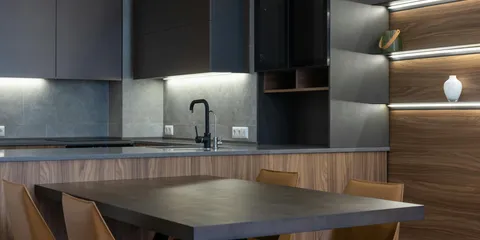
How to Fix Under Cabinet Lights in 5 Minutes (Bulb, Driver, or Wiring)
Most under-cabinet light failures are a burned-out bulb ($3–$8) or a tripped LED driver (free reset). Fix it in 5 minutes — no wiring skills needed.

How to Fix a Cracked Toilet Flange
Repair or replace a cracked toilet flange yourself with this complete guide covering diagnosis, repair rings, full flange replacement, and getting a leak-free wax seal.

How to Fix a Stuck Casement Window Crank
Learn how to diagnose and repair a casement window crank that is stuck, stripped, or broken so your window opens and closes smoothly again.

How to Insulate Pipes: Prevent Freezing and Reduce Heat Loss (2026)
Insulating pipes prevents freezing in winter and reduces heat loss on hot water lines. This guide covers foam pipe insulation, heat tape, and how to insulate pipes in crawl spaces, basements, and outside walls.
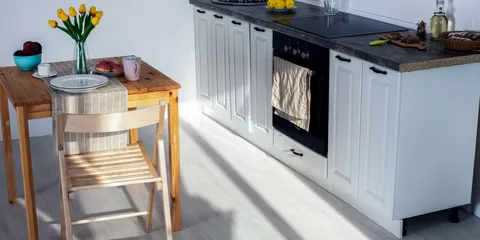
How to Fix a Broken Cabinet Hinge in 10 Minutes (Without Stripping the Wood)
Broken cabinet hinge? Tighten loose screws with toothpicks and wood glue, replace bent European hinges for $2–$8, or use oversized screws for stripped holes. Fixes that last — no new drill holes needed.
How to Fix a Broken Drawer: Slides, Runners, and Joints (2026)
Drawers that stick, fall out, or have broken corners are fixed by replacing drawer slides, reglueing joints, or reinstalling the slide hardware. This guide covers wooden runner drawers and modern ball-bearing slides.
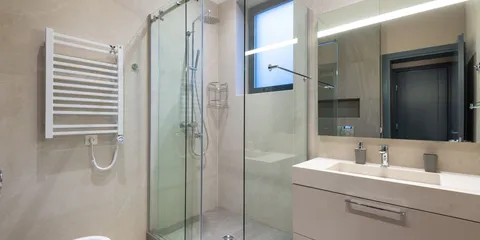
How to Fix a Broken Shower Glass Door Seal
Learn how to replace a worn or missing frameless shower door sweep and seal to stop leaks, eliminate mold, and restore a watertight barrier.
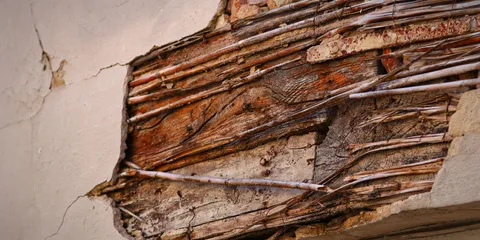
How to Fix a Cracked Plaster Wall: Hairline to Structural Repairs
Repair cracked plaster walls using mesh tape, setting compound, and skim coat techniques — from hairline cracks to large structural failures — and restore a smooth paintable surface.
How to Fix a Leaking Garbage Disposal: Sink Flange, Side Leak, and Bottom Drain
Diagnose and fix a garbage disposal that leaks — identifying whether the leak is from the sink flange, side discharge, or bottom reset button, with repair steps for each.

How to Fix a Toilet Leaking at the Base: Wax Ring Replacement and Flange Repair (2026)
Water pooling around the base of your toilet usually means a failed wax ring or a damaged toilet flange. This guide covers diagnosing the leak, replacing the wax ring, repairing a broken flange, and resetting the toilet correctly.
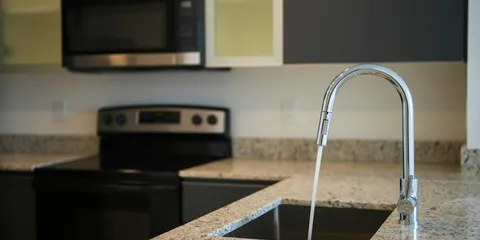
How to Fix a Leaky Kitchen Faucet
Learn how to stop a dripping kitchen faucet by replacing the cartridge, O-rings, or seat washer depending on your faucet type.
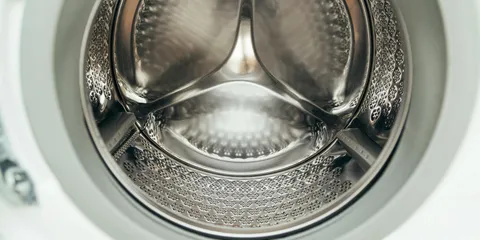
How to Clean a Washing Machine Drum: Front-Load and Top-Load Deep Clean
Step-by-step guide to deep cleaning a washing machine drum — removing mold, odors, and detergent buildup from both front-load and top-load machines.
How to Fix a Cracked Brick Chimney
Learn how to repair cracked bricks and deteriorated mortar joints on a chimney to stop water intrusion and prevent further structural damage.
How to Fix a Broken Ceiling Fan Pull Chain
Learn how to replace a broken ceiling fan pull chain switch yourself without calling an electrician.

How to Fix a Broken Fence Gate Latch
Learn how to repair or replace a broken fence gate latch and sagging hinges so your gate closes securely and swings smoothly again.
How to Fix a Broken Water Pressure Regulator
Learn how to diagnose, adjust, and replace a faulty water pressure regulator to restore safe water pressure throughout your home.

How to Fix a Corroded Shower Drain Cover
Remove and replace a corroded, rusty, or stuck shower drain cover using the right tools and hardware, and prevent future corrosion with the correct drain cover material.
How to Regrout a Shower: Step-by-Step Guide (2026)
Remove old cracked or moldy shower grout and apply fresh grout yourself. This guide covers grout removal tools, grout type selection, application, and sealing — no tile work required.
How to Seal a Concrete Floor: Basement, Garage, and Patio (2026)
Seal a concrete floor to stop dust, moisture, and stains. This guide covers penetrating sealers vs. topical coatings, surface prep, application steps, and the difference between sealing and epoxy coating.
Kitchen Sink Installation Cost in 2026: DIY vs. Plumber Prices
How much does kitchen sink installation cost? Breakdown of sink types (drop-in, undermount, farmhouse), labor rates, and how to cut costs by doing part of the job yourself.
How to Fix a Broken Garage Wall Shelf
Learn how to re-anchor a sagging or fallen garage wall shelf by finding studs, installing proper hardware, and securing brackets that hold real weight.
How to Fix a Broken Retaining Wall
Learn how to repair and reinforce a failing retaining wall with proper drainage fixes, block re-setting, and long-term stabilization techniques.
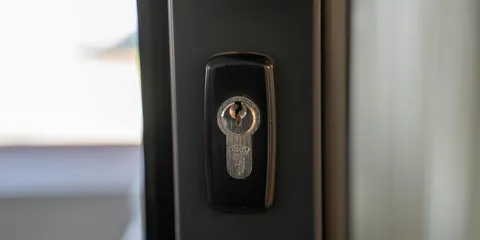
How to Fix a Sticky Door Lock
Diagnose and fix a stiff or sticky door lock by cleaning, lubricating, or adjusting the strike plate and latch mechanism yourself.
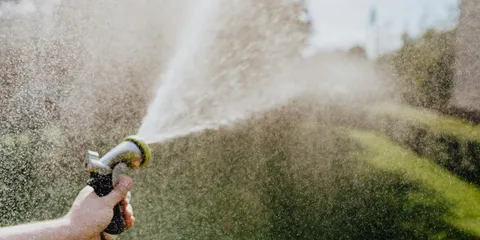
How to Fix a Leaky Outdoor Faucet (Hose Bib) in 30 Minutes (2026)
Outdoor faucet dripping from the spout or leaking at the handle? This guide covers both fixes: replacing the washer (spout drip) and tightening or replacing the packing nut (handle leak) — without calling a plumber.
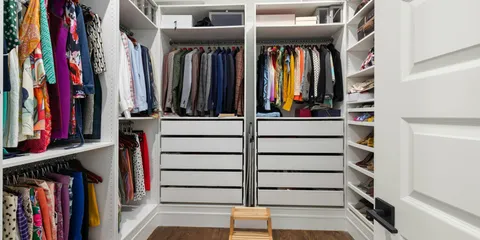
How to Fix a Sagging Closet Rod
Stop a sagging or fallen closet rod from collapsing under the weight of clothes by reinforcing brackets, adding center supports, or upgrading to a stronger rod system.
How to Fix a Broken Garage Ceiling Light
Learn how to safely replace a broken garage ceiling light fixture with the right tools and a few basic electrical skills.

How to Fix a Broken Garage Floor Epoxy Coating
Learn how to repair chipped, peeling, and bubbling garage floor epoxy coating with the right prep work and patching products.
How to Fix a Cracked Ceiling Plaster
Learn how to assess, stabilize, and patch cracked plaster ceilings using the right materials and techniques for a smooth, lasting repair.
How to Fix a Sagging or Bouncy Floor: Sistering Joists, Posts, and Crawl Space Repairs
A sagging or bouncy floor is a structural problem, but it is often a straightforward DIY fix using sistering joists, adjustable posts, or a combination of both.
How to Fix a Broken Kitchen Exhaust Hood Filter
Learn how to clean, repair, or replace a clogged or damaged range hood grease filter to restore full ventilation performance in your kitchen.
How to Fix a Broken Stair Tread
Learn how to repair or replace a cracked, split, or broken stair tread safely using basic woodworking tools and construction adhesive.
How to Fix a Sagging Gutter: Rehang and Realign in 30 Minutes (2026)
Gutters that sag in the middle or pull away from the fascia cause water damage to the foundation and siding. This guide covers replacing failed gutter spikes, installing gutter screws, and re-pitching for proper drainage.
How to Fix a Warped Laminate Countertop
Repair a bubbling, lifting, or warped laminate countertop using re-gluing, weight clamping, and surface restoration techniques that save you the cost of full replacement.
How to Fix a Cracked Foundation Block
Learn how to assess, clean, and repair cracks in concrete block foundation walls using hydraulic cement and masonry patching compound to stop water intrusion and restore structural integrity.

How to Fix a Rotted Exterior Door Frame
Learn how to repair a rotted exterior door frame using wood filler or sistering new lumber so your door seals, operates correctly, and looks great.

How to Wire a Ceiling Fan (Install or Replace in an Existing Box)
Wiring a ceiling fan is a straightforward electrical project — here's how to connect all the wires correctly, handle a fan with a light kit, and troubleshoot a fan that won't run.
How to Fix a Bathroom Exhaust Fan: Dead, Noisy, or Weak Airflow ($0–$45 Fix)
Bathroom exhaust fan not working? Clean the grille and fan blades first (fixes 40% of cases). Noisy fan needs bearing lubrication or motor replacement ($15–$45). Dead fan: check the switch, then the motor. Full replacement runs $25–$85 installed yourself.
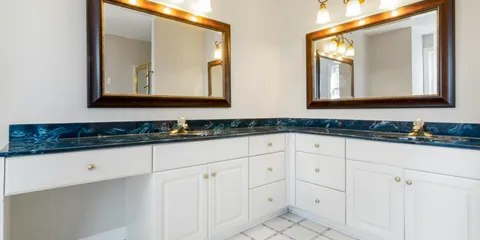
How to Fix a Broken Bathroom Mirror: Reframe or Replace in 30 Minutes ($0–$50)
Secure a loose mirror with the right clips or adhesive, reframe a cracked one, or do a full replacement in 30 minutes. Clips and adhesive cost $0–$15; replacement mirrors run $20–$50.

How to Fix a Burst Pipe
Stop water damage fast by learning how to shut off the water, apply an emergency repair, and complete a permanent pipe fix for a burst or cracked pipe.
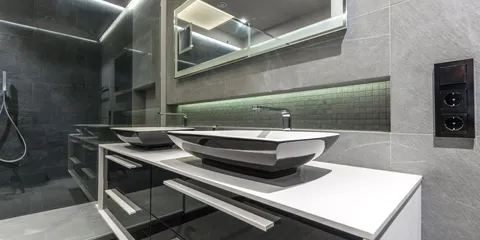
How to Fix a Cracked or Chipped Bathroom Vanity Top (2026)
A cracked or chipped bathroom vanity top can often be repaired rather than replaced. This guide covers epoxy filler repair, color matching, refinishing kits for cultured marble and porcelain, and when full vanity top replacement makes more sense.
How to Fix a Cracked Vinyl Fence Post
Learn how to repair and reinforce a cracked vinyl fence post using proven DIY methods that restore structural strength without replacing the entire post.
How to Fix a Leaky Outdoor Hose Bib: Packing Nut, Stem, and Cartridge Repair (2026)
A leaking outdoor hose bib (spigot) drips either from the spout when off or from around the handle when on. This guide covers tightening the packing nut, replacing the stem washer, swapping a cartridge, and when to replace the full spigot — including frost-free models.

How to Build a Raised Garden Bed: Materials, Sizes, and Step-by-Step Build (2026)
Build a cedar or pine raised garden bed from scratch in an afternoon. This guide covers the best wood species, ideal dimensions for reach, corner joint options, soil depth requirements, and how to fill without breaking the bank.
How to Fix a Broken Doorbell Transformer
Learn how to diagnose and replace a faulty doorbell transformer to restore your doorbell system safely and affordably.
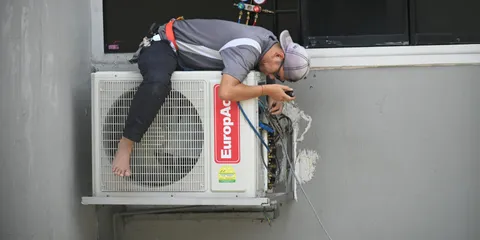
How to Fix a Clogged AC Condensate Drain
Clear a clogged air conditioner condensate drain line yourself to stop water leaks, prevent mold, and keep your AC running efficiently all summer.
How to Fix a Cracked Garage Door Panel
Learn how to repair or replace a cracked garage door panel yourself and restore your doors appearance, insulation, and structural integrity.
How to Fix a Door That Won't Close: 6 Causes and Fixes (2026)
Door not closing, sticking, or missing the strike plate? This guide diagnoses all 6 common causes — loose hinges, swollen wood, shifted strike plate, warped door, foundation movement — and shows how to fix each one.
How to Fix a Leaking Refrigerator: Water on the Floor and Pooling Inside (2026)
A refrigerator leaking water has one of four causes: a clogged defrost drain, a faulty ice maker supply line, a damaged door gasket, or a cracked drain pan. This guide covers finding the source, cleaning the drain, and replacing the water supply line.
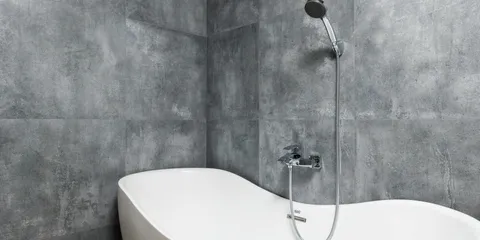
How to Fix a Leaky Shower: Diagnose and Fix Any Shower Leak (2026)
Shower leaking from the faucet, showerhead, or through the floor? This guide diagnoses the source and fixes each type — no plumber needed for most shower leaks.
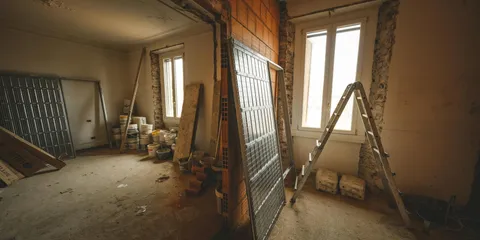
How to Fix a Sagging Ceiling: Causes, Repairs, and When to Evacuate
Identify the cause of a sagging ceiling and make safe repairs — from loose drywall screws to water damage to structural issues that require immediate attention.

How to Replace a Bathroom Exhaust Fan: Sizing, Wiring, and Duct Connection
Step-by-step guide to replacing an old bathroom exhaust fan — calculating the right CFM size, removing the old unit, wiring the new fan, and connecting the duct.
How to Fix a Cracked Plaster Ceiling
Learn how to repair hairline cracks, spider cracks, and larger plaster ceiling damage using the right materials and technique for a lasting finish.
How to Lubricate a Garage Door: Rollers, Hinges, Springs, and Tracks (2026)
A noisy or sluggish garage door almost always needs lubrication — not a service call. This guide covers what to lubricate, what product to use, and what never to put on a garage door track.

How to Fix a Noisy Bathroom Exhaust Fan: Rattling, Grinding, and Loud Operation (2026)
A noisy bathroom exhaust fan is usually caused by a loose grille, worn motor bearings, or accumulated dust on the fan blades. This guide covers cleaning, tightening, lubricating the motor, and replacing the motor or entire fan when needed.

How to Lay Tile: Thinset, Layout, Cutting, and Grouting (2026)
Laying ceramic or porcelain tile on a floor or wall. This guide covers substrate prep, layout lines, mixing thinset, setting tiles with proper coverage, cutting with a wet saw, and grouting for a professional finish.

How to Fix a Broken Concrete Retaining Wall Block
Learn how to reset, repair, or replace a cracked or displaced concrete retaining wall block before soil erosion or full wall failure sets in.
How to Fix a Broken or Loose Deck Railing
Step-by-step guide to repairing loose deck railing posts, replacing damaged rails, fixing wobbly balusters, and meeting residential building code requirements.

How to Fix a Cracked Pool Deck
Repair hairline, structural, and heaving cracks in a concrete pool deck yourself with this complete guide covering crack prep, filler selection, resurfacing, and sealing.
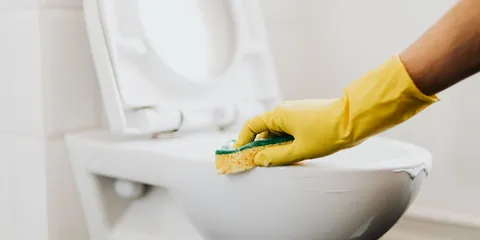
How to Fix a Cracked Toilet Tank: Seal vs. Replace ($20–$200)
Hairline crack above the waterline? Seal with waterproof epoxy ($10, 30-min fix). Crack below the waterline means the tank must be replaced ($70–$200). Don't let it drip.

How to Fix a Flickering Light Fixture: Bulb, Switch, and Wiring Causes (2026)
Flickering lights are almost always caused by a loose connection — usually at the bulb, the switch, or a wire terminal. This guide covers diagnosing whether the flicker is at the bulb, the switch, or in the wiring, and the specific fix for each.
How to Fix a Sticking Garage Door Cable
Learn how to diagnose, align, and replace a sticking or frayed garage door cable safely with this practical DIY guide.
How to Repair a Concrete Driveway: Cracks, Spalling, and Resurfacing
Guide to fixing concrete driveway problems — filling hairline cracks, repairing spalling surfaces, and resurfacing when repairs aren't enough.
How to Fix a Bubbling Paint Wall
Repair blistering or bubbling paint on interior walls by finding the moisture or adhesion cause, removing loose paint, priming, and repainting for a smooth lasting finish.

How to Fix a Cracked Chimney Crown
Seal chimney crown cracks before water infiltration causes expensive masonry damage — here is how to clean, prep, and apply flexible crown sealer yourself.
How to Fix a Cracked Fiberglass Bathtub
Learn how to repair cracks, chips, and stress fractures in a fiberglass or acrylic bathtub using a DIY repair kit for a smooth, watertight finish.
How to Fix a Leaking Main Water Shutoff Valve
Learn how to stop a dripping main shutoff valve by replacing the packing nut or packing washer without calling a plumber.
How to Fix a Rotted Deck Ledger Board
Learn how to safely repair or replace a rotted deck ledger board to restore structural integrity and prevent your deck from pulling away from the house.
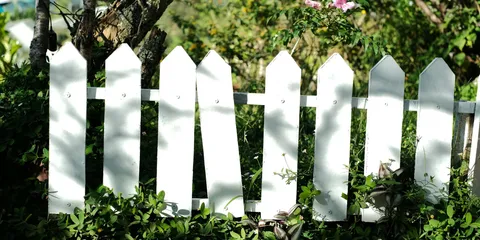
How to Fix a Broken Fence Picket
Learn how to remove and replace a cracked or rotted wood fence picket quickly using basic tools so your fence looks solid and uniform again.
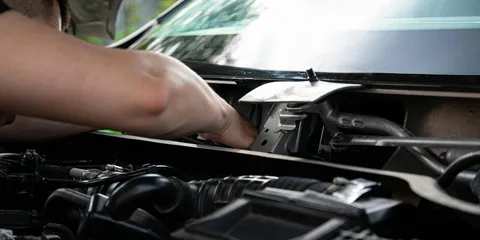
How to Fix a Range Hood Fan Not Working: Clean Filter, Reset, or Replace
Range hood fan not working? Clean the grease filters first (free fix). If still dead: reset the thermal fuse, replace the motor ($20–$60), or swap the full unit.
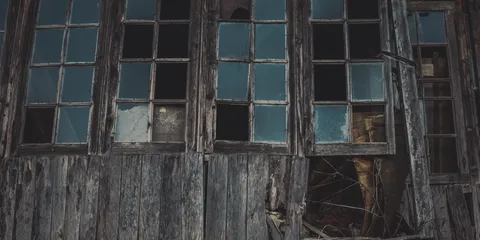
How to Fix a Broken Window Sash: Rope, Spring, and Balance Repair
Guide to repairing a window sash that falls down, won't stay open, or is stuck — covering sash rope replacement, spiral balance replacement, and block-and-tackle balance repair.
How to Fix a Chipped Bathtub: Porcelain, Enamel, and Acrylic Touch-Up Repair (2026)
A chipped bathtub exposes the substrate and rusts or stains rapidly if not repaired. This guide covers identifying the tub material, selecting the correct repair kit, and applying the repair for an invisible or near-invisible finish.
How to Fix a Slow-Filling Toilet Tank
Learn how to diagnose and fix a toilet tank that takes too long to refill by cleaning or replacing the fill valve and checking the water supply line.
How to Fix Damaged Wood Deck Boards
Learn how to identify, remove, and replace rotted or cracked wood deck boards yourself, and how to repair minor damage without full board replacement.
How to Install a Three-Way Switch: Wiring Two Switches for One Light (2026)
Three-way switches control a single light from two locations. This guide covers understanding three-way wiring (travelers and common terminal), replacing a defective three-way switch, and adding a second switch location.
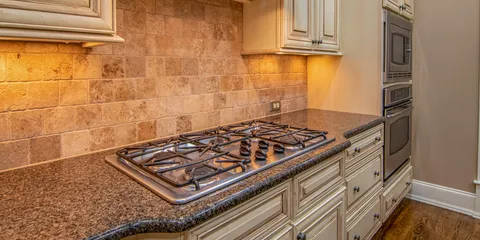
How to Fix a Broken Tile Backsplash
Learn how to repair and replace cracked or loose kitchen backsplash tiles yourself with simple tools and the right adhesive.
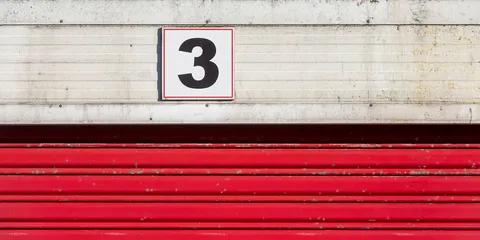
How to Replace a Garage Door Panel: Dent Repair, Single Panel Swap, and Full Section Replacement (2026)
A damaged garage door panel looks bad, affects insulation, and can misalign the door. This guide covers when to repair versus replace, how to swap a single section on a sectional door, and how to match panel profiles and colors on older doors.
How to Fix a Cracked Stair Tread Nose
Learn how to repair or replace a cracked stair nosing to restore the appearance of your stairs and eliminate a serious trip hazard.
How to Fix a Cracked Terrazzo Floor
Repair cracks in terrazzo flooring using epoxy filler, color-matched pigment, and surface polishing to restore a nearly invisible result without full floor replacement.
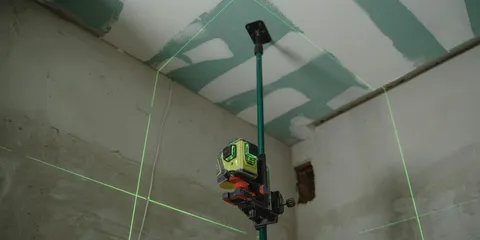
How to Fix a Drywall Ceiling Hole in 1–2 Hours (Any Size, Paint-Ready)
Patch any drywall ceiling hole — nail pop to 12-inch panel — with a California patch or backing board. Get a smooth, paint-ready finish in 1–2 hours without calling a drywaller.

How to Fix a Sump Pump: Not Turning On, Running Constantly, and Float Issues (2026)
A sump pump that won't turn on, runs without stopping, or hums without pumping has a failed float switch, a stuck or faulty switch, or a failed motor. This guide covers diagnosing and fixing each failure mode.

How to Fix an Exterior Door Handle
Learn how to diagnose and fix a loose, broken, or non-latching exterior door handle with this complete DIY repair and replacement guide.
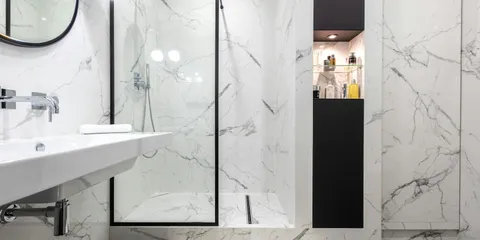
How to Fix a Leaking Shower Pan: Crack Repair, Liner Replacement, and Re-Grouting (2026)
A leaking shower pan can rot your subfloor and cause mold in weeks. This guide covers diagnosing the leak source, patching cracks in the pan, replacing a failed liner, resetting the drain flange, and re-grouting tile to stop water intrusion for good.
How to Fix a Leaking Water Softener Brine Tank
Learn how to diagnose and repair a cracked or overflowing water softener brine tank, including crack sealing and float valve adjustment.

How to Fix Cracks in Walls: Hairline Cracks, Settlement Cracks, and Corner Cracks (2026)
Wall cracks range from cosmetic shrinkage cracks to potential structural signals. This guide covers identifying crack types, patching drywall and plaster cracks with joint compound and mesh tape, and knowing which cracks need professional evaluation.

How to Fix a Broken Sliding Glass Door Lock
Learn how to diagnose and repair a broken sliding glass door lock mechanism so your door closes securely and your home stays protected.
How to Fix a Broken Toilet Wax Ring
Replace a failed toilet wax ring yourself in under two hours to stop leaks and sewer odors at the toilet base.
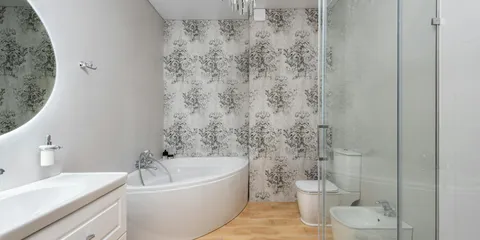
How to Fix a Cracked Bathtub Floor
Repair cracks in an acrylic or fiberglass bathtub floor yourself using the right filler, sandpaper, and refinishing paint to restore a watertight surface.
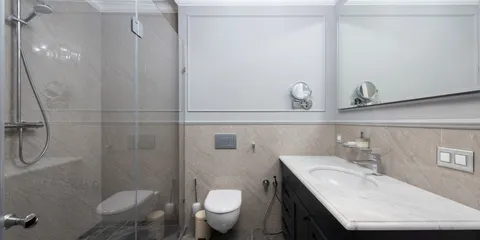
How to Fix a Leaking Toilet Supply Line
Stop a dripping toilet supply line for good with this step-by-step guide covering braided vs. plastic lines, compression fittings, shutoff valve packing, and full replacement.

How to Add an Outdoor Electrical Outlet: GFCI-Protected Exterior Outlet Installation (2026)
Adding an outdoor outlet requires a GFCI outlet, weatherproof in-use cover, and connection to an indoor circuit. This guide covers running cable through an exterior wall, proper weatherproofing, and code requirements for exterior outlets.
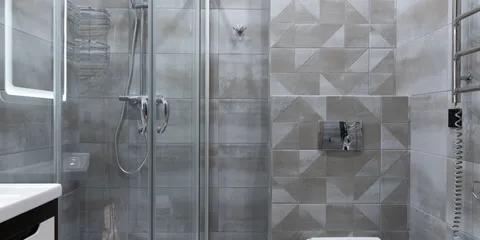
How to Fix a Broken Tile in the Shower: Removal, Replacement, and Waterproofing
Replace a cracked or broken shower tile without retiling the whole wall — removing the damaged tile, waterproofing behind it, setting the new tile, and grouting the joint.
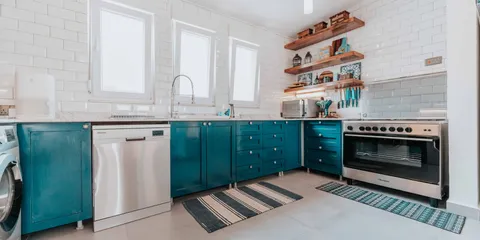
How to Fix a Leaking Dishwasher: Door Gasket, Hose, and Pump Seal Repair
Diagnose and fix a dishwasher that leaks from the door, under the unit, or at the water connection — door gasket, door latch, float switch, and supply hose issues.

How to Fix a Sagging Roof Ridge
Learn how to diagnose the cause of a sagging roof ridge and tackle the repair — from adding collar ties to sistering rafters and replacing a damaged ridge board.
How to Fix a Cracked Concrete Birdbath
Seal cracks in a concrete birdbath with hydraulic cement or waterproof epoxy to restore it to watertight service without buying a replacement.
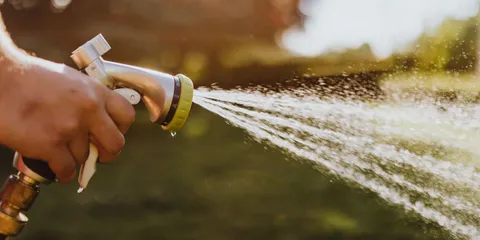
How to Fix a Leaking Garden Hose — Fittings, Cracks, and Splices
Step-by-step instructions for repairing a garden hose leak at the fitting, through the hose wall, or mid-hose using a mender coupler or splice kit.
How to Fix a Leaking Outdoor Hose Reel
Learn how to stop leaks at garden hose reel fittings and connectors by replacing washers, O-rings, and worn quick-connect couplings.
How to Patch Drywall: Fix Any Size Hole Step-by-Step (2026)
Patch drywall holes yourself — from nail pops and small dings to 6-inch cuts. This guide covers every patch method, feathering compound, and getting a texture match so the repair is invisible.
How to Fix a Broken Garage Drywall Ceiling
Learn how to repair and restore a damaged fire-rated garage drywall ceiling with the correct materials to maintain the fire barrier between your garage and living space.

How to Fix a Damp Crawl Space: Vapor Barriers, Drainage, and Encapsulation
Stop moisture from damaging your crawl space with a step-by-step guide covering vapor barriers, drainage solutions, dehumidifiers, and full encapsulation.
How to Fix a Deck Railing: Tightening Loose Posts, Replacing Balusters, and Code Requirements (2026)
A wobbly deck railing is both a safety hazard and a code violation. This guide covers tightening loose newel posts, replacing cracked or missing balusters, and the IRC code minimums for railing height and baluster spacing.

How to Fix a Dripping Outdoor Faucet
Stop a leaking hose bib or outdoor spigot by replacing the washer, packing nut, or cartridge with simple tools and no plumber required.
How to Fix Water Hammer: Banging Pipes When Water Shuts Off (2026)
Water hammer is the loud bang or clunk you hear when a faucet or valve shuts off quickly, sending a pressure wave through the pipes. This guide covers diagnosing true water hammer vs. loose pipes, recharging air chambers, and installing water hammer arrestors.
How to Organize a Garage: Zone Planning, Wall Storage, and Overhead Systems
A step-by-step approach to garage organization using zone planning, wall panels, overhead racks, and specialty storage for bikes and long items — so everything has a place and stays there.
How to Fix a Broken Under-Sink Cabinet
Learn how to repair a water-damaged or sagging under-sink cabinet bottom with new plywood, wood hardener, and basic tools — no full replacement needed.

How to Fix a Leaking Supply Line
Learn how to diagnose and replace a leaking water supply line under a sink or behind a toilet in under an hour.

How to Fix a Wall Anchor That Pulled Out of Drywall
Repair a pulled-out wall anchor in drywall using molly bolts, toggle bolts, E-Z Ancor replacements, and proper patching techniques so you can rehang items securely.

How to Fix a Tripped Circuit Breaker
Learn how to safely reset a tripped circuit breaker, identify the root cause of the trip, and know when the breaker itself needs to be replaced.
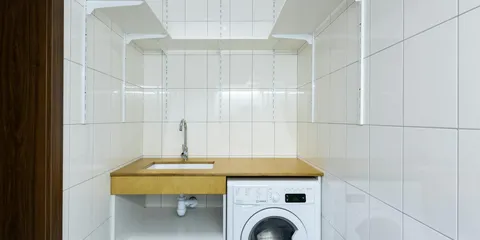
How to Fix a Broken Laundry Room Shelf
Repair a sagging or collapsed laundry room utility shelf by replacing brackets and anchors so it holds full loads reliably again.

How to Fix a Flickering Light Fixture
Diagnose and repair a flickering light fixture by checking the bulb, socket, wiring connections, and dimmer compatibility before calling an electrician.
How to Fix Condensation on Windows: Interior, Exterior, and Between-Pane Fog (2026)
Window condensation forms for different reasons on different surfaces. This guide covers interior condensation (high indoor humidity), exterior condensation (normal and harmless), and the one type that requires action: fogging between panes of a double-pane window.
How to Install a Radiant Barrier in Your Attic: Step-by-Step Guide
Cut summer cooling bills by installing a radiant barrier in your attic with this complete DIY guide covering materials, stapling technique, and common mistakes to avoid.

Water Softener Installation Cost 2026: $800–$2,500 Installed
Water softener installation costs $200–$500 for labor on a standard whole-house system. Salt-based all-in runs $800–$2,500; salt-free systems $600–$2,500. What affects the quote.

How to Fix a Cracked Stucco Wall
Learn how to patch hairline and structural stucco cracks on exterior walls to prevent water intrusion and restore curb appeal.
How to Fix a Broken Attic Vent
A damaged or blocked attic vent leads to moisture buildup, mold, and higher energy bills. Learn how to clear soffit vents, repair gable vent screens, and replace ridge vents yourself.
How to Fix a Broken Dryer Vent Cover
Learn how to remove a damaged dryer vent cap and install a replacement that seals out pests, weather, and cold air effectively.

How to Fix a Clogged Downspout: Flushing, Snaking, and Redirecting
Clear a blocked gutter downspout using a garden hose, plumber's snake, or downspout extension — and prevent future clogs with a downspout strainer or gutter guard.

How to Fix a Cracked Septic Tank Lid
Learn how to safely inspect, temporarily seal, and permanently repair or replace a cracked concrete or plastic septic tank lid.
How to Fix a Jammed or Humming Garbage Disposal
Unjam a stuck garbage disposal using the reset button and hex wrench, clear debris from the grinding chamber, and repair or replace worn impellers.

How to Fix a Noisy Furnace: Banging, Scraping, Whistling, and Rumbling Explained (2026)
A noisy furnace is almost always diagnosable by the type of sound it makes. This guide covers the causes of banging, scraping, whistling, and rumbling in gas furnaces — and whether each noise is a DIY filter swap, belt adjustment, or a call for a technician.
How to Fix a Rotted Window Sill: Epoxy Consolidant, Filler, and Full Replacement (2026)
A rotted window sill lets water into your wall framing and invites mold. This guide covers diagnosing rot depth, using epoxy wood consolidant and filler for partial repairs, applying Bondo for minor damage, doing a full sill replacement, and painting and sealing to prevent rot from returning.
How to Fix a Shower Door: Off-Track, Hard to Open, and Leaking (2026)
Sliding shower doors that jump off track, drag, or leak at the bottom are all fixable without replacing the door. This guide covers adjusting rollers, cleaning tracks, replacing the bottom sweep, and resealing the door frame.
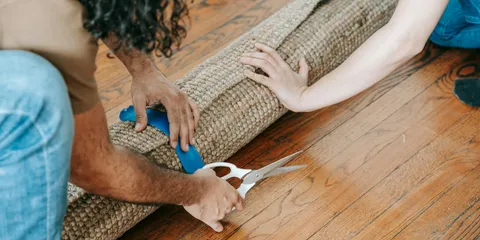
How to Repair Carpet: Patching Burns, Snags, and Damaged Sections (2026)
Carpet burns, pet damage, and snags can be repaired invisibly with a patch from a closet or leftover carpet. This guide covers cutting a clean patch, using carpet seam tape, and blending the repair with the surrounding pile.
How to Fix a Broken Pocket Door Track
Learn how to diagnose, repair, and replace a damaged pocket door track or roller assembly so your door slides smoothly again.
How to Fix a Cracked Ceramic Floor Tile
Learn how to repair or replace a cracked ceramic floor tile using DIY methods that restore your floor to a clean, safe finish.

How to Fix a Doorbell That Doesn't Ring: Button, Transformer, and Chime Diagnosis (2026)
A doorbell that doesn't ring has a failed button, a dead transformer, or a disconnected chime wire. This guide covers testing each component with a multimeter and the order of repair from simplest to most involved.

How to Fix a Toilet Flush Valve Leak
Learn how to stop water leaking from the toilet tank into the bowl by replacing the flush valve, spud washer, or tank-to-bowl gasket yourself in under two hours.
How to Fix a Warped Deck Board: Re-Screwing, Flipping, and Full Replacement
Warped and cupped deck boards create tripping hazards and trap moisture that rots the joists underneath. Learn how to flatten cupped boards by re-screwing them, flip boards to use the better face, sister a new board alongside a damaged one, and replace boards that are beyond saving.

How to Install a French Drain: Solving Yard Drainage and Basement Water Problems
Guide to installing a French drain to redirect groundwater away from your foundation or yard — trench depth, pipe sizing, gravel, and outlet placement.
AC Refrigerant Leak Signs and What to Do About Them
Learn to recognize the warning signs of an AC refrigerant leak — low cooling output, ice on coils, and hissing sounds — and understand when to recharge versus repair your system.

How to Fix Gaps Between Hardwood Floor Boards: Rope, Putty, Caulk, and Humidity Control
Gaps between hardwood floor boards are usually seasonal and fixable with rope filler, wood putty, flexible caulk, or humidity control — learn which method works for your gap type.

How to Fix a Broken Ceiling Medallion
Learn how to repair a cracked or loose ceiling medallion, or install a new one around a light fixture, using adhesive and simple painting techniques.
How to Fix a Garage Door: Troubleshooting 8 Common Problems (2026)
Garage door not opening, making noise, or not closing all the way? This guide covers the 8 most common garage door problems and how to fix each — from sensor alignment to spring diagnosis.
How to Fix a Rusted Drain: Clean, Seal, or Replace in 30 Minutes ($0–$25)
Replace a rusted bathtub, sink, or shower drain basket in 30 minutes, remove rust stains, or address corroded drain pipes. Drain basket replacement costs $8–$25.
How to Fix a Water Damaged Wood Floor
Learn how to assess, dry out, and repair water damaged hardwood or engineered wood floors before warping and mold set in permanently.

How to Fix a Broken Fence Rail
Replace a rotted or snapped fence rail yourself using basic tools — whether your fence is wood, vinyl, or aluminum.

How to Fix a Broken Water Softener Resin Tank
Learn how to diagnose and replace water softener resin to restore soft water to your home without calling a plumber.
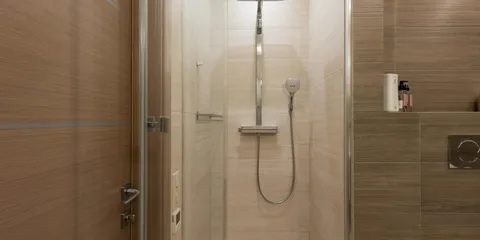
How to Fix a Leaking Shower Mixing Valve
Learn how to diagnose and replace a single-handle shower mixing valve cartridge to stop leaks and restore proper hot and cold water control.
How to Fix a Wall Anchor: Remove, Patch, and Reinstall (2026)
Stripped or pulled-out wall anchors leave holes that look bad and won't hold again. This guide covers removing different anchor types, patching drywall holes, choosing the right anchor for the load, and installing anchors correctly.

How to Fix a Fence Gate That Sags, Drags, or Won't Latch (2026)
A fence gate that sags, drags on the ground, or won't latch is almost always a hinge or post problem — not the gate itself. This guide covers anti-sag kits, hinge replacement, latch alignment, and post repair so you can fix your gate in an afternoon.
How to Fix a Broken Sprinkler Head: Replace, Adjust, and Unclog Pop-Up Heads (2026)
A broken or misaligned sprinkler head causes wet spots, dry patches, and wasted water. This guide covers replacing a broken pop-up head, adjusting spray arc and radius, unclogging a clogged nozzle, and raising a sunken head.

How to Fix a Cabinet Door Gap: Hinge Adjustment and Alignment Tips
Uneven gaps around a cabinet door are usually a quick hinge adjustment away from perfect — learn how to fix depth, lateral, and height settings plus warped door remedies.

How to Fix a Gas Fireplace Pilot Light That Won't Stay Lit (2026)
A gas fireplace pilot that won't light or won't stay lit after releasing the button is almost always a dirty pilot orifice or a failed thermocouple. This guide covers relighting the pilot, cleaning the orifice, and replacing the thermocouple yourself.
How to Fix a Loose Hardwood Floor Board
Secure a loose, bouncy, or popped hardwood floorboard by face-nailing, adding adhesive, or re-fastening the subfloor without damaging your finish floor.
How to Fix a Musty Basement Smell
Learn how to find and eliminate the source of a musty basement odor using proven DIY methods.
How to Fix a Sticky Lock: Key Won't Turn, Hard to Operate, and Frozen Deadbolt (2026)
A lock that is difficult to operate has worn tumblers, accumulated debris, or insufficient lubrication. This guide covers lubrication with graphite and silicone, cleaning debris from the keyway, and diagnosing a lock that needs replacement.
How to Install a USB Outlet (Replace a Standard Outlet in 30 Minutes)
Swap a regular wall outlet for a combination USB-A/USB-C outlet to charge phones and tablets without a bulky adapter — no electrician needed.
How to Fix a Bathroom Exhaust Fan: Noise, Weak Suction, and Motor Replacement
Learn how to diagnose and fix a noisy bathroom exhaust fan, restore weak suction, replace a worn motor, and clean clogged ducts—step-by-step DIY guide.

How to Fix a Broken Attic Stair Spring
Learn how to safely replace a broken tension spring on pull-down attic stairs so the door opens and closes smoothly without slamming or sagging.
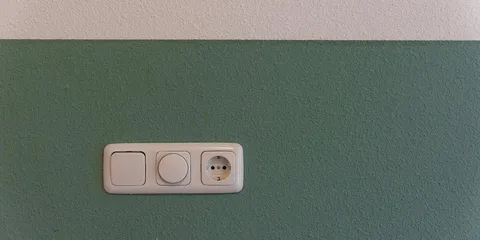
How to Fix a Broken Light Switch Plate
Replace a cracked, broken, or misaligned light switch plate in under 15 minutes with this simple DIY guide.

How to Fix a Broken Outdoor Gas Line Fitting
Learn how to safely inspect, shut off, and replace a damaged outdoor gas line fitting on a grill or patio connection before it becomes a serious hazard.
How to Fix a Damaged Hardwood Floor Board (2026)
A single cracked, cupped, or gouged hardwood board does not require sanding the entire floor. This guide covers plunge-cut removal, end-matched board replacement, face-nailing, and staining to match the existing floor.

How to Hang Shelves: Finding Studs, Anchors, and Level Every Time (2026)
Hang a floating shelf or bracket shelf that stays level and holds weight. This guide covers stud-finding, drywall anchors, heavy-load floating shelf hardware, and common hanging mistakes.
How to Reattach a Gutter Downspout: Step-by-Step Guide
Reattach a loose or separated gutter downspout to the wall and reconnect it to the gutter outlet in under an hour with basic tools.
How to Fix a Cracked Brick Wall
Learn how to identify crack types, repoint damaged mortar joints, and repair cracked bricks in interior and exterior walls with professional results.
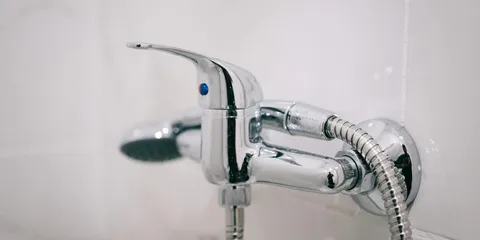
How to Fix a Dripping Showerhead
Stop a dripping showerhead for good with this complete DIY guide covering cartridge replacement, O-ring swaps, and thread sealing.

How to Fix a Broken Door Kick Plate in 15 Minutes ($10–$30 Replacement)
Reattach, repair, or replace a loose or damaged door kick plate in 15 minutes. Replacement kick plates cost $10–$30 and install with a basic screwdriver — no special tools needed.
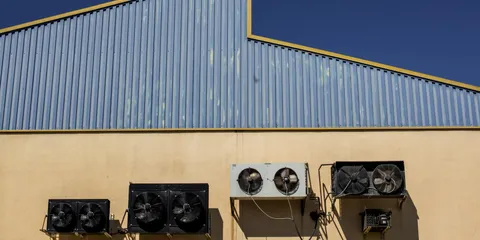
How to Fix a Broken Bathroom Exhaust Fan
Learn how to troubleshoot, repair, or replace a bathroom exhaust fan that is noisy, not turning, or not moving air to restore proper ventilation.
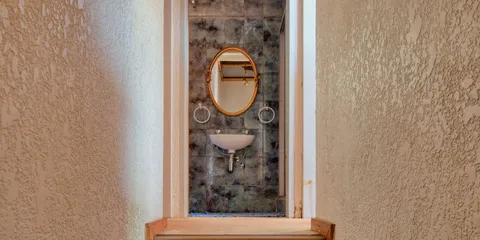
How to Fix a Cracked Bathroom Tile
Learn how to remove and replace a single cracked bathroom tile without disturbing surrounding tiles or damaging your walls and floor.
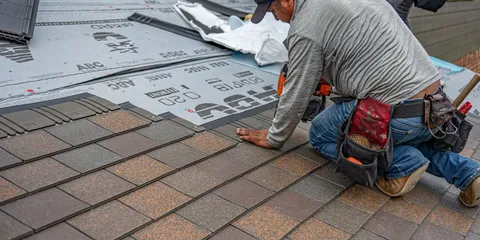
How to Fix a Leaking Roof: Finding the Source and Making Temporary and Permanent Repairs
Learn how to find where your roof is leaking, stop the damage with temporary patches, and make lasting repairs to shingles, flashing, and roof valleys.
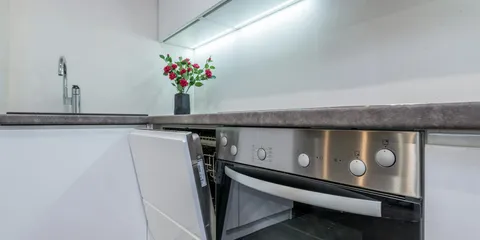
How to Fix a Warped Kitchen Cabinet Door
Learn how to flatten a warped kitchen cabinet door using clamping, moisture, and weight techniques so it hangs straight and closes properly again.
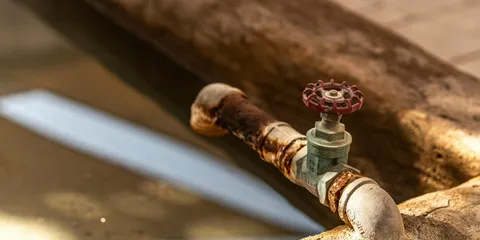
How to Bleed a Hot Water Radiator (Remove Air, Restore Heat)
A radiator with cold spots or that gurgles has trapped air — bleeding it takes five minutes per radiator and immediately improves heat output.
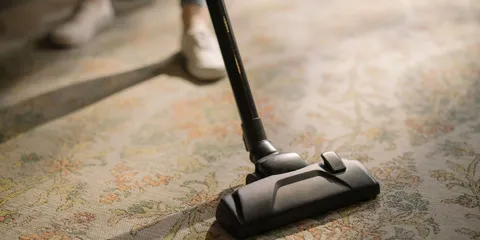
How to Clean Carpet: Deep Cleaning, Spot Treatment, and Deodorizing
A complete guide to carpet cleaning — weekly vacuuming, deep cleaning with a machine, spot treatment, deodorizing, and when to call a professional.

How to Fix a Cracked Wood Window Frame
Learn how to repair cracked or rotted wood window frames with epoxy filler, consolidant, and fresh paint to restore strength and weatherproofing.
How to Fix a Peeling Deck: Strip, Sand, and Refinish for Lasting Results
Learn how to strip peeling deck paint or stain, sand the surface correctly, clean and prep the wood, then choose between re-staining and repainting for a finish that lasts.

How to Fix a Refrigerator Door Gasket: Testing and Replacing a Worn Seal (2026)
A worn refrigerator door gasket lets warm air in constantly, raising energy bills and making the compressor run nonstop. This guide covers the paper slip test, DIY reseating tricks, and full gasket replacement.
How to Fix a Window That Won't Lock: Sash Lock, Alignment, and Replacement
Fix a window that won't lock by diagnosing a misaligned sash or failed lock mechanism, adjusting the frame, and replacing the hardware if needed.
How to Fix Cracked or Missing Floor Tile Grout
Repair cracked, crumbling, or missing floor tile grout with this complete guide covering grout saw removal, sanded vs. unsanded grout selection, proper application, cleanup, and sealing.
How to Fix a Cracked Basement Window Frame
Repair cracked or rotted wood and metal basement window frames to stop drafts, water infiltration, and pest entry without a full window replacement.

How to Repair Spalling Concrete: Surface Pitting, Flaking, and Scaling (2026)
Spalling is the flaking, pitting, or scaling of the concrete surface. It's caused by freeze-thaw cycles, deicing salts, or carbonation. This guide covers removing loose material, applying a concrete resurfacer, and preventing future spalling.
How to Fix a Broken Tile Shower Niche
Learn how to repair cracked or loose tiles in your shower niche, regrout properly, and reseal the area to stop water damage for good.
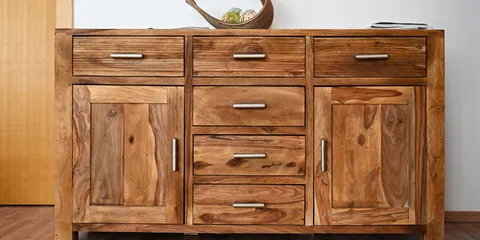
How to Fix a Cabinet Drawer That Won't Close in 10 Minutes
A cabinet drawer that won't close is usually misaligned slides — adjust the two hex screws in under 10 minutes. Also covers soft-close reset, roller replacement, and full slide swap.

How to Patch an Asphalt Driveway: Cold Patch, Crack Filler, and Pothole Repair (2026)
Asphalt driveways develop cracks and potholes from freeze-thaw cycles and UV degradation. This guide covers choosing the right repair product for the damage type, preparation, cold patch application, and sealing after repair.
How to Re-Caulk a Shower: Removing Old Caulk and Applying New for a Clean Seal
Complete guide to re-caulking a shower — removing deteriorated caulk, cleaning the joint, and applying new silicone caulk for a watertight, mold-resistant seal.
How to Fix a Broken Garage Floor Epoxy
Learn how to repair peeling, bubbling, or cracked epoxy garage floor coating so the surface looks clean and holds up for years.
How to Fix a Broken Sliding Window Track
Learn how to clean, repair, and replace a sliding window track so your windows glide smoothly again with basic tools and minimal cost.

How to Fix a Broken Deck Railing Post
Learn how to repair or reinforce a broken or wobbly deck railing post safely and securely using proper hardware and techniques.
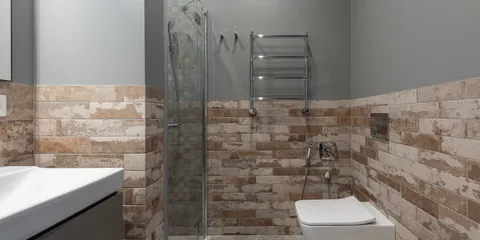
How to Fix a Rocking Toilet: Floor Bolts, Shims, and Wax Ring (2026)
A toilet that rocks or wobbles is a wax ring failure waiting to happen. This guide covers tightening floor bolts, shimming a toilet on an uneven floor, and inspecting the flange before committing to a full wax ring reset.
How to Fix a Rotted Deck Board
Replace a rotted deck board safely and correctly with the right fasteners, lumber, and sealing technique to restore your deck to full strength.

How to Fix a Garbage Disposal That Leaks: Top, Side, and Bottom Leaks (2026)
A leaking garbage disposal drips from one of three locations: the sink flange (top), the drain connection or dishwasher inlet (side), or the bottom reset button area (internal seal failure). Each location has a different fix.
How to Fix a Leaking Copper Pipe Joint
Learn how to stop a leaking soldered copper pipe joint using a repair clamp or sweat solder technique with this complete DIY plumbing guide.
How to Fix Noisy Pipes: Banging, Whistling, and Rattling (2026)
Pipes that bang when the water shuts off (water hammer), whistle when a faucet is open, or rattle inside walls all have specific causes and fixes. This guide covers diagnosing which type of noise you have and the correct repair for each.
How to Install a Prehung Interior Door: Rough Opening, Shimming, and Hanging (2026)
Installing a prehung interior door is a 2–4 hour project when the rough opening is the right size. This guide covers checking the opening, shimming the frame plumb and level, nailing, and trimming out.
How to Install a Smart Thermostat: Step-by-Step Guide (2026)
Install a smart thermostat yourself in 30 minutes. This guide covers compatibility checking, wiring a Nest or Ecobee to your existing HVAC system, and troubleshooting common issues like missing C-wire.
How to Fix a Bathtub Drain Stopper: $0–$5 Fix for Pop-Up, Push-Pull, and Trip-Lever Types
Bathtub drain won't hold water or won't open? Identify your stopper type: push-pull (no linkage), pop-up (lift-and-turn), or trip-lever (lever on overflow plate). Adjust the clevis strap or replace the rubber seal — most repairs cost $0–$5 and take 20 minutes.
How to Fix a Cracked Drywall Corner Bead: Remove, Replace, and Finish
Repair a cracked or damaged drywall corner by removing the old corner bead, choosing between paper, metal, or vinyl bead, and finishing with joint compound for a flawless edge.
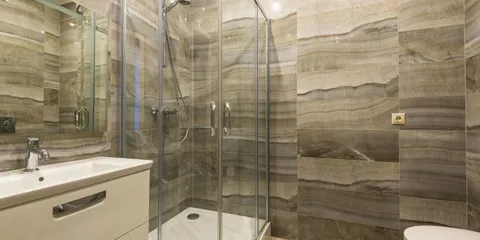
How to Fix a Cracked Fiberglass Shower Floor
Learn how to repair cracks in a fiberglass shower pan using a two-part epoxy or fiberglass repair kit, restoring a watertight seal without replacing the whole unit.

How to Fix a Cracked Window Sill
Learn how to repair cracked interior and exterior window sills using wood filler, epoxy, or full replacement to stop water damage and restore a clean finish.
How to Fix a Loose Cabinet Knob or Pull
Learn how to tighten, repair, and replace loose cabinet knobs and drawer pulls so they stay secure and look great.

How to Texture a Ceiling: Knockdown, Orange Peel, and Skip Trowel Techniques
Learn how to apply three popular ceiling textures — knockdown, orange peel, and skip trowel — with step-by-step instructions, tool lists, and tips for blending repairs into existing texture.
How to Caulk Windows: Stopping Drafts and Water Infiltration the Right Way
Learn how to remove old caulk, choose the right caulk type, and apply new caulk to seal window gaps for better energy efficiency and water protection.
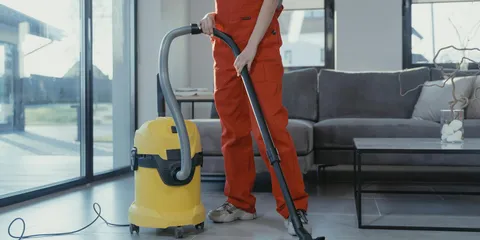
How to Fix an Outdoor Spigot Vacuum Breaker: $5 Part, 10-Minute Fix
The anti-siphon vacuum breaker is a $3–$8 part that installs by hand in under 10 minutes. Stops dripping from the top of the hose bib and blocks backflow contamination.

How to Fix a Cracked Composite Deck Board
Learn how to repair a cracked or stained composite deck board using color-matched filler and heat tools without replacing the entire board.

How to Fix a Humming Ceiling Light
Silence a buzzing or humming ceiling light by diagnosing the cause, whether it is a dimmer incompatibility, a loose ballast, a faulty bulb, or vibrating fixture hardware, and applying the correct fix.

How to Fix a Slow-Draining Kitchen Sink
Clear a slow or completely clogged kitchen sink drain yourself using a plunger, drain snake, or natural cleaning method without calling a plumber.
How to Remove Hard Water Stains: Toilets, Showers, and Faucets (2026)
Hard water stains are calcium and magnesium deposits that regular cleaners won't touch. This guide covers removing hard water buildup from toilets, shower glass, faucets, and showerheads using acid-based cleaners — and preventing future buildup.
How to Install a Programmable Thermostat: Wiring and Setup Guide
Step-by-step guide to replacing an old thermostat with a programmable or smart thermostat — labeling wires, reading the wiring diagram, and setting up schedules.
How to Fix a Door That Won't Latch: Adjust Strike Plate and Latch (2026)
A door that won't latch or latch properly is usually a strike plate alignment problem. This guide covers adjusting the strike plate, filing the strike plate hole, fixing a sticking latch, and shimming hinges.

How to Paint a Fence: Prep, Primer, and Painting for Long-Lasting Results
A practical guide to painting a wood fence — covering how to clean and prep, choose the right paint or stain, and apply it with a sprayer or brush for results that last years.
How to Fix a Broken Handrail Bracket: Secure It in 20 Minutes
A broken handrail bracket is a safety hazard — secure it in 20 minutes with longer screws into a stud, toggle anchors for drywall, or a $5–$15 replacement bracket.
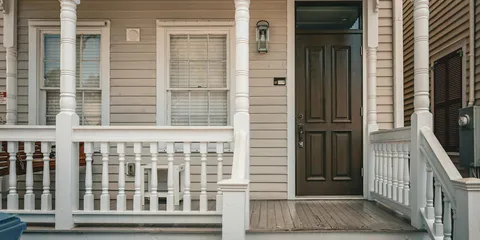
How to Fix a Cracked Porch Railing Cap
Repair or replace a cracked, split, or rotted porch railing top cap to restore curb appeal and keep your railing structurally sound.

How to Fix a Leaking Bathroom Exhaust Fan Duct
Learn how to find and seal leaks in bathroom exhaust fan ductwork to stop moisture damage, mold growth, and energy loss.
How to Fix a Toilet Seat Hinge: Tightening, Replacing, and Choosing the Right Seat
Fix a loose, cracked, or broken toilet seat hinge — from tightening the nuts to replacing the full seat with the right size and mounting type.
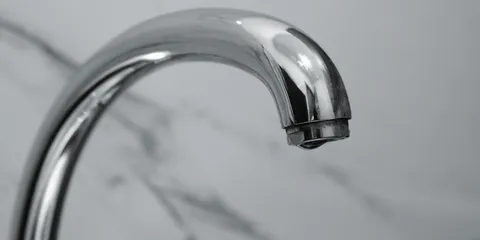
How to Fix a Broken Kitchen Faucet Cartridge
Learn how to replace a worn or broken single-handle kitchen faucet cartridge to stop drips, restore flow, and fix temperature control issues.
How to Fix a Broken Screen Door Spring in 20 Minutes ($5–$15 Replacement)
Screen door spring broken or off-track? New springs cost $5–$15 and take 20 minutes to install. Covers closer springs (pneumatic and chain), tension springs, and hinge-type springs — each type identified by location.
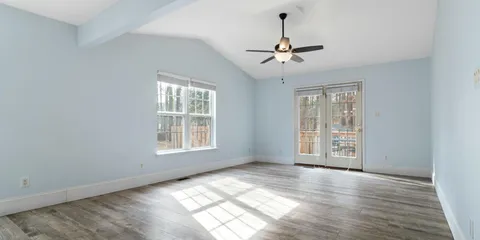
How to Fix a Ceiling Fan That's Not Working: Pull Chain, Capacitor, and Wiring (2026)
A ceiling fan that won't turn on, runs on only one speed, or hums without spinning has a failed pull chain switch, capacitor, or wiring connection. This guide covers diagnosing and replacing each component.
How to Fix a Cracked Vinyl Siding Panel
Learn how to repair or replace cracked vinyl siding panels yourself and restore your home exterior in a few hours.
How to Fix a Loose Kitchen Faucet Handle in 5 Minutes
A loose kitchen faucet handle usually has one cause: a loose set screw under the decorative cap. Tighten it with a 3/32" hex key in 5 minutes — no plumber needed.
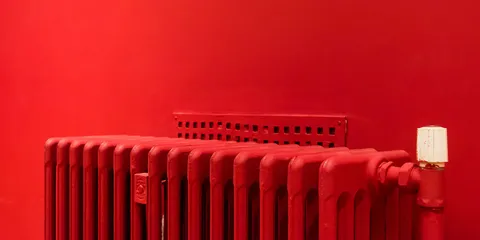
How to Fix a Furnace Not Heating: Filter, Ignition, and Thermostat Diagnosis (2026)
A furnace that runs but doesn't heat, or won't start at all, usually has a clogged filter, a failed igniter, or a thermostat issue. This guide covers the diagnostic sequence from cheapest and easiest to most complex.
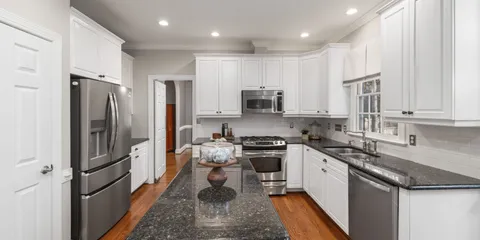
How to Fix a Leaking Dishwasher Door Seal
Learn how to identify a failing dishwasher door gasket and replace it yourself to stop leaks and water damage to your kitchen floor.
How to Fix Water Damage on a Ceiling: Stop the Leak, Repair the Drywall (2026)
Water stain, sagging, or bubbling ceiling? This guide covers finding and fixing the leak source, assessing drywall damage, cutting out the damaged section, and finishing with stain-blocking primer so the stain does not bleed through.
How to Fix a Broken Interior Wall Texture
Match and restore orange peel, knockdown, or skip-trowel wall texture over a drywall patch so the repair blends seamlessly with the surrounding wall.
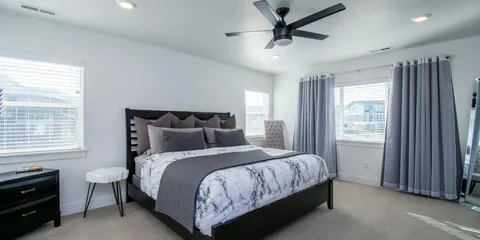
How to Fix a Ceiling Fan Wobble: Balancing Blades and Tightening Mounts (2026)
A wobbling ceiling fan is caused by blade imbalance, loose mounting hardware, or bent blade brackets. This guide covers the three-step fix: tighten everything, check blade pitch, and use a balancing kit if needed.
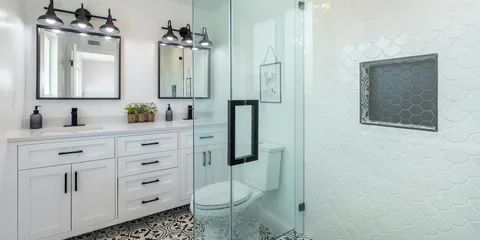
How to Install a Shower: Prefab Units and Custom Tile Shower Planning Guide
How to install a prefab shower unit or plan a custom tile shower — covering permits, rough-in plumbing, base installation, waterproofing, and what to tackle yourself versus hire out.
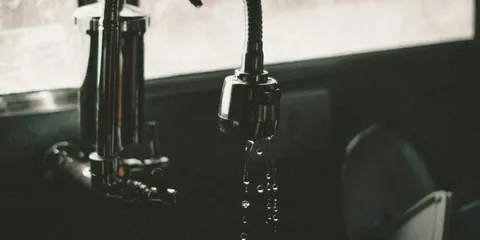
How to Fix a Kitchen Faucet Sprayer
Learn how to diagnose and repair a weak, leaking, or stuck kitchen faucet side sprayer yourself with basic tools and no plumber required.

How to Fix a Broken Doorknob Spindle: $5–$15 Replacement in 15 Minutes
Broken doorknob spindle (the square shaft connecting both knobs)? A universal spindle costs $5–$15 and installs in 15 minutes. Measure the length and confirm square vs. round before ordering.
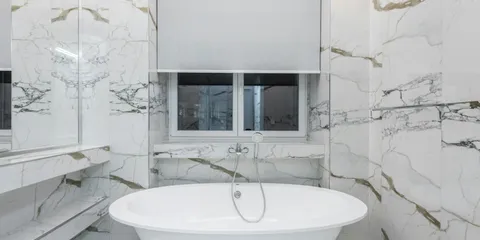
How to Fix a Cracked Fiberglass Tub Surround
Learn how to repair cracks, chips, and holes in a fiberglass tub surround using a repair kit, gel coat, and finishing techniques that restore a like-new finish.

How to Fix a Leaking Window Frame
Stop water from entering around a window frame by identifying the leak source, recaulking the exterior perimeter, replacing damaged weatherstripping, and repairing flashing.
How to Fix a Stuck or Stiff Deadbolt: Lubrication, Strike Plate, and Lock Repair
A deadbolt that won't turn or won't throw fully is usually a quick fix — here's how to diagnose and solve it in under an hour.
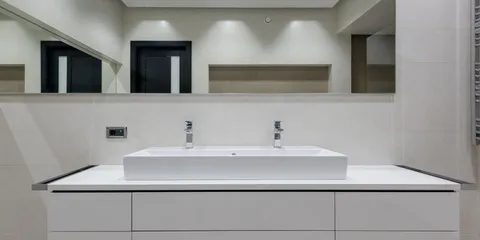
How to Install a Bathroom Sink: Drop-In, Undermount, and Pedestal Sink Guide
Complete guide to installing three types of bathroom sinks — drop-in, undermount, and pedestal — including plumbing connections and silicone sealing.
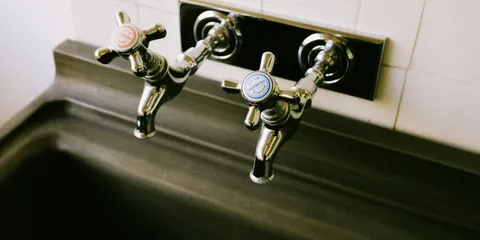
How to Fix a Loose or Broken Bathroom Faucet Handle in 15 Minutes ($0–$25, No Plumber)
Loose bathroom faucet handle? Tighten the set screw under the decorative cap ($0 fix in 5 minutes). Still wobbly? Worn cartridge or stem — replacement cartridges cost $8–$25 and take 15 minutes to swap. Covers ball, cartridge, and ceramic disc faucet types.

How to Fix a Broken Dryer Door Latch
Learn how to diagnose and replace a broken dryer door catch or latch so your dryer holds shut and runs a full cycle without interruption.
How to Fix a Door Threshold: Adjustable Thresholds, Worn Seals, and Replacement (2026)
A worn or misaligned door threshold lets cold air, water, and pests in under the door. This guide covers adjusting an adjustable threshold, replacing the threshold seal insert, and replacing the entire threshold when the substrate is rotted.

How to Fix a Broken Door Sweep in 15 Minutes ($5–$20 Replacement)
Replace a worn or damaged door sweep in 15 minutes to stop drafts, block insects, and improve energy efficiency. New door sweeps cost $5–$20 and cut with scissors to fit.
How to Fix a Cracked Garage Floor
Learn how to assess, prepare, and repair cracks in a concrete garage floor using the right fillers and sealers for a long-lasting result.
How to Fix a Leaky Basement: Interior and Exterior Waterproofing Methods (2026)
A wet basement can have multiple causes — window well drainage, wall cracks, floor cracks, or hydrostatic pressure. This guide covers diagnosing the source and the fix for each type of basement water problem.
How to Fix a Phantom Toilet Flush (Ghost Flushing): Flapper and Fill Valve Diagnosis (2026)
A phantom flush is when the toilet refills without being flushed — water quietly drains from the tank, triggering the fill valve. The cause is almost always a leaking flapper or a fill valve that is not shutting off completely. Both are $5–$15 DIY fixes.

How to Fix a Rotted Door Sill Plate
Repair or replace a rotted exterior door sill plate to restore the weathertight seal at the base of your door and prevent further moisture damage to the subfloor and framing.
How to Fix Squeaky Stairs: From Above, Below, and With Carpet (2026)
Squeaky stairs fixed from below (fastest), from above on hardwood treads (screws + wood plugs), or from above on carpeted stairs (nail through carpet method). Covers tread-to-riser squeaks and tread-to-stringer squeaks.
How to Fix Bathroom Floor Grout: Regrout Cracked or Missing Lines ($8–$20)
Cracked bathroom floor grout? Use a grout saw or oscillating tool to remove the old grout, brush out debris, then press in pre-mixed grout ($8–$15 a tub). The whole repair takes about 45 minutes plus 24 hours for cure time.

How to Fix a Loose Deck Railing Post
Learn how to diagnose, reinforce, and permanently secure a wobbly deck railing post so your deck railing meets safety codes and passes inspection.
How to Install a Light Switch: Replace a Single-Pole Switch Safely
Replacing a standard single-pole light switch is a beginner-friendly electrical project that takes about 30 minutes. This guide covers wiring, safety, and testing so you get it right the first time.

How to Fix a Broken Light Switch Cover
Learn how to safely replace a cracked, broken, or missing light switch cover plate in under 10 minutes with no electrical experience required.
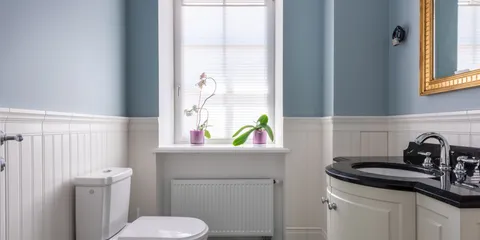
How to Fix a Toilet That Flushes Slowly: Clogged Rim Jets, Partial Blockages, and Flapper Issues (2026)
A slow-flushing toilet is usually caused by blocked rim jets under the rim of the bowl, a partial drain blockage, or a flapper that closes too soon. This guide covers diagnosing the cause and cleaning the rim jets with a wire and vinegar soak.
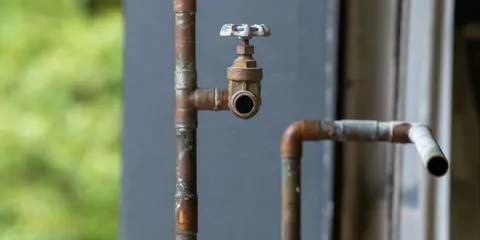
How to Fix a Broken Outdoor Faucet Handle
Learn how to replace a stripped, cracked, or missing outdoor spigot handle yourself in under an hour with basic plumbing tools and no soldering required.
How to Fix a Slow Flushing Toilet: Rim Jets, Flapper, and Water Level
Diagnose and fix a weak or slow-flushing toilet — clearing clogged rim jets, adjusting water level, repairing the flapper, and when to replace the fill valve.
How to Fix a Window That Won't Stay Open: Balance Springs, Tilt Latches, and Support Arms (2026)
A window that falls closed when raised has a failed balance mechanism. This guide covers identifying the window balance type, replacing spiral balances and channel balances in double-hung windows, and fixing casement window support arms.

How to Install a Ceiling Fan: Complete Step-by-Step Guide (2026)
Install a ceiling fan yourself in 1–2 hours. This guide covers mounting the brace or fan-rated box, hanging the motor, wiring hot/neutral/ground, and attaching the blades and light kit — with or without existing wiring.
How to Fix a Broken Exterior Light Fixture (2026)
An outdoor light fixture that flickers, won't turn on, or leaks water can usually be repaired without a full replacement. This guide covers replacing a bulb socket, making waterproof wiring connections, replacing the gasket seal, and swapping the full fixture.
How to Fix a Water Heater Pilot Light
Relight a water heater pilot light safely, replace a faulty thermocouple, and diagnose gas valve issues to restore hot water without calling a plumber.
How to Install a Door Sweep: Stopping Drafts, Bugs, and Light Under the Door (2026)
A door sweep seals the gap between the door bottom and the threshold. This guide covers choosing the right door sweep type, measuring the gap, cutting to width, and attaching with screws.

How to Build a Pergola: Planning, Post Setting, and Beam Assembly
A complete DIY guide to building a freestanding or attached pergola — covering permits, wood selection, post depth, beam and rafter installation, and finishing.
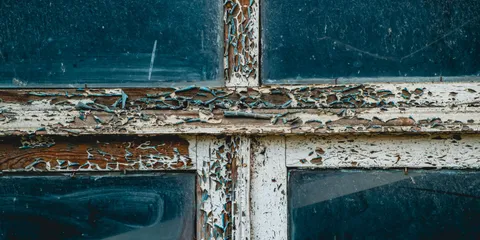
How to Fix a Broken, Cracked, or Chipped Tile (Floor and Wall, 2026)
Replace one broken tile or repair a crack without replacing the whole floor. This guide covers removing a single tile without damaging neighbors, matching grout, and fixing hairline cracks in ceramic and porcelain.

How to Fix a Dryer That Won't Start: Door Switch, Thermal Fuse, and Start Switch (2026)
A dryer that won't start at all has a failed safety component in most cases — not a motor or control board issue. This guide covers testing the door switch, thermal fuse, and start switch with a multimeter, and replacing the failed part.
How to Fix a Leaking AC Drain Line: Clear the Clog and Stop Water Damage
Step-by-step guide to unclogging an AC condensate drain line using a wet vac, bleach flush, and P-trap cleaning — plus how to install a float switch before the next leak.
How to Fix a Leaking Bathroom Supply Valve
Learn how to repair or replace a leaking bathroom angle stop supply valve before it causes water damage under your sink or toilet.

How to Fix a Leaking Irrigation Valve Box in 30 Minutes ($5–$25)
Diagnose and repair a leaking irrigation valve box — lid replacement, seal repair, or solenoid fix — in 30 minutes before water damage reaches the lawn or foundation. Parts cost $5–$25.
How to Fix a Microwave That Isn't Heating: Diode, Capacitor, and Door Switch (2026)
A microwave that runs but doesn't heat almost always has a failed high-voltage diode, burned magnetron, or tripped door switch. This guide walks through diagnosis in order of difficulty and cost, including which repairs are safe DIY and which require a technician.
How to Fix a Toilet That Won't Flush: Handle, Chain, and Flapper Fixes (2026)
A toilet that won't flush or flushes weakly usually has a disconnected flush chain, a broken handle, or low water in the tank. This guide covers each cause and the quick fix for each — most take under 10 minutes.
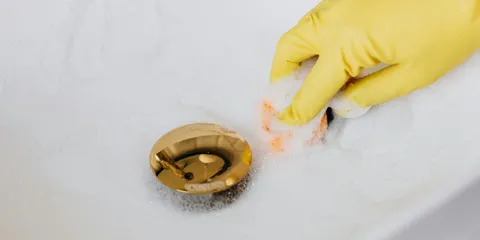
How to Replace a Bathroom Sink Drain: Stopper, P-Trap, and Drain Assembly (2026)
A bathroom sink drain includes the drain body, pop-up stopper, pivot rod, and P-trap. This guide covers replacing a corroded or leaking drain body, installing a new pop-up stopper assembly, and replacing a P-trap.
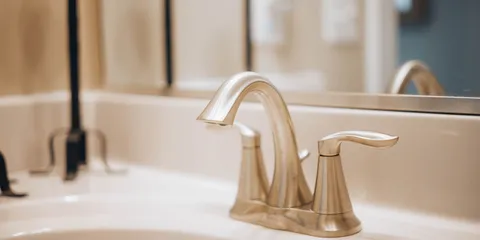
How to Fix a Bathroom Sink Stopper That Won't Stay Up or Down
A pop-up drain stopper that won't hold water or stay open is almost always a quick linkage adjustment — learn to fix the clevis strap, pivot rod, and lift rod in minutes.
How to Fix a Broken Outdoor Deck Light
Learn how to diagnose and repair a low-voltage deck light by replacing a burned-out socket, faulty fixture, or damaged wiring connector.
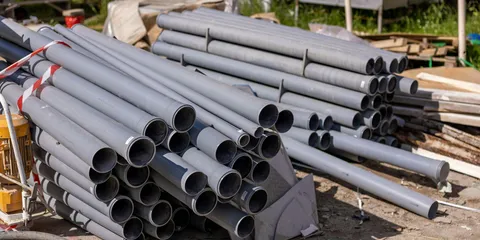
How to Fix a Leaking Pipe: Temporary Repair and Permanent Coupling Fix (2026)
A leaking pipe needs to be stopped immediately to prevent water damage. This guide covers temporary repair methods (pipe tape, clamp), and permanent repairs using compression couplings, SharkBite push-fit fittings, and copper sweat fittings.
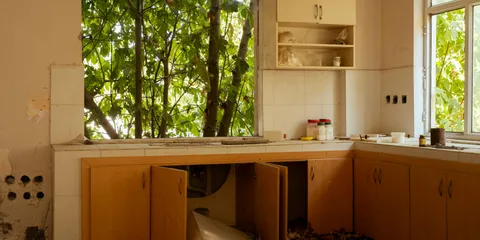
How to Fix a Broken Kitchen Cabinet Door
Sagging, crooked, or gap-showing cabinet doors are almost always a hinge adjustment — here is how to diagnose and fix European cup hinges and traditional overlay hinges.
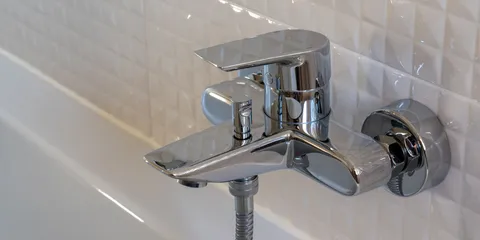
How to Fix a Dripping Bathtub Faucet: Two-Handle and Single-Handle Repair (2026)
A dripping bathtub faucet wastes thousands of gallons per year and the fix is usually a worn washer or cartridge. This guide covers two-handle (stem/washer) faucets and single-handle (cartridge) faucets — including how to shut off the water and identify what needs replacing.

How to Fix a Leaking Gas Fireplace Valve
Learn how to safely inspect, diagnose, and address a leaking gas fireplace valve before calling a technician or replacing the component yourself.
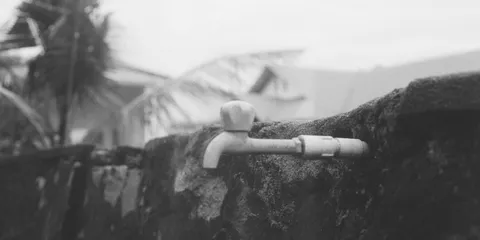
How to Fix a Leaking Outdoor Faucet: Packing Nut, Stem Washer, and Frost-Free Cartridge
Stop an outdoor hose bib from dripping by tightening the packing nut, replacing the stem washer, or swapping the cartridge in a frost-free faucet — all fixable in under an hour.
How to Fix a Sticking Drawer: Wood Swelling, Worn Slides, and Adjustment (2026)
A drawer that sticks or is hard to pull open is usually caused by humidity swelling the wood, a misaligned or bent drawer slide, or debris on the slide rails. This guide covers diagnosing the cause and the fix for wood, metal, and undermount slides.
How to Fix a Cracked Bathtub: Fiberglass, Acrylic, and Porcelain Repair
Repair a cracked bathtub at home — identify your tub material, use epoxy filler or fiberglass patch kits, fix porcelain chips, and decide when reglazing makes more sense.
How to Fix a Water Heater Dip Tube
Learn how to diagnose and replace a broken water heater dip tube to restore consistent hot water and eliminate white plastic flakes from your fixtures.

How to Fix Wood Rot: Epoxy Filler Repair and When to Replace the Board (2026)
Soft, spongy wood caused by rot can be repaired with a two-part epoxy system when the structural wood beneath is still sound. This guide covers diagnosing rot extent, consolidant treatment, epoxy filler application, and when replacement is the better option.
How to Fix a Leaking Radiator (Hot Water Heating Systems)
A leaking radiator in a hot water heating system is usually a bleed valve, packing nut, or union fitting issue — here's how to diagnose the source and make a lasting repair.
How to Repair Laminate Flooring: Chips, Scratches, Bubbles, and Plank Replacement (2026)
Laminate flooring can be repaired without replacing the entire floor. This guide covers filling chips with laminate repair paste, fixing surface scratches with matching markers, repairing bubbles caused by water, and replacing a damaged plank in a floating floor.

Loose Floor Tile? Fix It Without Replacing — $20 and 1 Hour (2026)
Tap the tile — if it sounds hollow, it's loose. Inject epoxy through the grout joint to reattach it without removing anything. Under $20 in materials, 1 hour. Works on ceramic, porcelain, and stone tile. Only remove and reset if the tile is cracked.
How to Fix a Rusted Gutter Seam
Learn how to repair a rusted or leaking gutter seam using the right sealant and prep techniques to stop water damage before it spreads.
How to Fix Peeling Bathroom Paint
Learn how to fix peeling bathroom paint by addressing moisture, scraping properly, priming, and applying a durable bathroom-grade finish coat.

How to Stain Wood Furniture: Prep, Application, and Finishing for a Professional Result
Complete guide to staining wood furniture — sanding, applying pre-conditioner, choosing stain type, wiping technique, and applying a protective topcoat.
How to Fix a Broken Interior Window Sill
Learn how to repair rot, cracks, and surface damage on interior window sills using wood filler, epoxy, and refinishing techniques that last.
How to Fix a Leaking Water Meter Pit in 30 Minutes ($0–$20 Seal or Lid Fix)
Diagnose and repair a leaking water meter pit box — lid replacement or seal repairs — in 30 minutes to protect your meter from flooding and freeze damage. Parts cost $0–$20.

How to Install Outdoor Lighting: Path Lights, Flood Lights, and String Lights
A practical DIY guide to installing outdoor lighting — covering low-voltage landscape lights, line-voltage flood and security lights, string lights, and solar options.
How to Fix a Broken Attic Hatch
Repair a sagging, damaged, or poorly fitting attic hatch door by reinforcing the frame, replacing the panel, and adding insulation for better energy efficiency.
How to Fix a Cracked Concrete Step Edge
Repair a chipped or cracked concrete step nosing yourself using vinyl concrete patcher to restore a safe, solid edge before cracks spread further.
How to Fix a Sliding Door That Is Hard to Open, Off-Track, or Drafty (2026)
Sliding door dragging, sticking, jumping the track, or letting in cold air? This guide covers the 5 most common sliding door problems: dirty track, bad rollers, off-track door, bent frame, and failed weatherstripping.

How to Patch a Roof: Fix Damaged Shingles and Stop a Leak (2026)
A damaged shingle or small roof leak can be patched before it causes ceiling damage. This guide covers replacing damaged asphalt shingles, sealing around flashings, and patching a flat roof.
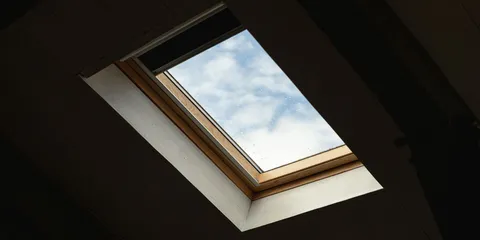
How to Fix a Broken Skylight Seal
Learn how to repair failed skylight flashing and sealant to stop leaks and prevent water damage to your home.

How to Fix a Leaking or Low-Pressure Kitchen Sink Sprayer (2026)
A kitchen sink sprayer that leaks at the base, dribbles from the head, or has lost water pressure has a few common causes — a worn diverter valve, a cracked hose, or a clogged or broken spray head. This guide covers diagnosing the problem and fixing each one, usually without a plumber.
How to Fix a Leaking Outdoor Hose Bib
Learn how to stop a dripping or leaking outdoor hose bib by replacing the packing washer, stem washer, or the entire spigot with basic plumbing tools.
How to Fix a Window Leaking During Rain: Flashing, Caulk, and Drainage Diagnosis (2026)
A window that leaks during rain has failed caulk, missing or damaged flashing, or a blocked weep hole. This guide covers finding the leak entry point, re-caulking, and when the problem requires flashing repair.
How to Fix a Window Latch: Won't Lock, Broken Lever, and Alignment Adjustment (2026)
A window latch that won't engage is usually misaligned, broken, or corroded. This guide covers adjusting the strike alignment on double-hung windows, lubricating sticky latches, and replacing broken latch mechanisms.

How to Wire a Light Switch: Single-Pole Switch Wiring for Beginners (2026)
Wiring a single-pole light switch is one of the most common DIY electrical jobs. This guide covers identifying the hot wire, connecting the switch, and wiring to code — including the neutral and ground requirements.

How to Fix a Broken Garage Opener Remote
Learn how to troubleshoot and repair a garage door opener remote by replacing the battery, fixing stuck buttons, and reprogramming the unit.
How to Fix a Dryer Not Heating: Heating Element, Thermal Fuse, and Gas Valve (2026)
A dryer that runs but produces no heat has a failed heating element (electric), a blown thermal fuse, or a failed gas valve coil (gas). This guide covers testing and replacing each component, starting with the cheapest part first.

How to Fix Sweating Pipes: Pipe Insulation for Condensation and Cold Water Lines
Stop cold water pipes from sweating by insulating them with foam pipe wrap and reducing basement humidity — complete guide to sizing, installation, and protecting fittings.

How to Install a Porch Light: Replace or Add an Exterior Light Fixture (2026)
Installing or replacing a porch or exterior wall light is a straightforward electrical job. This guide covers removing the old fixture, weatherproofing the box, connecting wires, and mounting the new light.
How to Fix a Leaky Toilet Base: Wax Ring Replacement (2026)
Water around the base of a toilet is almost always a failed wax ring. This guide covers confirming the source of the leak, removing the toilet, replacing the wax ring, and reinstalling correctly.
How to Fix a Loose Electrical Outlet: Tightening, Shimming, and Replacing (2026)
A loose outlet wiggles when you plug in a cord, eventually loosening the wire connections and creating a fire or shock hazard. This guide covers the three fixes: tightening the mounting screws, using outlet shims on a recessed box, and replacing a worn outlet.

How to Fix a Squeaky Door Hinge in 5 Minutes (2026)
Door hinge squeaking every time it opens? This guide covers the fastest fixes — WD-40, petroleum jelly, and the permanent hinge pin solution — for interior and exterior doors.

How to Fix a Wood Deck Handrail
Learn how to fix a loose, wobbly, or damaged wood deck handrail by tightening connections, replacing hardware, and reinforcing posts for a safe, code-compliant railing.
How to Hang a Picture: Finding Studs, Choosing Anchors, and Leveling (2026)
Hanging a picture correctly depends on finding the right wall support for the weight. This guide covers finding studs with a stud finder, choosing the correct anchor type, driving picture hooks, and hanging level without measuring tools.
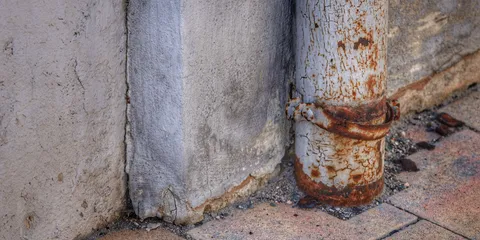
How to Fix a Cracked Basement Pipe Wrap
Learn how to repair or replace cracked pipe insulation in your basement to prevent freezing, condensation, and energy loss.
How to Replace an AC Capacitor: $8–$30 DIY Fix in 30 Minutes (Avoid a $200–$400 Service Call)
AC capacitor replacement costs $8–$30 at any HVAC supply store. Discharge the old capacitor, match the µF and VAC rating, swap it out. Most homeowners finish in under 30 minutes with a screwdriver and needle-nose pliers.
How to Fix a Drafty Window: Weatherstripping, Caulk, Film, and Storm Windows
Stop cold air infiltration around windows with the right fix for each gap type — from rope caulk to full storm window installation.
How to Fix a Running Toilet Fill Valve
Learn how to diagnose and replace a faulty toilet fill valve to stop a constantly running toilet and save water with this straightforward DIY repair.
How to Install Gutter Guards: DIY Types, Steps, and What Actually Works
Cut gutter cleaning from twice a year to once every few years by installing the right gutter guard for your tree situation.
How to Fix a Broken Closet Door Track
Learn how to realign, repair, or replace a sliding closet door track so your doors glide smoothly and stay on course.
How to Fix a Broken Storm Door Glass
Learn how to safely remove and replace a cracked or shattered storm door glass panel with the right tools and techniques.
How to Fix a Broken Window Latch That Won't Lock or Close
Repair a window latch that won't lock, close, or stay shut with this guide covering sash lock replacement, strike plate adjustment, and casement operator repair.

How to Fix a Cracked Ceiling: Hairline Cracks, Settlement Cracks, and Water Stains (2026)
Ceiling cracks range from cosmetic shrinkage cracks to structural warning signs. This guide covers identifying the type of crack, patching with joint compound, and knowing when a crack needs professional evaluation.

How to Get Rid of Ants: Carpenter Ants, Pavement Ants, and Odorous House Ants (2026)
Effective ant control requires killing the colony, not just the visible ants. This guide covers identifying the ant species, using bait correctly, sealing entry points, and when to call a professional.

Ceiling Fan Installation Cost 2026: $150–$350 (Replace) or $400–$700 (New)
Ceiling fan installation cost 2026: $150–$350 replace existing fixture, $400–$700 new circuit. Electrician labor $75–$150/hr. DIY swap: $0 labor if fan-rated box exists. Hunter $80–$250, Hampton Bay $50–$180, Minka-Aire $200–$600. Size guide: 75 sq ft → 36″, 225 sq ft → 50″.
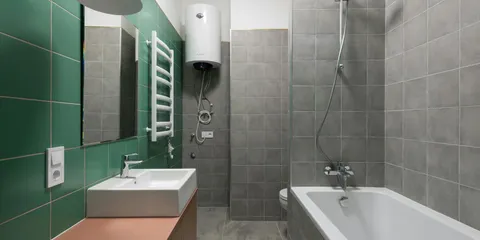
How to Fix a Leaking Boiler
Diagnose the source of a boiler leak and fix common causes like loose fittings, failed pressure relief valves, and corroded pump seals before calling a technician.
Garage Organization: How to Go From Chaos to Clean for Under $300
Transform a cluttered garage into an organized workspace with these proven storage systems, layout strategies, and budget-friendly solutions.
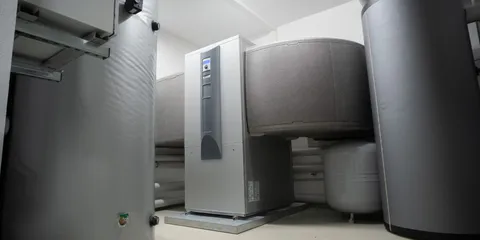
Heat Pump Installation Cost 2026: $4,500–$20,000 + Tax Credits
Heat pump installation costs $4,500-$20,000 depending on type and size. See pricing by system, tax credit savings up to $8,000, and ROI breakdowns.

How to Install a Dishwasher (Replacement in 90 Minutes)
Install or replace a dishwasher yourself and save $150-$300. Step-by-step guide: shutoff, water line, drain, electrical, leveling, and testing. Under two hours.
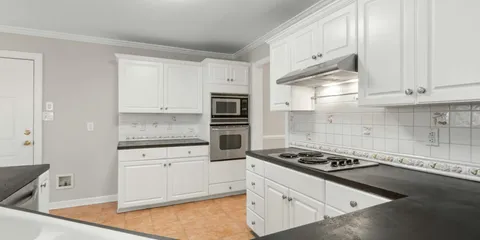
Kitchen Countertop Replacement Cost 2026: $2,000–$6,500 Installed
Kitchen countertop replacement costs $2,000–$6,500 for a typical 30 sq ft kitchen — laminate at the low end, granite and quartz at the high end. What drives the price and how to budget.
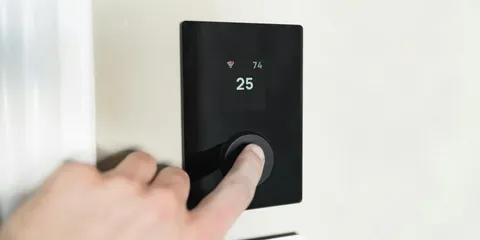
Best Smart Thermostats 2026: Nest vs Ecobee vs Honeywell — Which Saves More?
Best overall: Google Nest Learning Thermostat 4th Gen ($279). Best for room sensors: Ecobee Premium ($249). Most save 10–15% on HVAC costs, paying back in under 2 years. Head-to-head: Nest vs Ecobee vs Honeywell vs Amazon Smart Thermostat.

How to Build a Fire Pit (DIY Guide, 2026)
Build a backyard fire pit in a weekend. Paver, stone, and metal ring options, full material list, tool guide, and permit info. Wood vs. gas comparison.
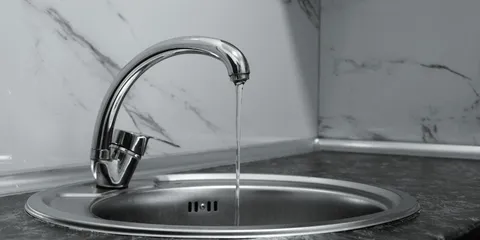
Drain Cleaning Cost 2026: $150–$900 by Service Type
Drain cleaning costs $150–$350 for a single clog, $300–$600 for main sewer line snaking, $400–$900 for hydro-jetting. Camera inspection adds $100–$350. What a fair quote looks like.
How to Caulk a Bathtub the Right Way
Cracked or moldy caulk lets water seep behind your tub and cause expensive damage. Here is how to remove old caulk and apply a clean, waterproof bead that lasts.

How to Fix a Leaking Copper Pipe
Learn how to stop a leaking copper pipe using a slip coupling, repair clamp, or push-fit fitting — no soldering required for most repairs.

How to Shut Off the Water to Your House (Before the Emergency)
When a pipe bursts you have minutes, not hours. Here is where the main water shutoff lives, how to turn it off, and how to find the street shutoff if yours is broken.

How to Fix a Squeaky Laminate Floor
Learn how to silence a squeaky laminate floor by identifying the cause and applying the right fix from above without removing planks.
How to Fix a Sticking Double-Hung Window
Learn how to clean, adjust, and lubricate a double-hung window that sticks or refuses to slide so both sashes operate smoothly again.
How to Replace a Garbage Disposal: A Complete DIY Guide
Replace a garbage disposal in under 2 hours — step-by-step DIY guide covering mounting assembly, electrical, drain connections, dishwasher hookup, and leak testing.
How to Install a Storm Door (2-3 Hours, Any Skill Level)
Install a storm door yourself in 2-3 hours and save $200-$400. Step-by-step guide: sizing, Z-bar mounting, hinge side alignment, closer setup, and weatherstripping.
How to Patch a Drywall Hole Like a Pro
Fix nail holes, fist-sized dents, and large drywall damage with these three methods. Most patches cost under $15 and take 30 minutes of active work.

Whole-House Generator Cost 2026: $8,000–$15,000 Installed
Whole-house generators cost $3,500-$25,000 installed. See pricing by kW size, fuel type, and transfer switch. Compare standby vs portable for your home.

Swimming Pool Installation Cost 2026: $3,500–$130,000 by Type
Swimming pool installation costs $3,500-$130,000 depending on type. See pricing for above-ground, inground, concrete, fiberglass, and vinyl liner pools.
How Long Do Home Appliances Last? (2026 Lifespan Guide)
Average lifespans for every major home appliance — water heaters, HVAC, washers, refrigerators, dishwashers, and more. With replacement-vs-repair thresholds.

How to Fix a Leaking Outdoor Spigot Handle
When your outdoor faucet handle spins freely but water keeps running, the packing nut or stem assembly is to blame. This guide walks you through diagnosing and fixing the problem yourself.
How to Fix a Musty Smelling House: Source Identification and Remediation
A musty odor in your home almost always signals moisture. Learn how to find the source — mold, HVAC, or crawl space — and eliminate it for good with air purifiers, dehumidifiers, and targeted remediation.

How to Seal an Asphalt Driveway: A Full DIY Guide
Step-by-step DIY guide to sealing an asphalt driveway — when to seal, picking the right sealer, prep work, application technique, drying time, and how to avoid the streaky finish.
How to Install a Bathroom Vanity: A Full DIY Walkthrough
Step-by-step guide to installing a bathroom vanity yourself — tools, prep, plumbing rough-in alignment, leveling, sealing, and the mistakes that cause leaks six months later.
How to Paint Kitchen Cabinets Like a Pro (Without Sanding to Bare Wood)
Transform your kitchen for $200 instead of $15,000. Here is the step-by-step process professionals use to paint kitchen cabinets that last.
Hot Tub Renovation & Installation Cost 2026: $300–$44,000 by Brand
Hot tub renovation costs $500–$8,000: shell $500–$1,500, pump $300–$800, heater $400–$1,200, control board $300–$1,500, full rebuild $3K–$8K. 50% rule helps you decide renovate vs. replace. New tub? Jacuzzi $7K–$20K, Hot Spring $8K–$22K, inflatable $300–$1,500.
How to Fix a Leaking Basement Crack
Learn how to seal a leaking foundation crack yourself using polyurethane injection or hydraulic cement to stop water intrusion for good.
How Much Does an Electrician Cost? 2026: $75–$150/hr + Job Price List
Electrician cost 2026: $75–$150/hr, $100–$250 service call. 25+ flat-rate prices: outlet $100–$200, EV charger $750–$2,500, 200A panel upgrade $1,800–$3,500. City rates + 5 legal DIY tasks that save $150–$500.
How to Fix a Window AC Unit Leaking Water Inside
Water dripping from your window air conditioner onto the floor or windowsill is a common and fixable problem. Learn how to clear the drain hole, fix the tilt, clean the filter, and repair the drain pan yourself.

How to Fix a Cracked Window Glazing
Learn how to remove old crumbling glazing compound and apply fresh window glazing putty to seal single-pane windows and stop drafts.

How to Fix an Interior Door That Won't Latch
When an interior door latch bolt misses the strike plate, the fix is almost always a quick file adjustment or strike plate relocation — here is how to diagnose and solve it.
How to Install Under-Cabinet Lighting (LED Strip Guide)
Install under-cabinet LED lighting in your kitchen in under an hour. Covers LED strip lights, puck lights, and hardwired options with costs and wiring tips.
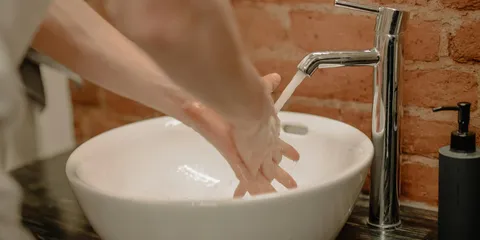
Water Softener Cost 2026: $1,500–$2,500 Standard System
Water softener costs $800–$2,500 for a whole-house salt-based system. Salt-free conditioners run $500–$2,000. Installation adds $200–$500. Annual salt cost $100–$300. Full cost-of-ownership breakdown.
How to Overseed a Lawn: A Full DIY Guide for Thicker, Greener Grass
Step-by-step guide to overseeding a lawn — when to overseed, picking the right seed, prep, application rate, post-seed watering, and how to avoid the bare-patch result.
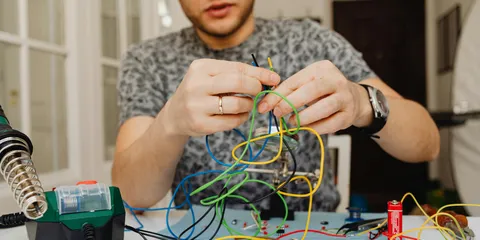
How to Reset a Tripped Circuit Breaker (And Why It Keeps Tripping)
Step-by-step guide to safely resetting a tripped breaker, plus how to diagnose what caused it. Covers overloads, short circuits, and ground faults.
Spring Home Maintenance Checklist: 15 Tasks That Prevent Expensive Repairs
A complete spring home maintenance checklist covering HVAC, gutters, foundation, deck, and more. Spend a weekend now to avoid thousands in repairs later.
Siding Replacement Cost 2026: $8,000–$22,000 by Material
Siding replacement costs $8,000–$22,000 for a typical 2,000 sq ft home. Vinyl $4–$8/sq ft, fiber cement $7–$13/sq ft, engineered wood $8–$14/sq ft. Full material comparison.
Annual Home Maintenance Schedule (2026): Month-by-Month Checklist
Month-by-month home maintenance checklist so nothing gets missed. January through December: HVAC filter changes, gutter cleaning, sprinkler winterization, AC prep, roof inspection, and seasonal prep tasks. Budget 1–2% of home value annually.
Best Cordless Drills for Homeowners 2026: DeWalt vs Ryobi vs Milwaukee Ranked
Best overall: DeWalt DCD794D1 20V Brushless ($100–$120) — compact, powerful, and built to last. Best budget: Ryobi PCL206K1 ($50–$65). DeWalt vs Ryobi vs Milwaukee vs Makita ranked by power, battery life, and value for home repairs.
How to Deep Clean a Bathroom (Top to Bottom)
A complete bathroom deep clean in the right order — ceiling, fan, mirror, shower, toilet, sink, floor. Includes what to use, how long to let cleaners dwell, and the parts most people skip.
How to Fix a Loose Floor Register in 10 Minutes ($0–$15 Clip or Seal Fix)
A loose floor register rattles and wastes conditioned air. Secure it with magnetic clips or seal the duct opening in 10 minutes. Parts cost $0–$15, including stuck damper fixes.
Home Inspection Cost 2026: $300–$600 and What You Actually Get
Home inspection costs $300–$600 for homes up to 2,000 sq ft, $500–$900 for 2,000–4,000 sq ft. Specialty inspections (radon, mold, sewer) add $100–$400 each.
How to Fix a Sunken Concrete Patio
Learn how to lift, level, and stabilize a sunken concrete patio slab using mudjacking, foam leveling, or DIY resurfacing techniques.
How to Fix a Garage Floor Oil Stain: From Fresh Spill to Old Set Stains
Oil and grease stains don't have to be permanent. Learn how to absorb fresh spills with cat litter, attack set stains with degreasers and poultice, and seal the concrete to prevent future staining.
Best Smart Locks 2026: Schlage vs Yale vs Level — Home Security Ranked
Best overall smart lock: Schlage Encode Plus ($260–$320) — ANSI Grade 2, built-in WiFi, Apple Home Key. Best budget: Yale Assure Lock 2 ($180–$230). Best for renters (no drill required outside): Level Lock+. All ANSI-certified.
How to Fix a Leaking P-Trap
A leaking P-trap under your sink can cause cabinet water damage fast — this guide shows you how to diagnose, tighten, reseat, or replace a P-trap in under an hour.

How to Fix a Sticking Bi-Fold Door
Learn how to diagnose and repair a sticking or misaligned bi-fold door by adjusting its hardware, pivots, and track for smooth, reliable operation.

How to Install a Tile Backsplash (DIY Guide, 2026)
Install a kitchen tile backsplash step-by-step. Subway, mosaic, and peel-and-stick options, full material list, wet saw tips, and grout pro tricks.
Best Home Security Cameras 2026: Arlo vs Ring vs Nest vs Wyze — Ranked
Tested and ranked: best overall — Arlo Pro 5S (2K, wire-free, no subscription). Best doorbell: Google Nest Doorbell wired ($179). Best no-sub: Eufy eufyCam 3. Best under $50: Wyze Cam v4. Full head-to-head on video quality, storage cost, and reliability.
Hardwood Floor Refinishing Cost 2026: $3–$8/sq ft Installed
Full breakdown of hardwood floor refinishing costs in 2026 — sand-and-finish, screen-and-recoat, dustless systems, stain choices, and when to refinish vs. replace.
How to Fix a Sagging Deck Board
Learn how to diagnose, re-fasten, and replace warped, cupped, or sagging deck boards to restore a flat, safe deck surface.
Deck Building Cost 2026: $15–$75/sq ft by Material
How much does it cost to build a deck per square foot? Pressure-treated wood, composite, and hardwood pricing with labor, permits, and real project examples.
How to Install a GFCI Outlet (Step-by-Step Safety Guide for 2026)
Install a GFCI outlet yourself in 30 minutes. Wiring diagram, line vs load explained, code requirements, testing, and the mistakes that cause GFCIs to trip or fail.

How to Fix a Leaking Roof Valley
Learn how to diagnose and repair a leaking roof valley by resealing flashing, replacing open valley metal, or installing new closed-cut shingles.

Lawn Aeration Cost 2026: $75–$200 for Standard Yard
Lawn aeration costs $75–$200 professionally for a 1/4-acre yard. DIY core aerator rental runs $60–$100/day. Core aeration outperforms spike — pricing, timing, and overseed combo guide.

The Complete New Homeowner Toolkit: 15 Tools You Actually Need
Skip the 200-piece sets. Here are the 15 essential tools every new homeowner needs for common repairs, maintenance, and DIY projects.

Best Ceiling Fans for Large Rooms: What Size You Actually Need
How to choose the right ceiling fan for large rooms. Covers blade span, CFM ratings, mounting height, and the best fans for rooms over 300 square feet.

Chimney Sweep Cost 2026: $150–$400 Cleaning + Repair Pricing
Chimney sweep costs $150–$400 for Level 1 cleaning, $200–$500 for Level 2 with camera. Common repairs: cap ($200–$700), crown ($300–$1,500), liner ($2,500–$5,000). When to hire.

How to Fix a Squeaky Door in 5 Minutes
Stop annoying door squeaks with simple fixes using household items. Covers hinge lubrication, pin cleaning, and when to replace hinges entirely.

Basement Waterproofing Cost 2026: $2,000–$20,000 by Method
Basement waterproofing costs $2,000-$20,000. Interior vs. exterior methods, sump pumps, French drains, crack injection, and DIY options compared.
How Much Does a Plumber Cost? 2026 Rates: $75–$175/hr + Flat-Rate Jobs
Plumbers charge $75–$175/hr in 2026. Service call: $75–$200. Unclog drain: $150–$350. Fix leaky faucet: $150–$300. Replace toilet: $200–$500. Water heater: $1,000–$3,500. What to DIY vs. hire out + how to get fair quotes.
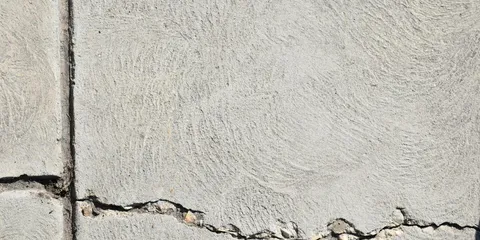
Foundation Repair Cost 2026: $2,000–$7,500 by Damage Type
Foundation repair costs $2,000-$25,000 depending on damage severity. See pricing for crack repair, piers, leveling, waterproofing, and complete replacement.
How to Fix a Loose Floor Tile
Re-adhere a loose or hollow-sounding floor tile without full replacement by injecting adhesive or re-setting the tile with fresh thinset for a lasting, flat repair.

10 Eco-Friendly Home Improvements That Actually Save Money
Practical eco-friendly home improvements ranked by ROI. From LED bulbs to insulation upgrades, these changes pay for themselves through lower utility bills.
How to Clean Windows Without Streaks (Squeegee Method)
How to clean windows streak-free using the professional squeegee method, plus screen cleaning, track cleaning, and the DIY solution that outperforms Windex. Covers interior and exterior windows.

How to Replace a Shower Head in 10 Minutes (and Pick the Right One)
Replace a shower head yourself in under 10 minutes — plus a buying guide covering flow rate, hand-held vs. fixed, rain shower heads, and low-pressure situations.

How to Replace a Light Switch (Single-Pole and Three-Way)
Replacing a light switch is one of the easiest DIY electrical upgrades. Swap a single-pole or three-way switch safely in under 15 minutes.
Kitchen Backsplash Cost 2026: $20–$120/sq ft ($600–$3,500 Typical)
Kitchen backsplash costs $600–$3,500 installed ($20–$120/sq ft). Subway tile labor: $10–$25/sq ft. Peel-and-stick DIY: ~$100. 10 tile types compared + the materials contractors refuse to install over old backsplash.
How to Fix a Split or Cracked Wood Door Panel
Step-by-step guide to repairing a split or cracked wood door panel using epoxy wood filler, Bondo, and paint. Covers when to replace a panel versus repair it, sanding, and finishing techniques.
How to Repair a Gutter Downspout Elbow in 20 Minutes for Under $12
A downspout elbow replacement takes 20 minutes and costs $5–$12. Measure the angle, cut to fit, seal the joint, and restore proper drainage away from your foundation.

Radon Mitigation Cost 2026: $1,200–$3,500 by Foundation Type
Radon mitigation typically costs $1,200-$3,500 depending on foundation type. See system options, DIY feasibility, and what drives costs up or down.
Window Replacement Cost 2026: $400–$1,500 per Window Installed
Window replacement costs $400-$1,500 per window installed. Full pricing by type, material, brand comparison, whole-house costs, and ROI breakdown.
Interior Door Replacement Cost 2026: $150–$650 Per Door
Interior door replacement costs $150-$650 per door installed. See pricing by slab vs. pre-hung, solid core vs. hollow, and DIY savings of $100-$200.
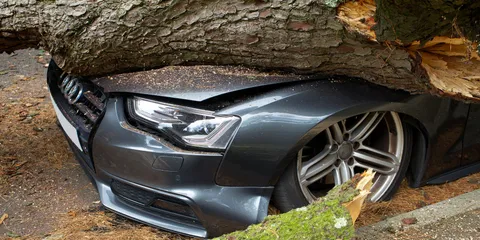
Tree Removal Cost 2026: $300–$2,500 by Tree Size + Stump Grinding Prices
Tree removal costs $300–$500 (small trees, under 30 ft) to $1,200–$2,500 (large, 60–80 ft). Stump grinding adds $100–$400. National average: $875. How to get fair quotes and avoid arborist overcharges.
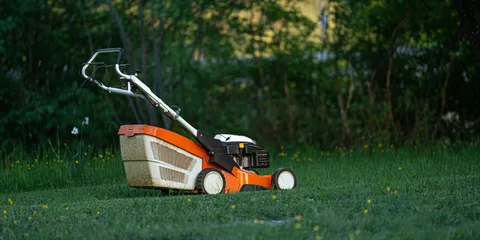
Best Lawn Mowers for Homeowners in 2026: Battery, Gas, Robot
2026 best lawn mowers for homeowners: top battery, gas, self-propelled, and robot picks for small, medium, and large yards. Deck size, runtime, and bagging compared.
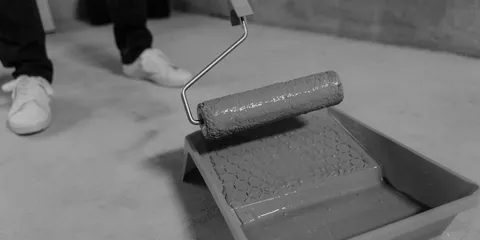
Crawl Space Encapsulation Cost 2026: $5,500–$15,000 Installed
Crawl space encapsulation costs $5,500-$15,000 for average homes. See pricing by size, components, DIY options, and energy savings ROI calculations.

How to Install a Smart Lock (Keypad or Wi-Fi)
Install a smart lock yourself in 20 minutes with a screwdriver. Step-by-step guide for keypad and Wi-Fi smart locks, plus what to buy and what to avoid.
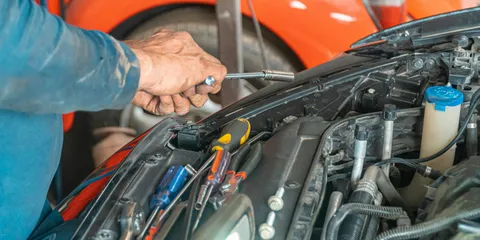
How to Change a Furnace Filter (5-Minute Job, $15-30 Filter)
Changing your furnace filter takes 5 minutes and cuts heating/cooling bills by 5-15%. Here is exactly how to find the size, swap it, and avoid the MERV rating mistake that starves your blower.

Best Paint for Bathroom Walls That Won't Peel or Mildew (2026)
Bathroom paint needs to handle humidity, steam, and moisture without peeling or growing mildew. Here are the best options tested by homeowners.
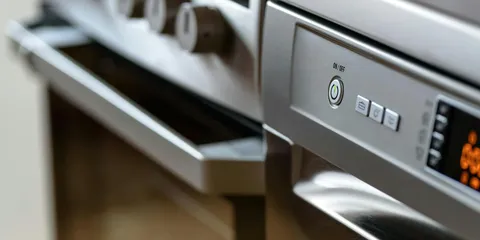
How to Clean an Oven: Self-Clean vs Manual vs Natural Methods
How to clean an oven — with and without the self-cleaning cycle, using store-bought cleaners, or with baking soda and vinegar. Includes racks, door glass, and the risks of self-clean that no one warns you about.
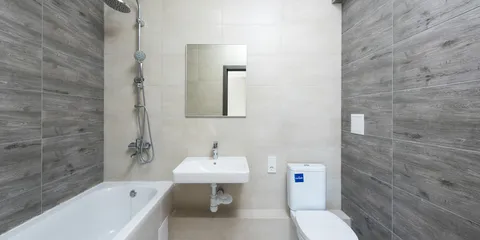
How to Install a Bathroom Exhaust Fan (Replacement or New)
Install or replace a bathroom exhaust fan yourself. Step-by-step guide for swapping an existing fan or adding one to a bath with no fan, with wiring and venting.

Pest Control Cost 2026: $150–$400 One-Time or $40–$85/Visit Quarterly
Pest control costs $150–$400 one-time or $40–$85/visit on a quarterly plan. Termites $600–$3,500, bed bugs $500–$1,500. Full pricing by pest, treatment, and plan type.

How to Fix a Leaking Air Conditioner Drain Line
Learn how to clear a clogged AC condensate drain line, stop water leaks, and prevent mold buildup with simple DIY tools and maintenance steps.
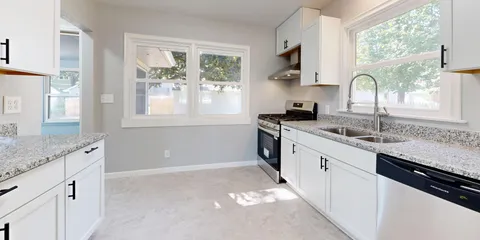
Kitchen Remodel Cost 2026: $14,500–$70,000+ Full Breakdown
A full kitchen remodel costs $14,500 to $70,000+ in 2026. Line-item breakdown of cabinets, countertops, appliances, labor, and how to cut costs without cutting quality.
Best Robot Vacuums for Homeowners (2026 Guide)
The best robot vacuums tested across hardwood, carpet, and pet hair. Top picks by budget, self-empty models, and which features are worth paying extra for.

How to Fix a Leaking Pool Skimmer
Stop a leaking pool skimmer with this step-by-step guide covering faceplate gasket replacement, body crack repair, plumbing joint sealing, and choosing between putty and epoxy.

How to Install a Water Softener: A Full DIY Walkthrough
Step-by-step DIY guide to installing a whole-house water softener — sizing, plumbing tie-in, brine tank setup, initial regeneration, and avoiding the common leaks.
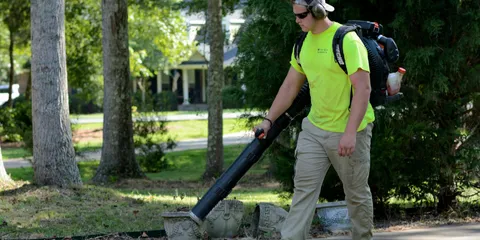
Best Leaf Blowers for Homeowners in 2026: Battery, Electric, and Gas
The best leaf blowers for homeowners in 2026 across battery, corded electric, and gas — covering CFM, MPH, runtime, noise, and the right blower for your yard size.
How to Lay a Paver Patio (DIY Guide, 2026)
Install a paver patio yourself. Layout, excavation, base prep, edge restraints, sand setting, and joint sand. Full DIY guide for a patio that lasts 25+ years.
Tile Flooring Installation Cost 2026: $7–$25/sq ft Installed
Tile flooring installation costs $7-$25 per square foot installed. See pricing by ceramic, porcelain, natural stone, and when DIY saves the most.
Best Garage Door Openers (2026 Buying Guide)
The best garage door openers ranked by drive type, noise, smart features, and reliability. Chain vs. belt vs. jackshaft, top smart picks, and what to skip.
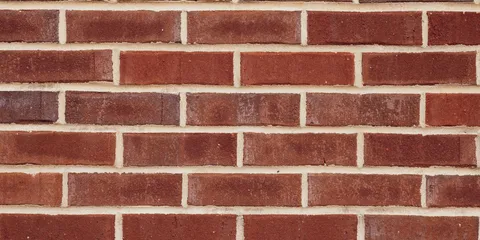
How to Clean Grout: 5 Methods From Gentle to Heavy-Duty
How to clean dirty grout in showers, floors, and backsplashes. Covers 5 methods from baking soda paste to oxygen bleach to steam — plus when to regrout vs clean, and the sealer step that prevents it from coming back.

Electrical Outlet Not Working? Here's How to Fix It
A dead outlet is often a simple fix — a tripped breaker or GFCI. Troubleshoot an outlet not working step-by-step and know when to call an electrician.

How to Fix a Leaking Radiator Pipe
Learn how to identify and seal a leaking radiator pipe connection yourself before minor drips cause major water damage.

Best Pressure Washers for Homeowners in 2026: Gas and Electric Picks
2026 best pressure washers for homes: top electric and gas picks for driveways, decks, siding, and cars. PSI, GPM, and use cases explained.
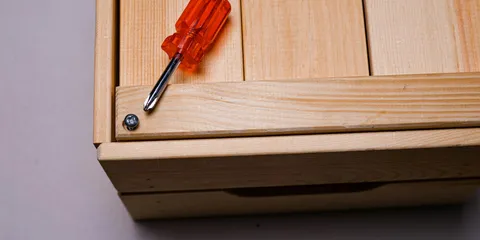
How to Fix a Stripped Door Hinge Screw
Repair stripped screw holes in door hinges using toothpicks, wooden dowels, or longer screws so the hinge holds securely without wobbling or sagging.
How to Stain a Deck (Step-by-Step for a 10-Year Finish)
Complete guide to staining a deck that lasts. Covers prep, stain selection, application technique, and the mistakes that cause peeling in year one.
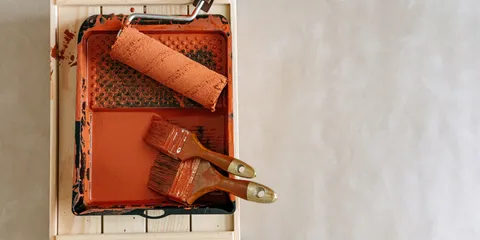
Exterior House Paint Cost 2026: $3,000–$8,500 Installed
Exterior painting costs $3,000–$8,500 for a 2,000 sq ft home. DIY materials run $400–$900. Pricing by siding type, story count, and prep — plus how to evaluate painter quotes.

How to Fix a Leaking Water Softener
Diagnose and repair the most common water softener leaks — from loose fittings and cracked resin tanks to faulty bypass valves and brine tank overflow.
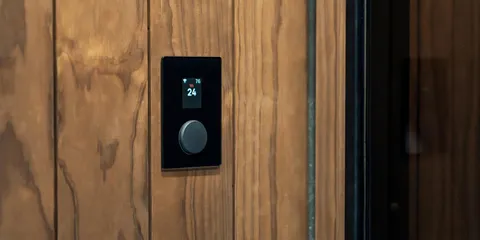
Water Heater Replacement Cost 2026: $800–$3,500 Installed
Water heater replacement cost 2026: $800–$1,800 for 40–50 gal tank installed, $1,500–$3,500 for tankless. Rheem vs A.O. Smith prices, heat pump hybrid (30% tax credit), and DIY savings guide.

Gutter Cleaning Cost 2026: $100–$400 by Story Count and Home Size
Gutter cleaning costs $100–$250 for a single-story home, $150–$400 for two stories. Three-story homes $250–$500. Annual cleaning prevents $2,000+ water damage. DIY vs. pro.
Spring Lawn Care Schedule: The Month-by-Month Plan That Actually Works
A complete spring lawn care schedule for cool-season and warm-season grass. Dethatch, aerate, overseed, fertilize, and mow at the right times — plus when to apply pre-emergent weed control.

Concrete Driveway Cost in 2026: $6–$14/sq ft — What You Will Actually Pay
A 20×40 ft concrete driveway costs $4,800–$11,200 for standard gray concrete ($6–$14/sq ft). Stamped: $8,000–$22,400. Add $2–$4/sq ft for old driveway tear-out. What affects your final quote + how to review bids.
How to Fix a Leaking Kitchen Faucet Sprayer
Diagnose and repair a dripping or malfunctioning pull-out or pull-down kitchen faucet sprayer with the right replacement parts and simple tools.
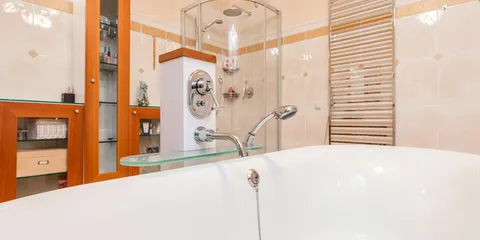
How to Fix a Leaking Shower Valve Cartridge
Learn how to identify, remove, and replace a faulty shower valve cartridge to stop leaks and restore proper water control.
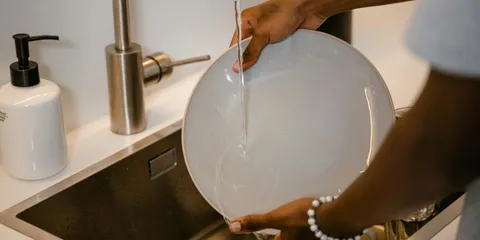
How to Fix a Running Dishwasher
Learn how to diagnose and fix a dishwasher that keeps running and will not end its cycle, covering the timer, door latch, float switch, and control board.

Sprinkler System Installation Cost 2026: $2,500–$5,500 Installed
Sprinkler system installation costs $2,500–$5,500 for an average yard. See per-zone pricing, DIY vs pro costs, and how to avoid the 3 most expensive mistakes.
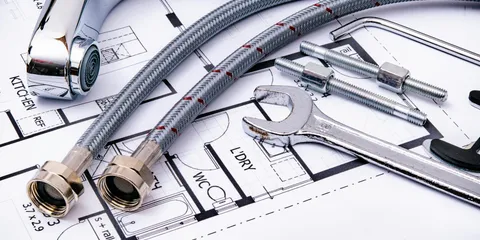
Best Sump Pump for Basements 2026: Top 5 Picks Compared
Top pick: Wayne CDU980E (1/3 HP, ~$165) for most basements. Compares 5 submersible and pedestal models, with battery backup picks for storm-season power outages.
Stump Grinding Cost 2026: $100–$450 per Stump by Size
Stump grinding costs $100-$450 per stump or $3-$6 per inch diameter. See pricing by size, alternatives like chemical removal, and DIY options for small stumps.
Well Pump Replacement Cost 2026: $1,200–$5,500 Installed
Well pump replacement costs $1,200-$5,500 installed. See pricing by submersible vs. jet pump, well depth, and what add-ons to budget for.

Bathroom Remodel Cost 2026: $1,500–$35,000 by Scope
Bathroom remodel costs $1,500–$5,000 for a cosmetic refresh, $6,000–$16,000 for a mid-range update, and $16,000–$35,000+ for a full gut renovation. Breakdown by fixture, labor, and scope.

Central AC Installation Cost 2026: $4,500–$12,000 Breakdown
Installed cost: $4,500–$12,000. New ductwork adds $3,000–$7,000. What drives your final quote — tonnage, SEER, and region — plus bid red flags to watch for.
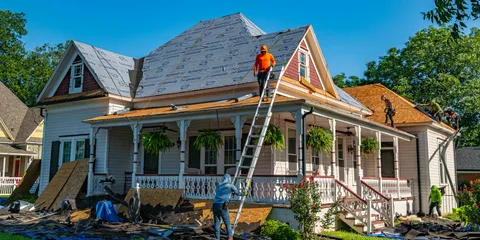
Gutter Replacement Cost 2026: $4–$40/Linear Foot by Material
New gutters cost $4–$40/linear ft installed — aluminum $800–$2,500, copper $3,500–$8,000 for a typical home. Pricing by material, style, and linear footage.
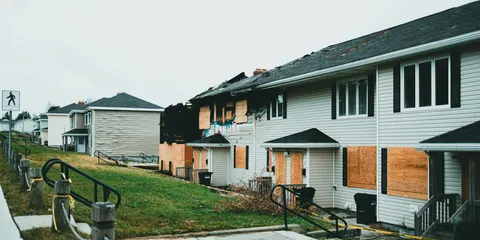
How to Fix a Damaged Soffit
Cracked, sagging, or missing soffit lets water, pests, and cold air into your home. This guide covers vinyl and aluminum soffit repair, fascia re-nailing, and permanently sealing squirrel entry points.

Mold Remediation Cost 2026: $500–$30,000 by Type and Size
Mold remediation costs $500–$6,000 for small-to-moderate problems — bathroom ($500–$1,500), basement ($1,000–$5,000), attic ($1,500–$9,000). Pricing by type, size, and severity.
How to Install Vinyl Plank Flooring: Step-by-Step DIY Guide
Save $1,500+ by installing vinyl plank flooring yourself. Step-by-step guide: tools, room prep, click-lock installation, cutting around obstacles, and finishing.
Best Dehumidifiers for Basements in 2026: Sized by Square Footage
The best basement dehumidifiers in 2026 across 30-pint, 50-pint, and whole-basement models — covering capacity, drainage, smart features, and sizing by square footage.
Gutter Guard Cost 2026: $7–$30/Linear Foot Installed
Gutter guard installation costs $7–$30 per linear foot — $1,050–$4,500 for a typical 150 LF home. Micro-mesh $1,500–$5,000 installed. DIY screen guards $0.50–$2/LF. Honest ROI breakdown.
Handyman Cost 2026: $60–$125/hr + 35 Job Prices — Get Free Local Quotes
Avg $75–$90/hr ($150–$250 min). 35 flat-rate jobs: ceiling fan $150–$275, TV mount $150–$300, toilet repair $100–$175, door hang $150–$250. 30–50% cheaper than a plumber or electrician. Get 3 free local quotes and compare before you hire.
Home Security System Installation Cost 2026: $200–$3,000
Home security installation costs $0-$1,500 DIY or $600-$3,000 professional. Compare SimpliSafe, ADT, Ring, and Vivint pricing plus monthly monitoring costs.
How to Fix a Leaking Basement Window Well
Learn how to stop a basement window well from flooding by improving drainage, sealing the liner, and redirecting surface water away from the well.
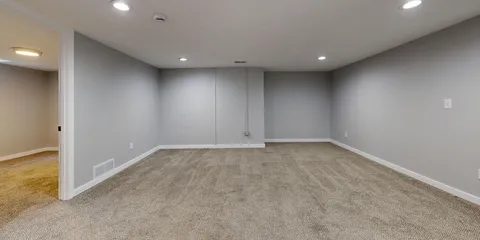
Basement Finishing Cost in 2026: What $30K–$100K Actually Gets You
Full 2026 cost guide for finishing a basement — framing, insulation, drywall, flooring, electrical, plumbing, egress, and the hidden costs that double a budget.

How to Power Wash Your House (2026): Siding, Driveway, and Deck Without Damage
Use 1,200–1,500 PSI and the green (25°) nozzle for painted siding, 12–18 inches away. Always spray downward — never up under siding laps. Covers vinyl, wood, stucco, concrete, and decks. The 4 mistakes that strip paint and drive water behind panels.
Drywall Repair Cost 2026: $50–$400 by Hole Size + DIY vs Pro
Drywall repair costs $50-400+ depending on damage size and whether you DIY or hire a pro. Full cost breakdown for every type of drywall damage.
How to Fertilize Your Lawn (Spring, Summer, Fall Schedule)
A simple year-round lawn fertilizer schedule. What to apply and when, NPK ratios explained, how much to buy, and the 3 biggest mistakes homeowners make.
How to Fix a Stuck Garage Door Cable
Diagnose and repair a frayed, jumped, or snapped garage door cable so your door opens and closes safely and smoothly again.

How to Fix a Leaking Irrigation Valve
Learn how to diagnose and repair a leaking or stuck irrigation zone valve by replacing the diaphragm, solenoid, or full valve body in under an hour.

How to Fix a Stuck Garbage Disposal in 5 Minutes
Your garbage disposal is humming but not spinning? Here is how to fix a jammed or stuck garbage disposal yourself in minutes using tools you already have.
How to Install a Smart Doorbell (Ring, Google Nest, or Any Brand)
Install a video doorbell yourself in 30 minutes. This guide covers both wired replacement and battery-powered options with step-by-step instructions.

How to Clean a Refrigerator: Interior, Coils, Gasket, and Drain Pan
How to clean a refrigerator step by step — interior shelves and drawers, the coils that most people never touch (and that kill efficiency), door gasket, drain pan, and the deodorizing habits that keep it smelling clean between deep cleans.
EV Charger Installation Cost 2026: $600–$2,500 + 30% Tax Credit
Home EV charger installation costs $600-2,500 depending on charger type, electrical work, and panel capacity. Full cost breakdown for Level 1 and Level 2 charging.

How to Install Attic Insulation (2026): Hit R-49 for Under $1,200 — DIY
Air-seal every penetration first — most homeowners skip this and lose 30% of their energy savings. Then blow cellulose or lay batts to R-49 (15–18 inches). Materials: $400–$1,200. Blower rental often free with purchase.
Cost to Replace a Garage Door 2026: $750–$4,000 Installed
Garage door replacement costs $750-$4,000 installed. See pricing by door size, material, insulation, and whether to replace the opener at the same time.

How to Fix a Damaged Door Frame
Learn how to repair a split, cracked, or rotted door frame using wood filler, epoxy consolidant, or partial replacement to restore strength and appearance.

How to Fix a Leaking Pool Light in 45 Minutes ($5–$25 Gasket Replacement)
Replace a pool light gasket and seal the conduit in 45 minutes to stop water leaking into the niche before it causes electrical damage or trips a GFCI. Gasket costs $5–$25.
How to Fix a Loose Porch Step
Re-anchor, shim, and level a wobbly or bouncy porch step using the right fasteners and techniques for wood, concrete, and composite construction.
How to Fix a Cracked Tile Countertop
Learn how to repair cracked or chipped tiles on a kitchen countertop using epoxy filler, color-matched grout, and tile replacement techniques.
How to Fix a Cracked Wood Deck Board
Repair or replace a cracked wood deck board using epoxy filler for minor cracks and board replacement for structural damage, restoring your deck safely and cleanly.

Refrigerator Water Line Leaking? Fix It in 30 Minutes (2026)
Pull the fridge out and locate the leak — usually the supply line, compression fitting, or saddle valve. Replace the supply line ($8–$20), tighten the fitting, or swap the valve. Most repairs take 30 minutes with basic hand tools. No plumber needed.
How to Install a Ceiling Fan With No Existing Wiring (2026): Without an Electrician
Install a ceiling fan where there is no existing wiring: run 14/2 cable through the wall or attic, install a fan-rated brace box, connect the switch loop. Most DIYers finish in 3–5 hours. Covers attic access vs. fishing through walls, plus when the job does need an electrician.
How to Fix Squeaky Floors (3 Methods That Actually Work)
Squeaky floors are caused by loose subfloor boards rubbing against nails or joists. Here are three proven methods to silence them for good.
How to Fix a Leaking Ice Maker Line
Stop an ice maker supply line leak by identifying the failure point, replacing the tubing or fittings, and restoring a watertight connection.
How to Fix a Sagging Attic Floor
Learn how to diagnose, brace, and repair sagging attic floor joists using sistering, blocking, and temporary support — plus how to safely reinstall insulation afterward.
How to Install Crown Molding (DIY Guide, 2026)
Install crown molding with perfect corners. Coped cuts, compound miters, shortcut tricks, and tool list. Full DIY guide for clean, professional results.
How to Fix a Leaking Outdoor Shower
Learn how to diagnose and repair the most common outdoor shower leaks, from dripping faucets to loose pipe connections, using basic plumbing tools.
Cost to Replace a Front Door 2026: $1,000–$2,500 Installed
Front door replacement costs $500-5,000+ depending on material, style, and installation. Here is a detailed breakdown so you know what to expect.
How to Fix Low Water Pressure in Your House (2026 Troubleshooting Guide)
Low water pressure? Here are the most common causes and DIY fixes, plus when to call a plumber. Covers single fixtures, whole-house issues, and well systems.
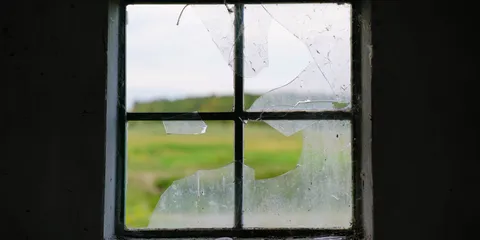
How to Fix a Cracked Vinyl Window Frame
A cracked vinyl window frame lets in drafts, moisture, and insects — this guide covers how to patch small cracks, seal damaged corners, and know when full sash replacement is the smarter call.
How to Fix Shower Caulk
Learn how to remove old, moldy shower caulk and apply a clean new bead of silicone caulk to stop leaks and prevent water damage behind tile.
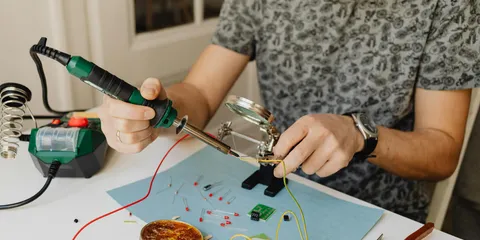
Best Budget Power Washers Under $250 (2026 Buyer's Guide)
We compared the top-rated electric power washers under $250 for driveways, decks, siding, and cars. Here are the four worth buying.

How to Fix a Stuck Exterior Door
Learn how to diagnose and fix a swollen, warped, or misaligned exterior door that sticks, drags, or won't close properly — including planing, hinge adjustment, and weatherstrip replacement.

Fireplace Installation Cost 2026: $600–$25,000 by Type
Fireplace installation costs $1,200-$10,000 for gas or electric, $4,500-$25,000+ for wood-burning. See pricing by fireplace type, chimney needs, and fuel choice.
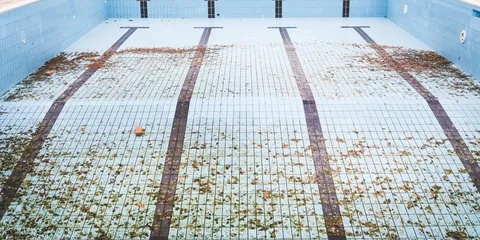
How to Fix a Cracked Swimming Pool Step
Learn how to repair cracks in concrete or fiberglass swimming pool steps using the right materials and techniques to restore a safe, watertight surface.
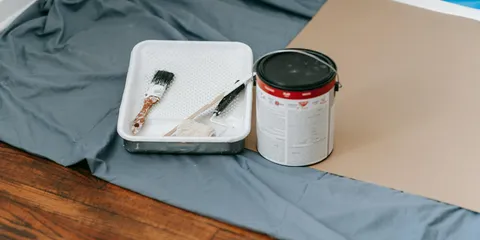
Cost to Paint a Room 2026: $300–$800 Pro or $100–$250 DIY
Room painting costs $200-800 DIY or $400-1,800 hiring a pro. Here is a full cost breakdown by room size, paint quality, and what drives the price up.
Best Tankless Water Heaters (2026 Buying Guide)
The best tankless water heaters tested by home size, fuel type, and climate. Top picks by GPM, Rinnai vs Navien, and which models are worth the premium.

Wallpaper Removal: How to Remove It Without Damaging Drywall
Score, soak, scrape — without gouging drywall. Works on strippable, vinyl, and painted-over wallpaper. The fabric softener ratio that beats expensive strippers.
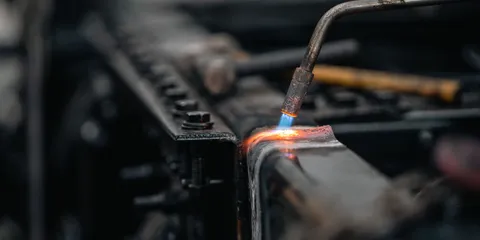
Furnace Replacement Cost 2026: $3,000–$15,000 Installed
2026 furnace replacement cost: gas, electric, oil, and propane. AFUE efficiency, sizing, ductwork, and how to compare HVAC contractor quotes without overpaying.
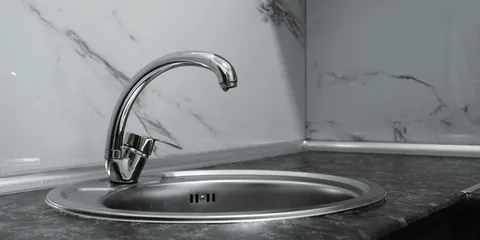
How to Fix a Leaking Sink Sprayer Hose
Learn how to stop a leaking kitchen sink sprayer hose by inspecting, repairing, or replacing the spray head, hose, and diverter valve.
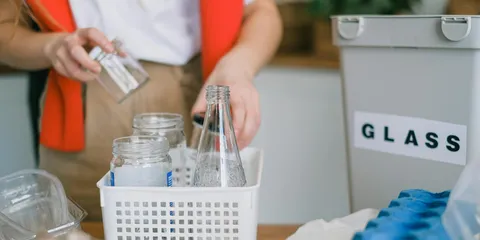
How to Fix a Garbage Disposal (Jammed, Humming, Leaking, or Dead)
Garbage disposal not working? Diagnose and fix the four most common problems yourself in under 10 minutes without calling a plumber.
How to Fix a Loose Toilet Tank Bolt
Learn how to tighten or replace a loose toilet tank bolt to stop leaks and wobbling without calling a plumber.

HVAC Maintenance Checklist (Seasonal Guide, 2026)
Complete HVAC maintenance checklist by season. DIY tasks, what to hire pros for, filter schedule, and how to extend system life 5-10 years.
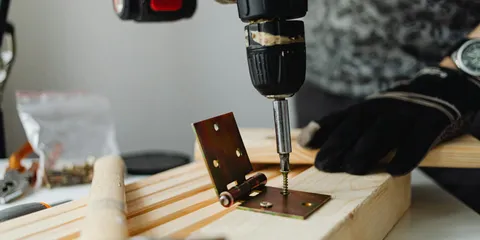
AC Tune-Up Cost 2026: $75–$200 for 14-Point Service
AC tune-up costs $75–$200 for a standard 14-point service. Spring tune-ups prevent most summer AC failures. What is included, when it is worth it, and how to avoid upsell traps.
How to Seal Drafty Windows (Cheap Fixes That Actually Work)
Stop window drafts and cut heating costs with these proven DIY fixes. From $3 weatherstripping to insulation kits, ranked by cost and effectiveness.
How to Apply Garage Floor Epoxy: A Weekend DIY Guide
Complete DIY guide to applying garage floor epoxy: prep, etching, kit selection, application, and curing. Cost, tools, and common mistakes to avoid.

How to Fix a Squeaky Ceiling Fan: 4 Causes Fixed in Under 20 Minutes ($0–$15)
Squeaky ceiling fan usually means loose screws, a worn blade bracket, or dry motor bearings. Tighten all screws first ($0 fix). If it still squeaks, a drop of machine oil on the bearings solves it. Full fix in under 20 minutes.
How to Fix a Toilet Fill Valve
Learn how to diagnose and replace a faulty toilet fill valve that runs constantly, fills slowly, or makes noise — a straightforward DIY repair that takes under an hour.

Best Wet/Dry Shop Vacuums for Homeowners in 2026
The best wet/dry shop vacuums for garages, basements, and workshops in 2026 — sized from 4 to 16 gallons, with HEPA options, cordless picks, and dust extractors.
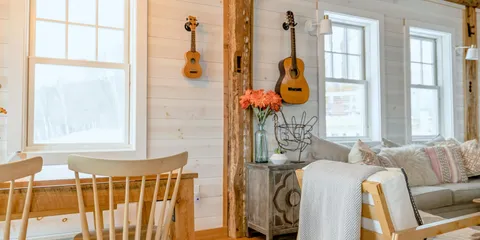
How to Install Shiplap in a Weekend: DIY Wall Guide (2026)
Install a shiplap accent wall in a weekend for $2–$7/sq ft in materials. Mark studs, work bottom-up, nail through tongues, stagger seams. Tools: nail gun, miter saw, level. Pro tips for tight joints and a clean painted finish.
How to Fix a Loose or Wobbly Porch Railing
Tighten a wobbly porch railing by reinforcing post bolts, installing a steel post base, setting a concrete anchor, or replacing damaged balusters — all with step-by-step DIY instructions.

How to Fix a Rotted Deck Joist
Learn how to repair or replace a rotted deck joist using sistering, temporary support, joist hanger replacement, blocking, and pressure-treated lumber — without tearing down the whole deck.
Best Air Purifiers for Allergies and Pet Hair 2026: Coway, Levoit, Winix Compared
Best overall: Coway Airmega 200M (~$200, 360 sq ft). Best budget: Levoit Core 300 (~$100). Best for large rooms: Winix 5500-2. True HEPA + CADR ≥ 200 required for pet dander. Why to skip ionizers and UV lights — and how to size for your room.
Septic Tank Pumping Cost 2026: $275–$600 by Tank Size
Septic tank pumping costs $275-$600 nationally, with most 1,000-gallon tanks running $300-$450. See pricing by tank size, region, and add-on services.
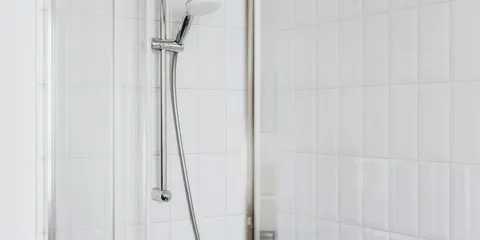
How to Clean a Shower Head: Vinegar Bag Method in 30 Minutes
How to clean a clogged or low-pressure shower head. Covers the vinegar bag soak (no removal needed), removal-and-soak for heavy buildup, and when to just replace the shower head.

How to Kill Weeds in Your Lawn Without Killing the Grass
A full guide to killing lawn weeds without harming grass — identifying common weeds, selective herbicides, pre-emergent timing, organic options, and the mowing and watering habits that prevent weeds from coming back.

How to Clean a Coffee Maker (2026): Descale in 20 Minutes with Vinegar
If your coffee has tasted off lately, mineral scale on the heating element is almost always the cause. Fix it in 20 minutes: run 1:1 vinegar and water, wait 30 min, flush with 2 water cycles. Works for drip machines, Keurigs, and espresso machines.
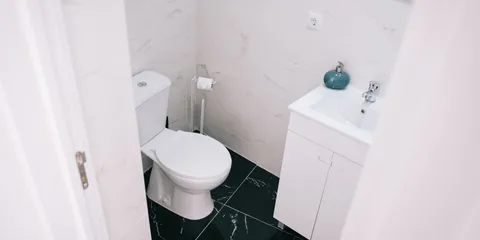
How to Install a Toilet (Complete Guide)
Remove an old toilet and install a new one yourself. Step-by-step guide from choosing the right toilet to setting the wax ring for a watertight seal.
How Much Does Duct Cleaning Cost? 2026: $300–$500 per Home
Duct cleaning costs $300–$500 for a typical home (10–15 vents) with a NADCA-certified company. Budget services advertising $49–$99 are bait-and-switch. Dryer vent add-on: $75–$150. When duct cleaning actually helps — and the upsells to skip every time.
How to Fix a Leaking Outdoor Faucet Stem
Learn how to repair a leaking outdoor faucet by replacing the stem packing to stop drips and water waste at the handle.

Sewer Line Replacement Cost 2026: $3,000–$25,000 by Method
Sewer line replacement costs $3,000-$25,000 depending on line length, depth, and method. Trenchless runs $80-$250 per linear foot; dig-and-replace runs $50-$200.
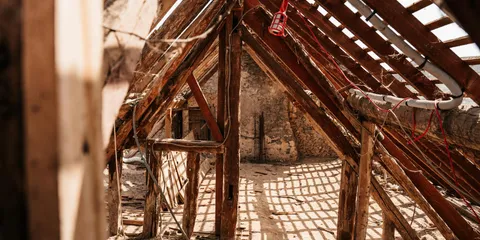
How Much Does Attic Insulation Cost? 2026: $1,500–$3,500 by Type
Attic insulation costs $1,500–$3,500 installed for a 1,000 sq ft attic (2026). Blown-in fiberglass: $1–$1.50/sq ft. Blown-in cellulose: $1.20–$2. Spray foam: $3–$6. R-38 to R-60 recommended for most climates. Includes DIY vs. pro cost comparison.

Best Home Backup Generator 2026: 7 Picks Ranked ($750–$1,100)
Best home backup generators 2026: 7 models ranked. Champion 8,750W dual-fuel ($899) best overall — powers fridge, well pump & furnace 10–12 hrs on 5 gal. Budget pick under $750. Honda vs Westinghouse vs DuroMax compared. Watt calculator + transfer switch guide.

How to Install a Garage Door Opener (Chain, Belt, or Smart)
Install a garage door opener yourself in 3-4 hours and save $300-$500. Step-by-step guide covering rail assembly, mounting, wiring, and programming for 2026 models.
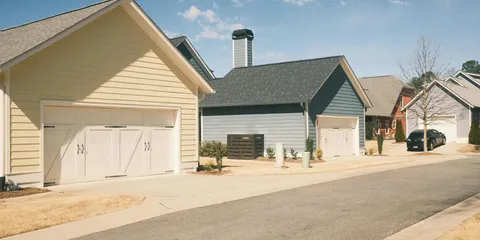
Asphalt Driveway Cost 2026: $7–$13/sq ft ($3,500–$7,800 Two-Car)
Asphalt driveway costs $7-$13 per square foot installed. See pricing by driveway size, thickness, and whether resurfacing or full replacement makes sense.
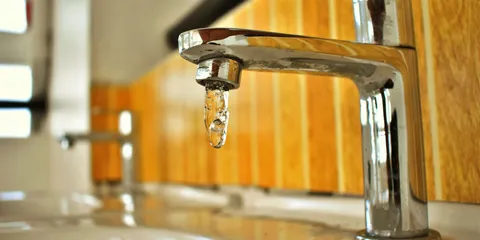
How to Fix a Leaky Faucet in 20 Minutes: Kitchen and Bathroom ($5–$30, Stop the Drip Yourself)
A dripping faucet wastes 3,000+ gallons per year. Fix it in 20 minutes: replace the washer, O-ring, or cartridge depending on your faucet type (ball, cartridge, compression, or ceramic disc). Parts cost $5–$30 at any hardware store.
How to Fix a Noisy HVAC Duct
Learn how to diagnose popping, rattling, and whistling noises from HVAC ductwork and apply the right fix to silence them for good.
How to Install a Sump Pump: A DIY Guide for Homeowners
Step-by-step guide to installing a sump pump in a basement: digging the pit, sizing the pump, running the discharge line, wiring, and testing. Tools and cost breakdown.
How to Fix a Leaking Pipe Inside a Wall
Learn how to locate a hidden pipe leak, safely open drywall, repair the pipe with a clamp or coupling, and patch everything back up like a pro.
10 Signs Your Water Heater Is Failing (And How Long You Have Left)
Rusty water, banging noises, warm spots, pooling at the base — the 10 signs your water heater is about to fail and how to tell repair from replace.
No guides match those filters.