How to Add an Electrical Outlet (2026): DIY — No Electrician Needed
Add a new outlet anywhere in your home by tapping an existing circuit — no electrician needed for most jobs. Step-by-step: wire routing through walls, new work box installation, wiring connections, and permit tips so it passes inspection.
Adding an outlet means tapping into an existing nearby outlet and extending the circuit. Turn off the breaker, verify the existing outlet is off with a voltage tester, pull the outlet from the box, run 14/2 or 12/2 NM cable from the existing box to the new location, install a new work box, and connect wires (black to brass, white to silver, bare to green). This is legal DIY work in most jurisdictions — but most areas require a permit for new wiring. Check with your local building department before starting.
Frequently Asked Questions
Do I need a permit to add an electrical outlet?
In most jurisdictions, yes — any new circuit wiring requires a permit and inspection. Some areas allow homeowners to pull their own permits; others require a licensed electrician. Running a new outlet off an existing circuit (not new circuit) is sometimes exempt, but 'sometimes' is not 'always.' Call your local building department and ask: it's free, takes 5 minutes, and protects your homeowner's insurance coverage and home sale.
What gauge wire do I use for a new outlet?
Match the wire gauge to the circuit breaker protecting the circuit. A 15-amp circuit uses 14-gauge wire (14/2 NM). A 20-amp circuit uses 12-gauge wire (12/2 NM). You can tell the breaker amperage by looking at the handle in your panel — it's stamped on. Never use 14-gauge wire on a 20-amp circuit: it's a fire hazard. You can use 12-gauge wire on a 15-amp circuit (more expensive, stiffer, but safe).
How do I fish wire through a finished wall?
The best approach depends on the wall type and where you're routing: (1) Along a baseboard: remove the base shoe molding and route wire in the gap behind it. (2) Vertical run in a stud bay: drill a hole through the top or bottom plate and fish down with a fish tape. (3) Through drywall: use a flexible drill bit to drill through blocking, then fish with a wire fish rod. (4) Between floors: go through the basement or attic when possible — running up from below or down from above is almost always easier than lateral runs.
What is the difference between a new-work box and an old-work box?
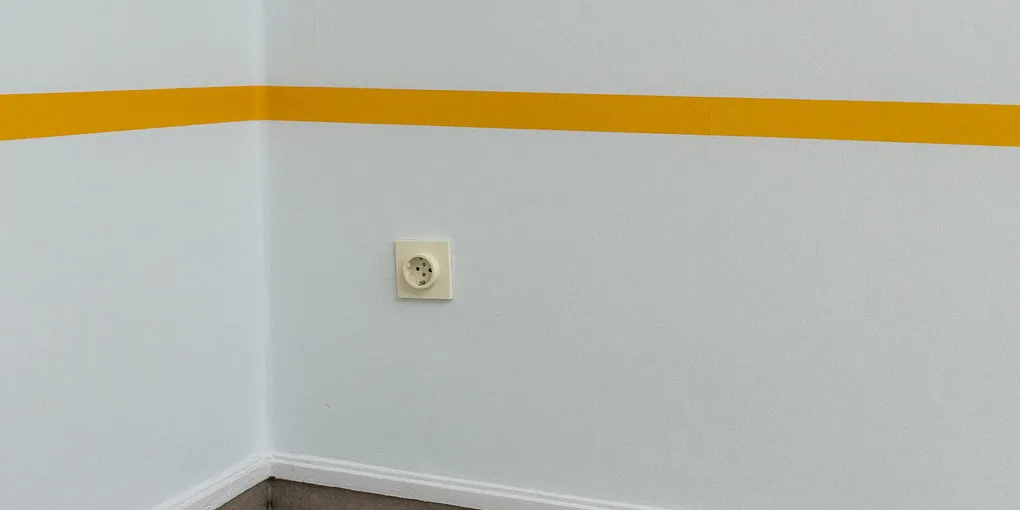
New-work (rough-in) boxes attach to studs before drywall is installed — they have nailing flanges. Old-work (retrofit) boxes clamp to the drywall itself using 'wings' or 'ears' that expand behind the drywall when you tighten the screws. For adding an outlet to a finished wall, you use an old-work box. Size: standard old-work plastic boxes are suitable for a single outlet with up to 3 cables.
How many outlets can I add to a circuit?
NEC guidelines allow 13 receptacles per 20-amp circuit or 10 per 15-amp circuit as a maximum — but that's the code floor, not the practical limit. A better rule: count up the devices likely to run simultaneously on the circuit. A dedicated shop circuit with a table saw should not share outlets. A bedroom circuit with lamps and phone chargers can handle several outlets. Never overload a circuit — if the existing circuit already trips occasionally, add a new circuit instead of tapping it.
How much does it cost to add an electrical outlet?
Adding an outlet to an existing circuit costs $100-$300 professionally installed in most cases — $75-$150 in labor for a simple tap from a nearby outlet with minimal wall fishing, plus $10-$30 in materials (outlet, box, wire). Jobs requiring longer wire runs, fishing through multiple walls, or attic access run $200-$400. Adding a new dedicated 20-amp circuit from the panel costs $250-$600 (includes the circuit breaker, wire run, and outlet). DIY cost is $15-$50 in materials alone if you already have the tools. A permit adds $50-$150 in most jurisdictions but is nearly always required for new wiring and protects your homeowner's insurance.
Can I add an electrical outlet myself without an electrician?
In most US states, yes — homeowners can legally add an outlet off an existing circuit as DIY work. The exceptions: Massachusetts requires a licensed electrician for most residential wiring; some cities (Chicago, NYC) have local ordinances. The job is intermediate DIY: you need to be comfortable identifying hot, neutral, and ground wires, working safely with the breaker off, and running cable through walls. Most homeowners who are comfortable with basic tools can complete a simple outlet addition in 2-3 hours. Permit is almost always required even for DIY — pull it yourself online or at the building department (straightforward, usually $50-$100). An inspector will verify the work is safe and up to code, which is worth the small cost.
How do I add an outlet without cutting drywall — is surface conduit an option?
Yes. Surface-mount raceway (also called surface conduit or Wiremold) lets you run wire along the baseboard or wall without cutting drywall at all. The system uses plastic or metal channels that snap to the wall, with the wire running inside. It's fully code-legal, requires a surface-mount outlet box instead of an in-wall box, and takes 1–2 hours for most runs. Appearance tradeoff: the raceway is visible on the surface. It blends well when painted to match the wall. Surface raceway works best for: running along baseboards in finished rooms, garage or workshop outlet additions, and basement walls where cutting concrete block or cinder block would be involved. For in-wall aesthetics (nearly invisible), you still need to cut drywall, fish wire, and patch — but surface raceway is a valid and frequently underused alternative that eliminates most of the difficulty.
Can I add a GFCI outlet anywhere, or only in kitchens and bathrooms?
You can install a GFCI outlet anywhere — in bedrooms, living rooms, or garages — but NEC requires GFCI protection in specific locations: all kitchen countertop outlets, bathroom outlets within 6 feet of a water source, garage outlets, outdoor outlets, basement outlets (unfinished areas), any outlet within 6 feet of a pool or spa, and boat docks. GFCI outlets make sense in any location near a water source or where the user might be standing on a damp floor or wet ground. A practical tip: use a GFCI outlet at the first outlet in a circuit near water, then run standard outlets downstream — the upstream GFCI protects all outlets connected after it. This is cheaper than wiring every downstream outlet as GFCI individually. The GFCI outlet will be labeled 'LOAD' on the terminals for this purpose.
Adding a new electrical outlet costs $130–$300 hired out, or $15–$80 in materials if you DIY by tapping a nearby existing circuit. Turn off the breaker, run 14/2 cable from the nearest outlet box to the new location, install an old-work box, and connect wires (black to brass, white to silver, bare to green). Most jurisdictions require a permit for new outlet wiring — check with your local building department before starting.
Adding an outlet to an unserved wall is one of the most useful home upgrades — and it’s within reach for a careful DIYer. The job involves two parts: getting wire from here to there, and making the connections.
What you need
- Voltage tester / non-contact tester — non-negotiable
- 14/2 NM-B cable (for 15A circuit) or 12/2 NM-B (for 20A) — buy 25% more than you think you need
- Old-work electrical box
- 15A or 20A outlet (match amperage to circuit)
- Outlet cover plate
- Utility knife, drywall saw, or oscillating tool
- Fish tape or fish rods
- Drill with 3/4-inch spade bit
- Wire stripper, needle-nose pliers
- Electrical tape
Step 1: Find a source outlet
Pick an existing outlet on the wall closest to where you want the new outlet. This outlet will supply power to the new one.
Check the breaker load: Identify which circuit the source outlet is on (flip breakers until it goes dead, or use a circuit tracer). Check how many other outlets and fixtures are on that circuit — if it’s already heavily loaded, consider tapping a different circuit.
Step 2: Turn off power and verify
Turn off the circuit breaker for the source outlet. Test with your non-contact voltage tester at the outlet — confirm no voltage before touching any wire.
Double-check: Hold the tester at the outlet slots. No beep = safe to proceed. Many electrical injuries happen because someone tested and moved on without verifying both slots.
Step 3: Plan and cut the new box location
Mark the location of the new outlet. Standard height is 12–18 inches from the floor. Locate the stud bays with a stud finder — you want the box between studs, not on one.
Trace the old-work box on the wall and cut the opening with a drywall saw. Cut just inside the lines so the box wings can grab drywall, not air.
Step 4: Run the cable
Route depends on your wall configuration. Common approaches:
Baseboard route (easiest): Pry off the base shoe molding. Route cable behind it along the floor, staple or tuck it behind the baseboard. Reinstall the molding to conceal.
Through the wall cavity: Drill a 3/4-inch hole through the bottom wall plate into the floor cavity (from below) or the top plate (from above). Drop or fish the cable through the stud bay. A flexible drill bit extension helps greatly for reaching plates inside wall cavities.
Run cable from the source outlet box to the new box location. Leave 8–10 inches of cable hanging out of each box.
NEC requirement: Secure the cable within 12 inches of each box and every 4.5 feet along the run using cable staples.
Step 5: Install the new box
Feed the cable through the cable entry hole in the old-work box. Slide the box into the drywall opening. Tighten the wing screws — the wings clamp against the back of the drywall, holding the box in place.
Step 6: Make connections at the new outlet
Strip 3/4 inch of insulation from each wire end.
- Black (hot) → brass screw on the outlet
- White (neutral) → silver screw
- Bare copper (ground) → green screw
If connecting to the side screws: hook the wire clockwise so tightening the screw draws the wire in rather than pushing it out.
Fold the wires carefully into the box and push the outlet in. Install the cover plate.
Step 7: Connect at the source outlet
Pull the source outlet from the box. You’ll see the existing wires connected to the terminals. You’re adding a second set of wires in parallel.
Two methods:
Using the screws (max 2 wires per screw): If the source outlet has only one wire on each terminal, add the new cable’s wires to the same terminals. Black to brass, white to silver, bare to green or ground bar.
Using wire nuts (cleaner): Use a wire nut to splice the existing black wire + new black wire + a 6-inch black pigtail together. Connect the pigtail to the brass screw. Same for white and bare.
Push the outlet back in and install the cover.
Step 8: Test
Restore power at the breaker. Use the voltage tester — both new and source outlets should show 120V. Plug in a lamp or phone charger to confirm the outlet works.
If the breaker trips immediately: there’s a short — turn off and trace the wiring. If the outlet is dead: check for a loose connection at the source.
Related guides
- How to Replace an Electrical Outlet — simpler job, same outlet location
- How to Install a Dimmer Switch — while you have the panel skills
- How to Install a Ceiling Fan — requires the same circuit work
- Electrician Cost Guide — when to call a pro
- Hot Tub Installation Cost — hot tubs require a dedicated 240V GFCI circuit; this is the same wiring work at larger scale
- Handyman Cost — outlet additions are a common handyman job in many states
- Whole House Generator Cost — whole-home backup power for extended outages
- How to Fish a Wire Through a Wall — step-by-step wire routing through finished walls when running the new cable
- How to Fix a Broken Outdoor Outlet Cover — replace a cracked or missing weatherproof cover on an outdoor outlet
- Find and check the source outlet
Choose an existing outlet on the wall closest to the new location. Identify its circuit: flip breakers until it goes dead, or use a circuit tracer. Verify the circuit isn't already heavily loaded — if it trips occasionally, tap a different circuit or add a new breaker instead.
- Turn off power and verify dead
Flip the circuit breaker for the source outlet. Hold a non-contact voltage tester at the outlet slots — no beep confirms it's safe. Test both slots. Do not skip this step; many electrical injuries happen because people tested quickly and moved on without confirming both hot and neutral slots are dead.
- Plan the new box location and cut the opening
Mark the new outlet location 12-18 inches from the floor, between studs (use a stud finder). Trace the old-work box outline on the drywall and cut the opening with a drywall saw. Cut just inside your lines so the box wings have drywall to grab.
- Run cable from source to new location
Route 14/2 NM cable (for 15-amp circuit) or 12/2 NM (for 20-amp) from the source outlet box to the new opening. Easiest path: behind the base shoe molding along the floor. For in-wall runs, drill through the bottom wall plate with a flexible drill bit extension. Leave 8-10 inches of cable hanging out of each box. Staple cable within 12 inches of each box and every 4.5 feet along the run.
- Install the new old-work box
Feed the cable through the box entry hole. Slide the box into the drywall opening and tighten the wing screws — the wings clamp to the back of the drywall. The box should not rock or pull out.
- Wire the new outlet
Strip 3/4 inch of insulation from each wire. Connect: black (hot) to brass screw, white (neutral) to silver screw, bare copper (ground) to green screw. Hook each wire clockwise around the screw so tightening draws it in. Fold wires into the box, push outlet in, install cover plate.
- Connect at the source outlet and test
Pull the source outlet from the box. Add the new cable wires in parallel: use wire nuts to splice old black + new black + 6-inch pigtail together, connect pigtail to brass screw (same for white and ground). Push source outlet back in. Restore the breaker. Test both outlets with a voltage tester — should read 120V. Plug in a device to confirm. If the breaker trips immediately, there's a short — turn off and trace the wiring.
Free: 10-Point Home Maintenance Checklist
Prevent costly repairs with this seasonal checklist. Save hundreds every year by catching problems early.
Your checklist is ready!
Open Checklist →Something went wrong. View the checklist here.