How to Repair Vinyl Siding: Cracks, Holes, and Warped Panels (2026)
Cracked, dented, or warped vinyl siding? This guide covers patching small holes, replacing a single panel, and fixing S-shaped warping — without calling a contractor.
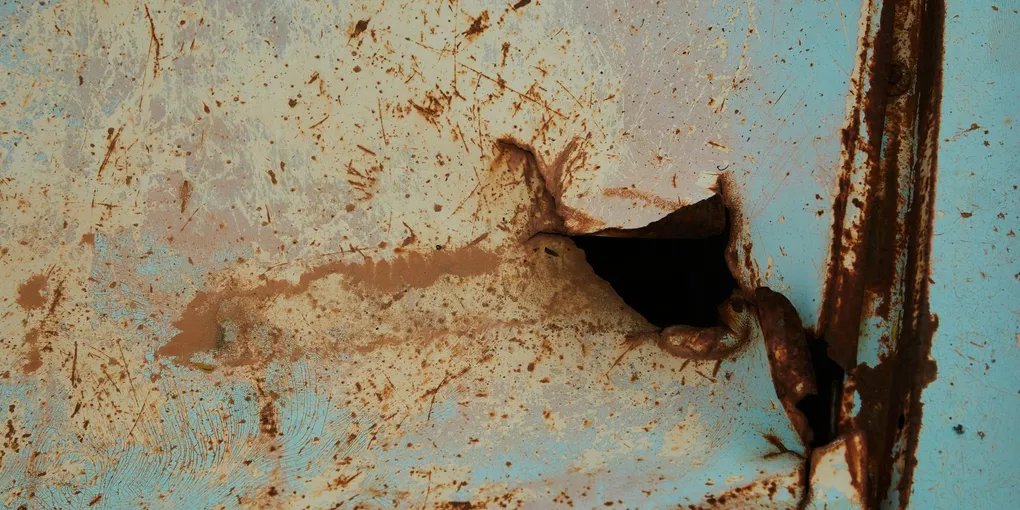
Small holes in vinyl siding (under 3/4 inch): use a color-matched vinyl patch kit or caulk rated for vinyl. Larger holes or cracked panels: cut out the damaged section and splice in a replacement piece. Warped siding: check for blocking — vinyl must float freely to expand and contract; remove any screws or nails driven through the face rather than the nail slot. A zip tool ($5) is the one specialty item the job requires.
Frequently Asked Questions
Can I repair vinyl siding myself?
Yes for small holes, cracks, and single-panel replacements. Vinyl is DIY-friendly — no special skills required, and panels interlock in a way that makes swapping one or two sections straightforward. The main challenge is finding matching siding. If your home is older (10+ years), the exact profile and color may be discontinued. Buy extra panels when you find a close match — you'll use them eventually.
How do I fix a small hole or crack in vinyl siding?
For holes under 1/2 inch: fill with color-matched exterior caulk (paintable vinyl siding caulk). Smooth with a wet finger. For holes 1/2 to 3/4 inch: cut a patch from a spare piece of matching siding, apply vinyl adhesive to both surfaces, press the patch over the hole, and secure with tape for 24 hours. For larger holes or full cracks, cut out the entire damaged section and splice in a replacement piece.
What is a zip tool and why do I need it?
A zip tool (also called a siding removal tool) is a J-shaped metal hook, about 10 inches long, used to unlock vinyl siding panels. Vinyl siding locks at the bottom edge — you slide the zip tool along the seam, the curved hook catches the lock, and pulling down pops the butt edge free so you can reach behind the panel. Without one, it's very hard to unlock panels without cracking them. They cost $5–$8.
How do I fix warped or wavy vinyl siding?
Warping is almost always a nailing problem. Vinyl siding must be nailed through the center of the nail slot — not tight, not at the edges. If a nail goes through the face of the panel (not the slot), it pins the panel in place and the heat expansion buckles it. Fix: use the zip tool to pop the panel free, remove the face-nailed fastener, and re-drive a roofing nail through the center of the nearest nail slot (loose enough to slide 1/4 inch). Second cause: panels butted too tight at J-channel or trim — they need 1/4 inch gap for expansion.
How do I match existing vinyl siding color and profile?
Take a photo of the profile (the S-shape or D-shape cross-section) and a color chip to a siding supply house, not a big box store. Siding has both a manufacturer color name and a profile name — note both. Common profiles: Dutch lap (angled), clapboard (flat), beaded (curved bottom), and board-and-batten. Most manufacturers have a 'find a match' service by photo. If you can't match the color exactly, repair on a less-visible wall side.
Small holes in vinyl siding (under 3/4 inch): use a color-matched vinyl patch kit or caulk rated for vinyl. Larger holes or cracked panels: cut out the damaged section and splice in a replacement piece.
Vinyl siding repairs look intimidating but follow a simple lock-and-unlock system. Here’s how to do it clean.
Tools and materials
- Zip tool (siding removal tool) — essential
- Tin snips or aviation snips
- Utility knife
- Hammer and galvanized siding nails (1-3/4 inch)
- Vinyl siding patch kit for small repairs
- Matching replacement vinyl panels (for full section repairs)
- Exterior vinyl caulk
Repair A: Small hole or crack (under 3/4 inch)
- Clean the damaged area with rubbing alcohol. Let dry.
- For holes under 1/2 inch: apply color-matched vinyl siding caulk. Smooth with a wet fingertip. Let cure.
- For holes 1/2 to 3/4 inch: cut a patch from a spare siding piece (2 inches larger than the hole in each direction). Apply vinyl adhesive to the patch and press over the hole. Secure with painter’s tape for 24 hours.
Repair B: Crack or large hole — splice method
For holes larger than 3/4 inch or a crack running more than 6 inches, cut out the damaged section and splice in a replacement piece.
Step 1: Unlock the panels above
Slide the zip tool along the seam above the damaged panel. The J-shaped hook catches the bottom lock of the panel above. Pull down and slide along to pop it free. You need to unlock enough to reach behind and pull out the nails.
Step 2: Cut out the damaged section
With a utility knife, score and cut a rectangle around the damage. Make the cuts square — angled cuts create gaps. Cut at least 2 inches past the damage on each side.
Slide your hand behind the panel and pull out the nails from the cut-out section.
Step 3: Cut the replacement piece
Cut a replacement from matching vinyl, 4 inches longer than the cut-out (2 inches overlap on each side).
Cut the top nailing flange off the 2-inch overlap sections at each end, leaving only the locking butt edge. This allows the replacement to slide under the existing panels on each side.
Step 4: Install the replacement
Slide the replacement piece into position. The butt edge of the replacement locks into the panel below. Nail through the nail slots with galvanized nails — leave the nail head 1/32 inch proud (don’t drive tight) so the panel can move.
Step 5: Re-engage the panel above
Snap the unlocked panel above back into position by pressing the bottom edge into the replacement’s top lock until it clicks.
Repair C: Warped or wavy panel
Warping is caused by nailing through the panel face or nails too tight. The panel can’t expand with heat.
- Use the zip tool to pop free the panel above the warped one.
- Check each nail in the warped panel. Look for any driven through the face (not in the slot) or driven flush/tight in the slot.
- Pull any face-nailed fasteners with a pry bar.
- Re-drive 1-3/4 inch galvanized nails through the center of the nail slots — loosely. The panel should slide 1/4 inch left and right.
- Check the panel ends at J-channel or corner posts. There should be a 1/4-inch gap for expansion. If butted tight, score the end and snap off a sliver with tin snips.
- Re-engage the panel above.
On hot days, the panels may not flatten immediately after correcting the nailing — give it a cold day and re-check.
Replacing a full panel
- Use the zip tool to unlock the panel above.
- Pull the nails from the panel you’re replacing (use a flat pry bar under each nail head).
- Snap the panel out of the lock below.
- Slide the new panel into the bottom lock. Nail through slots (loose).
- Re-engage the panel above.
Color matching tips
- Take a chip or photo to a siding supply house (not a big box store) — they can often match discontinued colors.
- Note whether the existing siding has a wood-grain texture or smooth face. Same profile, wrong texture = visible mismatch.
- If no match available: do repairs on the least-visible wall (rear or side) and use the matching panels from there for the front wall repair.
Related guides
- Siding Replacement Cost — when repair turns into full replacement
- How to Paint the Exterior of a House — refinishing after major repairs
- Exterior House Paint Cost — pricing for siding jobs
- How to Power Wash Your House — cleaning before inspection and repair
- Siding Repair Cost — what a contractor charges for vinyl and other siding repairs
- Repair small holes under 3/4 inch
Clean the area with rubbing alcohol. For holes under 1/2 inch: fill with color-matched exterior caulk and smooth with a wet finger. For holes 1/2 to 3/4 inch: cut a patch from a spare matching siding piece, apply vinyl adhesive to both surfaces, press the patch over the hole, and tape securely for 24 hours.
- Unlock the panels above the damaged section
Slide the zip tool (siding removal tool) along the seam above the damaged panel with the hook facing downward. Pull gently as you slide to pop the butt edge of the upper panel free. This exposes the nailing flange of the damaged panel.
- Cut out the damaged section
Score and cut a rectangle around the damage with a utility knife, extending at least 2 inches past the damage on each side. Pull out the nails from the cut-out section using a pry bar.
- Install the replacement piece
Cut a replacement piece 4 inches longer than the cut-out. Remove the nailing flange from the overlap areas so it can slide under adjacent panels. Slide it into position with its butt edge locking into the panel below. Nail through the nail slots leaving 1/32 inch of space — do not drive nails tight (vinyl needs room to expand).
- Re-engage the upper panel
Snap the unlocked panel above back into position by pressing its bottom edge into the replacement panel's top lock until it clicks. Confirm it is fully engaged along its length.
Free: 10-Point Home Maintenance Checklist
Prevent costly repairs with this seasonal checklist. Save hundreds every year by catching problems early.
Your checklist is ready!
Open Checklist →Something went wrong. View the checklist here.