How to Remove Old Caulk: From Tubs, Showers, Windows, and Countertops (2026)
Old caulk has to come out completely before recaulking — new caulk over old caulk fails within months. This guide covers the fastest removal methods for silicone, latex, and polyurethane caulk on all surfaces.
Remove old caulk in two steps: soften it with a caulk remover gel (let soak 2+ hours for silicone), then cut and scrape it out. For silicone caulk on tubs and showers, a caulk softener is almost essential — silicone bonds strongly to porcelain and tile. For latex caulk, mechanical removal alone usually works. The most important rule: get 100% of the old caulk out. New caulk won't bond to old caulk.
Frequently Asked Questions
What is the easiest way to remove silicone caulk?
Apply a silicone caulk remover gel (Goo Gone Caulk Remover, McKanica, or WD-40 Specialist Caulk Remover) directly to the old caulk. Let it soak for 2–8 hours — longer is better for thick beads. The softened caulk peels off in strips rather than crumbling. Score along each edge with a utility knife first to separate it from the surface, then pull strips off with needle-nose pliers. A plastic putty knife removes residue without scratching.
Can I caulk over old caulk?
No — not if you want it to last. New caulk applied over old caulk fails within months because caulk bonds to clean substrate (porcelain, tile, fiberglass) and to itself. Old caulk is already partially cured and may have mold growing through it. New caulk on top of old caulk creates a bond that peels off as a unit. Always remove 100% of old caulk before applying new.
How do I remove caulk from tile grout without damaging the grout?
Use a plastic caulk removal tool (not metal) for the initial scrape. The plastic edge conforms to the surface and doesn't gouge grout. For any remaining traces in the grout lines: a stiff-bristle brush + rubbing alcohol usually loosens it. Do not use a metal scraper against grout — you'll chip the edges. A caulk remover gel is safe on grout and softens residues that brushes can't reach.
What is the difference between a caulk removing gel and WD-40?
Caulk remover gels contain solvents specifically formulated to break the bond between caulk and substrate. WD-40 (the regular version) is a penetrating oil — it can loosen caulk but is less effective than a dedicated caulk remover, and the oil residue requires thorough cleaning before recaulking. WD-40 Specialist Caulk Remover is a different, solvent-based product that does work. Use a proper caulk remover gel for silicone in showers and tubs.
How long should I wait between removing old caulk and applying new caulk?
At least 24 hours, and in a shower or tub — 24–48 hours. The surface must be completely dry. Any moisture under new caulk causes mold to grow behind it within weeks. Run a fan in the bathroom with the window open, or use a hair dryer on low heat to speed drying. Test by pressing a paper towel against the joint: if it comes away dry, you're ready.
Remove old caulk in two steps: soften it with a caulk remover gel (let soak 2+ hours for silicone), then cut and scrape it out. For silicone caulk on tubs and showers, a caulk softener is almost essential — silicone bonds strongly to porcelain and tile.
Removing old caulk is the most important part of any recaulking job. Here’s how to do it right.
What you need
- Caulk remover gel (for silicone caulk — essential)
- Plastic caulk removal tool
- Utility knife with fresh blades
- Needle-nose pliers
- Stiff-bristle brush
- Rubbing alcohol
- Clean rags and paper towels
Step 1: Score both edges
Run a utility knife along each side of the old caulk bead, scoring as close to the wall surface as possible. You’re cutting the bond where the caulk meets the tub/tile/wall — this makes the next steps much easier.
Use a fresh blade. A dull blade tears and crumbles instead of cutting cleanly.
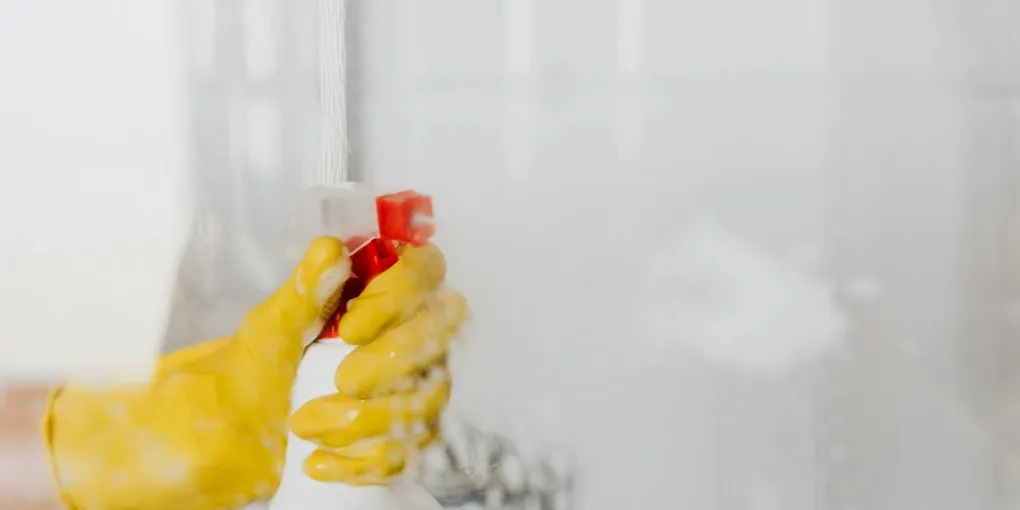
Step 2: Apply caulk remover (for silicone)
Apply caulk remover gel along the entire bead. For thick beads, push it in along the scored edges.
Let it soak:
- Thin beads: 2 hours
- Thick, old beads: 4–8 hours or overnight
- Shower corners (deep caulk pockets): overnight
The gel changes consistency of the caulk — silicone goes from rubbery to gummy and starts to release from the surface.
Step 3: Remove the caulk
After soaking, grip an end of the softened caulk with needle-nose pliers and pull slowly. Silicone will pull away in long strips if properly softened. If it tears instead of pulling, let the gel soak longer.
Use the plastic scraper for any stubborn sections. A plastic scraper won’t scratch porcelain, acrylic, or fiberglass — a metal putty knife will.
For latex caulk: scraping alone (no chemical softener needed) usually removes it. Score, then pry and scrape.
Step 4: Remove all residue
This step determines whether your new caulk will last. Any caulk residue = bond failure.
- Use a stiff brush to scrub the joint area.
- Wipe down with rubbing alcohol on a rag — this dissolves the last traces of silicone residue and degreases the surface.
- Check by running your finger along the joint: it should feel smooth with no rubbery spots.
- Let dry completely.
On tile grout: Use a toothbrush with rubbing alcohol to get into the grout lines.
Stubborn residue on porcelain or fiberglass: Acetone (nail polish remover) dissolves silicone residue quickly. Test in an inconspicuous area first — acetone can cloud some surfaces. Don’t use on painted surfaces.
Step 5: Dry completely before recaulking
Wait 24–48 hours after removal, especially in wet areas. Run a bathroom fan or set up air circulation.
Check the surface is fully dry. New caulk applied to any damp area will develop mold behind it quickly.
Recaulking the joint
Once dry, apply new caulk. For bathrooms: use 100% silicone caulk in the tub/shower — it’s more mold-resistant than latex. Fill the joint in one smooth pass and tool the bead with a wet finger. Do not disturb for 24 hours.
Related guides
- How to Caulk a Bathtub — the full recaulking guide after removal
- How to Regrout a Shower — when caulk removal reveals grout problems too
- How to Clean Grout — clean before deciding if you need to regrout or recaulk
- How to Fix a Leaky Shower — if the caulk failure caused water damage
- Score both edges of the old caulk bead
Run a utility knife with a fresh blade along each side of the caulk bead, cutting as close to the wall surface as possible. This severs the bond where caulk meets the substrate — without scoring, scraping will pull up the surface material rather than releasing the caulk cleanly.
- Apply caulk remover gel and let soak (silicone)
For silicone caulk: apply a silicone caulk remover gel (Goo Gone Caulk Remover or similar) along the entire bead, pushing it into the scored edges. Let soak 2–8 hours for standard beads, overnight for thick or old beads in shower corners. For latex caulk, skip the gel — mechanical removal alone usually works fine.
- Pull and scrape out old caulk
After soaking, grip an end of the softened caulk with needle-nose pliers and pull slowly — properly softened silicone pulls away in long strips. Use a plastic scraper (not metal) for stubborn sections; a plastic scraper won't scratch porcelain, acrylic, or fiberglass. If silicone tears instead of pulling cleanly, let the gel soak longer.
- Remove all residue and let dry completely
Scrub the joint area with a stiff brush, then wipe down with rubbing alcohol on a rag — this dissolves final silicone traces and degreases the surface. Run your finger along the joint to confirm no rubbery spots remain. On stubborn residue: apply acetone (nail polish remover) with a rag, test first in an inconspicuous area. Allow 24–48 hours to dry completely — any moisture under new caulk causes mold behind it quickly.
Free: 10-Point Home Maintenance Checklist
Prevent costly repairs with this seasonal checklist. Save hundreds every year by catching problems early.
Your checklist is ready!
Open Checklist →Something went wrong. View the checklist here.