How to Paint a Deck: Prep, Priming, and Painting for Lasting Results
A complete step-by-step guide to painting a deck with solid-color deck paint, covering cleaning, priming, application technique, and long-term maintenance.
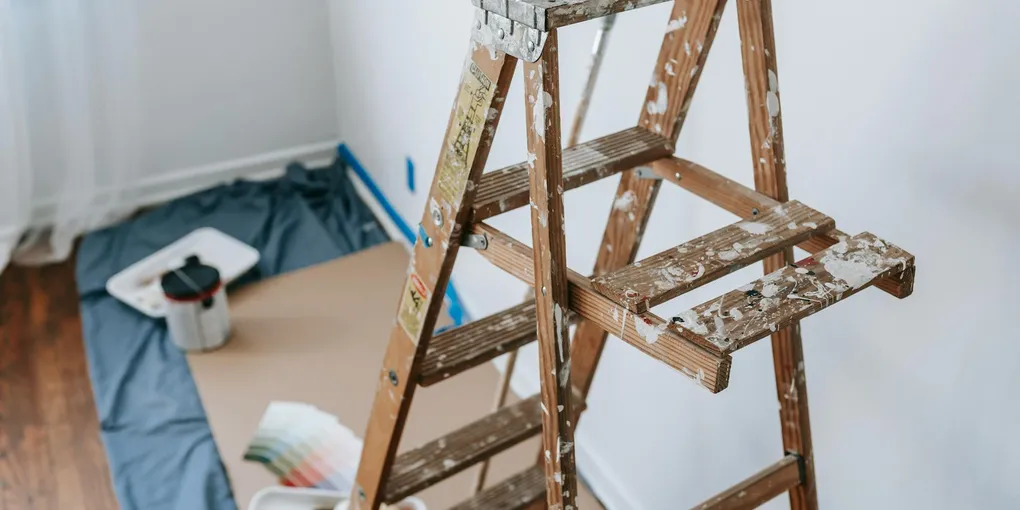
Painting a deck: (1) Clean the deck thoroughly — wash with a deck cleaner (oxygen bleach solution), scrub, rinse, and let dry 48 hours minimum. (2) Lightly sand with 80-grit to remove any gray weathering and open the wood grain. (3) Apply a bonding primer formulated for exterior wood — this step is critical for paint adhesion on previously weathered or bare wood. (4) Apply 2 coats of solid-color deck paint or solid deck stain (solid stain is more forgiving than paint for future maintenance). Use a brush for boards and railings, a roller for the field. (5) Let each coat dry per the label (usually 2 to 4 hours). (6) Maintenance: deck paint requires re-coating every 2 to 3 years. Deck stain is easier to maintain because it fades evenly rather than peeling in chunks.
Frequently Asked Questions
Should I paint or stain my deck?
Paint is the right choice when the wood is damaged, weathered, or previously painted — it hides imperfections completely. Stain is better for newer wood in good condition where you want to show the natural grain. Once you go paint, the wood must be stripped or painted again in the future. Semi-transparent stain is not an option on a painted deck without full stripping.
What is the best paint for a deck?
Look for a product labeled 'solid color deck paint,' 'deck and porch paint,' or 'solid color deck resurfacer.' Top picks: BEHR DeckOver and Rust-Oleum Restore for decks with surface cracks and worn boards. For sound wood in good condition, a 100% acrylic solid-color porch and floor paint (Behr Premium, Sherwin-Williams Porch & Floor) works well. Water-based acrylic formulas clean up easier and hold color better than oil-based in most climates.
Do I need to prime a deck before painting?
Yes, in most situations. Bare or stripped wood needs a bonding primer before paint. Old painted decks in reasonable condition can skip primer if you lightly sand and the surface is clean and sound. If you're painting over bare wood, pressure-treated lumber, or any surface with uneven absorption, apply one coat of exterior wood primer first. Skipping primer on bare wood is the number one cause of paint failure in year one.
How long does deck paint last?
Deck paint on horizontal surfaces (the floor you walk on) typically lasts 2-4 years before needing a full repaint. Vertical surfaces (railings, posts) can last 5-7 years. Heavy foot traffic, sun exposure, and moisture are the main factors. Resurfacing products like BEHR DeckOver can last 4-6 years because they fill cracks and provide a thicker film.
Can I paint over old deck stain?
You can paint over solid-color (opaque) deck stain — that product is essentially paint. You cannot paint successfully over semi-transparent or penetrating oil stain without thorough stripping and sanding, because the oil prevents paint from bonding. If the existing stain is flaking or peeling, you must remove it before painting regardless of type.
How many coats of paint does a deck need?
Two coats are standard. The first coat seals the wood and establishes the color base. The second coat builds the protective film that resists wear and moisture. On bare or stripped wood, some painters apply three coats — one primer coat plus two finish coats. Never try to do it in one heavy coat; thick single coats trap moisture, crack, and peel.
Painting a deck: (1) Clean the deck thoroughly — wash with a deck cleaner (oxygen bleach solution), scrub, rinse, and let dry 48 hours minimum. (2) Lightly sand with 80-grit to remove any gray weathering and open the wood grain.
Painting a deck is the right call when the wood is too weathered or damaged for stain to look good, or when you want a uniform, opaque finish that hides imperfections. Done right, painted decks look sharp and hold up for 3-5 years. Done wrong — mostly through rushed prep — paint peels in a season and requires full stripping to fix.
This guide covers the full process: cleaning, drying, priming, and painting in two coats.
When to Paint vs Stain
Paint and stain are not interchangeable. Choosing the wrong one creates a problem you’ll have to deal with for years.
| Factor | Choose Paint | Choose Stain |
|---|---|---|
| Wood condition | Weathered, cracked, gray, stained boards | Good condition, solid, relatively new |
| Wood grain | You don’t care about showing it | You want natural wood look |
| Existing finish | Already painted | Bare or previously stained with semi-transparent |
| Imperfection hiding | Yes — paint covers them | No — stain reveals everything |
| Future flexibility | Limited (must repaint) | More options down the road |
| Maintenance | Touch-up easier, full redo harder | Recoating easier without stripping |
When paint wins: Your deck boards are gray, checking, or showing surface cracks. The previous finish is already paint. You want a specific solid color. You’re using a resurfacer product to hide minor damage.
When stain wins: The wood is in good shape, relatively new, and you want it to look natural. See How to Stain a Deck for that process.
What You Need
Solid-color deck paint or resurfacer:
- BEHR DeckOver solid color deck paint — best all-around for worn decks, fills hairline cracks
Primer:
- Rust-Oleum deck primer — bonding primer for bare or stripped wood
Application tools:
- Deck paint roller with extension pole — 3/8” nap for smooth boards, 1/2” nap for rough or textured
- 2-inch paint brush for trim and edges — for railings, board edges, and detail work
- Deck paint brush applicator pad — optional but great for working paint into board gaps
Prep tools:
- Pressure washer — essential for thorough cleaning
- Stiff-bristle scrub brush
- Deck cleaner / brightener
- 80-grit sandpaper or sanding block
- Drop cloths and painter’s tape
- Safety glasses and gloves
Coverage estimate: Most deck paints cover 150-300 sq ft per gallon. A 300 sq ft deck needs 1-2 gallons per coat. Buy by project size, not by the label’s optimistic estimate — rough or thirsty wood absorbs significantly more.
Step 1: Clean and Prep the Deck
Good prep is 80% of a good result. Paint that goes on dirty or wet wood will peel. No exceptions.
Clear the Deck
Remove all furniture, rugs, planters, and grills. Cover nearby plants and shrubs with plastic sheeting — deck cleaner and paint overspray damage landscaping.
Inspect and Repair First
Before washing, do a full inspection while you can still see the board condition clearly:
- Raised nail heads: Countersink or replace with deck screws. Nail heads rust through paint.
- Loose boards: Drive in new screws. Boards that flex crack paint faster.
- Rotting boards: Replace them. Paint hides rot temporarily but doesn’t stop it.
- Surface cracks and checks: If shallow, a thick resurfacer like BEHR DeckOver will fill them. Deep splits need wood filler or board replacement.
- Peeling old paint: Scrape loose paint with a paint scraper before washing. You don’t need bare wood everywhere, but paint must be adhered solidly.
See How to Fix Deck Boards if you have significant board damage.
Apply Deck Cleaner
- Wet the deck surface with a garden hose first.
- Apply deck cleaner per the manufacturer’s directions. Oxygenated (percarbonate) cleaners are safer for surrounding plants than bleach-based.
- Let it dwell 10-15 minutes — don’t let it dry on the surface; mist with water if needed.
- Scrub with a stiff-bristle brush, working with the wood grain.
- Rinse thoroughly.
Pressure Wash
Pressure washing removes weathered gray wood fibers, mildew, old finish residue, and deep-set dirt that hand scrubbing misses. It opens the wood surface for better adhesion.
Technique:
- Use a 25° or 40° fan tip — never the 0° pencil tip
- Keep 1,500 PSI or below on softwood (pine, fir); 2,000 PSI max on hardwood
- Hold the tip 12-18 inches from the surface
- Move consistently with the grain in smooth overlapping passes
- Don’t hover or stop — you’ll gouge the wood
After washing, re-scrape any paint that lifted but didn’t come off. Rinse the full deck one more time.
Sand Rough Spots
Once dry enough to sand (the next morning is fine for this step), hit any rough or furred areas with 80-grit sandpaper. Sand any areas where old paint edges are raised to feather them into the surrounding surface. Smooth, sound edges hold paint; sharp ledges peel.
Step 2: Allow Complete Drying
Minimum: 48-72 hours with no rain. Longer in humid climates.
This is the most commonly skipped step and the most common cause of paint failure. Painting over damp wood traps moisture, which pushes paint off the wood from below.
To test: press a piece of plastic wrap flat against the deck and tape the edges. After one hour, check for moisture droplets on the underside of the plastic. If you see moisture, the wood is still too wet.
In humid climates or during spring, 72 hours is more reliable than 48. If it rains after cleaning, restart the 48-72 hour clock.
Step 3: Apply Primer
When to Prime
| Situation | Primer Needed? |
|---|---|
| Bare or stripped wood | Yes — always |
| Pressure-treated new lumber | Yes — use a PT-compatible primer |
| Previously painted, paint in good condition | Optional — lightly sand instead |
| Previously painted, paint peeling or bare patches | Yes — spot prime at minimum |
| Over oil-based stain (sanded off) | Yes — shellac-based primer |
How to Apply Primer
- Stir the primer thoroughly — don’t shake.
- Cut in edges and railings with a 2-inch brush first.
- Apply to the deck floor with a roller, working in 3-4 board sections at a time.
- Keep a wet edge — always roll back into freshly applied primer.
- Work from the far end of the deck toward your exit.
- Let dry completely per the product’s label (typically 2-4 hours, but 24 hours before painting is better in humid conditions).
One coat of primer is standard. On extremely porous or thirsty wood, two coats may be needed — if the first coat soaks in and looks blotchy after drying, apply a second.
Step 4: Apply the First Coat
Timing and Conditions
Paint in temperatures between 50-90°F. Avoid direct hot sun during application — paint skins over on the surface before penetrating properly. Early morning or overcast days work best.
Check the 48-hour weather forecast. No rain during application and for at least 24 hours after each coat.
Technique
- Stir paint thoroughly. Do not shake — shaking creates bubbles that dry as pits in the finish.
- Start with railings, balusters, and posts using a 2-inch brush. Work drips down onto the deck floor so they get rolled into the floor coat.
- Cut in along the house wall and any areas the roller can’t reach.
- Apply to the deck floor with a roller on an extension pole. Use a 3/8” nap roller on smooth boards, 1/2” nap on rough or textured surfaces.
- Work with the boards — roll parallel to the boards, not across them. Paint that bridges the gaps between boards cracks as boards expand and contract.
- Paint in 3-4 board-width sections across the deck. Complete the full length of that section before moving to the next.
- Keep a wet edge — always roll back into the section you just painted. Stopping mid-section and returning later causes lap marks.
- Start at the far end of the deck and work toward the door. Don’t paint yourself into a corner.
First Coat Coverage
Apply at the manufacturer’s recommended spread rate — typically 150-200 sq ft per gallon for the first coat on thirsty wood. Don’t try to stretch coverage by applying too thin. The first coat needs to seal the surface.
Step 5: Second Coat
Wait time between coats: Follow the label, but typically 4-6 hours for water-based acrylic, 24 hours for oil-based. Touch the first coat — it should be fully dry to the touch and not tacky. When in doubt, wait longer.
The second coat is your protective layer. Apply using the same technique as the first coat:
- Lightly sand any drips, runs, or raised grain with 120-grit sandpaper. Wipe off dust.
- Apply the second coat in the same direction, with the boards.
- The second coat typically covers more efficiently — expect 200-300 sq ft per gallon.
- Pay extra attention to high-wear areas: stairs, in front of doors, anywhere foot traffic concentrates.
After the second coat:
| Use | Wait Time |
|---|---|
| Light foot traffic | 24-48 hours |
| Furniture replaced | 48-72 hours |
| Normal use | 72 hours |
| First rain OK | 24 hours minimum |
Don’t put rugs or furniture back until fully cured. Rugs trap moisture and cause paint to lift in early cure stages.
Maintenance and Touch-Ups
Annual:
- Sweep regularly to prevent moisture-holding debris
- Clean mildew spots with a deck cleaner as soon as you see them
- Touch up any chipped or peeling areas before they spread
Touch-up technique: Clean the area, sand edges smooth, spot prime bare wood, apply one or two coats of matching paint. Blending paint touch-ups is difficult — touch up entire boards when possible, not just the damaged spot.
Every 2-3 years:
- Full clean and inspection
- If paint is still adhered well overall, a single fresh coat applied over clean, lightly scuffed paint extends life significantly without a full strip-and-repaint
- If paint is peeling in multiple areas, a full strip and repaint is the only reliable fix
Signs it’s time for full repaint:
- Paint peeling away from the wood in sheets
- Multiple bare patches despite touch-ups
- Paint surface feels chalky or powdery (oxidized)
- Widespread mildew coming through paint
When you repaint, scrape, sand, and prime bare areas as described above. You don’t need to strip the entire deck if the existing paint is sound — just feather the edges and paint over it.
Related Reading
- How to Stain a Deck
- How to Waterproof a Deck
- How to Repair a Deck
- How to Clean a Deck
- How to Fix Deck Boards
- Clean and Prep the Deck
Good prep is 80% of a good result. Paint that goes on dirty or wet wood will peel. No exceptions.
- Allow Complete Drying
Minimum: 48-72 hours with no rain. Longer in humid climates.
- Second Coat
Wait time between coats: Follow the label, but typically 4-6 hours for water-based acrylic, 24 hours for oil-based. Touch the first coat — it should be fully dry to the touch and not tacky. When in doubt, wait longer.
Free: 10-Point Home Maintenance Checklist
Prevent costly repairs with this seasonal checklist. Save hundreds every year by catching problems early.
Your checklist is ready!
Open Checklist →Something went wrong. View the checklist here.