How to Level a Floor: Self-Leveling Compound and Shimming for Tile and Flooring
Guide to leveling an uneven floor before installing tile, hardwood, or vinyl — using self-leveling compound for dips and shims for high spots.
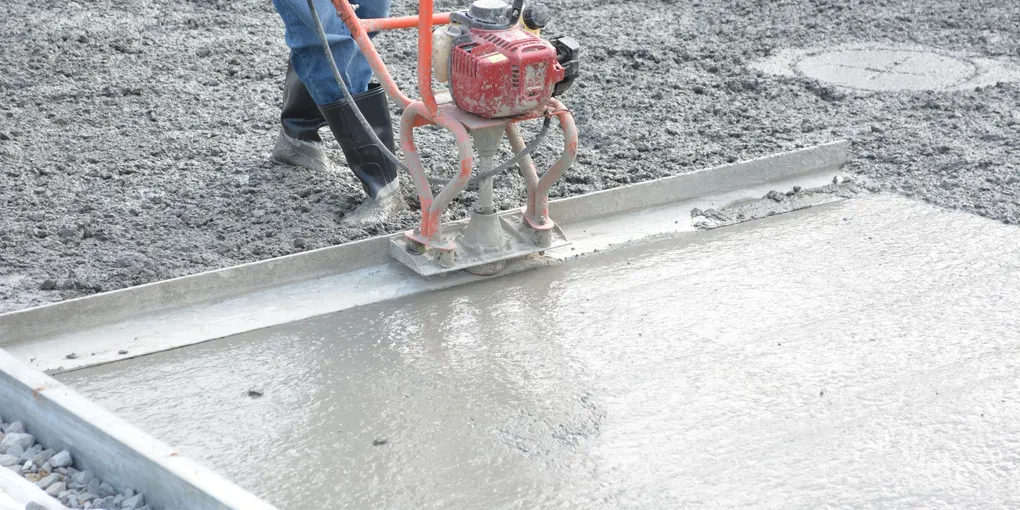
Tile and rigid flooring require a flat subfloor within 3/16 inch over 10 feet (or 1/8 inch over 6 feet for tile). Low spots are filled with self-leveling compound — a pourable cement product that seeks its own level. High spots must be sanded, ground, or planed down before any poured compound can work. Always prime the subfloor before pouring, and allow full cure time (typically 24 hours) before laying flooring on top.
Frequently Asked Questions
How do I know if my floor needs to be leveled before installing tile?
Use a 6-foot or 10-foot straightedge or level laid flat on the subfloor. Slide it across the floor in multiple directions. If you can see daylight under the straightedge, or if a feeler gauge shows gaps greater than 3/16 inch over 10 feet, the floor is too uneven for tile and needs leveling. Most vinyl plank and engineered hardwood manufacturers allow 3/16 inch over 10 feet as well.
What is self-leveling compound and how does it work?
Self-leveling compound (SLC) is a modified Portland cement product mixed with water to a pourable consistency. When poured onto a prepared subfloor, it flows and settles flat under gravity — similar to pancake batter. It fills dips, voids, and low spots, curing to a hard, flat surface. It does not fix high spots. Brands include Quikrete, Henry, Ardex, and Mapei.
How much slope or unevenness is acceptable under tile?
The Tile Council of North America (TCNA) standard for tile installation is no more than 3/16 inch variation over 10 feet, and no more than 1/16 inch variation over 12 inches (no sudden lips or bumps). Larger format tiles (12x24 or bigger) require even flatter substrates because they bridge low spots and tent over high spots, causing cracks.
Can I use self-leveling compound on a wood subfloor?
Yes, but you must prime the wood subfloor first with a product specifically designed for wood — such as Henry 336 or Ardex P 51. Without primer, the wood absorbs water from the compound too quickly and causes it to crack and crumble. All plywood joints and seams must also be filled and taped before pouring. Do not pour SLC over OSB subfloor without a layer of luan or cement board underneath — OSB swells with moisture.
How long does self-leveling compound take to dry?
Most self-leveling compounds allow foot traffic in 2-4 hours, but tile installation should wait at least 24 hours. Full cure for heavy loads or inflexible adhesive is typically 24-72 hours depending on thickness, temperature, and humidity. In cold or humid conditions, add 50% to all cure times. Never rush — installing tile over partially cured compound causes adhesion failure.
What do I do if my floor has both high spots and low spots?
You must fix high spots before addressing low spots — self-leveling compound will not cover a high spot. Grind, sand, or plane down high spots first (a belt sander or floor grinder works well). Once the floor is flat or slightly low everywhere, apply primer and pour the self-leveling compound to bring everything up to a common plane. Trying to reverse the order results in wasted compound and a floor that still is not flat.
Level an uneven floor using self-leveling compound (SLC) for low spots under 1 inch, or shims and blocking for high spots — a bag of SLC covers about 50 sq ft at 1/4 inch depth and costs $20–$30. Floors must be within 3/16 inch over 10 feet for tile, and 1/8 inch for vinyl plank. Clean the subfloor, apply primer, pour compound, and allow 24 hours to cure before installing flooring. Slopes over 1.5 inches over 10 feet indicate a structural issue requiring a structural engineer.
Uneven subfloors are one of the leading causes of failed tile installations, cracked grout, and loose vinyl plank flooring. A floor that flexes or has voids beneath it transmits stress directly to the surface material — tile cracks, grout fractures, and vinyl planks develop hollow spots and edge separations.
The fix is straightforward but requires the right sequence: test, correct high spots, fill low spots, prime, pour, and cure. Skip any step and the floor will fail again.
The 10-Foot Straightedge Test
Before buying materials, measure exactly how uneven the floor is and where the problem areas are.
What you need: A 6-foot or 10-foot aluminum straightedge or level. A feeler gauge or set of washers of known thickness (3/16 inch is your threshold for most flooring types).
How to do it:
- Lay the straightedge flat on the subfloor.
- Slide it in multiple directions — parallel to joists, perpendicular to joists, diagonal.
- Look for gaps between the straightedge and the floor.
- Where gaps exist, slide the feeler gauge under. Mark any gap larger than 3/16 inch (for vinyl and tile) with chalk or a pencil.
- Also check for high spots — places where the straightedge rocks on a hump.
Map the entire floor before doing anything else. You will likely find a pattern: low spots near the center of joist spans (wood sags over time), high spots at joists or seams, and humps at doorways.
Tolerances by flooring type:
- Ceramic and porcelain tile: 3/16 inch over 10 feet; 1/16 inch over 12 inches
- Large format tile (12x24 or larger): 1/8 inch over 10 feet
- Vinyl plank (LVP/LVT): 3/16 inch over 10 feet
- Engineered hardwood: 3/16 inch over 10 feet
- Solid hardwood: 1/4 inch over 10 feet (hardwood is more forgiving)
High Spots vs. Low Spots
These require completely different fixes.
High spots must be mechanically reduced — ground, sanded, or planed down.
- Isolated humps at plywood seams: use a belt sander or hand grinder to knock down the raised edge.
- High spots over joists: if the subfloor is screwed down, drive additional screws near the high area to pull the panel flat; sand remaining hump.
- Popped fasteners or screw heads: countersink or drive them flush.
- Significant floor crowning over a beam: requires a floor grinder, which can be rented.
Self-leveling compound is not designed to cover high spots. If you pour over a high spot, the compound will flow away from it, and the high spot will still be there — just surrounded by a moat of compound.
Low spots are addressed with self-leveling compound or, for minor irregularities, floor patching compound applied by trowel.
Rule: always address all high spots before pouring any compound.
Preparing the Subfloor
A properly prepared subfloor is what separates a self-leveling pour that holds for 20 years from one that cracks in six months.
Step 1: Secure the subfloor. Walk the floor and feel for bounce, squeak, or flex. Drive 1-5/8 inch coarse-thread screws every 8 inches along any bouncy area to pull the subfloor panel tight to the joists. A subfloor that flexes will crack cured SLC.
Step 2: Fill large gaps and seams. Use floor patching compound or hydraulic cement to fill any gaps at plywood seams wider than 1/8 inch. Allow to cure.
Step 3: Clean thoroughly. Sweep, vacuum, and damp-mop the subfloor. SLC bonds chemically — oil, wax, paint, adhesive residue, and dust all compromise the bond. For adhesive removal, use a floor scraper. For oil, use a degreaser.
Step 4: Install temporary dams. Self-leveling compound is poured liquid and will flow under doors, into adjacent rooms, and down floor register openings. Use foam backer rod, caulk, or duct tape to dam doorways and cover register holes before mixing.
Step 5: Apply primer. Pour primer over the subfloor and spread it with a paint roller. Use a primer rated for your subfloor type — wood and concrete use different primers. Allow the primer to tack dry (typically 30-60 minutes) before pouring. Do not let it dry completely — pour SLC while the primer is still slightly tacky.
Products for this phase:
- Quikrete self-leveling compound
- Self-leveling floor primer
- Long level or straightedge
- Mixing drill with paddle
- Feeler gauge for floor leveling
Mixing and Pouring Self-Leveling Compound
Self-leveling compound has a short working time — typically 10-20 minutes before it starts to set. Mix and pour quickly.
Mixing:
- Add water to a clean bucket first, then add the dry compound powder. The ratio is printed on the bag — follow it exactly. Too much water weakens the compound; too little makes it too thick to flow.
- Mix with a drill and paddle mixer on low speed for 3-5 minutes until smooth with no lumps. The consistency should resemble thin pancake batter — pourable but not watery.
- Let it rest 1 minute (slaking), then remix briefly.
Pouring:
- Start at the far end of the room from the exit door.
- Pour the compound directly over the low spots and let it flow. It seeks its own level and will find the depressions.
- Guide the flow with a gauge rake or spreader to push compound into corners and edges — it does not flow well against walls.
- For pours over 1/4 inch deep, you may need multiple bags mixed in sequence. The first pour must still be wet when the second arrives — work in batches with a helper if the room is large.
- Use a floor leveling gauge to verify depth and check for remaining voids while the compound is still fluid.
Feathering the edges: Where the compound thins out at the edge of a low spot, the edge will be slightly raised and can create a hump if not feathered. Use a trowel to blend the edge while the compound is still workable.
Maximum pour depth per application varies by product — most are designed for 1/4 inch to 1-1/2 inch pours. For deeper fills, pour in layers and allow each layer to cure before the next.
Shimming High Spots
For high spots that cannot be ground down (for example, a wide hump in the center of a room where grinding is impractical), shimming underlayment is an option for floating floors but not for tile.
Floor leveling shim tape comes in adhesive strips of varying thicknesses and can be applied to the subfloor in low areas adjacent to a high spot — effectively raising the surrounding area so the high spot is relatively less pronounced. This is a workaround, not a preferred solution, and is only appropriate for resilient flooring, not tile.
For tile installations, high spots must be physically reduced. Period.
Drying Time and When to Float Tile
Most self-leveling compounds allow foot traffic in 2-4 hours. However:
- Tile installation: wait at least 24 hours
- Vinyl plank installation: follow manufacturer — typically 24 hours minimum
- Hardwood installation: 24-72 hours depending on moisture sensitivity
- Cold weather (below 60°F): add 50% to all cure times
- High humidity: extended cure times; do not pour SLC in conditions above 90% relative humidity
Test moisture content before installing flooring over SLC if your flooring manufacturer requires it. A concrete moisture meter gives a reading in seconds.
Do not install tile directly over a pour that has any give, softness, or chalky surface when scratched. A properly cured SLC pour is hard, dense, and does not dust.
Related Reading
- How to Tile a Bathroom Floor
- How to Install Vinyl Plank Flooring
- How to Install Hardwood Flooring
- How to Repair a Loose Floor Tile
- How to Fix a Floor Tile That Is Loose — epoxy injection method for tiles that clunk underfoot after leveling
- The 10-Foot Straightedge Test
Before buying materials, measure exactly how uneven the floor is and where the problem areas are.
- High Spots vs. Low Spots
These require completely different fixes.
- Preparing the Subfloor
A properly prepared subfloor is what separates a self-leveling pour that holds for 20 years from one that cracks in six months.
- Mixing and Pouring Self-Leveling Compound
Self-leveling compound has a short working time — typically 10-20 minutes before it starts to set. Mix and pour quickly.
- Shimming High Spots
For high spots that cannot be ground down (for example, a wide hump in the center of a room where grinding is impractical), shimming underlayment is an option for floating floors but not for tile.
- Drying Time and When to Float Tile
Most self-leveling compounds allow foot traffic in 2-4 hours. However:
Free: 10-Point Home Maintenance Checklist
Prevent costly repairs with this seasonal checklist. Save hundreds every year by catching problems early.
Your checklist is ready!
Open Checklist →Something went wrong. View the checklist here.