How to Install Hardwood Flooring (DIY Guide, 2026)
Install hardwood floors yourself. Prefinished vs unfinished, nail-down vs floating, tools, acclimation, layout, and common mistakes. Full DIY guide.
DIY hardwood flooring installation costs $3-$12/sq ft in materials for a 200 sq ft room ($600-$2,400). Professional installation adds $3-$8/sq ft labor ($600-$1,600), so DIY saves $600-$1,600 per 200 sq ft. Prefinished engineered hardwood is the easiest DIY option — no sanding or staining, installs as a floating floor, compatible with concrete subfloors and radiant heat. Solid hardwood needs nail-down install over plywood subfloor, a pneumatic nailer, and better-than-average woodworking skills. Always acclimate wood 3-7 days in the room before install.
Frequently Asked Questions
Solid vs engineered hardwood — which should I install?
Engineered for most DIYers and most rooms. It's more dimensionally stable, installs over concrete and radiant heat, and costs less. Solid hardwood is better only when you plan to sand and refinish multiple times over decades — and only on plywood subfloor in above-grade rooms without moisture issues.
Can I install hardwood over concrete?
Only engineered hardwood, and only as a floating install or with a moisture barrier and glue-down. Solid hardwood on concrete shows moisture problems within 1-3 years — cupping, buckling, or warping. Always test concrete moisture with a calcium chloride kit or relative humidity probe before committing.
How long does acclimation take?
3-7 days minimum. Store the boxes flat in the room where they'll be installed, at normal indoor humidity (35-55%). Open boxes but don't unstack them. This lets the wood equilibrate to the room's humidity so it doesn't expand or contract after install.
Do I need underlayment for engineered hardwood?
Yes for floating engineered floors — a 2-3 mm foam or cork underlayment cushions, dampens sound, and provides a small moisture barrier. Skip underlayment for nail-down or glue-down installs (both use different prep).
What's the hardest part of installing hardwood?
Cutting accurate end and rip cuts around obstacles, especially around door jambs, vents, and room transitions. Layout errors in the first row (not parallel to the longest wall, wrong expansion gap) also cause problems that compound across the whole room.
How much expansion gap is needed around the perimeter?
1/2 inch minimum all around the room perimeter, at all doorways, and where flooring meets vertical obstacles (islands, columns). Cover the gap with baseboard or quarter-round molding. Solid hardwood needs more (3/4 inch); engineered can get away with less.
DIY hardwood flooring installation costs $3-$12/sq ft in materials for a 200 sq ft room ($600-$2,400). Professional installation adds $3-$8/sq ft labor ($600-$1,600), so DIY saves $600-$1,600 per 200 sq ft.
Hardwood flooring is the most transformative single upgrade in most homes. Replace worn carpet or dated tile with hardwood and the room reads newer, the house values higher, and the floor lasts 50+ years if it’s solid. This guide covers DIY install for engineered hardwood (easiest) and references solid nail-down for advanced DIYers.
Engineered vs Solid Hardwood
Engineered Hardwood — Best for DIY
- Thin hardwood top layer over plywood cross-grain core
- $3-$10/sq ft
- Installs as floating, nail-down, or glue-down
- Works over concrete, plywood, or radiant heat
- Refinishes 1-3 times (depending on wear-layer thickness)
- Dimensionally stable with humidity changes
Best for: DIYers, condos, basements, homes with concrete slab.
Engineered Hardwood Flooring — wide selection of styles.
Solid Hardwood — Premium, Harder DIY
- Single piece of hardwood throughout
- $5-$15/sq ft
- Nail-down only, over plywood subfloor
- Above-grade only (no basements)
- Refinishes 5-8+ times over 50+ year life
- Expands and contracts with humidity
Best for: Long-term homeowners, luxury installs, refinishing projects.
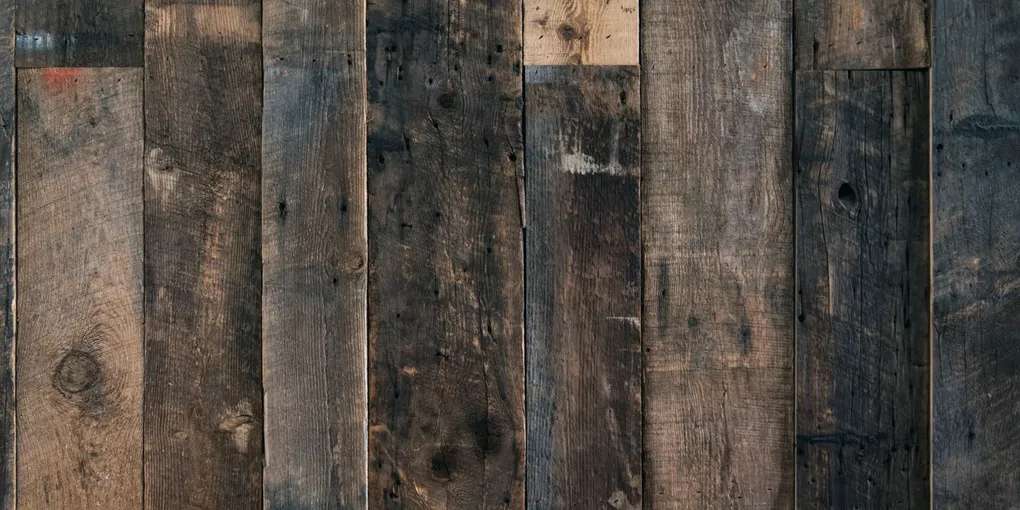
Wood Species Comparison
| Species | Hardness | Cost | DIY Friendly |
|---|---|---|---|
| Red oak | Medium | $4-$8 | Yes |
| White oak | Medium | $5-$10 | Yes |
| Maple | Hard | $5-$9 | Medium |
| Hickory | Hardest | $6-$11 | Medium |
| Walnut | Soft | $7-$14 | Yes |
| Brazilian cherry | Very hard | $8-$15 | Medium |
| Pine | Soft | $3-$6 | Yes |
Hardness (Janka scale) affects dent resistance. For families with kids or dogs, hickory or white oak.
Tools You’ll Need
Essential
- Miter Saw ($200-$500) — cross cuts on boards.
- Table Saw or Track Saw ($300-$700) — rip cuts for last row.
- Pneumatic Flooring Nailer + Compressor ($150-$400, or rent $40-$60/day) — for nail-down solid hardwood.
- Tapping Block and Pull Bar ($20-$40) — snugs boards together.
- Flooring Spacers ($5-$15) — maintains expansion gap.
- Jamb Saw or Oscillating Multi-Tool ($80-$200) — undercut door jambs.
- Pry Bars ($15-$30) — remove baseboards, fit last row.
- Tape Measure ($15-$25)
- Chalk Line ($10-$20) — mark first row reference.
- Moisture Meter ($30-$80) — check subfloor and wood moisture.
Materials
| Item | Purpose | Cost (200 sq ft) |
|---|---|---|
| Hardwood flooring | Primary | $600-$2,000 |
| Underlayment (floating only) | Cushion, sound | $80-$150 |
| Flooring nails | Nail-down | $25-$50 |
| Transition strips | Doorways | $20-$40 each |
| Quarter-round or shoe molding | Cover expansion gap | $50-$150 |
Buy 10-15% more wood than measured to allow for waste, defects, and end cuts.
Step 1: Acclimate the Flooring
Why It Matters
Wood absorbs or releases moisture depending on humidity. Install wood that hasn’t equilibrated to room humidity and it will expand (buckling) or contract (gaps) after install.
How to Acclimate
- Deliver boxes 3-7 days before install
- Store in the room where it will install
- Open boxes but leave boards stacked loosely
- Maintain 35-55% relative humidity in the room (measure with a hygrometer)
- Don’t skip — even prefinished engineered needs acclimation
Moisture Meter Test
At day 3-5, check wood moisture with a moisture meter. Compare to subfloor moisture. They should be within 2-4 percentage points of each other before install.
Step 2: Prepare the Subfloor
Plywood Subfloor
- Clean thoroughly (vacuum, mop)
- Check for squeaks — screw subfloor to joists with 3” deck screws
- Check for level with a straight edge. If more than 1/8” over 6 ft, shim or sand
- Fill holes or depressions with floor leveling compound
- Staple down rosin paper or felt paper (for nail-down) — $20-$30
Concrete Subfloor (engineered only)
- Sweep and vacuum
- Test moisture with a calcium chloride kit ($15) or RH probe
- Readings must be below manufacturer’s limit (typically 3 lb/1000 sq ft or 75% RH)
- Install moisture barrier (6-mil plastic sheeting) if floating
- Install foam underlayment over moisture barrier
Remove Baseboards
- Score paint line with utility knife
- Pry gently from the bottom
- Label each piece with location
- Reinstall (or replace) after flooring goes in
Undercut Door Jambs
- Lay a scrap piece of flooring next to the jamb
- Use a jamb saw or oscillating multi-tool to cut the jamb at flooring height
- Removing the bottom 1/2” of the jamb lets flooring slide under for a clean look
Step 3: Plan the Layout
Choose Direction
Flooring typically runs parallel to the longest wall or toward the main room’s light source. Running perpendicular to floor joists provides extra stability (important for solid hardwood on plywood).
Calculate Last Row Width
- Measure room width perpendicular to board direction
- Divide by plank width
- If the remainder is less than 1.5”, adjust your starting position so the first and last rows are equal width
Example: 10-foot room, 5-inch planks. 120 / 5 = 24, exactly. Final row will be full width. ✓
Example: 10 ft 2 in room, 5-inch planks. 122 / 5 = 24.4 rows. Last row would be 0.4 x 5 = 2 inches. Adjust first row to 3.5” width so last row is 3.5” width.
Snap a Chalk Line
Measure out the first plank’s distance from the starting wall (plank width + expansion gap). Snap a chalk line to guide the first row. Don’t trust the wall to be straight — it rarely is.
Step 4: Install the First Row
First Row Is Critical
All subsequent rows depend on the first being straight. Spend the extra time here.
For Nail-Down (Solid Hardwood)
- Place the first board against a spacer at the starting wall (1/2” gap)
- Align board to the chalk line
- Face-nail through the board (top) into the subfloor every 6-8 inches — these nails will be covered by baseboards
- Continue down the wall, fitting boards end-to-end
- Stagger end joints — next board in next row shouldn’t be within 6” of previous end joint
For Floating (Engineered Hardwood)
- Place first plank tongue-side toward wall, spacer in gap
- Click next plank into the end of the first
- Continue down the wall
- Use a pull bar to seat last plank into wall (use tapping block to avoid damaging edges)
Step 5: Build Successive Rows
For Nail-Down
- Hold the next board’s tongue into the previous board’s groove
- Seat with a tapping block (rubber mallet)
- Use the pneumatic flooring nailer at 45° through the tongue every 6-8 inches
- Cleat nails or staples work — match to nailer brand
For Floating
- Insert the end of the next board into the previous at 45° angle
- Lower into place — board should click
- Use tapping block along the long side to fully seat
- Adjust expansion gap as needed with spacers
Stagger the End Joints
- Minimum 6” between end joints in adjacent rows
- Avoid “H” patterns (joints aligned every 2 rows)
- Ideal stagger: 8-16” random
Work from Multiple Boxes
Pull boards from 3-4 different boxes at a time. Batch color variations average out, preventing visible banding.
Step 6: Cut Around Obstacles
Doorways
- Measure precisely
- Dry-fit the board before gluing or nailing
- Use a jamb saw to undercut the door trim at the flooring height
Around Vents or Plumbing
- Mark the shape on the board with a pencil
- Cut with a jigsaw (for round holes, a hole saw)
- Dry-fit, trim as needed
- Install and cover the seam with a register grate
Doorway Transitions
- T-molding: for same-height floors in adjacent rooms
- Reducer: for transitioning to lower floors (tile, vinyl)
- Threshold: for doorways to rooms with different flooring
Match transition color and species to flooring when possible.
Step 7: Install the Last Row
Measure Each Section
Walls are rarely straight. The last row often needs different widths at different points.
Cut the Last Row
- Measure the gap at each wall location
- Subtract 1/2” for expansion
- Rip each board to width with a table saw
- Account for the tongue (remove it or trim if snagging)
Install
- Insert the last row
- Use a pull bar to seat against the previous row
- Space against the wall with expansion spacers
Step 8: Finish the Install
Remove Spacers
Pull all perimeter and doorway spacers.
Install Transitions
- T-molding, reducers, thresholds at each doorway
- Screwed or glued to the subfloor
- Avoid fastening directly to flooring
Install Baseboards
- Replace original baseboards or install new
- Nail into studs, not the flooring
- Caulk the top seam to the wall
Optional: Quarter-Round or Shoe Molding
- Covers the expansion gap between flooring and baseboard
- Match wood color or paint to baseboards
Maintenance
Daily / Weekly
- Sweep or vacuum (use hardwood floor attachment)
- Damp mop with hardwood-rated cleaner — never soaked
Monthly
- Check for water damage in high-risk areas (kitchens, entries)
- Re-tighten any creaky floor boards
Annually
- Apply hardwood floor polish or recoat
- Inspect expansion gaps under baseboards
Every 10-25 Years
- Recoat the finish (solid and engineered)
- Sand and refinish (solid only)
Never Do
- Wet mop or steam mop (water destroys finishes)
- Use vinegar or ammonia (dulls finish)
- Walk with high heels or dog nails untrimmed (scratches)
- Drag furniture without felt pads
Common Mistakes
Not Acclimating
Skipping acclimation is the #1 cause of buckling, gapping, and warranty denial. Even if you’re in a rush, 3 days minimum.
Too Small Expansion Gap
1/4” expansion seems like enough — it isn’t. Hardwood can expand 1/2” across a 12-foot room during humid summers.
First Row Not Square
Small errors in the first row compound across the room. If the first row isn’t square to the chalk line, the last row will be visibly tapered.
Nails Too Close to End of Boards
Nailing within 1-2” of the end splits the tongue or weakens the joint. Start nails at least 2” from any end.
Ignoring Subfloor Moisture
Install over a wet subfloor and within 6-12 months you’ll have cupping, squeaks, or outright failure.
Wrong Underlayment
Some underlayments are for engineered click-lock; others for laminate. Check manufacturer’s requirement on the flooring box.
DIY vs. Pro
DIY Savings (200 sq ft Living Room)
- Materials: $600-$2,000
- Tool rental: $80-$150 (nailer, compressor)
- Time: 12-20 hours first-time
Pro install: $1,200-$3,600 labor + $600-$2,000 materials.
DIY saves $1,000-$2,000 on a 200 sq ft install.
When to Hire Pro
- Solid hardwood nail-down (precision matters)
- Herringbone, chevron, or complex patterns
- Rooms over 500 sq ft
- Rooms with multiple doorways and complex transitions
- Subfloor prep issues (significant out-of-level)
Cost Comparison: Hardwood vs. Other Flooring
| Material | Installed Cost/sq ft | Lifespan | Refinish |
|---|---|---|---|
| Solid hardwood | $8-$23 | 50-100 yrs | Yes, 5+ times |
| Engineered hardwood | $6-$18 | 20-50 yrs | 1-3 times |
| Luxury vinyl plank | $3-$10 | 15-25 yrs | No |
| Laminate | $3-$8 | 10-25 yrs | No |
| Tile | $7-$20 | 50+ yrs | No |
| Carpet | $4-$10 | 8-15 yrs | No |
Hardwood has the highest upfront cost but the best lifetime economics if you stay in the home 10+ years.
Related Reading
- How to Install Vinyl Plank Flooring — easier DIY alternative
- Carpet Installation Cost — the main hardwood alternative, with a side-by-side cost comparison
- Hardwood Floor Refinishing Cost — if your existing floors can be saved instead of replaced
- How to Fix Squeaky Floors — subfloor prep issue
- How to Install Crown Molding — pair with new flooring
- How to Install Baseboards — finishing touches
- Kitchen Remodel Cost Breakdown — hardwood in kitchen considerations
- Annual Home Maintenance Schedule — care calendar for new floors
- How to Clean Hardwood Floors — proper mopping technique after installation
- Acclimate the flooring
Deliver flooring to the room 3-7 days before install. Open boxes, stack loosely, let equilibrate to room humidity.
- Prepare the subfloor
Clean thoroughly. For plywood: check for level (1/8 inch over 6 ft). For concrete: test moisture. Add underlayment for floating installs.
- Plan the layout
Find the longest wall. First row will run parallel to it. Calculate last-row width to ensure it's at least 1.5 inches wide.
- Install the first row
Place first row along longest wall with expansion gap. If nailing, face-nail first row. If floating, use spacers.
- Stagger joints
End joints in successive rows should be offset by at least 6 inches. Avoid H-patterns (joints aligned every 2 rows).
- Continue rows across the room
For nail-down: use a pneumatic nailer at 45° through the tongue. For floating: click boards together at ends and sides.
- Make cuts around obstacles
Measure carefully around doorjambs, vents, and islands. Use a jamb saw for doorjamb undercut.
- Install the final row
Final row will likely need ripping. Measure each section — walls aren't straight. Cut each board individually.
- Install transitions and trim
Install thresholds at doorways. Re-install baseboards or add quarter-round. Set reveals consistent.
Free: 10-Point Home Maintenance Checklist
Prevent costly repairs with this seasonal checklist. Save hundreds every year by catching problems early.
Your checklist is ready!
Open Checklist →Something went wrong. View the checklist here.