How to Install Baseboard Trim: Measuring, Cutting Corners, and Finishing
A practical step-by-step guide to installing baseboard trim — covering material selection, measuring, cutting inside and outside corners, nailing, caulking, and painting for a clean professional finish.
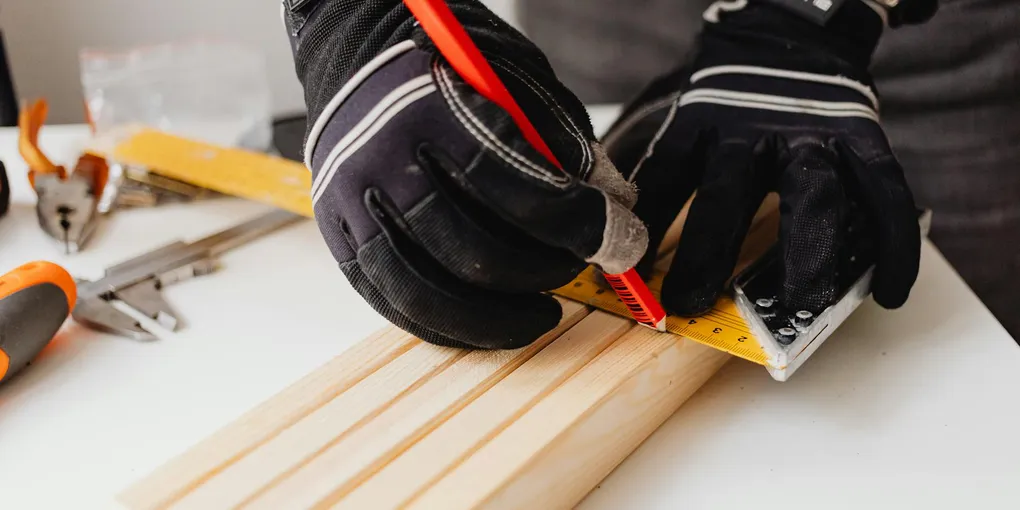
Installing baseboard trim: (1) Measure each wall and buy 10% extra for waste. (2) Mark stud locations on the wall — nails go into studs for holding power. (3) Inside corners: cope one piece (cut the profile of the second piece into the end of the adjoining piece) for a tight fit — miter joints open as wood moves. (4) Outside corners: cut both pieces at 45 degrees in opposing directions. Test-fit before nailing. (5) Nail with a finish nailer (15- or 16-gauge) — one nail into each stud, angled slightly downward. (6) Leave a 1/16 inch gap at the floor for seasonal wood movement; fill with paintable caulk. (7) Fill nail holes with spackling. Sand flush after drying. (8) Caulk the top edge where baseboard meets the wall, and any gaps at corners. (9) Paint before or after installation — painting before avoids getting wall paint on the floor.
Frequently Asked Questions
What size baseboard trim should I use?
Match baseboard height to ceiling height. For 8-foot ceilings, 3-3.5 inch baseboard looks proportional. For 9-10 foot ceilings, use 4-5 inch. For ceilings above 10 feet, 5-7 inch baseboard fills the wall correctly. Taller baseboard reads as higher-end; going below 2.5 inches looks builder-grade. Thickness matters too — 7/16 inch MDF is standard; 9/16 inch solid wood is more durable and looks heavier.
Do I need a miter saw to install baseboard?
A miter saw is the fastest and most accurate option, but it isn't required. A miter box and hand saw ($20-$40) handles all the same cuts — 45° miters for outside corners, coped inside corners — just more slowly. For a single room, a miter box is fine. For a whole house or multiple rooms, a miter saw pays for itself in time and accuracy.
How do I cut inside corners for baseboard?
Coping is the correct method. Cut the first piece square and butt it into the corner. On the second piece, cut a 45° inside miter, then use a coping saw to follow the profile of the cut — removing the material behind the face so only the face profile remains. The coped piece overlaps the face of the first piece. This creates a tight joint even when walls aren't exactly 90°, which they almost never are.
How do I cut outside corners for baseboard?
Both pieces get a 45° miter cut so the long faces meet at the corner point. On piece one, miter left at 45°. On piece two, miter right at 45°. Test-fit before nailing. If the joint opens at the wall, your corner is obtuse — try 44° or 43° miters. If the joint opens at the face, your corner is acute — try 46°. A dab of construction adhesive at the joint before nailing holds outside corners together permanently.
Should I nail or glue baseboard?
Use both. Drive 2-inch finish nails or brad nails into wall studs every 16 inches, and run a bead of construction adhesive along the back of the baseboard before pressing it to the wall. The adhesive handles any minor gaps between the baseboard and an uneven wall, and the nails hold the piece while the adhesive cures. Glue-only installs work but are harder to remove later if you ever need to replace the baseboard.
Do I caulk before or after painting baseboard?
Fill nail holes with wood filler first and let it dry. Then caulk the seam between the top of the baseboard and the wall with paintable latex caulk, and caulk any corner joints that show gaps. After caulking, paint. Caulk applied before paint bonds better and the paint smooths over the caulk edge cleanly. Never caulk after the final coat — fresh caulk looks shiny and distinct from cured paint.
Installing baseboard trim: (1) Measure each wall and buy 10% extra for waste. (2) Mark stud locations on the wall — nails go into studs for holding power.
Baseboard trim does two jobs: it covers the gap where your walls meet the floor, and it gives every room a finished, polished edge. Without it, walls look unfinished. With it — even plain, flat baseboard — rooms feel complete. This guide covers everything from choosing material to the final coat of paint, including the two corner cuts most DIYers get wrong the first time.
Choosing Baseboard
MDF — The Default Choice
MDF (medium density fiberboard) is the right call for most painted baseboard installations. It’s consistent, pre-primed, takes paint cleanly, and runs $0.50-$1.50 per linear foot. It doesn’t expand or contract with humidity the way solid wood does, which means fewer cracked paint joints over time. The downside: it dents more easily than wood and doesn’t tolerate water well — avoid it for bathrooms.
Solid Wood (Pine, Poplar)
Primed pine and poplar cost $1.50-$3 per linear foot and are more durable than MDF. Better for high-traffic areas, pet households, and anywhere the baseboard might take knocks. Also the right choice if you’re staining instead of painting.
Profile Options
Baseboard profile is a style decision. Common options:
- Flat / square stock — modern, minimalist, easiest to cut
- Colonial / stepped — traditional, stepped profile, most common in older homes
- Craftsman — wide and flat with a cap rail or simple bead, mid-century and arts-and-crafts styles
- Victorian / ornate — built-up from multiple pieces; for period-restoration work
Height and Thickness
| Ceiling Height | Baseboard Height | Notes |
|---|---|---|
| 8 ft | 3–3.5 inches | Standard residential |
| 9–10 ft | 4–5 inches | Feels proportional |
| 10–12 ft | 5–7 inches | High-ceiling rooms |
| 12+ ft | 6–8 inches | Formal or historic homes |
Standard thickness is 7/16 inch (MDF) or 9/16 inch (solid wood). Thicker stock looks more substantial and is worth the small extra cost.
What You Need
Power Tools
- 10-inch compound miter saw — the right tool for fast, repeatable cuts; handles both miter and bevel angles
- Finish nailer or brad nailer (18-gauge) — drives 2-inch finish nails cleanly without splitting trim
Hand Tools (Budget Option)
- Miter box and hand saw — handles 45° and 90° cuts without power tools; slower but accurate enough for one room
Fastening and Filling
- Loctite construction adhesive — run a bead on the back of each piece before nailing; bridges gaps and prevents seasonal movement
- DAP Alex white paintable caulk — seals the top seam of the baseboard to the wall and fills corner gaps
- Wood filler for nail holes — lightweight spackle or painter’s putty for nail hole repairs
Other Supplies
- Tape measure and pencil
- Stud finder
- Coping saw
- Sanding block (120-grit, then 220-grit)
- Primer and trim paint (satin or semi-gloss)
- Painter’s tape
Planning and Measuring
Walk the Room First
Walk the perimeter and note every corner type and wall condition:
- Inside corners — most common; walls meet at roughly 90°
- Outside corners — walls project outward (doorways, bump-outs)
- Door casings and jogs — baseboard returns or butts against casing
- Any existing trim to remove — old baseboard must come off cleanly; use a pry bar and score the paint first with a utility knife to avoid tearing drywall
Measure Each Wall
Measure every wall from corner to corner. Write the measurements down on a simple sketch of the room. For walls with doors, measure from the door casing to the adjacent corner.
Add 10% for Waste
Miscuts happen. Inside copes sometimes take two tries. Always buy at least 10% more baseboard than your measured total. For a room with outside corners, add 15% — outside corner miters waste more material.
Map Your Cut Sequence
Plan which pieces install first. The general rule:
- Start on the longest wall with inside corners on both ends — cut square on one end, cope the other
- Work around the room in one direction
- Outside corners are the last pieces cut for that wall section — fit the inside pieces first so you have accurate measurements for the outside miter
Cutting Inside Corners
Inside corners are where most DIYers go wrong. The instinct is to cut two 45° miters that meet in the corner — this works only if the corner is exactly 90°, which is rare. Walls that are 88° or 92° produce a visible open gap.
Coping is the correct method for inside corners.
Why Coping Works
A coped joint doesn’t depend on the wall angle at all. The coped piece wraps around the face profile of the first piece. Even if the corner is 85°, the cope closes tight.
How to Cope
- Install the first piece with a square cut on the corner end — it simply butts into the wall
- On the second piece, cut a 45° inside miter (as if you were mitering the corner)
- The miter cut exposes the profile of the baseboard face
- Use a coping saw to follow that exposed profile line, cutting away the material behind the face at a slight back-cut angle (about 5–10° away from the face)
- Test-fit the coped piece against the installed piece — the face profile of the coped piece should nest against the face of the first piece
- Adjust with a file or rasp until the joint closes completely
A coped joint that fits right needs no caulk to look good. Small gaps under 1/16 inch are fine — caulk handles those.
Cutting Outside Corners
Outside corners use 45° miters on both pieces. Unlike inside corners, both pieces are mitered — neither is square.
| Feature | Inside Corner | Outside Corner |
|---|---|---|
| Cut method | Cope (square + profile cut) | 45° miter on both pieces |
| Wall dependency | None — works on any angle | Depends on corner being ~90° |
| Looks when corner isn’t square | Still tight | Open gap at face or wall |
| Fix for out-of-square | Adjust cope profile | Adjust miter angle (43–47°) |
| Adhesive needed | No | Yes — glue the miter joint |
Step by Step
- Cut piece one with the miter angled so the long face points toward the room (facing away from the wall)
- Cut piece two the mirror image — same angle, opposite direction
- Test-fit both pieces together at the corner before touching the nail gun
- If the joint opens at the wall, decrease the miter angle slightly (44° or 43°)
- If the joint opens at the face, increase the angle (46° or 47°)
- Apply a dab of construction adhesive to the miter faces, press together, and nail
Back-Cutting Tip
Set your miter saw bevel to 1–2° away from vertical when cutting outside corners. This undercuts the back of the piece slightly so only the face edge contacts the mating piece — making a tighter face joint even if the cut isn’t perfect.
Nailing and Fastening
Find Your Studs
Use a stud finder to locate and mark every stud along the wall. Most walls are framed 16 inches on center, but older homes vary. Mark each stud location lightly in pencil at baseboard height.
Nail Size
Use 2-inch (6d) finish nails or 2-inch 18-gauge brad nails. Nails shorter than 1.5 inches won’t reach the stud reliably through drywall and baseboard combined.
The Adhesive + Nail Method
Run a single bead of construction adhesive along the back of the baseboard, about 1 inch from the bottom edge, before pressing the piece to the wall. The adhesive fills any gap between the baseboard back and an uneven wall. Drive finish nails into studs to hold the piece while the adhesive cures.
Nailing Pattern
- Drive one nail near the top edge of the baseboard into the stud
- Drive one nail near the bottom edge into the bottom plate (the horizontal framing member at floor level — always present, always nailable)
- Repeat at every stud — roughly every 16 inches
- At corners, add nails within 2–3 inches of the corner end
At Door Casings
Where baseboard meets a door casing, cut the baseboard end square and butt it tightly against the casing face. No miter needed. If there’s a gap, caulk will close it.
Filling Nail Holes and Caulking
The sequence matters: fill, sand, caulk, then paint. Skipping steps or reversing the order shows in the final finish.
Step 1: Fill Nail Holes
Press a small amount of lightweight wood filler or painter’s putty into each nail hole with your finger. Wipe off the excess. Let it dry completely (15–30 minutes for most fillers).
Step 2: Sand Smooth
Sand the filled nail holes with 120-grit sandpaper, then follow with 220-grit. The goal is a surface flush with the surrounding baseboard. Don’t skip the second sanding — scratches from 120-grit show through paint.
Step 3: Caulk the Top Seam
Run a continuous bead of paintable latex caulk (DAP Alex Plus or equivalent) along the seam where the top of the baseboard meets the wall. This is the most visible gap in the finished room. Keep the tube tip cut small — a 1/8-inch opening gives a bead you can smooth flat. Drag a wet finger along the bead within 60 seconds to press it into the seam and remove excess.
Step 4: Caulk Corner Joints
At inside corners, if any gap shows between the coped piece and the first piece, apply a small amount of caulk and smooth it flush. Outside corner miter joints get a thin bead at any visible seam.
What Not to Caulk
Do not caulk the bottom of the baseboard to the floor if you have hardwood or engineered flooring — the floor expands and contracts seasonally, and a rigid caulk joint will crack. Leave that seam open or use a flexible floor caulk.
Painting Baseboard
Prime Before Painting
Raw MDF edges, patched nail holes, and bare wood all need primer before finish paint. Use a brush-applied primer or a spray shellac primer for quick adhesion. Let it dry fully.
Paint Sequence
Apply trim paint in this order:
- Cut in the top edge of the baseboard carefully against the wall — use painter’s tape on the wall side if needed
- Paint the face of the baseboard with a brush, working in long smooth strokes with the grain
- Cut in the bottom edge against the floor
- Apply a second coat after the first is fully dry (at least 4 hours, overnight is better)
Finish
Satin or semi-gloss paint is correct for baseboard. It cleans more easily than flat paint and holds up to scuffs and cleaning. Eggshell is acceptable but semi-gloss is the industry standard for trim.
Related Reading
- How to Paint Baseboards and Trim
- How to Install Crown Molding
- How to Patch Drywall
- How to Repair Plaster Walls
- Cutting Inside Corners
Inside corners are where most DIYers go wrong. The instinct is to cut two 45° miters that meet in the corner — this works only if the corner is exactly 90°, which is rare. Walls that are 88° or 92° produce a visible open gap.
- Cutting Outside Corners
Outside corners use 45° miters on both pieces. Unlike inside corners, both pieces are mitered — neither is square.
- Nailing and Fastening
Drive one nail near the top edge of the baseboard into the stud Drive one nail near the bottom edge into the bottom plate (the horizontal framing member at floor level — always present, always nailable)
- Filling Nail Holes and Caulking
The sequence matters: fill, sand, caulk, then paint. Skipping steps or reversing the order shows in the final finish.
Free: 10-Point Home Maintenance Checklist
Prevent costly repairs with this seasonal checklist. Save hundreds every year by catching problems early.
Your checklist is ready!
Open Checklist →Something went wrong. View the checklist here.