How to Repair Plaster Walls: Hairline Cracks, Loose Plaster, and Large Holes (2026)
Plaster walls in older homes require different repair techniques than drywall. This guide covers diagnosing loose plaster vs. drywall, filling hairline cracks with setting compound, stabilizing loose plaster with plaster washers, and patching holes.
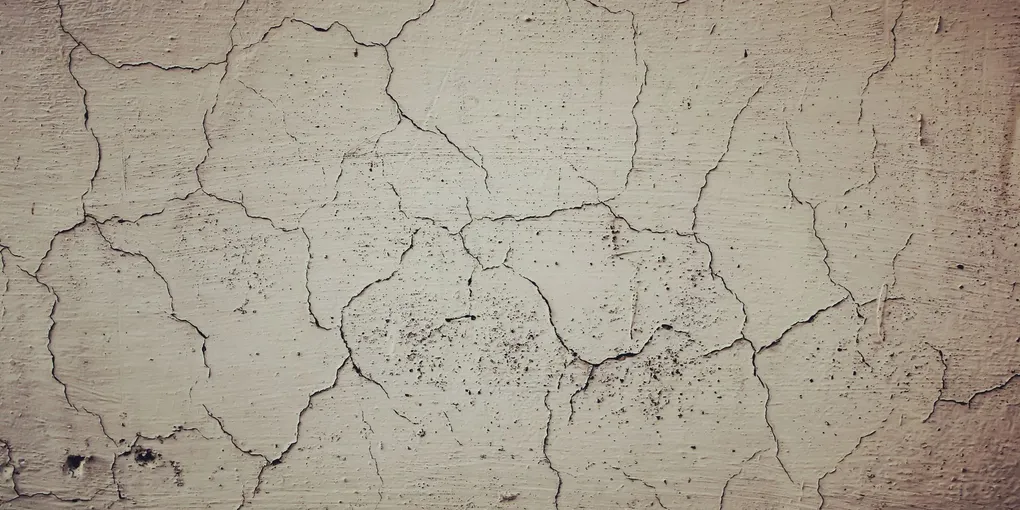
Plaster wall repair: (1) Tap the wall — solid 'thud' = bonded plaster. Hollow sound = plaster has separated from the lath behind it. Hollow areas need to be either stabilized with plaster washers (screws with large fender-washer heads that pull the plaster back against the lath) or removed and patched. (2) For cracks: use setting-type joint compound (Durabond 20 or 45), not ready-mixed. Setting compound bonds to plaster; ready-mixed may not. (3) For holes: apply plaster bonding agent first, then patch with setting compound in thin layers. Multiple thin coats outperform one thick coat.
Frequently Asked Questions
How do I know if my walls are plaster or drywall?
Age is the most reliable indicator: homes built before 1950 are almost certainly plaster; post-1960 are almost certainly drywall; 1950–1960 may be either. Tap test: plaster sounds solid and dense; drywall sounds hollow. Look at a damaged area or outlet box edge: plaster is hard and has a gritty texture — a keyhole saw struggles to cut it. Drywall has a paper face and chalky white gypsum core that cuts easily. Plaster walls in older homes are typically three layers: scratch coat, brown coat, and finish coat — total thickness 3/4 to 1 inch. Drywall is smooth, uniform, and 1/2 or 5/8 inch thick.
What is the best joint compound for plaster repair?
Setting-type compound (Durabond 20 or 45, Easy Sand) is preferred for plaster repairs: (1) Setting compounds cure by chemical reaction, not evaporation — they get hard like cement and provide a much stronger bond to the plaster substrate. (2) Setting compounds shrink less than ready-mixed compounds as they cure, reducing cracking in the patch. (3) Setting compounds bond to plaster without a primer. Ready-mixed compound (the pre-mixed tub type) can be used as a final skim coat for a smooth finish, but should not be used as the base layers in a plaster repair — it shrinks too much and doesn't bond as well. Durabond 20 means 20-minute working time; Durabond 45 gives you 45 minutes.
How do I stabilize loose plaster instead of removing and replacing it?
Plaster that sounds hollow has separated from the wood lath behind it but the plaster itself may still be intact. The plaster-to-lath bond has failed, but the plaster hasn't fallen. Stabilizing saves the original plaster: (1) Drill 3/16-inch holes through the plaster at 4-inch intervals across the hollow area (into the lath, not through it). (2) Inject plaster conditioner/consolidant (Plaster-Weld, Big Wally's Plaster Magic) through the holes with a syringe — this adhesive re-bonds the plaster to the lath. (3) While the adhesive is still wet, drive plaster repair screws (which have large fender washers) through the plaster and into the lath to mechanically clamp the plaster against the lath while the adhesive cures. (4) After cure (24 hours): remove the screws (or leave them), skim over the holes with setting compound.
How do I patch a large hole in plaster?
Large plaster hole repair: (1) Remove all loose and crumbling plaster around the hole. The edges must be sound. (2) If the wood lath is intact behind the hole: the lath provides the backing for the repair. If lath is missing: cut a piece of metal lath and secure it to the surrounding intact lath with staples. (3) Apply plaster bonding agent (Plaster-Weld, Zinsser Gardz) to the lath and the edges of the hole. Let dry tacky. (4) Mix Durabond to thick peanut butter consistency. Push a scratch coat into the hole, pressing it into the lath keys. Score the surface with a notched trowel. Let set. (5) Apply a brown coat, leaving 1/8 inch below the final surface. Score and let set. (6) Skim with a thin finish coat of ready-mixed compound or finish plaster. Sand smooth.
Can I use drywall to patch a large area of damaged plaster?
Yes — for large sections of failed plaster (full walls or large areas), drywall repair is more practical than plaster patching. Steps: (1) Remove all failed plaster down to the wood lath. (2) Cut drywall to fit the section (usually easiest to cut to a full stud bay width). (3) Attach drywall directly to the wood studs with drywall screws — the extra thickness of the original plaster means the drywall may sit 1/4 inch behind the surrounding plaster surface. (4) Use joint compound to bridge the transition from drywall to existing plaster. (5) Skim coat the drywall to blend with the original plaster texture. The plaster-to-drywall transition is the most time-consuming part — feather the compound out 12 inches on each side.
Plaster wall repair: (1) Tap the wall — solid ‘thud’ = bonded plaster. Hollow sound = plaster has separated from the lath behind it.
Setting compound (Durabond) bonds to old plaster — ready-mixed compound shrinks and pops off.
What you need
- Durabond 20 or 45 setting compound
- Plaster bonding agent (Plaster-Weld or Zinsser Gardz)
- Plaster repair screws with washers (for stabilizing loose sections)
- 6-inch and 10-inch drywall knives
- Sandpaper (100-grit and 220-grit)
- Ready-mixed joint compound (for final skim coat)
Step 1: Tap test and map damage
Tap the wall with a coin across the affected area. Mark all hollow areas. Decide: stabilize in place (hollow but intact) or remove and patch (crumbling or hole present).
Step 2: Stabilize loose but intact plaster
Drill 3/16-inch holes at 4-inch intervals across the hollow area. Inject plaster consolidant. Drive plaster repair screws with large washers to clamp plaster against lath. Let cure 24 hours. Skim over the holes with Durabond.
Step 3: Patch cracks
Widen cracks to a small V-groove with a can opener or utility knife. Apply plaster bonding agent to the crack. Fill with Durabond mixed to peanut butter consistency. Feather with a 6-inch knife. Let set. Sand and apply a second thin skim coat of ready-mixed compound.
Step 4: Patch holes
Apply bonding agent to the hole interior and edges. Let tack. Apply Durabond in thin layers — no more than 1/4 inch per coat. Score each coat before it fully sets. Build up to within 1/8 inch of the surface. Final skim coat with ready-mixed compound. Sand smooth.
Related guides
- How to Patch Drywall — drywall repair for post-1950 homes
- How to Fix Cracks in Walls — crack repair techniques shared with drywall
- How to Fix Nail Pops in Drywall — related fastener repairs in older walls
- Tap test and map damage
Tap the wall methodically with a coin across the affected area. A solid thud = bonded plaster. A hollow, higher-pitched sound = plaster has separated from the lath behind it. Mark all hollow areas with painter's tape. Decide the repair approach: intact but hollow plaster can be stabilized in place; crumbling or holed plaster must be removed and patched.
- Stabilize loose but intact hollow plaster
Drill 3/16-inch holes through the plaster at 4-inch intervals across the hollow area (stop before punching through the lath). Inject plaster consolidant (Plaster-Weld or Big Wally's Plaster Magic) through each hole with a syringe to re-bond the plaster to the lath. While wet, drive plaster repair screws with large fender washers through the plaster into the lath to mechanically clamp the plaster during cure. After 24 hours, skim over the holes with Durabond 45.
- Patch cracks with setting compound
Widen cracks to a small V-groove with a can opener tip or utility knife. Apply plaster bonding agent to the crack and let it dry slightly tacky. Fill with Durabond 45 mixed to peanut butter consistency, pressing firmly into the crack. Feather with a 6-inch knife. Let set fully (45 minutes). Sand lightly, then apply a second thin skim coat of ready-mixed compound for a smooth finish.
- Patch holes with layered coats
Remove all loose and crumbling material to clean, sound edges. Apply plaster bonding agent to the lath and hole edges; let dry tacky. Mix Durabond to thick consistency and apply a scratch coat — press into the lath keys, score the surface with a notched trowel. Let set. Apply a brown coat leaving 1/8 inch below the final surface. Let set and score again. Apply a final thin skim coat of ready-mixed compound or finish plaster. Sand smooth after full cure.
Free: 10-Point Home Maintenance Checklist
Prevent costly repairs with this seasonal checklist. Save hundreds every year by catching problems early.
Your checklist is ready!
Open Checklist →Something went wrong. View the checklist here.