How to Install a Shower: Prefab Units and Custom Tile Shower Planning Guide
How to install a prefab shower unit or plan a custom tile shower — covering permits, rough-in plumbing, base installation, waterproofing, and what to tackle yourself versus hire out.
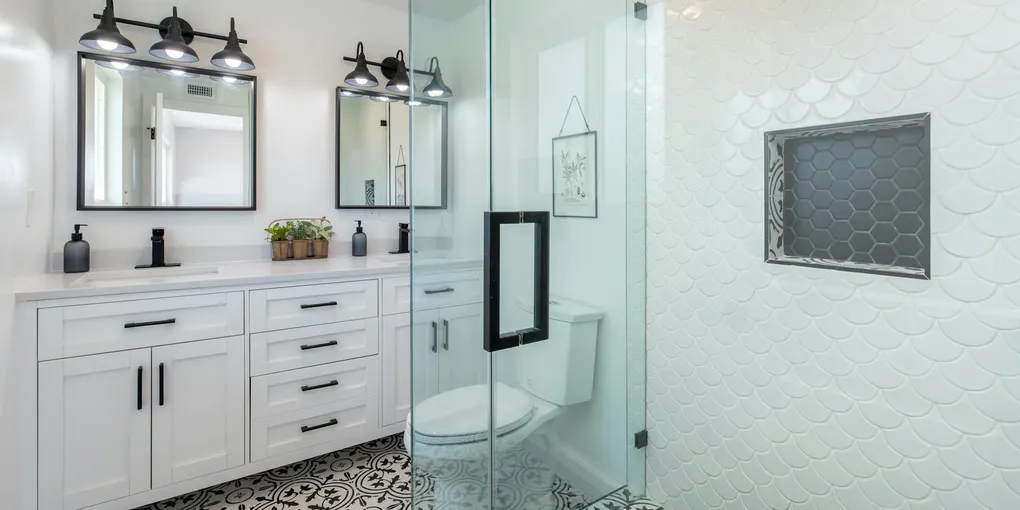
Prefab shower kits are designed for DIY installation and can be completed in a weekend by someone with basic plumbing skills. Custom tile showers require more skill, more time, and unforgiving waterproofing work — a single missed seam can cause structural water damage that takes years to appear. Decide which path fits your skills before buying anything.
Frequently Asked Questions
What is easier to install: a prefab shower or a tile shower?
A prefab (prefabricated) shower is significantly easier. The base and wall panels are manufactured to fit together with minimal fieldwork. A competent DIYer can complete a prefab installation in one to two days. A custom tile shower involves cement board installation, waterproofing membrane application, tile layout and cutting, grouting, and caulking — each step requires care, and the waterproofing layer is unforgiving. Expect 3 to 7 days for a custom tile shower, longer on your first attempt.
Do I need a permit to install a shower?
Usually yes, if any plumbing work is involved. Adding a new shower drain or relocating supply lines is a plumbing alteration that requires a permit in most jurisdictions. Replacing an existing shower in the same location with existing rough-in plumbing is sometimes exempt, but policies vary. Check with your local building department before starting. Unpermitted bathroom plumbing work can create problems when selling a home.
How long does it take to install a shower?
A prefab shower swap in an existing opening with existing rough-in plumbing takes 6 to 16 hours spread over a day or two. A custom tile shower in an existing space takes 3 to 7 days, including drying time for mortar, thin-set, and grout. A new shower in a space that requires rough-in plumbing work adds 1 to 2 days of plumbing and inspection time before finishes begin.
What is the minimum size for a shower?
The IRC (International Residential Code) requires a minimum shower interior of 30 inches by 30 inches. However, 32 by 32 inches is the practical minimum for comfort, and 36 by 36 inches is much better. Standard prefab kits come in 32-inch and 36-inch square configurations. If you are doing a custom tile shower, 36 by 48 inches is considered the comfortable DIY-friendly minimum.
Can I convert a bathtub to a shower?
Yes, and it is one of the most common bathroom remodels. The tub drain and supply lines are in roughly the right location, but the drain will need to be moved or adapted for a shower base, and the rough-in height for shower valve and head will be different from a tub. If the tub is in a three-wall alcove, a prefab shower kit is designed to fit exactly that space. Budget $500 to $2,500 for a DIY tub-to-shower conversion depending on whether you go prefab or custom tile.
What waterproofing do I need for a custom tile shower?
Tile and grout are not waterproof — the substrate behind them must be. The two main options are a sheet membrane (such as Schluter Kerdi) applied directly to cement board, and a liquid-applied membrane (such as RedGard) painted over cement board. Sheet membranes like Kerdi are more reliable because there is no guesswork about coverage — every inch of the surface is covered. Liquid membranes work well but require careful application with no missed spots or thin areas. Either system must also include properly overlapped pre-formed corners and sealed penetrations at the drain and niches.
Prefab shower kits are designed for DIY installation and can be completed in a weekend by someone with basic plumbing skills. Custom tile showers require more skill, more time, and unforgiving waterproofing work — a single missed seam can cause structural water damage that takes years to appear.
The first decision in any shower project is whether you’re installing a prefab unit or building a custom tile shower. This isn’t just a style choice — it’s a skill and time commitment choice. Both produce functional, durable showers, but they require different tools, different timelines, and different tolerances for error.
A prefab shower is the right call when you’re replacing an existing shower in the same location, want a reliable result without masonry skills, or have a straightforward bathroom with standard dimensions. A custom tile shower makes sense when you want a specific look, need a non-standard size, or are planning a larger bathroom remodel where tile work is already happening.
This guide covers the full installation process for a prefab unit, and a planning overview for custom tile — with links to detailed sub-guides for each step.
Prefab vs. Custom Tile Comparison
| Prefab Shower | Custom Tile Shower | |
|---|---|---|
| DIY Difficulty | Moderate | Hard |
| Timeline | 1–2 days | 3–7 days |
| Material Cost (32x32) | $300–$900 | $800–$2,500+ |
| Waterproofing Complexity | Built in | Required; installer responsibility |
| Lifespan | 15–25 years | 30–50+ years |
| Repair | Panel replacement | Regrout or retile sections |
| Customization | Limited sizes/colors | Unlimited |
| Best For | Direct replacement; quick remodel | Design-forward; non-standard sizes |
Permits and Rough-In Plumbing
Do You Need a Permit?
If your project involves any of the following, you almost certainly need a permit:
- New shower drain or relocating an existing drain
- Moving or adding supply lines
- Converting a tub to a shower
- Any new rough-in plumbing
If you are replacing an existing prefab shower in the same footprint using the same drain and supply connections, check with your local building department — some jurisdictions classify this as maintenance and don’t require a permit. Others do. Don’t assume; call first.
Rough-In Dimensions
Before buying any shower product, confirm your rough-in plumbing locations:
Drain: The shower drain should be centered in the shower base. Prefab bases have a fixed drain location — verify yours matches your existing drain position, or plan for drain relocation.
Shower valve: The rough-in height for the shower valve body (the mixing valve behind the wall) is typically 28 to 48 inches from the subfloor. The standard is 38 to 42 inches for most applications.
Shower head arm: The rough-in supply stub-out for the shower head is typically 72 to 80 inches above the subfloor, centered horizontally in the shower.
For a Moen or similar pressure-balancing shower valve, the valve manufacturer publishes exact rough-in dimensions — confirm these before framing or tiling begins.
When to Hire a Plumber
If the rough-in plumbing needs to move, a licensed plumber is the right call unless you have experience working with drain slope, trap requirements, and supply line sweating or press fittings. Drain relocation in particular requires precise slope (1/4 inch per foot of run to the stack) and must be inspected before it’s covered. This is not a step to skip.
Installing a Prefab Shower Unit
A standard prefab shower installation in an existing three-wall alcove with existing rough-in follows this sequence.
Step 1: Remove the Existing Shower or Tub
Shut off water supply to the bathroom at the fixture shut-off valves or the main. Remove the existing shower head, handle, and trim. Disconnect the drain.
For a tile shower demolition, use a reciprocating saw along the seams and a pry bar. Work carefully near the shower valve rough-in — you want to keep the valve body intact. Dispose of tile debris properly; older tile may contain asbestos if the home was built before 1980.
For an old prefab unit, panels typically unscrew from wall studs after trim pieces are removed. Fiberglass and acrylic panels can be cut apart for easier removal if they won’t fit through doorways intact.
Step 2: Inspect and Prep the Rough Opening
With the old unit removed, inspect:
- Subfloor: Any soft spots, rot, or water damage must be repaired before the new base goes in. This is the most common hidden issue in shower replacements.
- Framing: Studs should be plumb and in good condition. Most prefab wall panels attach directly to studs with screws or adhesive.
- Existing drain: Confirm the drain location matches your new base’s drain opening.
Step 3: Set the Shower Base
The shower base (also called the receptor or shower pan) goes in first.
- 32x32 or 36x36 prefab shower base: Choose acrylic or fiberglass. Check that the drain hole location matches your existing drain stub-out.
- Set the base in the opening and check that it’s level side to side and front to back. An unlevel base causes water to pool at the wrong end — adjust with composite shims under the base.
- Connect the drain assembly. Most prefab bases use a 2-inch waste drain fitting. Follow the manufacturer’s instructions for the specific drain kit — there are snap-in, screw-in, and compression-ring versions. Confirm there are no leaks before proceeding.
- Some manufacturers recommend applying a full mortar bed under the base (mortar fill, leveled, then the base pressed in). Others specify dry installation. Check your specific product instructions.
Step 4: Install the Wall Panels
Most prefab kits use either a three-panel system (back wall and two side walls) or a one-piece unit.
Three-panel systems:
- Apply manufacturer-specified adhesive or construction adhesive to the studs per the instructions
- Start with the back wall panel, press firmly against studs, and secure with screws at the designated holes
- Install the side panels, overlapping or interlocking with the back panel per the kit design
- For panel-to-panel joints, apply 100% silicone caulk in the joint channel before pressing panels together — this is the waterproofing at panel seams
The panels typically sit on top of the base flange. This overlap joint between the base and wall panels is critical — it must be caulked with 100% silicone before finishing.
Step 5: Install the Shower Valve Trim and Head
With the wall panels in place:
- Install the shower valve trim kit (handle, plate, cartridge) per the valve manufacturer’s instructions
- Attach the shower arm through the hole in the wall panel (typically pre-cut or cut on site per the rough-in location)
- Thread on the shower head
For a linear or tile-in drain option in a custom application, installation differs — see the manufacturer’s instructions for that drain type.
Step 6: Caulk All Seams
Every joint where two surfaces meet must be caulked with 100% silicone (not latex, not paintable caulk — silicone only):
- Panel-to-panel seams
- Panel-to-base seams
- Around the valve trim plate where it meets the wall panel
- Around the shower drain flange
Apply a smooth, continuous bead. Tool it with a wet finger or caulk tool. Let cure 24 to 48 hours before use.
Step 7: Install the Shower Door or Curtain Rod
Follow the door manufacturer’s instructions for your opening width and panel thickness. For a curtain rod, use wall anchors rated for the stud spacing in your installation.
Test the full unit: run water, check for leaks at the drain, at the valve, and along every panel seam. A dry paper towel along each seam reveals even small drips.
Custom Tile Shower Overview
A custom tile shower starts where a prefab unit ends — instead of manufactured panels, you are building the wall and floor structure yourself, layer by layer. The sequence is:
-
Framing and backer: Cement board (Hardiebacker or equivalent) replaces drywall in the shower wet zone. It screws to studs and provides a stable, moisture-resistant substrate.
-
Waterproofing membrane: Applied over the cement board to create the true water barrier. The industry standard is a sheet membrane system such as Schluter Kerdi, which adheres directly to cement board with unmodified thin-set mortar. Pre-formed corners and curb pieces create continuous coverage at every transition. Liquid-applied membranes (painted-on) are an alternative — they work well but require no missed spots.
-
Shower drain: For a custom tile floor, a linear drain or standard tile-in drain integrates with the waterproofing system. The drain flange must be at the exact finished tile height, and the shower floor slopes toward it at 1/4 inch per foot.
-
Tile layout and installation: Floor and wall tiles are set with the appropriate thin-set mortar for your tile type. Floor tile layout should start from the drain and work outward. Wall tile layout starts with a level horizontal datum line.
-
Grouting: After thin-set cures (24 to 48 hours), tile joints are filled with sanded or unsanded grout depending on joint width. Grout is not a waterproof layer — it is protected by the membrane beneath.
-
Caulking: All inside corners and the floor-to-wall transition receive 100% silicone caulk, not grout. Grout in corners cracks over time as the tile assembly flexes; silicone moves with it.
For detailed step-by-step guidance on the tile and grout phases, see the related articles below.
Common Mistakes
Not leveling the base. A shower base that’s off by even 1/4 inch will collect water at the low end. Level the base before connecting the drain.
Using latex or acrylic caulk at panel seams. Silicone only in wet shower areas. Latex caulk fails within 12 to 18 months in a shower environment.
Skipping or rushing the waterproofing membrane. This is the most expensive mistake in a custom tile shower. Water that gets past tile and grout will rot framing and subfloor silently for years. The Kerdi or equivalent membrane is not optional.
Tiling over regular drywall. Standard drywall absorbs moisture and fails even with a membrane applied. Use cement board or a rated tile backer in all wet zones.
Missing the slope on a custom tile floor. The shower floor must slope continuously toward the drain at 1/4 inch per foot. A flat floor with a drain in the corner will always pool in the opposite corner.
Related Reading
- How to Tile a Bathroom Floor — tile layout, thin-set, and cutting for floor tile
- How to Grout Tile — mixing, application, and sealing grout in wet areas
- How to Repair a Fiberglass Shower — patching cracks and surface damage in prefab units
- How to Clean a Shower — maintaining grout, glass, and acrylic surfaces long-term
- Prefab vs. Custom Tile Comparison
| | Prefab Shower | Custom Tile Shower | |---
- Installing a Prefab Shower Unit
A standard prefab shower installation in an existing three-wall alcove with existing rough-in follows this sequence.
Free: 10-Point Home Maintenance Checklist
Prevent costly repairs with this seasonal checklist. Save hundreds every year by catching problems early.
Your checklist is ready!
Open Checklist →Something went wrong. View the checklist here.