How to Install a Light Switch: Replace a Single-Pole Switch Safely
Replacing a standard single-pole light switch is a beginner-friendly electrical project that takes about 30 minutes. This guide covers wiring, safety, and testing so you get it right the first time.
Replacing a light switch: (1) Turn off the breaker for that circuit. Verify with a non-contact voltage tester — test before touching anything. (2) Remove the cover plate and unscrew the switch from the box. Pull it out carefully. (3) Photograph the existing wiring before disconnecting anything. (4) A standard single-pole switch has two brass screws (hot wires) and a green screw (ground). Black wire to a brass screw, the other wire (may be black or white marked with tape) to the other brass screw, bare copper to the green. (5) Push wires in and screw the new switch into the box. (6) Restore power and test. If the light doesn't work: check wiring connections. If the breaker trips immediately: a wire is shorted — turn off and inspect.
Frequently Asked Questions
Do I need to turn off the breaker to replace a light switch?
Yes, always. Flip the breaker for the circuit supplying that switch before touching any wires. Verify power is off with a non-contact voltage tester — never assume the switch position makes a wire safe. The tester costs $15–$25 and is non-negotiable for any electrical work.
What is a single-pole switch versus a 3-way switch?
A single-pole switch controls a light from one location only. It has two brass screw terminals (plus a green ground screw) and the toggle is labeled ON and OFF. A 3-way switch controls a light from two locations (like at both ends of a hallway) and has three terminals — one common and two traveler screws — with no ON/OFF label. This guide covers single-pole switches. 3-way switch replacement follows a different wiring procedure.
Which wire goes where on a light switch?
On a single-pole switch, it doesn't matter which black (hot) wire goes to which brass terminal — the switch simply interrupts the hot wire in either direction. What matters: black wires go to brass screws, the bare copper or green wire goes to the green ground screw, and the white wire (if present and taped black) is being used as a switched hot. Never connect a white wire to a switch terminal unless it has black tape indicating it's re-identified as a hot.
There is no ground wire in my switch box. Is that safe?
Older homes (pre-1960s) often have wiring without a ground conductor. You can install a modern switch without a ground connection — it will function normally. However, you cannot install a metal-face switch with exposed conductors safely without a ground. Use a plastic-bodied switch or a switch rated for use without ground. You cannot add a ground wire at the switch box unless you run new cable or install a GFCI outlet upstream on the circuit.
My switch box has three or more wires. Which ones do I connect to the new switch?
Multiple cables in a switch box are common — the box may be a junction point for other outlets or switches. Take a photo of the wiring before disconnecting anything. The wires that were connected to the old switch terminals are the only ones that connect to the new switch. Any other wire connections (wire nuts joining wires not attached to the switch) should be left exactly as you found them.
The new switch feels loose in the box or doesn't sit flush. What is wrong?
Two common causes: (1) The mounting screws are not tight — snug both mounting screws evenly and check that the switch is level. (2) The wires behind the switch are not folded neatly and are pushing the switch face out from the box. Fold the wires in accordion pleats and tuck them into the box before pushing the switch in. If the box is too shallow (a common issue in old construction), a switch extension ring ($2–$5) brings the mounting bracket forward.
Replacing a light switch: (1) Turn off the breaker for that circuit. Verify with a non-contact voltage tester — test before touching anything.
Replacing a light switch is one of the safest and most useful electrical repairs a homeowner can learn. The job takes under 30 minutes, costs $5–$15 for parts, and requires only basic tools. Whether your switch has stopped clicking, feels loose, or you just want to upgrade to a decorator-style rocker, this guide walks you through the whole process.
What You Need
Gather these tools and parts before shutting off power. Having everything ready means you spend minimal time with the box open.
- Single-pole light switch replacement ($3–$8 for a standard 15-amp switch; $8–$20 for a rocker/decorator style)
- Non-contact voltage tester ($15–$25 — essential for verifying power is off)
- Phillips and flathead screwdrivers ($10–$25 for an insulated set)
- Needle-nose pliers ($8–$15 for forming wire hooks)
- Wire stripper ($10–$20 if any wire ends need re-stripping)
- Electrical tape ($4–$8 for re-identifying wires if needed)
A phone for photographing the existing wiring and a small flashlight or headlamp are also helpful.
Understanding Light Switch Wiring
Before you open anything, it helps to understand what you’ll find inside the box.
A standard single-pole switch interrupts the hot (black) wire going to a light fixture. Inside the switch box, you’ll typically find one or two cables entering the box. Each cable contains a black wire (hot), a white wire (neutral), and a bare copper wire (ground).
Switch loop wiring is common in older homes: only one cable enters the box, containing a black and white wire. Both wires are hot in this configuration — the white wire carries power to the switch, and the black wire carries switched power to the fixture. A properly wired switch loop has the white wire re-identified with black tape. If you find a white wire on a switch terminal with no tape, add black tape when you reassemble.
Feed-through wiring is common in newer construction: the power comes into the switch box on one cable, and a second cable runs from the switch to the fixture. You’ll see two cables, and the neutral whites are typically joined together in a wire nut inside the box — they don’t connect to the switch at all.
In both cases, only the black wires (and the ground) connect to the switch itself.
Step 1: Shut Off Power and Verify It’s Off
Go to your electrical panel and flip the breaker for the circuit that controls the light you’re working on. If the panel isn’t labeled, flip the switch on and off circuits until the light goes dead, then flip that breaker to off.
Return to the switch and use your non-contact voltage tester near the switch face before removing the cover plate. The tester should not beep or light up. This is a preliminary check — you’ll test again once the box is open.
Cost note: If you don’t own a voltage tester, buy one before starting — they’re $15–$25 and will protect you for every electrical project you do for the rest of your life.
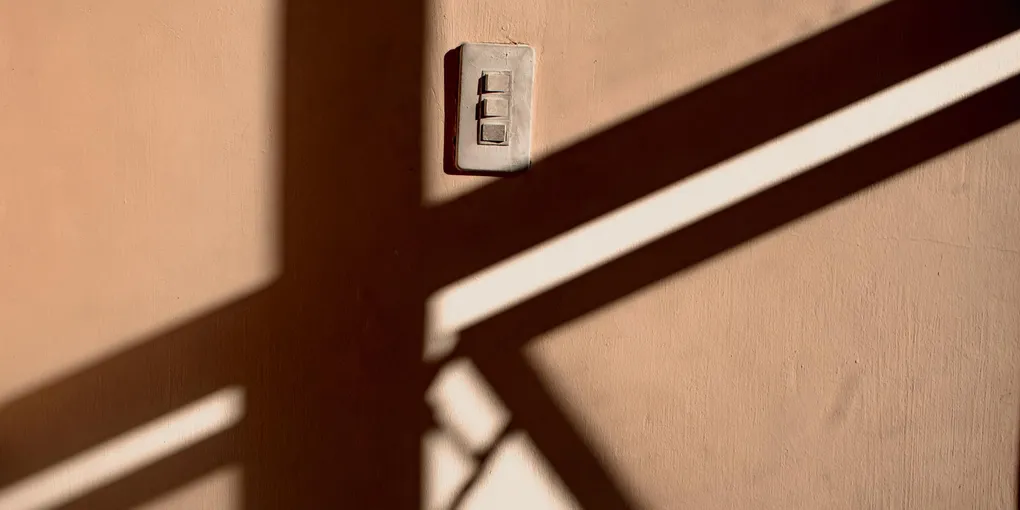
Step 2: Remove the Cover Plate and Old Switch
Unscrew the single center screw on the cover plate and set the plate aside. You’ll now see the switch mounted in the electrical box with two mounting screws — one at the top and one at the bottom of the switch’s metal strap.
Hold your voltage tester near each terminal of the switch and each wire entering the box. Confirm no beeping. If the tester reacts, go back to the panel and find the correct breaker.
Once confirmed safe, unscrew the two mounting screws and gently pull the switch out of the box. The wires attached to the terminals will limit how far it comes out — pull only far enough to access the screws comfortably.
Step 3: Document the Wiring
Before disconnecting anything, take a clear photo of the switch with the wires attached. Note:
- Which terminal each wire connects to
- How many wires are in the box total
- Whether any white wires have black tape
This photo is your reference if you get confused during reassembly.
Step 4: Disconnect the Old Switch
Use a flathead screwdriver to loosen the terminal screws on the old switch. The wire is wrapped around the screw shank in a hook — turn the screw counterclockwise until you can slip the wire hook free. If the switch uses back-stab connections (wires inserted into holes in the back of the switch rather than wrapped around screws), insert a small flathead screwdriver into the release slot next to each hole to free the wire.
Back-stab connections are unreliable. If your old switch used them, do not use the back-stab holes on the new switch — connect the wires to the screw terminals instead. This takes two extra minutes and makes a significantly more reliable connection.
Once disconnected, inspect the wire ends. The copper should be clean and shiny with about 3/4 inch exposed. If the wire tips are dark, corroded, or nicked, use your wire stripper to clip off the bad section and strip 3/4 inch of fresh insulation.
Step 5: Connect the New Switch
Form a clockwise J-hook at the end of each black wire using needle-nose pliers. Hook each wire clockwise around a brass screw terminal on the new switch — clockwise so that tightening the screw pulls the hook tighter rather than pushing it off.
Tighten the screws firmly with a flathead screwdriver. The wire should not move when tugged. Over-tightening can crack the plastic switch body — snug plus a quarter turn is enough.
Connect the bare copper ground wire to the green screw on the new switch. If the old switch had no ground screw or the box has no ground wire, skip this step (see FAQ above).
Important: If there is a white wire on the old switch (switch loop wiring), wrap black electrical tape around the white wire where it attaches to the terminal. This re-identifies it as a hot conductor so future homeowners and electricians understand what they’re looking at.
Step 6: Fold Wires and Mount the Switch
Gently fold the connected wires in accordion folds behind the switch body — this is the technique that prevents the switch from sitting proud of the box. Push the switch into the box while guiding the folded wires in ahead of it.
Align the switch so it sits plumb (level in the box) and drive the two mounting screws. These screws thread into the electrical box — snug them evenly so the switch doesn’t torque to one side.
Step 7: Install the Cover Plate and Test
Snap or screw on the cover plate. If you’re using a decorator/rocker switch, the cover plate is typically a larger rectangle that snaps directly onto the switch — no center screw required.
Go to the breaker panel and restore power to the circuit. Return to the switch and flip it on and off. The light should respond immediately. If the light doesn’t come on, flip the switch off, kill the breaker, and re-check that both wires are firmly secured to the terminals.
Cost summary for this project:
- Standard switch: $3–$8
- Decorator rocker switch: $8–$20
- Voltage tester (if you need to buy): $15–$25
- Total project cost: $18–$53 if buying all tools new; $3–$20 if you already own a tester
Troubleshooting Common Problems
Switch works but light flickers: The wire connection is loose. Kill the breaker, pull the switch out, and re-tighten the terminal screws. Flickering under load indicates a high-resistance connection — a fire risk if left unresolved.
Breaker trips immediately when switch is flipped on: There is a short circuit in the light fixture or wiring, not in the switch itself. The switch is fine. Investigate the fixture wiring.
Switch toggles but nothing happens: Confirm the light bulb is working (test it in another fixture). If the bulb is good, the switch may be wired incorrectly — one wire may be on the wrong terminal, or a wire may not be making contact with the screw.
Switch buzzes slightly: A faint buzz from a new switch is usually a sign of a loose connection or that the switch is a standard toggle installed on a circuit that also has a dimmer elsewhere. Check all connections. If the switch is on the same circuit as a dimmer for a different fixture, that dimmer may be causing the buzz.
When to Upgrade While You’re in There
If you’re already in the box, consider these upgrades for roughly the same time investment:
Upgrade to a rocker switch ($8–$15): Decorator-style rockers look significantly more modern than traditional toggle switches and are easier to operate with full hands. They use the same wiring.
Add a timer switch ($20–$40): In-wall countdown timers are ideal for exhaust fans and exterior lights. They run on the same two wires as a standard switch.
Install a smart switch ($30–$80): Smart switches require a neutral wire in the box — check that you have a white wire joining other white wires in a wire nut before purchasing. If your box has a neutral, a smart switch adds voice control and scheduling to any fixture.
Related Reading
- How to Install a Dimmer Switch
- How to Install a GFCI Outlet
- Electrical Outlet Not Working — How to Diagnose and Fix
- Shut Off Power and Verify It's Off
Go to your electrical panel and flip the breaker for the circuit that controls the light you're working on. If the panel isn't labeled, flip the switch on and off circuits until the light goes dead, then flip that breaker to off.
- Remove the Cover Plate and Old Switch
Unscrew the single center screw on the cover plate and set the plate aside. You'll now see the switch mounted in the electrical box with two mounting screws — one at the top and one at the bottom of the switch's metal strap.
- Document the Wiring
Which terminal each wire connects to
- Disconnect the Old Switch
Use a flathead screwdriver to loosen the terminal screws on the old switch. The wire is wrapped around the screw shank in a hook — turn the screw counterclockwise until you can slip the wire hook free.
- Connect the New Switch
Form a clockwise J-hook at the end of each black wire using needle-nose pliers. Hook each wire clockwise around a brass screw terminal on the new switch — clockwise so that tightening the screw pulls the hook tighter rather than pushing it off.
- Fold Wires and Mount the Switch
Gently fold the connected wires in accordion folds behind the switch body — this is the technique that prevents the switch from sitting proud of the box. Push the switch into the box while guiding the folded wires in ahead of it.
Free: 10-Point Home Maintenance Checklist
Prevent costly repairs with this seasonal checklist. Save hundreds every year by catching problems early.
Your checklist is ready!
Open Checklist →Something went wrong. View the checklist here.