How to Install a GFCI Outlet (Step-by-Step Safety Guide for 2026)
Install a GFCI outlet yourself in 30 minutes. Wiring diagram, line vs load explained, code requirements, testing, and the mistakes that cause GFCIs to trip or fail.
Installing a GFCI outlet takes 20-30 minutes and costs $15-25 for the outlet. Turn off the breaker, verify with a voltage tester, then connect the hot and neutral wires to the LINE terminals (not LOAD) and the ground to the green screw. Push wires in carefully, secure the outlet to the box, and restore power. Press the TEST button — the RESET button should pop out. National Electrical Code requires GFCI protection in bathrooms, kitchens (counter receptacles), garages, basements, laundry, outdoors, and within 6 feet of any sink.
Frequently Asked Questions
What is the difference between LINE and LOAD on a GFCI outlet?
LINE terminals receive power from the breaker (incoming hot and neutral). LOAD terminals send protected power to additional downstream outlets on the same circuit. If you only have one cable in the box, connect it to LINE and ignore LOAD. If you have two cables, the one from the breaker goes to LINE and the one feeding other outlets goes to LOAD.
Do I need a permit to install a GFCI outlet?
Most jurisdictions allow homeowners to replace a like-for-like outlet without a permit. Adding a new circuit or new outlet location typically requires a permit and inspection. Check your local building department before starting. GFCI replacement is one of the most common DIY electrical jobs and rarely requires a permit when you are swapping an existing outlet.
Why does my GFCI outlet keep tripping?
Common causes are moisture in the box, a faulty appliance plugged in downstream, a worn-out GFCI (they last 10-15 years), shared neutral wiring, or wires reversed on LINE and LOAD. Unplug everything on the circuit and reset. If it still trips with nothing connected, replace the GFCI.
Can I install a GFCI outlet without a ground wire?
Yes. The 2020 and later National Electrical Code allows GFCI outlets in two-wire (no ground) systems as a way to provide shock protection without rewiring. You must label the outlet 'No Equipment Ground' with the included sticker. The outlet still protects against shock, but does not provide grounded protection for surge-sensitive electronics.
How often should I test a GFCI outlet?
Test once a month by pressing the TEST button. The RESET button should pop out and the outlet should lose power. If it does not, the GFCI has failed and must be replaced immediately. Modern self-testing GFCIs check themselves automatically and indicate failure with a flashing or solid red light.
Do GFCI outlets wear out?
Yes. GFCIs typically last 10-15 years. The internal sensing circuitry degrades over time, especially in humid environments like bathrooms and outdoors. If yours is over 10 years old, replace it as preventive maintenance — they are inexpensive and the safety upgrade is significant.
Installing a GFCI outlet takes 20-30 minutes and costs $15-25 for the outlet. Turn off the breaker, verify with a voltage tester, then connect the hot and neutral wires to the LINE terminals (not LOAD) and the ground to the green screw.
A GFCI (Ground-Fault Circuit Interrupter) outlet detects tiny imbalances between hot and neutral current — the kind that happen when electricity is flowing through a person instead of back through the neutral wire. It cuts power in 25 milliseconds, fast enough to prevent serious injury or death from electric shock.
The National Electrical Code now requires GFCI protection in every wet or damp location: bathrooms, kitchens, garages, unfinished basements, laundry rooms, outdoor receptacles, and any outlet within 6 feet of a sink. If your home was built before 1973 — or even before 2014 in some states — many of those outlets are still standard receptacles that need to be upgraded.
This guide walks through replacing a standard outlet with a GFCI in about 30 minutes. The job is straightforward but requires respect for the safety basics.
Tools and Materials
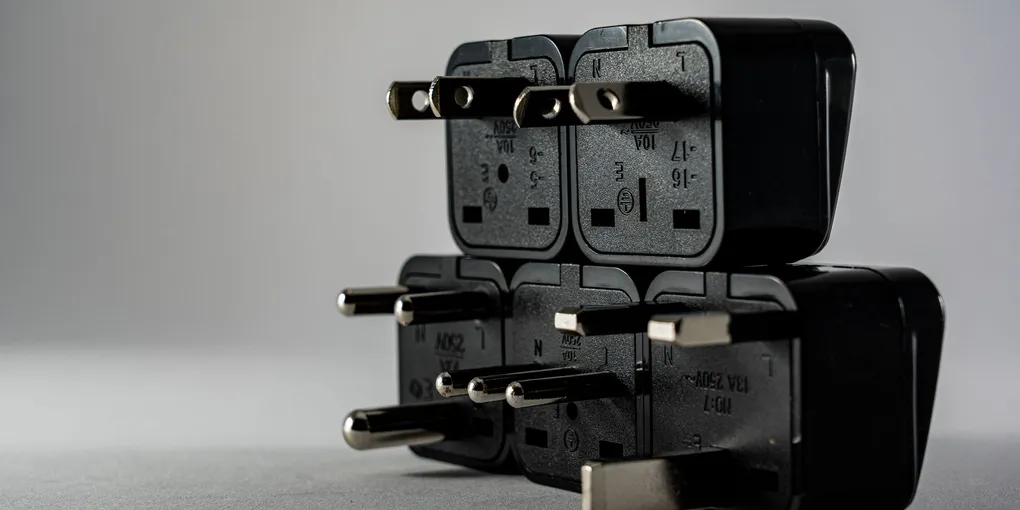
- GFCI outlet, 15-amp or 20-amp to match the breaker — $15-25
- Non-contact voltage tester — $10-20 (do not skip this)
- Insulated screwdriver set — $15-30
- Wire strippers — $10-25
- Needle-nose pliers
- Flashlight or headlamp
- Electrical tape (optional)
If you are installing in a damp/outdoor location, you also need a weatherproof in-use cover — code requires it for any outdoor receptacle.
Step 1: Turn Off the Power at the Breaker
This is non-negotiable. Working live with electricity is how people die or burn down houses.
- Open your electrical panel.
- Find the breaker that controls the outlet (labels are often inaccurate — when in doubt, flip them off one at a time and test the outlet with a lamp or radio).
- Flip the breaker to OFF.
- Tape over the breaker handle so no one accidentally turns it back on while you work.
Step 2: Verify the Power Is Off
Plug a lamp into the outlet. If the lamp does not light, that’s a good first check — but it is not enough. The outlet may be wired to a different breaker, or there may be backfed voltage.
Use a non-contact voltage tester:
- Touch the tester to the outlet’s slots — should read no voltage.
- After removing the cover plate (next step), test against the wires inside the box.
- Test the tester against a known live outlet first to confirm it is working.
Never trust a single test. Check, then check again.
Step 3: Remove the Old Outlet
- Unscrew the cover plate (single screw, center).
- Unscrew the two outlet mounting screws (top and bottom of the outlet, attaching it to the box).
- Gently pull the outlet out of the box. Wires are typically 6 inches long — enough to work with but not pull all the way out.
- Test again with the voltage tester against each wire. Confirm zero voltage on hot, neutral, and ground.
Step 4: Identify the Wires
Most residential outlets use 14-gauge (15-amp circuit) or 12-gauge (20-amp circuit) wire. You’ll see:
- Black wire (hot) — carries current from the breaker
- White wire (neutral) — return path
- Bare copper or green wire (ground) — safety path to ground
There may be one cable (single set of wires) or two cables (incoming and outgoing) in the box. Two cables means the outlet feeds power to other outlets downstream.
How to Tell LINE from LOAD When You Have Two Cables
This is the most important step in the entire job. Get this wrong and the GFCI will not protect properly.
- Carefully separate the two cables — one is incoming from the breaker (LINE), the other is outgoing to other outlets (LOAD).
- With power restored at the breaker (after wires are safely apart and not touching), use the voltage tester on each black wire.
- The black wire that reads HOT is the LINE wire (incoming from breaker).
- The black wire that reads no voltage is the LOAD wire (going to downstream outlets).
- Turn the breaker OFF again before continuing.
Mark the LINE black wire with a small piece of electrical tape so you don’t mix them up.
If you are uncertain, an alternative method: install temporarily with both cables on LINE first. The GFCI will work for the outlet itself. Then reset the LOAD wires onto the LOAD terminals one cable at a time, testing the downstream outlets.
Step 5: Wire the GFCI Outlet
GFCI outlets are deeper than standard outlets and require more space in the box. If your box is shallow, a box extender ring can give you the room you need.
Single-Cable (Easy) Setup
If only one cable enters the box:
- Connect the black (hot) wire to the brass screw labeled LINE.
- Connect the white (neutral) wire to the silver screw labeled LINE.
- Connect the bare copper or green wire to the green grounding screw.
- Tape over the LOAD terminals (factory tape is usually already there — leave it).
Two-Cable Setup
- Connect the LINE cable’s black wire to the brass LINE screw.
- Connect the LINE cable’s white wire to the silver LINE screw.
- Connect the LOAD cable’s black wire to the brass LOAD screw.
- Connect the LOAD cable’s white wire to the silver LOAD screw.
- Connect both bare ground wires (twisted together with a pigtail to the GFCI) to the green ground screw.
Wiring Best Practices
- Strip ½ inch of insulation off each wire end. Too short and the connection is weak; too long and exposed copper risks shorting.
- Form wires into a clockwise hook around screw terminals so tightening pulls the wire in.
- Do not use the back-stab holes unless you are using a high-quality outlet specifically rated for them. Screw terminals are far more reliable.
- Tighten firmly — loose connections cause heat, arcing, and fires. The screw should not turn further with normal hand pressure.
Step 6: Mount the Outlet and Test
- Carefully fold the wires into the box behind the outlet — accordion-fold rather than crushing them.
- Push the outlet into the box.
- Screw the outlet to the box with the two mounting screws — keep it square.
- Install the cover plate.
- Restore power at the breaker.
Test the GFCI
- Press RESET — should click in and stay.
- Press TEST — RESET should pop out and the outlet should lose power.
- Plug a lamp in to confirm zero voltage when tripped.
- Press RESET again — power restored.
If you wired downstream outlets through the LOAD terminals, plug a lamp into each one and repeat the TEST/RESET cycle. Each downstream outlet should also lose power when the GFCI trips.
Use a GFCI Tester for Confirmation
A plug-in GFCI tester ($10-15) gives you a one-button test that simulates a real ground fault. Every electrician carries one — it costs nothing and verifies the outlet is actually protecting you, not just clicking on and off mechanically.
Common Mistakes to Avoid
Mistake 1: Reversing LINE and LOAD
This is the number one wiring error. The outlet will appear to work — power flows, the lamp lights — but the GFCI protection circuit is wired backwards. The TEST button may not trip properly, and downstream outlets are not protected.
Symptom: TEST button does nothing, or the outlet trips immediately when you press RESET and never holds.
Fix: Swap the LINE and LOAD wires.
Mistake 2: Loose Neutral Connection
A loose white-wire connection (especially on the LOAD side) causes intermittent tripping that drives homeowners crazy.
Fix: Pull the outlet, check every screw and wire for tightness, then reinstall.
Mistake 3: Shared Neutral on Multi-Wire Branch Circuits
Some older homes have multi-wire branch circuits — two hot wires (one black, one red) sharing a single neutral. Standard GFCI outlets cannot handle this. They will trip immediately because current on the shared neutral does not match the hot they are watching.
Fix: A double-pole GFCI breaker at the panel, or rewiring the circuit with separate neutrals. This is a job for an electrician.
Mistake 4: Buying the Wrong Amperage
A 15-amp GFCI on a 20-amp circuit is a code violation in most contexts. Match the breaker amperage:
- 15-amp breaker → 15-amp GFCI (smaller blade openings)
- 20-amp breaker → 20-amp GFCI (one slot has a horizontal T-shape)
Check the breaker before buying.
Mistake 5: Skipping the Voltage Test
Plenty of “I thought I had the right breaker” stories end at the emergency room. Always confirm with a tester. Always.
Code Requirements: Where GFCIs Are Required
The 2023 National Electrical Code requires GFCI protection at:
- All bathroom receptacles
- Kitchen countertop receptacles (any outlet within 6 feet of the sink, plus all counter outlets in newer installations)
- All garage receptacles (including ceiling outlets for garage door openers in newer revisions)
- All outdoor receptacles
- Unfinished basement receptacles
- Laundry room receptacles
- Wet bar sinks, utility sinks, and any receptacle within 6 feet of any sink
- Crawl spaces at or below grade level
- Boathouses, kitchens, and dishwasher receptacles
- Pools, spas, fountains (specific requirements)
If you are upgrading an older home, prioritize bathrooms, kitchens, garages, and outdoor outlets first.
When to Call an Electrician
Most GFCI replacements are safely DIY-able. Call a licensed electrician if:
- You find aluminum wiring (silver-colored, not copper) — needs special connectors and treatment
- The box is overcrowded or has melted/charred insulation
- You discover knob-and-tube wiring (very old homes)
- The outlet is part of a multi-wire branch circuit
- You are adding a new outlet location (requires running new cable)
- Local codes require an electrician for permitted work
Typical electrician cost for a GFCI replacement: $80-150 including the outlet. Whole-house GFCI upgrades for a 1960s-1970s home: $400-1,200 depending on the number of outlets.
Maintenance
- Test every GFCI monthly by pressing TEST then RESET
- Replace any GFCI older than 15 years, even if it still appears to work
- Replace immediately if the TEST button fails to trip the outlet
- Replace outdoor GFCIs every 7-10 years — sun and moisture shorten their life
- Look for the indicator light on self-testing models — solid red usually means failed; check the manual
Related Guides
For more electrical projects, see our guides on resetting a tripped circuit breaker, installing a dimmer switch, replacing a light switch, and troubleshooting an outlet that stopped working.
- How to Fix a Broken Light Switch Cover — replace a cracked or missing cover plate after completing electrical work
- How to Fix a Broken Outdoor Motion Sensor Light — GFCI protection is required for all outdoor motion sensor fixtures
- How to Fix a Broken Wall Outlet Cover — replace a cracked or missing cover plate after completing electrical work
- Turn Off the Power at the Breaker
This is non-negotiable. Working live with electricity is how people die or burn down houses.
- Verify the Power Is Off
Plug a lamp into the outlet. If the lamp does not light, that's a good first check — but it is not enough. The outlet may be wired to a different breaker, or there may be backfed voltage.
- Remove the Old Outlet
Unscrew the cover plate (single screw, center).
- Identify the Wires
Most residential outlets use 14-gauge (15-amp circuit) or 12-gauge (20-amp circuit) wire. You'll see:
- Wire the GFCI Outlet
GFCI outlets are deeper than standard outlets and require more space in the box. If your box is shallow, a box extender ring can give you the room you need.
- Mount the Outlet and Test
Carefully fold the wires into the box behind the outlet — accordion-fold rather than crushing them.
Free: 10-Point Home Maintenance Checklist
Prevent costly repairs with this seasonal checklist. Save hundreds every year by catching problems early.
Your checklist is ready!
Open Checklist →Something went wrong. View the checklist here.