How to Hang a Door: Fitting and Hanging a Door Slab in an Existing Frame
Learn how to fit and hang an interior door slab in an existing frame, including trimming the door, cutting hinge mortises, and adjusting for proper gaps and plumb.
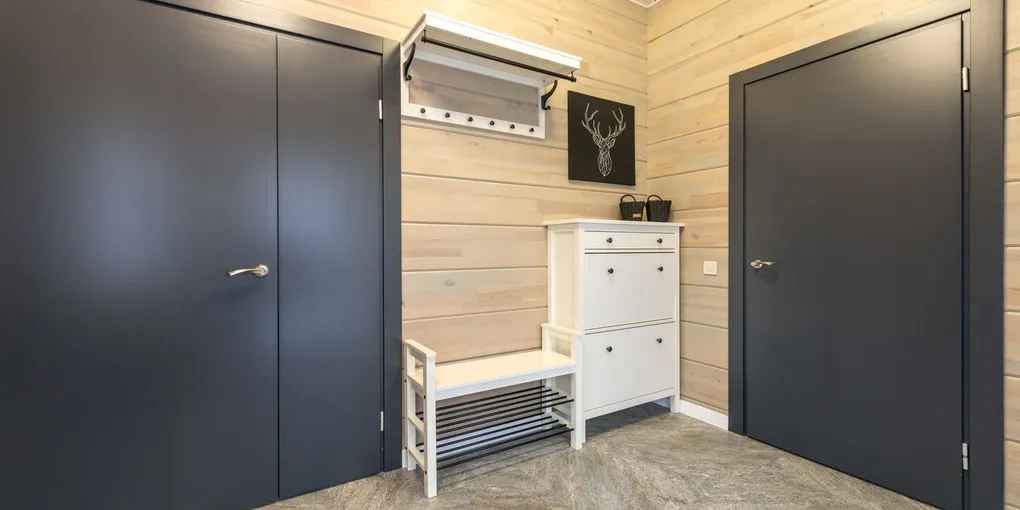
Hanging a door slab: (1) Measure the rough opening and buy a door slab 2 inches narrower and 2 inches taller than the opening (leaves 1 inch per side and 1 inch at top for shimming). (2) Trim the door to fit: mark reveal lines on all four sides (1/8 inch clearance at top and sides, 3/4 inch at bottom), use a circular saw with a guide. (3) Mark and cut three hinge mortises on the door edge using a chisel — match hinge locations on the existing jamb. (4) Screw hinges to the door, then have a helper hold the door in the opening while you screw the hinges to the jamb. Use a pry bar under the door to hold it at the right height. (5) Test swing and strike plate alignment. Adjust shims behind hinges or strike plate as needed. A door that swings open or closed on its own needs the jamb plumbed.
Frequently Asked Questions
What size gap should be around a door?
Standard clearance is 1/8 inch on both sides and the top of the door, and 3/4 inch at the bottom. The bottom gap accounts for carpet, rugs, or air circulation. If you have thick carpet, increase the bottom clearance to 1 inch.
How do I know if I need to trim a door to fit?
Measure the inside of the frame at the top and at the floor, then subtract 1/4 inch for the side gaps combined and 7/8 inch for the top and bottom gaps combined. If the opening is smaller than the door slab, the door needs trimming. Most slabs need at least a light trim on the bottom to clear the flooring.
What type of hinges do I need to hang a door?
Interior doors typically use 3.5-inch butt hinges. A standard hollow-core door weighs 25-35 pounds and needs two hinges. A solid-core door weighs 60-80 pounds and requires three hinges. Use square-corner hinges if your mortises are square; round-corner hinges if they are radiused.
How do I cut mortises for door hinges?
Score the mortise outline with a sharp chisel held vertically, then make a series of shallow cross-grain cuts inside the outline about 1/8 inch apart. Pop out the waste with horizontal chisel strokes and pare the bottom flat. The finished mortise should be exactly as deep as the hinge leaf thickness — flush when the hinge is seated.
My door swings open or closed by itself — how do I fix it?
A self-moving door means the hinge-side jamb is not plumb. If the door swings open, the top of the frame leans toward the room; if it swings closed, the top leans away. Fix it by placing a cardboard shim behind one of the hinges to tilt the door's pivot axis. Adding shim behind the top hinge closes the door; shim behind the bottom hinge opens it.
How do I fix a door that sticks after hanging?
Identify exactly where it sticks by running a dollar bill around the closed door — it will stop where the fit is tight. If it sticks at the top corner opposite the hinges, the hinges are too shallow or the door is slightly bowed. Deepen the hinge mortises slightly or add a thin cardboard shim behind the bottom hinge to shift the latch side of the door downward.
Hanging a door slab: (1) Measure the rough opening and buy a door slab 2 inches narrower and 2 inches taller than the opening (leaves 1 inch per side and 1 inch at top for shimming). (2) Trim the door to fit: mark reveal lines on all four sides (1/8 inch clearance at top and sides, 3/4 inch at bottom), use a circular saw with a guide.
Hanging a door slab in an existing frame is the right move when the frame is square and solid but the original door is warped, damaged, or the wrong size. It costs less than buying a prehung unit and takes less demolition — you keep the existing frame, casing, and trim. The trade-off is that you do the fitting work yourself.
A prehung door comes pre-mortised and hinged inside its own frame. You swap the entire assembly. A slab is just the door panel, and you fit it to the frame you already have. If your frame is out of square by more than 1/4 inch, a prehung replacement is easier. If the frame is solid, go with the slab.
This guide covers everything from measuring and trimming the door to cutting hinge mortises, hanging the door, and adjusting for gaps and swing.
Measuring and Planning
Before buying or cutting anything, measure the rough opening carefully.
Measure the inside of the frame in three places: the width at the top, the middle, and the bottom. Do the same for the height on both sides. Use the smallest measurement in each direction — that is the true constraint.
Standard interior door slabs come in widths of 24, 28, 30, 32, and 36 inches. The most common interior door is 32 inches wide by 80 inches tall (6’8”). Door slabs are typically 1-3/8 inches thick for hollow-core and 1-3/4 inches for solid-core.
Gap requirements:
- Sides (hinge side and latch side): 1/8 inch each
- Top: 1/8 inch
- Bottom: 3/4 inch minimum (1 inch if carpet will be installed)
So the door slab itself should be 1/4 inch narrower than the frame opening (1/8 inch per side) and 7/8 inch shorter than the opening height (1/8 inch top + 3/4 inch bottom).
Write those dimensions down before you touch a saw.
Trimming the Door to Fit
Most slabs need at least a trim on the bottom to clear the flooring and achieve the right bottom gap. If the frame is narrow, you may need to rip one edge as well.
Rules for trimming:
- Never remove more than 1 inch from any edge. Beyond that, you risk cutting into the door’s internal structure or compromising the stile.
- If you need to remove width, split the difference between both sides when possible — this keeps the latch mortise (pre-bored on some slabs) centered.
- Always trim from the bottom when removing length, not the top.
Saw setup: Use a circular saw with a fine-tooth carbide blade (at least 40 teeth). Clamp a straightedge guide to the door to keep the cut straight. Score the cut line with a utility knife before sawing to prevent tear-out on the face veneer.
Support the door on sawhorses so the off-cut side is free to drop without binding the blade. Keep the door’s finished face down so any tear-out happens on the back side.
After cutting, run a block plane or 80-grit sandpaper along the cut edge to smooth any fuzz and ensure a clean, flat surface.
What You Need
- 3.5-inch interior door hinges (set of 2 or 3)
- Circular saw for trimming
- Hinge mortise template kit
- Wood chisel set
- Door hanging kit / door jack
- Block plane for fitting
You will also need a hammer, utility knife, combination square, pencil, 6-foot level, and wood screws (1-1/2 inch and 3-inch lengths).
Step 1: Mark and Cut Hinge Mortises
The hinge locations on the door must match the existing mortises on the frame exactly. The fastest way to transfer them is to hold the door in the opening.
Transfer hinge locations from frame to door:
Stand the door in the opening, hinge side against the hinge jamb, with the bottom gap set correctly. Use a door jack or have a helper hold the door. With the door pressed against the hinge jamb, use a sharp pencil to mark the top and bottom of each existing hinge mortise directly onto the door edge.
Take the door down and extend those marks across the door edge with a square. Use one of the old hinges as a template to mark the width of the mortise on the face of the door edge.
Cutting the mortise:
Set the hinge in position and score around it with a sharp utility knife. This severs the wood fibers cleanly and gives your chisel a clean shoulder to work to.
Hold a sharp chisel vertically and score just inside the knife lines to deepen the outline. Then make a series of parallel cuts across the grain inside the mortise area, about 1/8 inch apart, to a depth equal to the hinge leaf thickness (typically 1/16 to 3/32 inch).
Drive the chisel horizontally at the depth line to pop out the waste. Work from the center outward. Pare the bottom flat with light strokes. Test-fit the hinge leaf — it should sit perfectly flush with the door edge, neither proud nor recessed.
If you have multiple doors to hang, a hinge mortise template and router will cut the time significantly.
Step 2: Mount Hinges on Door
Set each hinge into its mortise. The hinge barrel (the knuckle) should face the room the door swings toward, and it should sit just proud of the door face — not recessed behind it.
Drill pilot holes for the screws using a bit slightly smaller than the screw shank. This prevents the wood from splitting and keeps the hinge from drifting as you drive screws. Drive screws with a hand screwdriver for the last few turns to avoid stripping — hinge screws are soft and strip easily with power drivers at full torque.
Use 1-1/2 inch screws for the door-side hinges. For the jamb-side hinges, at least one screw in each hinge should be a 3-inch screw that reaches through the jamb and into the framing. This is what gives the door its holding strength.
Step 3: Hang the Door
This step requires either a door hanging jack or a second person. The door needs to be held exactly in position while you engage the hinges.
Using a door jack: A door jack (also called a door hanger tool) wedges under the door and lifts it to the correct height. This lets you work alone. Set the jack under the latch side of the door and adjust until the hinge leaves on the door align with the mortises on the jamb.
With a helper: Have your helper hold the door in position at the correct height while you align the hinges.
Start with the top hinge. Hold the hinge leaf against the jamb mortise and drive one screw partway in to hold it. Check that the bottom hinge aligns, then drive one screw into it as well. With the door held by two partial screws, check the gaps on all four sides. If everything looks right, drive all remaining screws.
Set the hinge pins last. Tap them down from the top with a hammer. The door should swing freely without binding.
Step 4: Check the Swing and Gaps
Open and close the door several times. Watch the gaps on all four sides. Use a level on the hinge jamb to check if it is plumb.
What you are looking for:
- Even 1/8-inch gap on both sides and the top
- Door swings freely and stays where you put it
- No binding at any corner when closing
Adjusting with cardboard shims:
If the gap is uneven on the hinge side — wider at the top than the bottom, or vice versa — the hinge side of the door is not parallel to the jamb. Fix this by placing a thin cardboard shim behind one of the hinges.
- Shim behind the top hinge: pivots the door so the latch side moves toward the frame at the top (closes a gap there, opens one at the bottom)
- Shim behind the bottom hinge: pivots the door the opposite direction
Cut the shim to fit the mortise exactly. Remove the hinge, place the shim, reinstall the hinge, and re-check. One layer of cardboard shim (about 1/32 inch) makes a noticeable difference.
If the door is binding against the frame at the latch side, you may need to plane that edge slightly. Mark the high spot with the door closed, remove the door, and take light passes with a block plane until the gap is even.
Step 5: Install the Knob and Strike Plate
Most slabs sold at home centers come pre-bored for a standard 2-3/8 inch backset knob. If yours is not bored, you will need a door lock installation kit with a hole saw.
Install the knob or lever per the manufacturer’s instructions. Once the knob is in, close the door slowly and watch where the latch bolt hits the jamb. Mark the center of the latch bolt on the jamb with a pencil.
Use the strike plate as a template to mark the outline and the latch pocket. Chisel out the latch pocket to the appropriate depth (usually 5/8 inch for a standard latch bolt). Mortise the strike plate flush with the jamb surface, then screw it in place.
Close the door and test the latch. The bolt should engage the strike plate cleanly without lifting or dropping. If the latch rides above or below the strike, adjust the strike plate position or file the opening slightly.
Troubleshooting
Door won’t stay open — swings closed on its own. The frame leans slightly toward the room. The door’s center of gravity is past the hinge pivot line, so gravity pulls it closed. Shim behind the bottom hinge to tilt the pivot axis and compensate.
Door won’t stay closed — swings open on its own. The frame leans away from the room. Shim behind the top hinge.
Door sticks at the top corner opposite the hinges. This is the most common sticking problem. It usually means the hinge mortises are slightly too shallow (hinge is proud, pushing the door out of the frame at the top corner). Deepen the mortises slightly with a chisel. Alternatively, the door slab is slightly bowed — check it with a straightedge.
Hinge-side gap is uneven. The door is not parallel to the hinge jamb. Use cardboard shims behind the hinges as described in Step 4.
Gap at the bottom is uneven side to side. The floor is not level or the door slab is not square. Plane the bottom edge at a slight angle so it mirrors the floor slope.
Hinge screws are stripping out. Remove the screw, insert a golf tee or wooden matchstick with wood glue into the hole, let it dry, trim flush, and re-drive the screw. It will hold.
Related Reading
- How to Install a Prehung Door
- How to Fix a Door That Won’t Close
- How to Fix a Sagging Door
- How to Fix a Sticking Door
- How to Replace a Door Knob
- Mark and Cut Hinge Mortises
The hinge locations on the door must match the existing mortises on the frame exactly. The fastest way to transfer them is to hold the door in the opening.
- Mount Hinges on Door
Set each hinge into its mortise. The hinge barrel (the knuckle) should face the room the door swings toward, and it should sit just proud of the door face — not recessed behind it.
- Hang the Door
This step requires either a door hanging jack or a second person. The door needs to be held exactly in position while you engage the hinges.
- Check the Swing and Gaps
Open and close the door several times. Watch the gaps on all four sides. Use a level on the hinge jamb to check if it is plumb.
- Install the Knob and Strike Plate
Most slabs sold at home centers come pre-bored for a standard 2-3/8 inch backset knob. If yours is not bored, you will need a door lock installation kit with a hole saw.
Free: 10-Point Home Maintenance Checklist
Prevent costly repairs with this seasonal checklist. Save hundreds every year by catching problems early.
Your checklist is ready!
Open Checklist →Something went wrong. View the checklist here.