How to Fix a Sticking Door: Planing, Sanding, and Adjusting Hinges (2026)
A door that sticks or drags usually has one of three causes: swollen wood from humidity, a hinge that has shifted, or a settling frame. This guide covers diagnosing the cause, planing and sanding the binding edge, and adjusting hinges.
Sticking door fix: (1) Close the door slowly and note exactly where it binds — look for paint scraping, shiny rub marks, or the edge where it catches. (2) If it sticks only in summer: the wood is swollen from humidity — plane or sand the binding edge, then seal the bare wood with primer to prevent re-absorption. (3) If it sticks at the latch side corner: the latch-side hinge has likely pulled loose — tighten or replace the screws. (4) If it sticks at the top: the top hinge has sagged — tighten or shim it. Most sticking doors are fixed without removing the door.
Frequently Asked Questions
How do I find exactly where a door is sticking?
Close the door slowly while watching the edges. Look for: shiny paint worn off in a strip (the binding spot), paint scraping marks on the frame, or a visible gap on one edge while the opposite edge drags. For a close call: run a strip of paper around the door perimeter while closed — where the paper can't move, that's where the door is tight. Mark the binding area with chalk on the door edge before opening — the chalk transfers to the frame, showing the exact contact point.
Why does my door stick only in summer and not in winter?
Seasonal sticking is almost always wood swelling from humidity absorption. Wood expands across the grain (width and height) in humid conditions. An exterior door that clears fine in dry winter air will bind in high summer humidity because the door has grown slightly. The fix: plane or sand the binding edge in late summer when the door is at maximum size, remove 1/16 to 1/8 inch, then immediately seal the bare wood with exterior primer or paint. Sealing the cut edge is critical — bare end grain or edge grain absorbs moisture fastest, and without sealing, the door swells back to the same size within one season.
Can I fix a sticking door without removing it?
Yes — for most sticking doors, you can plane or sand in place. A belt sander or hand plane (set to a very shallow cut) works on the door edge without removal. For the hinge edge: tightening hinge screws is always done in place. For the top edge: a hand plane or oscillating multi-tool can reach the top of the door while it hangs. The only cases requiring door removal: the bottom edge is dragging on the floor (the door must be removed and the bottom planed), and extensive fitting (more than 1/4 inch removal needed).
My door sticks at the latch-side top corner. What is causing that?
A latch-side top corner drag is the classic symptom of a sagging bottom hinge or a loose top hinge. The door is pivoting: if the top hinge is loose, the top of the door swings away from the frame and the bottom-latch corner drops and drags. First: tighten all hinge screws. If the screw holes are stripped: remove each screw, push a wooden toothpick and wood glue into the hole, let dry 30 minutes, then re-drive the screw — the wood fills the stripped hole and holds again. If the frame itself has shifted (the door frame is out of plumb): the hinge leaf can be shimmed with a cardboard piece behind it to tilt the door.
What is a hinge shim and when do I need one?
A hinge shim is a thin piece of material (cardboard, plastic, or commercial shim) placed behind a hinge leaf between the hinge and the mortise. Shimming a hinge tilts the door in that direction. When to shim: if the door binds on the latch side at the top, shimming the bottom hinge pushes the door bottom outward and corrects the bind. Shimming the top hinge pulls the top latch corner in. Commercial door hinge shims (Shim-It brand) are pre-cut to common hinge sizes. Cardboard from a cereal box is a free alternative — cut it to match the hinge mortise exactly and punch the screw holes through it.
Sticking door fix: (1) Close the door slowly and note exactly where it binds — look for paint scraping, shiny rub marks, or the edge where it catches. (2) If it sticks only in summer: the wood is swollen from humidity — plane or sand the binding edge, then seal the bare wood with primer to prevent re-absorption.
Mark the binding spot with chalk before you start — the chalk transfers to the frame and shows the exact contact area.
What you need
- Chalk or pencil (for marking)
- Hand plane or belt sander / orbital sander
- Screwdriver or drill (for hinge screws)
- Wood toothpicks and wood glue (for stripped screw holes)
- Cardboard (for hinge shimming)
- Exterior primer or paint (to seal planed edges)
Step 1: Locate the binding area
Close the door slowly. Watch for shiny rub marks, paint scraping, or resistance. Run a strip of paper around the perimeter — where it pulls free versus where it won’t move shows tight spots. Mark the binding area with chalk.
Step 2: Check the hinges first
Before any planing, tighten every hinge screw. Loose hinge screws are responsible for most sticking doors. Open the door and tighten all screws — top, middle, and bottom hinge, all screws.
If screws spin freely (stripped hole): remove the screw, push 2–3 toothpicks and a drop of wood glue into the hole, break them off flush, let dry 30 minutes, and re-drive the screw.
Check whether tightening the hinges resolved the stick before proceeding.
Step 3: Plane or sand the binding edge
For a door that still sticks after hinge tightening:
Remove only a thin amount — 1/16 to 1/8 inch. A hand plane set shallow removes material quickly and precisely. A belt sander with 60-grit can plane in place without removing the door.
Sand at an angle — slightly bevel the edge so the outer face contact is slightly less than the inner edge. This “relief angle” prevents the door from dragging even with slight seasonal movement.
Step 4: Seal the planed surface immediately
Any bare wood exposed by planing or sanding must be sealed before closing. Apply exterior primer (for exterior doors) or interior primer (for interior doors) to the planed edge. Let dry before rehanging or closing.
Without sealing: the bare wood absorbs humidity and swells back. The fix lasts one season at most.
Step 5: Test and adjust
Close the door. The binding should be gone. If slight resistance remains: plane or sand another pass — 1/32 inch at a time. The goal is a slight clearance gap (1/16 inch) around the perimeter.
Related guides
- How to Fix a Sagging Door — hinge adjustment for severely sagging doors
- How to Fix a Door That Won’t Close — latch alignment and strike plate adjustment
- How to Weatherstrip a Door — sealing the door perimeter after fitting
- Find the binding edge
Open and close the door slowly while watching and feeling where it makes contact. Rub a piece of chalk or pencil along the door edges, then close the door — the chalk transfers to the frame at the exact binding point. Common locations: top corner opposite the hinges (indicates a sagging hinge), or the bottom edge (indicates swollen wood or a settled floor). A door that sticks only in summer is swollen wood; sticking year-round points to hinges or frame shift.
- Tighten hinge screws first
Before any planing or sanding: tighten all hinge screws — a loose hinge allows the door to drop and bind at the latch corner. Replace any stripped screws with 3-inch wood screws to reach the framing. If the door still binds after tightening: check if a hinge leaf is bent outward (sticking out of the mortise). A slightly proud hinge leaf can be mortised deeper by carefully chiseling the recess 1/16 inch deeper.
- Sand the binding edge for minor sticking
For edges that are sticking by less than 1/8 inch: sand the binding edge with 80-grit sandpaper on a block — the chalk marks show exactly where to sand. Remove material gradually, testing fit after every few passes. Work along the grain, not across it. After sanding: prime and paint the raw wood immediately to seal out moisture. Unfinished wood absorbs humidity and the swelling recurs.
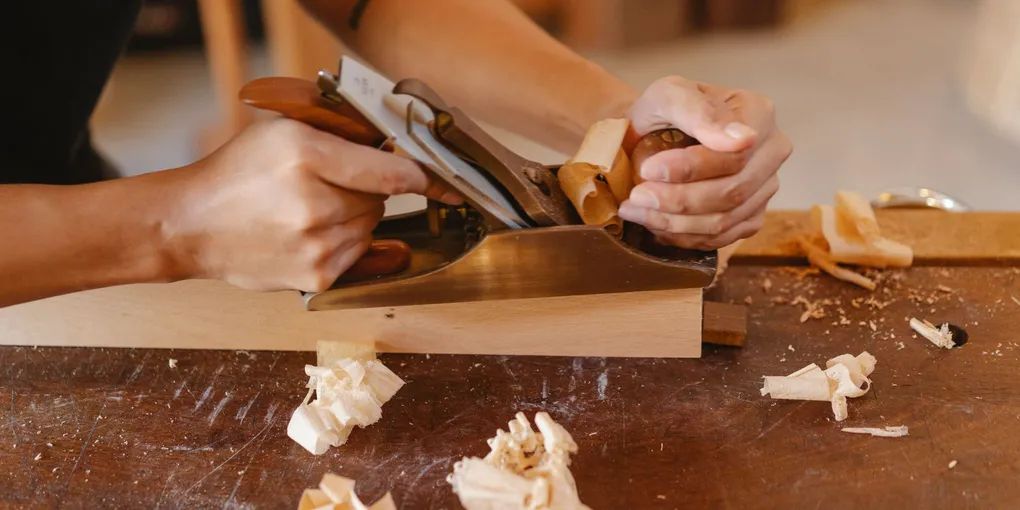
- Plane the binding edge for significant swelling
For edges that need more than 1/8 inch removed: remove the door from the hinges (tap hinge pins up and out). Secure the door on edge in a workbench vise or between sawhorses. Use a hand plane or belt sander on the binding edge. Take thin passes and test-fit frequently — it is easier to remove more material than to add it back. After planing: apply primer and paint before rehinging.
- Check and adjust the strike plate
After any hinge or edge work: the strike plate position may need adjustment to match the new door position. Test the latch: it should engage the strike smoothly without lifting or dragging. If the latch hits above or below the strike opening: mark the latch contact point with lipstick, close the door, and see where the mark lands. Chisel the strike plate mortise or relocate the plate to align with the latch.
Free: 10-Point Home Maintenance Checklist
Prevent costly repairs with this seasonal checklist. Save hundreds every year by catching problems early.
Your checklist is ready!
Open Checklist →Something went wrong. View the checklist here.