How to Fix a Leaking Bathroom Faucet: Cartridge and Two-Handle Repair
Fix a dripping bathroom sink faucet — replacing the cartridge on single-handle faucets and repairing compression valves on older two-handle models.
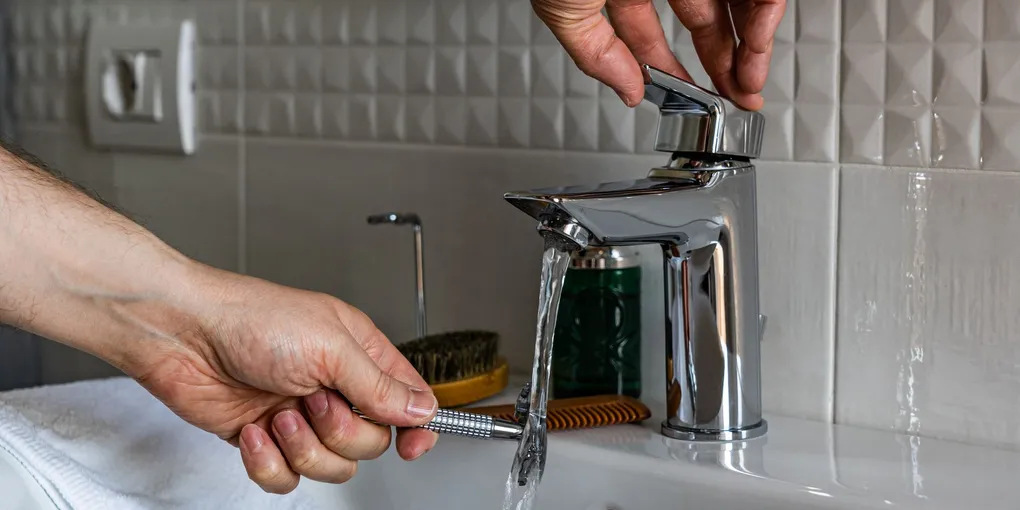
A bathroom faucet that drips one drop per second wastes more than 3,000 gallons of water per year. Beyond the water bill, that steady drip wears a rust stain into your sink basin and tells you something inside the faucet is failing.
A bathroom faucet that drips one drop per second wastes more than 3,000 gallons of water per year. Beyond the water bill, that steady drip wears a rust stain into your sink basin and tells you something inside the faucet is failing. The good news is that the fix is almost always a worn cartridge or a deteriorated rubber washer — parts that cost a few dollars and take less than an hour to replace.
This guide covers the two most common bathroom sink faucet repairs: replacing the cartridge in a single-handle faucet and repairing the compression valve in an older two-handle faucet. It also covers the less obvious leak source — water seeping from the base of the spout.
Identify the Leak Source First
Before you pull anything apart, watch the faucet carefully to determine exactly where the water is coming from.
Drip from the spout. Water drips from the end of the spout even when the handle is fully off. This is almost always an internal seal failure — a worn cartridge in a single-handle faucet or a failed seat washer in a two-handle compression faucet. This is the most common bathroom faucet leak.
Leak around the handle base. Water appears at the base of the handle when the faucet is running. This indicates a worn O-ring or packing nut on the stem. The handle area is under pressure when the faucet runs, so you only see the drip when water is flowing.
Leak at the base of the spout. Water pools around the base where the spout meets the sink deck. This is an O-ring failure on the faucet body itself, usually from age and mineral buildup. It is less common but straightforward to fix.
Once you know where the water is coming from, you know what to replace.
Identify Your Faucet Type
The repair approach depends on your faucet configuration.
Single-handle faucets control both hot and cold with one lever or knob. Most modern single-handle bathroom faucets use a cartridge — a self-contained valve unit that slides in and out of the faucet body. Common brands include Moen (most prevalent), Delta, Kohler, and Pfister. Each brand uses a brand-specific cartridge, so you need to identify the manufacturer before buying a replacement.
Two-handle faucets have separate hot and cold handles. Older two-handle faucets (pre-1980s especially) use compression valves — a rubber seat washer pressed against a brass seat by a threaded stem. When you turn the handle, you are literally screwing the washer down onto the seat. These washers wear out over time. Newer two-handle faucets may also use cartridges, one per handle.
To tell the difference: if tightening the handle slightly reduces the drip, it is a compression faucet. If the handle stops at a fixed point and tightening does nothing, it is a cartridge.
Tools and Parts You Will Need
- Moen bathroom faucet cartridge replacement (match to your brand)
- Pfister bathroom faucet cartridge (if you have a Pfister faucet)
- Bathroom faucet seat washer repair kit (for two-handle compression faucets)
- Cartridge puller tool (makes removal much easier, especially on stuck Moen cartridges)
- Plumber silicone grease (for lubricating O-rings and cartridge bodies)
- Teflon tape plumbing (for threaded connections)
Additional tools: adjustable wrench, Phillips and flathead screwdrivers, needle-nose pliers, utility knife, small bucket or towel.
How to Replace a Single-Handle Bathroom Faucet Cartridge
This procedure covers the most common repair: a dripping spout on a single-handle faucet.
Step 1: Shut off the water supply. Turn both supply stop valves under the sink clockwise until they stop. Open the faucet to relieve pressure and drain the lines. If there are no stop valves, shut off the main house water.
Step 2: Remove the handle. Pry off the decorative cap on top of the handle using a flathead screwdriver — it usually pops off to reveal a Phillips screw underneath. Remove the screw and pull the handle straight up and off the stem. Some handles have a set screw on the side or back; check if the handle does not pull free easily.
Step 3: Expose the cartridge. Some faucets have a retaining nut or bonnet nut over the cartridge. Use an adjustable wrench to unscrew it counterclockwise. Others have a retaining clip — a small U-shaped piece of metal that slides out from the top of the cartridge housing. Use needle-nose pliers to pull the clip straight up and set it aside; you will reuse it.
Step 4: Remove the cartridge. This is the step that separates easy jobs from frustrating ones. Grab the cartridge stem with pliers and pull straight up. Many Moen cartridges are rubber-bonded to the housing after years of use and will not budge. A cartridge puller tool threads onto the stem and provides mechanical leverage to extract the cartridge without damaging the housing. Do not twist — pull straight up only.
Step 5: Note the orientation. Before discarding the old cartridge, look at which way the flat sides of the cartridge face. There is a correct front-to-back orientation. Installing the cartridge 180 degrees backwards will make your hot and cold run in the wrong direction — fixable, but annoying. Most cartridges have an alignment tab or mark to guide reinstallation.
Step 6: Install the new cartridge. Apply a thin coat of plumber’s silicone grease to the O-rings on the cartridge body. Slide the new cartridge into the housing in the same orientation as the old one, pushing it down until it is fully seated. Replace the retaining clip or retaining nut to lock it in place.
Step 7: Reassemble and test. Reattach the handle and screw. Turn the supply valves back on slowly. Turn the faucet on to test. If hot and cold are reversed, shut the water off, remove the handle and clip, rotate the cartridge 180 degrees, and reinstall.
How to Repair a Two-Handle Compression Faucet
If you have a two-handle faucet that drips from the spout, identify which handle is leaking by feeling whether the drip water is warm or cold. Shut off only the corresponding supply valve.
Step 1: Remove the handle. Pry off the decorative cap, remove the handle screw, and pull the handle off. You should now see a packing nut — a large hex nut threaded onto the stem.
Step 2: Remove the stem. Use an adjustable wrench to unscrew the packing nut counterclockwise. Then unscrew the entire stem assembly — it threads into the valve seat. As you unscrew it, it rises out of the body. Remove the stem completely.
Step 3: Replace the seat washer. At the bottom of the stem, you will find a rubber seat washer held by a brass screw. Remove the screw and the old washer. Take both to the hardware store if you are not sure of the size. Install the new washer and screw it down snugly — do not overtighten or you will crush the washer.
Step 4: Replace the O-rings. While the stem is out, examine the O-ring or packing material around the upper portion of the stem. If the faucet was leaking around the handle (not just the spout), the O-ring is the culprit. Slide the old one off and roll a new O-ring of the same diameter into position. Coat it lightly with silicone grease.
Step 5: Reassemble. Thread the stem back into the body by hand, then tighten the packing nut with the wrench. Reinstall the handle and turn the water on to test.
If the faucet still drips after replacing the washer, the brass valve seat inside the faucet body may be pitted or corroded. You can resurface it with a seat wrench and seat grinder (available at plumbing supply stores) or replace the entire faucet — often the easier choice on a very old fixture.
Fix a Leak at the Base of the Spout
Water pooling around the base of the spout means the O-rings on the faucet body are worn. These O-rings create a watertight seal between the rotating spout and the faucet body.
Step 1: Shut off both supply valves and open the faucet to drain.
Step 2: Remove the spout. On most bathroom faucets, the spout lifts straight up after you remove the handle and cartridge. On some designs, there is a set screw at the back of the spout or a decorative collar that unscrews counterclockwise. Wiggle and pull — the spout will come free once the O-rings release.
Step 3: Replace the O-rings. You will see one or more rubber O-rings sitting in grooves on the faucet body post. Remove the old O-rings with a pick tool or small screwdriver, being careful not to scratch the brass. Take the old O-rings to the hardware store or measure the groove diameter to find replacements of the exact same size. Coat the new O-rings with silicone grease and roll them into their grooves.
Step 4: Reseat the spout. Push the spout back down firmly onto the body. Turn the water on and check the base for leaks. If it still seeps, the spout may not be fully seated or an O-ring may have rolled out of position — remove and reinstall.
When to Replace the Entire Faucet
Some repairs are not worth doing. Consider replacing the faucet entirely if:
- The faucet body is cracked or corroded
- The valve seat is damaged beyond resurfacing
- You cannot find replacement cartridges for an obscure brand
- The faucet is more than 20 years old and you have already replaced the cartridge once
- The faucet looks dated and you want to update the bathroom anyway
Replacing a bathroom faucet is a separate project, but not a difficult one. See our guide on how to replace a bathroom faucet for the full walkthrough. And if you are also dealing with slow drainage, here is how to install a bathroom sink from start to finish.
Most leaking bathroom faucets can be fixed for under $30 in parts. The cartridge or washer is almost always the culprit, and once you have shut the water off and removed the handle, the repair is straightforward even on your first attempt.
- Identify the Leak Source First
Before you pull anything apart, watch the faucet carefully to determine exactly where the water is coming from.
- Identify Your Faucet Type
The repair approach depends on your faucet configuration.
- How to Replace a Single-Handle Bathroom Faucet Cartridge
This procedure covers the most common repair: a dripping spout on a single-handle faucet.
- How to Repair a Two-Handle Compression Faucet
If you have a two-handle faucet that drips from the spout, identify which handle is leaking by feeling whether the drip water is warm or cold. Shut off only the corresponding supply valve.
- Fix a Leak at the Base of the Spout
Water pooling around the base of the spout means the O-rings on the faucet body are worn. These O-rings create a watertight seal between the rotating spout and the faucet body.
Free: 10-Point Home Maintenance Checklist
Prevent costly repairs with this seasonal checklist. Save hundreds every year by catching problems early.
Your checklist is ready!
Open Checklist →Something went wrong. View the checklist here.