How to Fix a Faulty Dimmer Switch
Learn how to diagnose and fix a dimmer switch that buzzes, flickers, does not dim correctly, or fails to turn on by replacing it with a compatible LED-rated dimmer.
A dimmer switch that buzzes, flickers, runs too hot, or refuses to dim LED bulbs smoothly is almost always caused by a compatibility mismatch — not a wiring fault. The fix is straightforward: identify what is wrong, select the correct replacement dimmer, and swap it in.
A dimmer switch that buzzes, flickers, runs too hot, or refuses to dim LED bulbs smoothly is almost always caused by a compatibility mismatch — not a wiring fault. The fix is straightforward: identify what is wrong, select the correct replacement dimmer, and swap it in. This guide covers diagnosis, safe switch removal, and installation of a compatible replacement.
What You Need
- LED-compatible dimmer switch — Lutron Caseta, Leviton Decora, or equivalent; $15–$40
- Non-contact voltage tester — essential for safely confirming power is off; $12–$20
- Phillips and flathead screwdrivers
- Needle-nose pliers
- Electrical tape
- Wire stripper (if the existing wire ends are damaged)
- Pencil and masking tape for labeling wires
Step 1: Diagnose the Problem
Understanding the symptom helps you choose the right fix.
Buzzing or humming: The dimmer is incompatible with LED bulbs, or the load exceeds the dimmer rating. Most likely fix: replace the dimmer with a current LED-compatible model.
Flickering at certain brightness levels: Incompatible dimmer-to-LED bulb combination. Either the dimmer or the bulbs (or both) need to change. Check the dimmer packaging for a compatibility list — most manufacturers publish a list of tested, compatible LED bulbs.
Lights will not dim all the way down: The minimum trim level is set too high on the existing dimmer. Try adjusting the internal trim screw first (see Step 5) before replacing the switch.
Lights do not turn on at all: The dimmer may have failed internally, or a circuit breaker has tripped. Check the breaker first. If the breaker is fine and a non-dimming switch in the same box works, the dimmer has failed and needs replacement.
Switch is physically warm but not hot: Normal. Dimmers dissipate heat as they reduce power. Hot to the touch: overloaded. Check wattage.
Step 2: Turn Off the Power
Never work on a switch with the power on. A dimmer switch carries line voltage and contact with live wires causes serious injury.
- Identify the circuit breaker controlling the room’s lighting circuit. It may be labeled in the panel, or you may need to turn off breakers one at a time until the light goes off.
- Turn the breaker off.
- Hold a non-contact voltage tester near the switch. A working tester beeps and lights up when near a live wire. After turning off the breaker, test the switch and confirm the tester gives no indication. Test the tester against a known live outlet first to verify it is working.
- Turn the light switch to the on position before removing it — if the light does not come on, power is confirmed off.
Step 3: Remove the Old Dimmer Switch
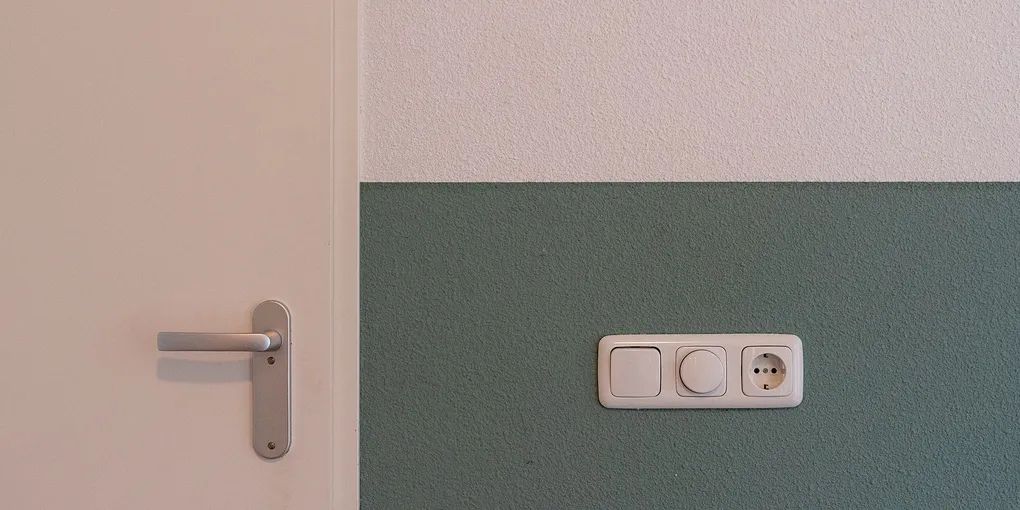
- Remove the switch cover plate: unscrew the center screw and pull the plate straight off.
- Locate the two screws holding the switch body in the electrical box — one at the top and one at the bottom. Remove both.
- Carefully pull the switch body out of the box. It is attached by wires, so it will only come out a few inches. Do not yank or pull hard.
- Before disconnecting anything, use masking tape and a marker to label each wire: which terminal (or wire color) connects where. Take a photo with your phone as a backup reference.
- Disconnect the wires: most dimmer switches use either screw terminals (loosen the screw, slide out the wire) or wire leads (the switch has pigtail wires that connect to your house wires with wire nuts). Note which connection method your switch uses.
- Once disconnected, remove the old switch.
What you may find in the box:
- Two wires (one black, one white): Two-wire switch loop. The white wire is used as a hot conductor here, not a neutral. Choose a no-neutral compatible dimmer for the replacement.
- Three wires (black, white, and green or bare copper): Black is hot, white is neutral, green or bare is ground. Most dimmers work with this configuration.
- Three-way wiring (two black wires and a red wire): This controls the light from two locations. You need a three-way dimmer, not a standard single-pole dimmer. The replacement must be a three-way compatible model.
Step 4: Select the Right Replacement Dimmer
The right dimmer depends on three factors:
Bulb type:
- LED bulbs: Use a dimmer explicitly labeled “LED compatible” or “for use with LED bulbs.” Lutron Caseta and Leviton Decora Smart are reliable choices with extensive LED compatibility lists.
- Incandescent or halogen: Any standard dimmer works. Wattage matching is the main concern.
Wiring configuration:
- Single-pole (controls one switch location): The most common type.
- Three-way (controls from two switch locations): Requires a three-way dimmer. Both switches in a three-way setup must be replaced with compatible three-way dimmers.
Wattage rating:
- Add up the wattage of all bulbs on the circuit. The dimmer rating must exceed the total load by at least 25 percent. For example, four 60-watt equivalent LED bulbs drawing 9 actual watts each (36 watts total) can use any dimmer rated for 150 watts or more.
Neutral wire requirement:
- Standard dimmers: most do not require a neutral wire.
- Smart dimmers and some LED-specific dimmers: require a neutral wire. Check your box before buying.
Step 5: Install the New Dimmer Switch
Follow the specific instructions packaged with your replacement dimmer. General procedure:
- Feed the wires from the box to the new dimmer using the same configuration as the old switch — hot wire to hot terminal, neutral to neutral (if applicable), ground to ground.
- Screw terminals: Strip 3/4 inch of insulation from the wire end if needed, insert under the screw, and tighten clockwise. The wire should not be able to pull free with a firm tug.
- Wire lead connections: Match the colors (black to black, white to white or as labeled) and twist together clockwise, then secure with a wire nut. Tug each wire after tightening to confirm the connection is solid.
- Fold the wires neatly into the electrical box. Wires have memory and resist being bent — work them in gently rather than forcing them.
- Press the switch body into the box and drive the mounting screws to hold it in place. The switch should sit flush and level with the wall surface. Most switches have slotted mounting holes that allow slight adjustment — a level helps.
- Attach the cover plate and snap on the dimmer slider or dial.
Step 6: Adjust the Low-End Trim
Most LED-compatible dimmers have a trim adjustment that sets how low the light goes before switching fully off. This prevents the lights from flickering at the low end or staying slightly lit when the dimmer is at zero.
- Turn the circuit breaker back on.
- Set the dimmer to its lowest setting.
- Remove the cover plate (the switch body stays in the box). Look for a small notched screw on the face of the switch body — this is the low-end trim adjustment.
- If the light is still glowing slightly at the lowest setting, turn the trim screw counterclockwise in small increments until the light goes fully dark.
- If the light flickers at the low end, turn the trim screw clockwise slightly until flickering stops.
- Replace the cover plate.
Step 7: Test and Verify
- Turn the dimmer on and sweep from lowest to highest setting. The light should increase smoothly with no flickering, buzzing, or sudden jumps in brightness.
- Listen for buzzing from the switch and from the light fixture. A faint buzz from the fixture itself (not the switch) may indicate a bulb that is not compatible with the dimmer — replace the bulb with a model on the dimmer manufacturer compatibility list.
- Test the switch after five to ten minutes of operation and confirm it is not excessively hot.
If the dimmer still buzzes or flickers after installation, the bulbs are the most likely remaining issue. Cross-reference your bulb brand and model with the dimmer compatibility list and swap bulbs as needed.
Related Reading
- How to Replace a Standard Light Switch
- How to Install a Ceiling Fan
- How to Install a Ceiling Fan With No Existing Wiring — add a fan where no wiring or box exists
- How to Install a Smart Thermostat
- Diagnose the Problem
Understanding the symptom helps you choose the right fix.
- Turn Off the Power
Never work on a switch with the power on. A dimmer switch carries line voltage and contact with live wires causes serious injury.
- Remove the Old Dimmer Switch
Remove the switch cover plate: unscrew the center screw and pull the plate straight off.
- Select the Right Replacement Dimmer
The right dimmer depends on three factors:
- Install the New Dimmer Switch
Follow the specific instructions packaged with your replacement dimmer. General procedure:
- Adjust the Low-End Trim
Most LED-compatible dimmers have a trim adjustment that sets how low the light goes before switching fully off. This prevents the lights from flickering at the low end or staying slightly lit when the dimmer is at zero.
Free: 10-Point Home Maintenance Checklist
Prevent costly repairs with this seasonal checklist. Save hundreds every year by catching problems early.
Your checklist is ready!
Open Checklist →Something went wrong. View the checklist here.