How to Fix a Broken, Cracked, or Chipped Tile (Floor and Wall, 2026)
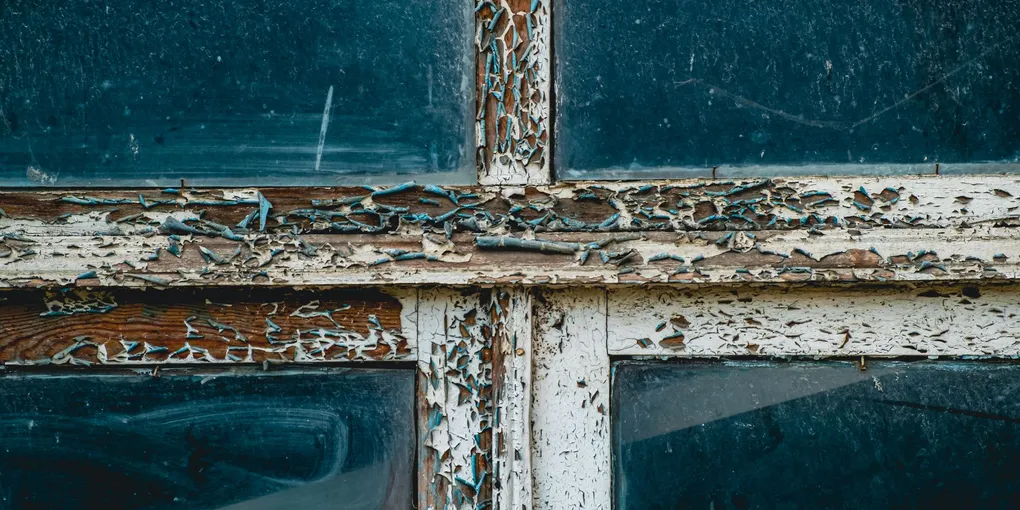
Replace one broken tile or repair a crack without replacing the whole floor. This guide covers removing a single tile without damaging neighbors, matching grout, and fixing hairline cracks in ceramic and porcelain.
Replace a single tile by scoring and breaking the old tile, chiseling out the pieces, scraping clean the substrate, setting the new tile in thinset, and regrout after 24 hours. The hardest part is finding a matching replacement tile — bring a broken piece to a tile store. A hairline crack that isn't loose can be repaired with tinted epoxy filler for a near-invisible fix.
Frequently Asked Questions
Can I replace just one cracked tile?
Yes. Tile replacement is one of the most DIY-friendly repairs — you only need to remove and replace the affected tile(s). The key challenge is sourcing a matching tile. Check your garage for spares left by the installer. If none, take a broken piece to a tile store — they can often match discontinued tiles or find something close enough that blends in.
How do I remove a tile without cracking the surrounding tiles?
Score a grid pattern across the broken tile with an angle grinder or oscillating tool, then use a chisel and hammer to break it into small pieces starting from the center. Never pry against an adjacent tile — always work from the center outward. On floor tile, hitting too hard can crack tiles 6–12 inches away through the substrate. Work in small pieces, not big chunks.
How do I fix a tile that is loose but not cracked?
Hollow-sounding tiles (tap with your knuckle — hollow clunk vs. solid thud) indicate that the tile has separated from the substrate. If the tile isn't cracked, you can try to inject thinset or construction adhesive under the edges using a syringe or by drilling a small hole in the grout joint. If that doesn't work, the tile needs to be removed and reset. A loose tile that's not fixed will eventually crack from the hollow spot beneath it.
What if I can't find a matching tile?
Options: (1) Replace with a different tile as an intentional accent. (2) Use the closest match and put it somewhere less visible (inside a cabinet or behind furniture). (3) Pull all the most visible tiles from your spare supply and use them for the repair — put the non-matching tiles where they're less seen. (4) Accept a slight mismatch — in most cases, tile that's the same size and color family blends better than you'd think once grouted.
Can I repair a hairline crack in a tile without replacing it?
Yes for hairline cracks where the tile is still firmly bonded. Use [two-part tile repair epoxy](https://www.amazon.com/s?k=tile+crack+repair+epoxy+filler&tag=fixupfirst-20) or [grout repair colorant](https://www.amazon.com/s?k=grout+colorant+repair+pen&tag=fixupfirst-20) tinted to match the tile. Apply with a toothpick, wipe off the excess, and let cure. On floor tiles, this holds surprisingly well. On tiles with structural cracks (crack goes through the full thickness), replacement is the better option.
How do I remove a broken tile without damaging surrounding tiles?
Safe broken tile removal technique: (1) Remove the grout first: use an oscillating tool with a grout removal blade, a grout saw, or a rotary tool to cut out all grout from the perimeter joints of the broken tile. This is the most important step — it isolates the tile from its neighbors before you start chiseling. (2) Score the tile surface: use an angle grinder with a diamond blade to score an X across the face of the tile. This weakens it so it breaks into smaller pieces during removal. (3) Chisel from the center: place a cold chisel at the center intersection of your scored X, hold at a low angle (20–30 degrees), and tap firmly with a hammer. Work outward from the center in small sections. Never insert a pry bar under the edge of a tile — the levering action transmits force into adjacent tiles and cracks them. (4) Protect neighbors: tape painter's tape along the edges of all surrounding tiles. This protects their glaze from errant chisel strikes. (5) Keep chisel impact forces light: repeated light taps are safer than one hard blow. If a piece won't release, try heat (heat gun for 60–90 seconds) to soften the adhesive underneath. (6) Scrape the substrate clean: once pieces are removed, scrape all old thinset or mastic from the backing surface with a floor scraper. The new tile needs to bond to bare, flat substrate — not old adhesive.
How much does it cost to fix a broken tile — DIY vs. professional?
DIY single tile replacement cost: $15–$60 in materials — replacement tile ($5–$30), grout ($5–$15), thinset ($5–$15), grout saw blade ($5–$20). Time: 2–4 hours plus 24-hour thinset cure. If you have matching spare tiles from the original installation, the cost drops to $10–$20. Hiring a tile setter or handyman: $150–$400 for a single tile. Tile setters typically charge $100–$150 minimum service call. Labor for one tile runs 1–2 hours; the premium reflects minimum charge and material sourcing time. Multiple tiles cost more efficiently (not linear) — 3–5 tiles might run $250–$600 total. When to DIY: single tile replacement on floor or wall with a matching spare tile and a solid (non-hollow) substrate. One of the most beginner-friendly repairs. When to hire: more than 5 tiles (larger-scale setting requires experience for level results), shower floor or wet area with waterproofing requirements, in-floor heated tile (requires specialized thinset and reconnection), natural stone matching and cutting, or when the cement board or drywall substrate is also damaged.
Replace a single tile by scoring and breaking the old tile, chiseling out the pieces, scraping clean the substrate, setting the new tile in thinset, and regrout after 24 hours. The hardest part is finding a matching replacement tile — bring a broken piece to a tile store.
A broken tile doesn’t mean replacing the whole floor. Here’s how to do a clean single-tile replacement.
Assess the damage first
Before starting, categorize your repair:
| Type | What it means | Best fix |
|---|---|---|
| Hairline crack, tile still bonded | Cosmetic only | Epoxy filler |
| Full crack, tile still flat | May become worse | Replace tile |
| Cracked and hollow-sounding | Substrate failed, tile loose | Replace tile, fix substrate |
| Multiple adjacent broken tiles | Impact damage | Replace all affected tiles |
| Cracked grout only (no tile) | Normal grout failure | Regrout only — see regrout guide |
Option A: Repair a hairline crack (no replacement)
For cracks where the tile is still firmly bonded:
- Clean the crack thoroughly — vacuum, then wipe with rubbing alcohol on a cotton swab to remove all grease and residue. Let dry completely.
- Apply two-part tile epoxy filler. Mix per instructions, tint if available, and work into the crack with a toothpick. Overfill slightly.
- Wipe excess with a damp cloth immediately.
- Let cure 2–4 hours. Lightly sand if proud with 400-grit sandpaper.
- For a better color match, dust a bit of grout powder (matching color) over the epoxy while it’s still slightly tacky — it mimics the tile texture.
Option B: Replace a single tile
What you need:
- Replacement tile (same size and as close to matching as possible)
- Oscillating multi-tool with tile blade or angle grinder with diamond blade
- Cold chisel and hammer
- Tile thinset mortar
- Grout — match existing (sanded for joints wider than 1/8 inch, unsanded for narrower)
- Margin trowel or grout float
- Tile spacers
Step 1: Remove the grout around the broken tile
Use an oscillating multi-tool with a grout removal blade to cut out the grout on all four sides of the broken tile. Remove grout to a depth of at least 1/8 inch. Don’t skip this step — prying on the tile with grout still intact will crack adjacent tiles.
Important: Only go as deep as the grout line, not into the thinset below.
Step 2: Break and remove the tile
Starting from the center of the broken tile, use a cold chisel and hammer to break it into small pieces (4–6 inches maximum per piece). Work from the center outward — never lever against adjacent tiles.
For unbroken tile that needs replacement: Score an X across the tile’s face with a scoring wheel or angle grinder first. This gives the chisel a starting point and reduces the force needed.
Collect all pieces as you go — they’re sharp.
Step 3: Clean the substrate
Chip off all old thinset from the subfloor or backer board. The new tile needs a flat, solid bond surface. Use a wide chisel held at a low angle to scrape rather than chip.
Check the substrate for damage:
- Crack backer board: Patch with backer board tape and thinset before setting the new tile.
- Wet or soft subfloor: This means water penetrated from above (loose tile, failed grout). Dry completely before proceeding. If the subfloor is soft or spongy, the structure beneath needs repair before retiling.
Step 4: Set the new tile
- Mix thinset to a peanut butter consistency (not runny).
- Apply thinset to the substrate with a margin trowel or notched trowel. Comb parallel ridges with the notched edge.
- Back-butter the replacement tile (apply a thin coat directly to the back of the tile) for better bond on small areas.
- Press the tile firmly into position, twisting slightly to collapse the thinset ridges.
- Check level with adjacent tiles — the new tile must be flush, not proud or recessed.
- Insert tile spacers around the perimeter to match the existing grout joint width.
- Let thinset cure 24 hours before grouting.
Step 5: Grout
Remove the spacers. Mix grout to a smooth paste. Apply with a rubber grout float held at a 45-degree angle, forcing grout into the joints.
Clean excess grout off the tile face within 15–20 minutes with a damp sponge. Work diagonally across the joints to avoid pulling grout out.
After 24–48 hours, apply grout sealer to the new joints.
Color matching: Mix a small test batch of grout with the same ratio of water/grout as your main batch and let it dry on a piece of cardboard. Grout dries 2–3 shades lighter than when wet. Compare to existing grout before committing.
Related guides
- How to Regrout a Shower — full shower grout removal and replacement
- How to Grout Tile — grouting a full tile floor or wall
- How to Tile a Bathroom Floor — full floor tile installation
- How to Clean Grout — cleaning before deciding if you need to replace
- How Much Does a Handyman Cost?
- Tile Flooring Installation Cost — when repair turns into full replacement
- How to Fix a Floor Tile That Is Loose — epoxy injection for hollow tiles that haven’t yet broken
- Remove the grout around the broken tile
Use an oscillating multi-tool with a grout removal blade to cut out grout from all four joints to 1/8-inch depth. This isolates the damaged tile and protects surrounding tiles from crack propagation during removal.
- Break and remove the tile
Score an X across the tile face with an angle grinder and diamond blade. Starting at the center intersection, use a cold chisel at a low angle (20-30 degrees) and tap with a hammer to break into small pieces. Work outward from the center. Never insert a pry bar under the tile edge — it transmits force and cracks adjacent tiles.
- Clean the substrate
Scrape all old thinset or mastic from the substrate with a floor scraper until the surface is flat and clean. Check for cracked backer board or water damage — address these before setting the new tile.
- Set the new tile
Mix thinset to peanut butter consistency. Apply to the substrate with a notched trowel. Back-butter the tile, press firmly and twist slightly to set. Use spacers on all sides. Verify flush with surrounding tiles. Let cure 24 hours before grouting.
- Grout the joint
Remove spacers. Apply grout with a rubber float held at 45 degrees, forcing it into joints. Clean excess with a damp sponge using diagonal strokes. Allow to dry, then apply a second sponge pass. Seal grout after 24-48 hours with tile and grout sealer.
Free: 10-Point Home Maintenance Checklist
Prevent costly repairs with this seasonal checklist. Save hundreds every year by catching problems early.
Your checklist is ready!
Open Checklist →Something went wrong. View the checklist here.