How to Fix a Broken Cabinet Shelf Pin (And Stop Shelves From Falling)
Missing or broken shelf pins let cabinet shelves sag and crash — here's how to repair them, drill replacement holes, and upgrade to a more reliable shelf support system.
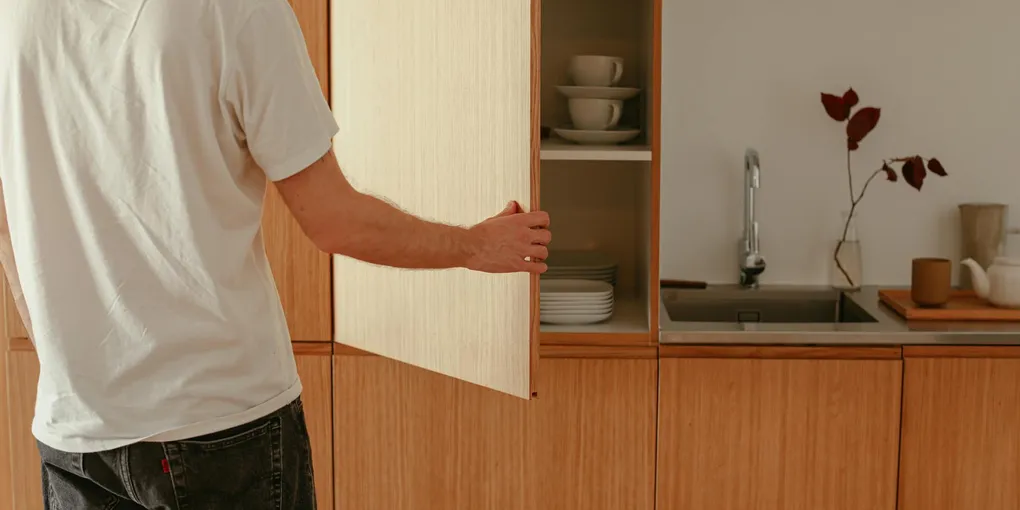
Fixing cabinet shelf pins: (1) Missing or broken pin: buy replacements — bring an intact pin to the hardware store to match the diameter (typically 5mm or 1/4 inch). A pack of 50 costs $5 to $8. (2) Stripped hole (pin falls out or wobbles): apply a tiny drop of super glue around the pin before inserting; or fill the hole with a wooden toothpick coated in wood glue, let dry, and re-drill. (3) Shelf that sags in the middle (too long without support): add a center support bracket or replace the shelf with 3/4-inch plywood. Particle board shelves under 30 inches span well; over 30 inches they sag with a full load. (4) Wrong shelf pin style: if the cabinet has slotted shelf standards (metal strips), use slotted shelf clips that snap into the track — far more adjustable and stronger than pin-in-hole systems.
Frequently Asked Questions
What size are standard cabinet shelf pins?
The most common shelf pin size is 5mm diameter — used in virtually all flat-pack and most factory-built cabinets from IKEA, IKEA-style manufacturers, Home Depot, and cabinet shops. A less common size is 1/4 inch (6.35mm), found in older American-made cabinets and some custom cabinet work. To identify your size: bring an old pin to a hardware store and match it, or measure the hole diameter in the cabinet side with a small ruler. Buying the wrong size results in pins that are too loose or won't fit.
Why do shelf pins keep breaking or falling out?
Shelf pins fail for several reasons. Cheap plastic pins crack under heavy loads — replace them with metal pins. Oversized holes (drilled too large or worn over time) allow pins to shift and fall out — the fix is sleeve inserts or relocating the shelf to different holes. Uneven load distribution puts all the weight on one side — center heavy items and spread weight front-to-back. If multiple pins in a row fail, the shelf itself may be too long, thin, or heavily loaded — a longer shelf needs a center support or a thicker shelf board.
Can I drill new shelf pin holes myself?
Yes — drilling new shelf pin holes is a common DIY fix. The key is keeping them accurately aligned so the shelf sits level. Use a shelf pin drilling jig (a pre-drilled metal template available at hardware stores) with a 5mm or 1/4-inch bit. Clamp the jig to the cabinet side, drill to a consistent depth (use a drill stop or wrap tape around the bit at 1/2 inch depth), and repeat at the same position on the opposite side. Even spacing is critical — misaligned holes will tilt the shelf.
What are the strongest types of shelf supports?
From strongest to weakest: (1) Shelf pin rails — a metal rail with regularly spaced slots screwed to the cabinet side; pins clip into the rail and cannot fall out. (2) Heavy-duty metal shelf pins with locking tabs — the tab inserts into a groove cut in the shelf underside to lock it in place. (3) Standard round metal shelf pins — reliable when holes are the correct size. (4) Plastic shelf pins — the weakest option; fine for light loads (books, dishes) but not for heavy items like small appliances or canned goods.
My shelf hole is stripped or too big — can I fix it without drilling new holes?
Yes. For a slightly oversized hole: insert a metal shelf pin sleeve (a thin metal cylinder that lines the hole, sold at hardware stores) to reduce the effective hole diameter. The sleeve grips the cabinet material and accepts a standard pin. For a badly damaged hole: fill the hole with a wooden toothpick and wood glue, let it cure 24 hours, then re-drill at the original location. For a hole that can't be repaired: offset the new hole by 1 inch up or down so you're drilling into undamaged material.
How do I keep shelves from sagging in the middle?
A shelf that sags in the center has too much span for its thickness. Solutions: (1) Add a center shelf support — a bracket that attaches to the cabinet back and supports the shelf's midpoint. (2) Replace the shelf with a thicker board — 3/4 inch is standard, but heavily loaded shelves benefit from 1-inch or adding a front edge strip (a strip glued to the front edge of the shelf increases stiffness significantly). (3) Reduce the load — redistribute heavy items across multiple shelves. For spans over 36 inches, a center support is almost always necessary.
Can I use a shelf pin drilling jig inside a cabinet that is already installed?
Yes. Jigs are designed to clamp to the cabinet side from inside the cabinet and work in installed cabinets. The challenge is drill clearance — you need enough room to hold the drill perpendicular to the cabinet panel. In tight base cabinets, a right-angle drill attachment (a chuck that swivels the drill head 90 degrees) dramatically improves access. A 5mm brad-point bit in a shorter length than standard twist bits also helps in confined spaces. Mark your first hole position carefully, clamp the jig firmly before drilling, and use tape on the bit as a depth stop to prevent drilling through the cabinet side.
What load capacity should I expect from standard cabinet shelf pins?
Standard 5mm metal shelf pins are typically rated 20 to 30 lbs per pin, giving a total shelf capacity of 80 to 120 lbs across four pins — adequate for dishes, books, and small appliances. Plastic shelf pins fail at much lower loads and should be replaced with metal in any cabinet holding more than light items. Heavy-duty pins (rated 50+ lbs each) are available for shelves storing canned goods, tools, or equipment. Always assess your actual shelf load before choosing a pin style: a full set of stoneware dishes can easily weigh 25 to 35 lbs, which puts a standard particleboard shelf with plastic pins near its limit.
Fixing cabinet shelf pins: (1) Missing or broken pin: buy replacements — bring an intact pin to the hardware store to match the diameter (typically 5mm or 1/4 inch). A pack of 50 costs $5 to $8.
Shelf pins are the unsung heroes of every kitchen and bathroom cabinet. They do their job silently until they break, strip out, or go missing entirely — and then your shelves and everything on them are at risk of a crash landing. Fortunately, fixing shelf pins is one of the quickest cabinet repairs you can make.
This guide covers every scenario: replacing broken pins, repairing stripped-out holes, drilling new holes with precision, and upgrading to a stronger shelf rail system when standard pins keep failing.
What You Need
Depending on your repair method, you’ll need a subset of these:
- 5mm metal shelf pins replacement set — buy a variety pack so you have extras on hand
- Shelf pin drilling jig — ensures perfectly aligned holes every time
- Drill with 5mm bit and depth stop — the depth stop prevents drilling through the cabinet side
- Metal shelf pin rail system — for upgrading to a stronger support system
- Shelf support center bracket — prevents sagging on long shelves
- Wood glue and toothpicks — for filling stripped holes before re-drilling
Identify Your Shelf Pin Type and Size
Before buying replacement pins, identify what size your cabinet uses. Remove a surviving pin and bring it to the hardware store, or measure the hole diameter carefully.
5mm pins are the modern standard, used in virtually all flat-pack furniture and most cabinet shop work from the past 25 years.
1/4-inch (6.35mm) pins appear in older American-made cabinets and some custom work. The difference between 5mm and 1/4 inch is small (about 1.35mm) but a 1/4-inch pin in a 5mm hole will be sloppy and unstable.
Also identify the pin shape. Most residential cabinet pins are simple round pegs. Some cabinets use spoon-style pins (with a flat top that extends under the shelf), locking pins (with a tab that engages a groove in the shelf), or proprietary formats. The replacement must match both size and style.
Fix 1: Simple Pin Replacement
If the pins are just missing or the plastic pins cracked, this is a 5-minute fix.
Purchase the correct size replacement pins in metal (not plastic — see the FAQ for why). Insert the pin into the hole with the flat or shelf-supporting side facing up. The pin should fit snugly without wobbling. If it’s loose, the hole is stripped — see Fix 3 below.
Repeat for all four support points. Set the shelf on the pins. Check that it sits level — if one corner is lower, the pin is higher or the hole is in a different position. Swap pins or adjust until the shelf rests flat.
For heavier shelf loads (small appliances, canned goods, heavy cookware), consider upgrading to locking pins. These have a small tab that inserts into a slot or hole cut in the underside of the shelf, preventing the shelf from being lifted off the pins. Useful in base cabinets where heavy items may be slid in and inadvertently lift the shelf.
Fix 2: Fill and Re-Drill Stripped Holes
If pins are loose and wobbling in their holes, the hole has widened past the pin’s diameter. The holes must be repaired before new pins will hold.
For moderately stripped holes: Insert metal shelf pin sleeves — thin metal cylinders sold at hardware stores — into the hole. The sleeve’s outer diameter matches the hole, and the inner diameter accepts a standard pin. Tap the sleeve in flush with a hammer and the pin will now fit snugly.
For badly stripped holes: Clean out any debris from the hole. Apply a small amount of wood glue to 2–3 wooden toothpicks. Insert the toothpicks into the hole to fill it completely. Break off the toothpicks flush with the cabinet surface. Let the glue cure for at least 4 hours (overnight is better).
Once cured, re-drill the hole at the original location. The toothpick-filled wood is now solid and will hold a pin securely. Use a 5mm brad-point bit or Forstner bit for the cleanest hole — brad-point bits don’t wander on wood grain the way twist drill bits do.
Alternatively, offset the new hole. If the original location is very badly damaged, shift the new hole 1 inch up or down from the original. This gives you clean, undamaged material to drill into. The shelf will sit slightly higher or lower, which usually doesn’t matter in a cabinet context.
Fix 3: Drill New Holes with a Jig
When you need to add shelf pin holes at a new height, or when the existing holes are damaged beyond repair and you’re shifting the location more than an inch, a drilling jig is the right tool.
A shelf pin drilling jig is a metal template with evenly spaced holes pre-drilled at the correct spacing (usually 32mm on center). You clamp it to the cabinet side, insert a drill bit, and drill through each template hole — every hole ends up perfectly aligned.
Mark your starting position. Decide how high you want the shelf and mark where you want the bottom of the shelf to sit. The pin holes should be 1/2 inch to 5/8 inch above that line (the pin sits at that height, the shelf on top of it).
Set your drill depth. Shelf pin holes should be approximately 1/2 inch deep. If you drill through the cabinet side, you’ve ruined it. Use a drill depth stop collar on the bit or wrap a piece of painter’s tape around the bit at 1/2 inch from the tip — stop drilling when the tape reaches the surface.
Clamp and drill. Secure the jig with a clamp so it doesn’t shift mid-drilling. Drill each hole with steady, moderate pressure. Clear chips from the bit frequently.
Repeat on the opposite cabinet side. This is where most DIYers go wrong. The jig must be positioned identically on both sides so the four holes are at the same height. Measure from the cabinet bottom to the first jig hole position on both sides and confirm they match before drilling.
Fix 4: Install a Shelf Rail System
If you have ongoing issues with pins pulling out — especially in a cabinet with heavy, frequently reorganized contents — consider upgrading to a metal shelf rail (pilaster) system. Rails are a much stronger and more versatile solution than pin holes alone.
A shelf rail is a metal strip with evenly spaced slots, screwed to the inside face of the cabinet side. Shelf pin clips engage the slots and cannot pull out even under significant load — the slot geometry locks them in place.
Installing shelf rails:
Measure and cut the rails to length (most are sold in standard lengths that may need trimming with metal snips). Position one rail near the front edge of the cabinet side and one near the back. They must be perfectly plumb (use a level) and at the same height on both left and right sides.
Pre-drill pilot holes for the rail mounting screws to avoid splitting the cabinet material. Screw the rails in place using the provided screws.
Clip the shelf pin clips into the rail slots at the desired height. Set the shelf on the clips. Done — the shelf is now supported by a system that will outlast the cabinet itself.
Preventing Future Shelf Pin Failures
A few habits extend shelf pin life significantly:
Upgrade to metal pins. Plastic pins are a false economy. Metal pins cost a few cents more per pin and last indefinitely. When you’re already replacing pins, buy the metal version.
Distribute weight evenly. Heavy items at the back center of a shelf put the most stress on pins. Spreading weight front-to-back and side-to-side reduces strain.
Add a center support for long shelves. Any shelf over 30–36 inches long that carries significant weight benefits from a center support bracket attached to the cabinet back. This halves the effective span and dramatically reduces sag.
Don’t overload shelves. Cabinet shelves are typically designed for 20–30 lbs per shelf. Check your cabinet specs if you’re storing unusually heavy items.
When to Replace the Shelf Itself
If the shelf itself has bowed significantly (more than 1/4 inch of sag at the center), flattening or strengthening the shelf is a better approach than just fixing the pins.
Cut a new shelf from 3/4-inch plywood or melamine-coated particleboard. Standard cabinet shelves are typically 10–12 inches deep for upper cabinets and 20–24 inches deep for base cabinets. Measure the existing shelf for both depth and length (measure between the cabinet sides, then subtract 1/8 inch for clearance).
Edge-banding the front edge gives the new shelf a finished look and also stiffens it slightly. Iron-on edge banding is available at hardware stores and applies in minutes.
Related Reading
- Fix 1: Simple Pin Replacement
If the pins are just missing or the plastic pins cracked, this is a 5-minute fix.
- Fix 2: Fill and Re-Drill Stripped Holes
If pins are loose and wobbling in their holes, the hole has widened past the pin's diameter. The holes must be repaired before new pins will hold.
- Fix 3: Drill New Holes with a Jig
When you need to add shelf pin holes at a new height, or when the existing holes are damaged beyond repair and you're shifting the location more than an inch, a drilling jig is the right tool.
- Fix 4: Install a Shelf Rail System
If you have ongoing issues with pins pulling out — especially in a cabinet with heavy, frequently reorganized contents — consider upgrading to a metal shelf rail (pilaster) system.
Free: 10-Point Home Maintenance Checklist
Prevent costly repairs with this seasonal checklist. Save hundreds every year by catching problems early.
Your checklist is ready!
Open Checklist →Something went wrong. View the checklist here.