How to Fix a Cabinet Door Gap: Hinge Adjustment and Alignment Tips
Uneven gaps around a cabinet door are usually a quick hinge adjustment away from perfect — learn how to fix depth, lateral, and height settings plus warped door remedies.
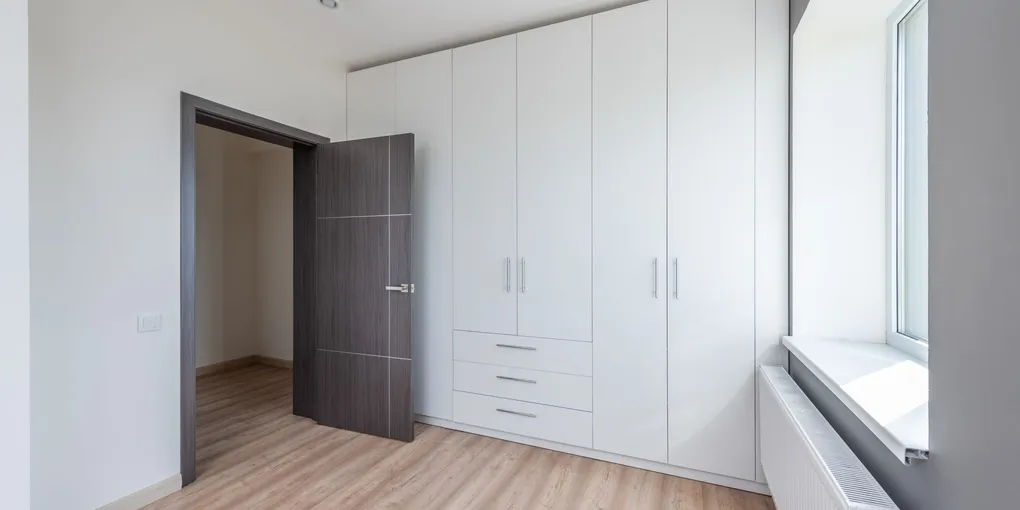
A cabinet door that hangs crooked, catches on the frame, or shows a gap that is wide on one side and tight on the other is a common frustration — and one of those problems that is surprisingly easy to fix once you understand how adjustable hinges work.
A cabinet door that hangs crooked, catches on the frame, or shows a gap that is wide on one side and tight on the other is a common frustration — and one of those problems that is surprisingly easy to fix once you understand how adjustable hinges work. In most kitchens and bathrooms built or remodeled in the last 30 years, the cabinets use European cup hinges (also called concealed or 35mm hinges). These hinges have three-way adjustment built in, meaning you can move the door in any direction you need without removing it, re-drilling, or calling a carpenter.
This guide covers every adjustment scenario, plus solutions for warped doors and older cabinets with non-adjustable hinges.
What You Need
The tools required are minimal. In many cases, a single screwdriver is the only thing between you and a perfectly aligned door.
- #2 Phillips Screwdriver — The workhorse for all European hinge adjustments. A screwdriver with a magnetic tip makes dropping screws into the cabinet less likely.
- European Concealed Hinges (35mm) — If your hinges are cracked, stripped, or have no adjustment range left, replacements are inexpensive. Bring the old hinge to match the overlay and arm length.
- Hinge Plate Shims / Thin Washers — For fine-tuning depth or correcting mild warpage, thin shims behind one hinge plate give precise control without screw adjustments alone.
- Magnetic Cabinet Door Catches — Essential for doors with mild warping; a strong magnet near a bowed corner pulls it flush to the face frame when closed.
- Toothpicks and Wood Glue — The standard repair for stripped screw holes. Dip toothpicks in wood glue, snap them off flush, let dry, and the hole holds screws firmly again.
- Digital Calipers or Combination Square — Measure gaps precisely to confirm adjustments are making real progress rather than eyeballing.
Understanding European Hinge Adjustments
Before touching a screwdriver, it helps to know what each part of the hinge does. A standard European concealed hinge has two main components: the cup (which mounts in a drilled hole in the door) and the mounting plate (which screws to the inside of the cabinet). The arm connecting them has adjustment screws.
Depth adjustment (in/out): The large center screw on the hinge arm. Turning it clockwise moves the door closer to the cabinet face frame (in); counterclockwise moves it away (out). Use this when the door sticks out farther on one side, or when it sits recessed relative to adjacent doors.
Lateral adjustment (left/right): The screw on the side of the hinge arm, sometimes a slot rather than a dedicated screw. This moves the door left or right. Use this to close a gap on one side that has opened up on the other.
Height adjustment (up/down): The mounting plate typically has an elongated screw slot. Loosen the mounting plate screw, slide the plate up or down, and retighten. This adjusts the door’s position along the vertical axis. Use this when the gap is uneven from top to bottom.
Most adjustments require only a quarter to half turn of the screw — make small moves, close the door, and assess before continuing.
Step 1: Identify Which Gap Is Wrong
Stand in front of the cabinet and look at the door with it closed. Note:
- Is the gap wider at the top or bottom? → Height adjustment needed.
- Is the gap wider on the left or right? → Lateral adjustment needed.
- Does the door sit proud of (sticking out from) the face frame on one side? → Depth adjustment needed.
- Does the entire door sit crooked — like a tilted rectangle? → The top hinge and bottom hinge need opposite lateral adjustments (one moved left, one moved right) to straighten the door’s vertical axis.
Use calipers or a ruler to measure the gap at the top, bottom, left, and right. Writing down the measurements helps you confirm that your adjustments are moving in the right direction.
Step 2: Make the Hinge Adjustments
Open the door to access the hinges. You will typically have two hinges on standard cabinet doors; taller doors may have three.
For lateral (left/right) correction: Locate the lateral adjustment screw on each hinge. Turn it in small increments — a quarter turn at a time. Both hinges must be adjusted equally and in the same direction for the door to move laterally without tilting. After each adjustment, close the door and check the gaps.
For height (up/down) correction: Loosen (do not remove) the screw that holds the mounting plate to the cabinet. Slide the mounting plate up or down in its slot, then retighten. Again, both hinges need to move the same amount. If you want the door to go up, move both mounting plates up. Moving only one plate will tilt the door rather than shift it cleanly.
For depth (in/out) correction: Turn the large center screw on each hinge. If the door is too far out on the hinge side, turn clockwise on that hinge’s depth screw. If the door is angled (one side in, one side out), adjust one hinge deeper than the other until the door surface is parallel to the face frame.
Step 3: Fix Stripped Screw Holes Before Adjusting
If the door droops or shifts when you move it by hand — even before adjusting anything — the hinge screws may have stripped out of the door or cabinet. No amount of adjustment will hold if the fasteners are loose in their holes.
To repair stripped holes:
- Remove the hinge completely.
- Dip 3–5 wooden toothpicks in wood glue and push them into the hole. Break them off flush with the surface.
- Allow 30 minutes to dry.
- Reinsert the original screw — it will bite into the wood fibers of the toothpicks.
For larger stripped holes, use a wood golf tee instead of toothpicks — the taper fills the hole completely. After the glue dries, trim the tee flush with a chisel and reinstall the hinge.
Step 4: Address Door Warpage
A warped door is a different problem from a misaligned hinge — it means the door itself has a twist or bow. Open the door and look along its face from an angle to check for any curvature.
Mild warp (less than 1/4 inch):
- Add a third hinge in the center. A center hinge on a bowed door pulls the middle toward the face frame, reducing visible bow. Measure halfway between the existing hinges, mark the cup hole location, and drill with a 35mm Forstner bit.
- Add a magnetic catch. Install a strong magnetic catch near the bowed corner (typically a bottom corner for a door that bows outward at the bottom). The magnet holds the corner closed and hides the warp.
- Use depth adjustment strategically. On a bowed door, set the hinge nearest the bow slightly deeper (more in) to compensate. This is a masking technique rather than a cure, but it works well for mild cases.
Moderate warp (1/4 to 1/2 inch):
Some woodworkers attempt to flatten warped solid-wood doors by clamping them flat across the width with battens and leaving them in the sun or a warm room for a few days. This works on solid wood doors but not on MDF, particleboard, or thermofoil-wrapped doors.
Severe warp (over 1/2 inch):
Door replacement is the practical solution. Cabinet replacement doors are available from home improvement stores, cabinet suppliers, and online retailers. Measure the existing door precisely (width, height, and overlay) before ordering.
Step 5: Shimming Hinge Plates
Shimming is a technique that gives you sub-millimeter control when the hinge’s built-in adjustment has run out of range or when you need to correct a slight angle in how the door sits.
Place a thin shim (a business card, playing card, or commercial hinge shim) behind one of the hinge’s mounting plate screws before driving it home. This tilts the mounting plate slightly, which in turn adjusts the door’s angle. Adding a shim to the top screw pushes the top of the hinge plate out from the cabinet, moving the door away from the frame at the top. Adding it to the bottom screw has the opposite effect.
This technique is especially useful when you need to correct a door that twists (where the top is flush but the bottom sticks out, or vice versa) rather than simply shifting in one direction.
Adjusting Older Surface-Mounted Hinges
Older cabinets — typically pre-1990s — often have visible butt hinges or decorative surface-mounted hinges with no built-in adjustment. Your options are limited but not zero.
Slot the screw holes. Using a rotary tool or small file, elongate the screw holes in one leaf of the hinge in the direction you need to move the door. Remove the screws, shift the door, and re-drive. This provides about 1/8-inch of adjustment.
Shim behind the hinge leaf. Thin cardboard or sheet metal shimstock placed behind one leaf adjusts the door’s depth relative to the face frame.
Replace with European hinges. If the cabinet doors have face frames and the doors are full-overlay, semi-overlay, or inset style with appropriate clearances, you can retrofit European cup hinges. This requires drilling 35mm cup holes in the door with a Forstner bit, which is straightforward with a drill press or a steady hand and a 35mm bit chucked in a handheld drill. The payoff is full three-way adjustability going forward.
Final Check: Consistent Gaps Make the Difference
After all adjustments, step back and evaluate the full run of cabinet doors together. Individual door alignment matters less than the overall visual rhythm. Check:
- Are all doors at the same height?
- Are all gaps between adjacent doors roughly equal?
- Do all doors sit at the same depth (flush with each other)?
Minor inconsistencies between doors are often addressed by adjusting multiple doors rather than making one door perfect while its neighbors are misaligned. Work from the center of a bank of cabinets outward for the most consistent result.
Related Reading
- How to Install Under-Cabinet Lighting
- How to Paint Kitchen Cabinets
- How to Replace a Kitchen Faucet
- Identify Which Gap Is Wrong
Stand in front of the cabinet and look at the door with it closed. Note:
- Make the Hinge Adjustments
Open the door to access the hinges. You will typically have two hinges on standard cabinet doors; taller doors may have three.
- Fix Stripped Screw Holes Before Adjusting
If the door droops or shifts when you move it by hand — even before adjusting anything — the hinge screws may have stripped out of the door or cabinet. No amount of adjustment will hold if the fasteners are loose in their holes.
- Address Door Warpage
A warped door is a different problem from a misaligned hinge — it means the door itself has a twist or bow. Open the door and look along its face from an angle to check for any curvature.
- Shimming Hinge Plates
Shimming is a technique that gives you sub-millimeter control when the hinge's built-in adjustment has run out of range or when you need to correct a slight angle in how the door sits.
Free: 10-Point Home Maintenance Checklist
Prevent costly repairs with this seasonal checklist. Save hundreds every year by catching problems early.
Your checklist is ready!
Open Checklist →Something went wrong. View the checklist here.