How to Fix a Loose or Broken Bathroom Faucet Handle in 15 Minutes ($0–$25, No Plumber)
Loose bathroom faucet handle? Tighten the set screw under the decorative cap ($0 fix in 5 minutes). Still wobbly? Worn cartridge or stem — replacement cartridges cost $8–$25 and take 15 minutes to swap. Covers ball, cartridge, and ceramic disc faucet types.
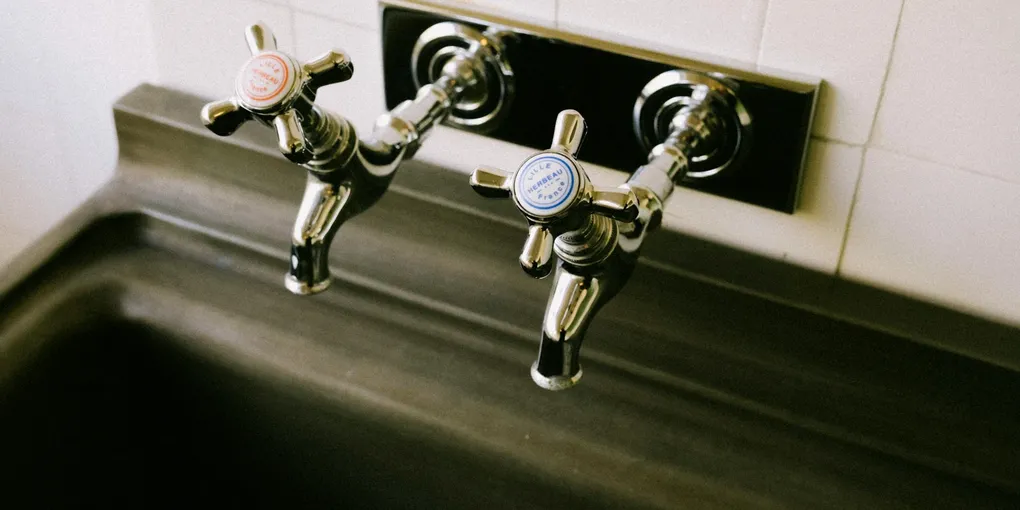
Fixing a loose bathroom faucet handle: (1) Look for a decorative cap on the handle — pry it off to expose the set screw underneath. (2) Tighten the set screw with a hex key (Allen wrench) or Phillips screwdriver. Most handles use a 1/8" or 3/32" hex. (3) If tightening doesn't hold, the stem or cartridge underneath may be worn — turn off the supply valves, remove the handle, and inspect. (4) For a broken handle: identify the faucet brand (often stamped on the faucet body) and buy a replacement — Delta, Moen, and Kohler all sell OEM handles for $10–$30. The repair takes 15–30 minutes and does not require a plumber.
Frequently Asked Questions
Why do faucet handles get loose over time?
Faucet handles loosen because of repeated use working on the set screw that holds the handle to the valve stem. Each time the handle is turned, small amounts of lateral force are applied to the set screw. Over months and years, the screw backs off slightly. Handles on separate hot and cold stems — common on older two-handle faucets — tend to loosen faster because users grip and pull the handle to turn the water on and off rather than rotating it cleanly. The cartridge or ball mechanism inside the faucet can also wear, which allows the handle to wobble on the stem rather than gripping it firmly.
What screw holds a faucet handle on?
Most faucet handles are held by a set screw — a small screw, typically with an Allen hex socket, that threads into the side of the handle collar and bites against a flat on the valve stem. The set screw is usually hidden under a decorative cap on the top of the handle, under the handle base plate, or accessible from the side of the handle near the base. On some faucets, particularly older ones, a threaded nut beneath the handle secures it to the stem rather than a set screw. A few modern faucet designs use a retaining clip or a push-fit mechanism.
How do I remove a faucet handle that has no visible screws?
Faucet handles without visible screws have a decorative cap concealing the screw. Pry the cap off with a small flathead screwdriver or a fingernail — it is typically a snap-fit plastic or chrome disc on the top of the handle. Beneath it you will find the set screw. Insert the correct Allen key size (commonly 3/32, 1/8, or 5/32 inch for bathroom faucets), turn counterclockwise to loosen, and lift the handle straight up off the stem. If the handle will not lift off after loosening the screw, the handle has corroded onto the stem and requires a handle puller tool.
How do I remove a faucet handle that is stuck on the stem?
A handle that will not pull off after the set screw is removed has either corroded to the stem or swelled slightly from moisture. Do not pry against the faucet body — this damages the body finish and can crack the sink deck. Use a faucet handle puller tool: the puller's jaws grip under the handle base and a center bolt presses against the stem, pulling the handle off with even pressure. A second method is to thread the set screw back in one turn, wedge two flathead screwdrivers under opposite sides of the handle base, and work the handle up evenly. Penetrating oil applied around the base the night before makes removal easier.
How do I replace a broken faucet handle?
To replace a handle, you need to match the faucet brand and series, or measure the valve stem to find a universal replacement. Remove the old handle and look for the faucet manufacturer's name or model number on the faucet body — it is often on the back side of the spout or on the underside of the faucet. Bring that information to a plumbing supply store or search online. If the faucet is discontinued or the brand is unknown, measure the stem: the diameter, the flat or D-shaped profile, and the length. Universal replacement handles with adjustable set screw positions fit many stems. Install by sliding the handle onto the stem, driving the set screw down until it contacts the stem flat, and snapping on the cap.
What is plumber's putty used for on a faucet handle repair?
Plumber's putty is not used on faucet handles themselves. It is used when reseating the faucet base plate — the decorative escutcheon plate that sits between the faucet body and the sink deck — if it is lifted during handle or faucet repair and the original seal was putty rather than silicone. If you see an oily gray material under the base plate when you remove the faucet for access, that was plumber's putty and you should replace it with fresh putty on reinstallation. Do not use plumber's putty on plastic or marble sink surfaces — it can stain. Use clear silicone on those materials instead.
How do I replace a cartridge in a single-handle bathroom faucet?
Cartridge replacement fixes handles that wobble, drip regardless of position, or have lost hot/cold temperature control. Steps: turn off the supply valves under the sink, remove the handle (set screw under decorative cap), note the cartridge orientation (photograph before removing), pull out the retaining clip or unscrew the retaining nut, then pull the cartridge straight up out of the valve body. Install the new cartridge in the same orientation — direction matters for temperature function. Moen, Delta, and Kohler cartridges are brand-specific; the replacement must match your exact model. Moen replaces cartridges free under their lifetime warranty — call their support line with the faucet model number before buying one.
How do I know if I need a new cartridge or just new O-rings?
O-ring failure: water drips from the base of the handle or around the spout when the faucet is fully closed — this is typically O-ring wear, not cartridge failure. O-rings on the cartridge stem are $2-5 and replaced without buying a new cartridge; pull the cartridge, note the O-ring sizes, and replace with matching rubber rings from a plumbing supply store. Cartridge failure: the handle is stiff or mushy to turn, temperature control has degraded (can't reach full hot at max rotation), or water won't fully stop even with the handle closed. In those cases, the cartridge valve mechanism is worn and the whole cartridge must be replaced.
Fixing a loose bathroom faucet handle: (1) Look for a decorative cap on the handle — pry it off to expose the set screw underneath. (2) Tighten the set screw with a hex key (Allen wrench) or Phillips screwdriver.
A loose faucet handle is an easy fix — the set screw just needs tightening. A stuck or broken handle requires a few more steps but remains a straightforward DIY repair. The critical step is locating the set screw and identifying whether the handle is loose on the stem or if the cartridge inside the faucet is the real problem.
What You Need
- Faucet handle puller removal tool — removes handles that have corroded onto the valve stem
- Faucet set screw Allen key set — metric and SAE hex keys for the small set screws used in faucets
- Universal faucet handle replacement — fits multiple stem types when original handle is discontinued
- Faucet handle repair kit — includes set screws, caps, and seat washers for common repairs
- Plumber’s putty — for reseating faucet base plates during repair
- Decorative faucet handle cap covers — replacement hot/cold index buttons and snap caps
Tightening a Loose Handle
The fix for a loose handle is almost always tightening the set screw.
- Shut off the water supply at the shutoff valves under the sink. This is not strictly necessary for a handle tightening, but it prevents surprises if the handle comes fully off the stem while you work.
- Find the decorative cap. Look at the top of the handle for a small disc — typically marked “H” or “C” or a manufacturer logo. Pry it off gently with a small flathead screwdriver. Set it aside.
- Locate the set screw beneath the cap. It will be an Allen hex socket screw, typically 3/32 to 5/32 inch.
- Select the correct Allen key. Try sizes until one fits snugly without wobbling in the socket. A worn-out set screw socket rounds easily if you use the wrong size.
- Turn clockwise to tighten. Do not overtighten — the screw should be firm but does not need to be wrenched down hard. Overtightening can strip the socket or crack a plastic handle collar.
- Replace the cap by pressing it down until it snaps.
- Turn the water back on and test the handle.
Removing a Handle That Is Stuck
If the set screw is loose or removed but the handle will not lift off, corrosion has bonded it to the stem.
Method 1 — Handle puller:
- Thread the set screw back in one turn to give the puller something to push against.
- Slide the handle puller jaws under the handle base.
- Turn the center bolt clockwise. It presses against the stem head, pulling the handle body upward with even force.
- The handle will release with a pop.
Method 2 — Penetrating oil:
- Apply penetrating oil (not WD-40 — a true penetrating oil like PB Blaster or Liquid Wrench) around the base of the handle where it meets the stem.
- Let it soak for several hours or overnight.
- Work the handle back and forth gently while pulling up. It will loosen progressively.
- Do not lever against the faucet body.
Replacing a Broken Handle
When the handle itself is cracked, the plastic collar has broken, or the set screw socket has stripped out, the handle needs replacement.
Identify the faucet:
- Look for the manufacturer name on the faucet body — often on the back of the spout base or beneath the escutcheon plate.
- Note the faucet series name or model number if visible.
- Search the manufacturer’s website for a replacement handle by model, or take the old handle to a plumbing supply store.
If the faucet is discontinued or unidentified:
- Measure the stem: note whether it is round, D-shaped, or has a flat on one side.
- Measure the stem diameter and length above the packing nut.
- A universal replacement handle with an adjustable set screw collar will fit most standard stems.
Install the new handle:
- Slide the handle onto the stem.
- Insert the set screw and tighten until it contacts the flat on the stem firmly.
- Turn the water on and test the handle through its full range of motion.
- Snap the decorative cap into place.
Related Reading
- How to Fix a Leaking Bathroom Faucet
- How to Replace a Bathroom Faucet
- How to Fix a Dripping Faucet
- How to Fix a Broken Faucet Aerator — clean or replace a clogged aerator to restore full water pressure while the faucet is disassembled
- Tightening a Loose Handle
The fix for a loose handle is almost always tightening the set screw.
- Removing a Handle That Is Stuck
If the set screw is loose or removed but the handle will not lift off, corrosion has bonded it to the stem.
- Replacing a Broken Handle
When the handle itself is cracked, the plastic collar has broken, or the set screw socket has stripped out, the handle needs replacement.
Free: 10-Point Home Maintenance Checklist
Prevent costly repairs with this seasonal checklist. Save hundreds every year by catching problems early.
Your checklist is ready!
Open Checklist →Something went wrong. View the checklist here.