How to Fix a Broken Faucet Aerator
Learn how to clean, unclog, or replace a faucet aerator to restore full water pressure and flow in under 30 minutes.
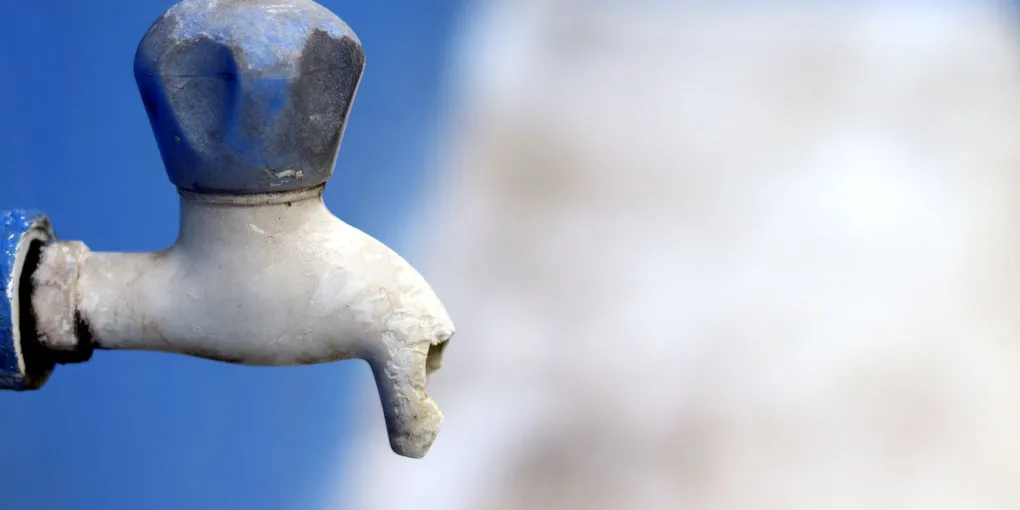
Fixing or replacing a faucet aerator: (1) Symptoms of a failing aerator: low water flow, splashing water, uneven stream, or white deposits visible at the faucet tip. (2) Remove the aerator: most unscrew counterclockwise by hand from the tip of the faucet. If stuck, wrap with tape and use pliers. (3) Soak in white vinegar for 30 minutes to dissolve mineral deposits. Use a toothbrush to scrub the screen and housing. Rinse thoroughly. (4) If the screen is torn or the housing is cracked: replace the aerator. Bring the old one to the hardware store or measure the thread diameter (most are 15/16 inch for standard faucets, 55/64 inch for smaller faucets). Replacements cost $3 to $8. (5) Reinstall by hand-tightening only — use pliers only if it leaks, and even then just a quarter-turn. Over-tightening cracks the aerator housing. Clean or replace aerators annually in hard water areas.
Frequently Asked Questions
What does a faucet aerator do?
A faucet aerator screws onto the tip of the faucet spout and mixes air into the water stream. This reduces water usage by up to 30% while maintaining the feel of strong water pressure. It also prevents splashing and can filter out small particles.
How do I know if my faucet aerator is clogged?
Signs of a clogged aerator include reduced water pressure from that faucet only, an uneven or splashing water stream, water spraying sideways, or visible white mineral deposits on the aerator screen. If all other faucets have normal pressure, the aerator is almost certainly the culprit.
Can I clean an aerator instead of replacing it?
Yes — most aerators can be cleaned and reused. Soak the components in white vinegar for 30 to 60 minutes to dissolve mineral deposits, then scrub with an old toothbrush. Replacement is only necessary if the screen is physically damaged, torn, or heavily corroded.
What size aerator do I need for my faucet?
Aerators come in male-threaded (for faucets with external threads) and female-threaded (for faucets with internal threads) versions, and in standard (15/16-inch), junior (13/16-inch), and Tom Thumb (3/4-inch) sizes. Use a ruler to measure your faucet tip diameter, or bring the old aerator to the hardware store for a match.
Do I need to turn off the water to replace a faucet aerator?
No. Replacing or cleaning a faucet aerator only requires removing the tip of the spout — no water supply valves need to be shut off. Just be sure the faucet handle is in the off position before you begin.
Why does my new aerator still have low pressure?
If water pressure is still low after installing a new aerator, the issue may be upstream: check the shut-off valves under the sink to confirm they are fully open, inspect the supply lines for kinks, and look for a flow restrictor inside the faucet body itself. A whole-home pressure issue could also be the cause.
Fixing or replacing a faucet aerator: (1) Symptoms of a failing aerator: low water flow, splashing water, uneven stream, or white deposits visible at the faucet tip. (2) Remove the aerator: most unscrew counterclockwise by hand from the tip of the faucet.
A faucet that trickles when it used to flow is almost always a clogged or damaged aerator. This tiny mesh screen at the tip of your spout collects mineral scale, sediment, and debris over time until water can barely get through. The fix costs almost nothing and takes less than 30 minutes — no plumber required.
What You Need
- Adjustable pliers or aerator removal tool — A rubber-grip aerator key or padded pliers prevents scratching the faucet finish while giving you enough torque to break a stubborn aerator loose.
- Replacement aerator set — Pick up an assorted kit that includes multiple sizes and thread types. These kits typically cost $8–$15 and will cover most standard kitchen and bathroom faucets.
- White vinegar
- Old toothbrush
- Small bowl or cup
- Plumber’s tape (Teflon tape)
- Flashlight (helpful for internal-thread faucets)
Step 1: Identify Your Aerator Type
Look at the tip of your faucet spout. If the threads are on the outside of the spout, you have an external-thread (male) faucet — the aerator screws on from the outside. If the threads are on the inside of the spout opening, you have an internal-thread (female) faucet — the aerator sits inside the tip.
Some modern faucets have a hidden aerator recessed deep inside the spout. These require a special cache aerator key, which is usually included with the faucet. Check your faucet manual if you cannot see any visible screen at the tip.
Step 2: Remove the Aerator
Place a piece of tape on the jaws of your pliers to avoid scratching the faucet finish. Grip the aerator housing firmly and turn counterclockwise (lefty-loosey). Most aerators hand-tighten and should break free with moderate plier pressure.
If the aerator is stuck from mineral buildup:
- Wrap a cloth soaked in white vinegar around the aerator tip.
- Let it sit for 20–30 minutes to soften the deposits.
- Try again with the pliers. Apply steady, even pressure rather than jerky force.
Once loose, finish unscrewing by hand and remove the aerator. Hold a small bowl beneath the faucet — a bit of water or debris may fall out.
Step 3: Disassemble and Inspect
Aerators have several small components. As you disassemble, lay each piece in order on a paper towel so you can reassemble correctly:
- Housing — the threaded outer shell
- Screen(s) — one or two mesh layers that filter the water
- Flow restrictor — a small plastic disc with a center hole (often colored)
- Washer/O-ring — creates the watertight seal
Inspect each part. White or yellow crusty buildup is mineral scale. Brown or green deposits are oxidation or sediment. A torn, collapsed, or missing screen requires replacement.
Step 4: Clean the Aerator Components
Place all the small parts in a cup or bowl and pour enough white vinegar to fully submerge them. Let them soak for 30–60 minutes.
After soaking, use an old toothbrush to scrub each component under running water. Work the brush gently across the mesh screens — don’t push debris further into the screen, brush it outward. Hold the screens up to a light source to confirm the mesh openings are clear.
Rinse all parts thoroughly with clean water.
Step 5: Reassemble or Replace
If cleaning worked: Reassemble in reverse order — washer/O-ring first, then flow restrictor, then screen(s), then housing. Confirm the washer is seated flat; a missing or misaligned washer causes leaks.
If the screen is damaged: Install a new aerator from your replacement kit. Match the thread type (male or female) and diameter. Wrap two turns of Teflon tape clockwise around the threads before screwing the new aerator on — this ensures a leak-free seal and makes future removal easier.
Step 6: Reinstall and Test
Screw the aerator back onto the faucet by hand, turning clockwise. Tighten with pliers just until snug — one-quarter turn past hand-tight is enough. Over-tightening can crack plastic housings or make the next removal very difficult.
Turn the faucet on and observe the stream. It should be even, consistent, and free of spray. Check around the aerator base for drips. If you see a drip, tighten the aerator slightly or check that the internal washer is properly seated.
Preventive Maintenance Tips
Mineral-heavy water (hard water) clogs aerators faster. In a hard-water area, plan to clean aerators once or twice a year. You can also install a whole-house water softener to reduce scale throughout your plumbing system, extending the life of faucets, showerheads, and water-using appliances.
Kitchen faucets clog faster than bathroom faucets because they handle more water volume. Add aerator cleaning to your annual home maintenance checklist.
Related Reading
- Identify Your Aerator Type
Look at the tip of your faucet spout. If the threads are on the outside of the spout, you have an external-thread (male) faucet — the aerator screws on from the outside.
- Remove the Aerator
Place a piece of tape on the jaws of your pliers to avoid scratching the faucet finish. Grip the aerator housing firmly and turn counterclockwise (lefty-loosey). Most aerators hand-tighten and should break free with moderate plier pressure.
- Disassemble and Inspect
Aerators have several small components. As you disassemble, lay each piece in order on a paper towel so you can reassemble correctly:
- Clean the Aerator Components
Place all the small parts in a cup or bowl and pour enough white vinegar to fully submerge them. Let them soak for 30–60 minutes.
- Reassemble or Replace
If cleaning worked: Reassemble in reverse order — washer/O-ring first, then flow restrictor, then screen(s), then housing. Confirm the washer is seated flat; a missing or misaligned washer causes leaks.
- Reinstall and Test
Screw the aerator back onto the faucet by hand, turning clockwise. Tighten with pliers just until snug — one-quarter turn past hand-tight is enough. Over-tightening can crack plastic housings or make the next removal very difficult.
Free: 10-Point Home Maintenance Checklist
Prevent costly repairs with this seasonal checklist. Save hundreds every year by catching problems early.
Your checklist is ready!
Open Checklist →Something went wrong. View the checklist here.