How to Clean an Oven: Self-Clean vs Manual vs Natural Methods
How to clean an oven — with and without the self-cleaning cycle, using store-bought cleaners, or with baking soda and vinegar. Includes racks, door glass, and the risks of self-clean that no one warns you about.
Clean an oven by coating the interior with a baking soda paste (1/2 cup baking soda + 3 tbsp water), letting it sit overnight, spraying with vinegar, and wiping out the foaming residue. For heavier buildup, use a commercial oven cleaner like Easy-Off Heavy Duty. Self-clean mode works but has real risks — overheats control boards, warps door seals, and releases carbon monoxide from burning food residue. Clean racks separately in a soap-filled tub overnight. Door glass needs a non-abrasive paste to avoid scratching. Plan 15 minutes of active work plus overnight soak time. Budget $5-$20 in supplies.
Frequently Asked Questions
What's the best way to clean an oven?
Baking soda paste overnight + vinegar spray in the morning works for 80% of ovens. For heavy grease and carbonized spills, commercial oven cleaner (Easy-Off Heavy Duty, Zep) is faster but harsher — ventilate well and wear gloves. Self-clean mode works but stresses the oven's electronics, and the 800°F+ temperatures can damage door seals and door glass over repeated use. Most oven manufacturers now recommend against using self-clean more than 2-3 times a year.
Is self-cleaning safe?
It works but has documented risks. Self-clean runs at 800-1000°F for 3-5 hours, which (1) can warp door seals and damage the door glass over time, (2) stresses the control board from extreme heat, (3) releases carbon monoxide and PTFE/Teflon-coating fumes from food residue burning, and (4) trips thermal fuses in some ovens. Use sparingly (2-3 times/year max), ventilate heavily, keep pets and kids out of the kitchen, and turn off self-clean if you smell unusual odors. If your oven is over 10 years old, skip self-clean and use manual methods.
Can I use oven cleaner in a self-cleaning oven?
Manufacturers say no. Commercial oven cleaners are designed for standard porcelain and may damage the special high-temperature coating inside self-cleaning ovens. That said, many homeowners use them without issue. If you do: apply sparingly, avoid the heating elements and door gasket, ventilate, and wipe residue thoroughly. The manufacturer-approved method is manual cleaning with baking soda paste only. Never use oven cleaner with the self-clean cycle running.
How do I clean oven door glass?
For the inside of the glass (where food splatters accumulate), use a paste of baking soda + water. Apply, let sit 10-15 minutes, wipe off with a microfiber cloth. For stubborn cooked-on spots, a [flat razor blade scraper](https://www.amazon.com/s?k=flat+razor+blade+scraper+glass&tag=fixupfirst-20) held at a 45-degree angle lifts spots without scratching. NEVER use an abrasive pad or steel wool — permanent scratches on oven door glass cost $150-$400 to replace. For between-glass buildup (dirt you can see but can't reach), the oven door usually disassembles — check the manual for instructions.
How often should I clean my oven?
Wipe spills as they happen (much easier before they carbonize). Full clean every 3-6 months or when you see significant buildup. Use self-clean mode 1-2 times a year maximum. Clean the racks every 6-12 months by soaking overnight in hot soapy water. Door glass: wipe inside monthly, full clean quarterly. If you bake or roast weekly, you're on the 3-month schedule; occasional users can stretch to 6-9 months.
Can I clean an oven with vinegar?
Yes, vinegar helps dissolve grease and react with baking soda to foam out residue. Spray directly after applying baking soda paste — the foaming reaction lifts stuck-on food. On its own, vinegar is not strong enough for heavy oven buildup. Combine with baking soda for the best DIY cleaning result. Unlike grout, oven interiors aren't damaged by acid — the porcelain enamel is acid-resistant.
How do I clean a gas oven differently from an electric oven?
Gas ovens have burner grates and a broiler drawer that electric ovens don't. Remove the grates and soak in hot soapy water for 15–30 minutes, then scrub with a stiff brush — the baked-on buildup comes off more easily than it looks. Check for clogged burner ports (small holes around the burner ring) and clear with a straightened paperclip if any ports aren't lighting. The oven cavity cleaning is the same as electric: baking soda paste overnight, vinegar spray, wipe out. For the broiler drawer at the bottom: remove and wash the broiler pan in the sink. Never use self-clean mode on most gas ovens — gas models are particularly susceptible to thermal overload of the gas valve components. Check your manual before ever using self-clean on a gas range.
How do I clean the oven door gasket without damaging it?
The door gasket (the braided fiberglass or rubber seal around the oven door frame) should be cleaned but never scrubbed hard. Use a damp cloth with mild dish soap and wipe the gasket gently — do not use abrasive cleaners, oven cleaner spray, or steel wool. The fibers can tear, reducing the seal. Also avoid applying oils, silicone sprays, or any product not rated for high-heat use — they can off-gas during baking. If the gasket is cracked, torn, or no longer making contact with the door frame, replace it. Replacement gaskets cost $15–$40 and clip or slip into a channel around the door frame. A compromised door gasket reduces oven efficiency and causes uneven baking — the oven loses heat and compensates by running longer cycles.
Clean an oven by coating the interior with a baking soda paste (1/2 cup baking soda + 3 tbsp water), letting it sit overnight, spraying with vinegar, and wiping out the foaming residue. For heavier buildup, use a commercial oven cleaner like Easy-Off Heavy Duty.
An oven that’s been neglected for 6-12 months doesn’t just look bad — it smokes every time you preheat (carbonized grease re-burning), transfers off-flavors to food, and becomes a fire risk as buildup gets thick enough to catch ignition temperatures. The fix takes 15 minutes of active work plus an overnight soak and $5-$20 in supplies. This guide covers the manual method that most manufacturers now recommend over self-clean, the racks-separate technique that actually works, and the door-glass trick that prevents scratches.
Tools and Supplies
- Baking soda — the foundation of DIY oven cleaning
- Distilled white vinegar — reacts with baking soda to lift residue
- Dish soap — for rack soak
- Microfiber cloth pack — heavy-duty cleaning set
- Rubber gloves — baking soda dries skin fast, commercial cleaners are caustic
- Flat razor blade scraper — for stuck-on door glass spots
- Plastic scraper — for scraping interior without scratching enamel
- Easy-Off Heavy Duty Oven Cleaner — if you want chemical fast-track
- Zep Oven Cleaner — alternative commercial cleaner
- Nylon scrub brushes — for rack scrubbing
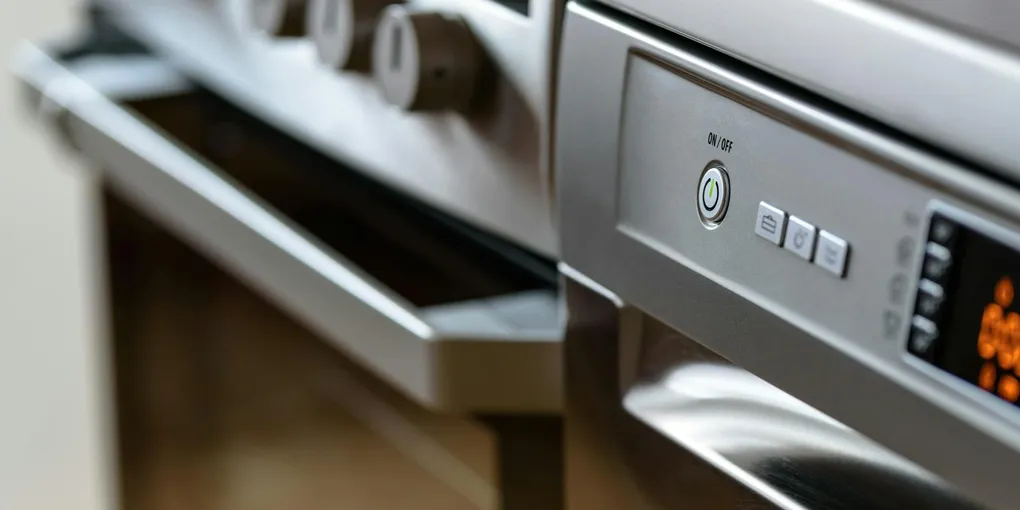
The Self-Clean Cycle: Mostly Avoid
Most modern ovens have a “Self Clean” or “AquaLift Clean” button. They work, but modern repair technicians almost universally advise against using them:
The real risks:
-
Control board failure — self-clean runs the oven at 800-1000°F for 3-5 hours. The extreme heat stresses the electronic control board, which sits at the back of the oven near the heating elements. Control boards cost $200-$500 and fail prematurely when exposed to repeated self-clean cycles.
-
Door seal damage — the rubber or metal gasket around the door wasn’t designed to sustain that heat for hours. Repeated self-clean shortens its life from 15+ years to 5-7.
-
Door glass cracks — the extreme heat gradient (inside 1000°F, outside room temp) stresses the glass. Not common, but happens on older ovens.
-
Thermal fuse blown — a safety fuse that trips at 600°F+ sometimes activates during self-clean, requiring replacement ($50-$150) before the oven will work again.
-
CO and fume release — carbonized food burns into carbon monoxide and various acrid fumes during self-clean. Run the range hood at max, open windows, and keep pets out of the kitchen (birds are especially sensitive — fumes have killed pet parrots).
-
PTFE/Teflon warnings — if anything non-stick-coated has been in contact with the oven interior, the coating can off-gas at self-clean temperatures.
When self-clean is OK:
- Once or twice a year maximum
- Newer ovens (under 5 years)
- Ventilate heavily
- Skip if any unusual odors develop
When to never use it:
- Oven is over 10 years old
- Control board has ever been replaced
- You cook with cast iron or heavy grease regularly (more residue = more smoke)
- You live in an apartment with smoke detectors very close to the kitchen
- Birds or cats in the home
For the rest: use manual cleaning methods. They’re safer for the oven and your lungs.
The Manual Method That Works
This is the now-standard approach most manufacturers prefer over self-clean.
Step 1: Remove Everything
Pull out racks, side guides, probe, any pizza stones, pans, and anything else inside. Place racks aside for separate cleaning.
Use a shop vac or dry paper towels to sweep out crumbs, charred bits, and food particles. Don’t use water yet — wet + crumbs = mud that smears.
Step 2: Apply Baking Soda Paste
Mix 1/2 cup baking soda with 3 tablespoons water to a spreadable paste. Adjust for consistency. For a whole oven, make a double batch.
Spread paste over all interior surfaces:
- Back wall
- Both side walls
- Oven floor
- Oven ceiling
- Interior of the door (not the heating elements, not the door gasket)
Focus thicker layers on stained or heavily soiled areas. Wear gloves — baking soda dries skin fast.
Avoid:
- Heating elements (top broiler, bottom element)
- The fan and cover in convection ovens
- The temperature probe or any sensors
- The door gasket/seal
Step 3: Let It Sit Overnight
The long dwell is what makes baking soda work. Leave the paste for 12-24 hours.
Don’t shortcut to 1-2 hours — the paste needs time to react with carbonized grease.
Step 4: Soak the Racks Separately
While the oven sits, soak the racks.
Method A — Bathtub soak:
- Line the bathtub with old towels (protects finish from rack bars)
- Fill with very hot water + 1/2 cup dish soap + 1/2 cup baking soda
- Submerge racks
- Soak 8-12 hours
Method B — Trash bag with ammonia:
- Put racks in a trash bag outside or in a ventilated area
- Pour 1/4 cup household ammonia in each bag, seal
- The fumes break down grease
- After 12 hours, open the bag OUTSIDE (ammonia fumes are strong)
- Wipe down with a damp cloth — most residue comes off
Method B is faster and uses less water but requires outdoor space and ventilation.
Step 5: Spray With Vinegar and Wipe
In the morning, fill a spray bottle with distilled vinegar. Spray all baking soda surfaces. The vinegar reacts with baking soda — foaming is normal and desirable; it lifts stuck-on residue.
Wait 5-10 minutes. Wipe everything out with a damp microfiber cloth, rinsing the cloth frequently. Use a plastic scraper or old credit card for stubborn spots.
Don’t use steel wool or abrasive pads on the oven interior — the porcelain enamel scratches and the scratches collect grease permanently.
Step 6: Rinse and Dry
Wipe everything one more time with a clean damp cloth (water only) to remove any baking soda or vinegar residue. Towel dry or leave the door open for 30 minutes to air dry.
Step 7: Clean the Door Glass
For the inside glass:
- Apply baking soda paste
- Wait 10-15 minutes
- Wipe with microfiber
- For stuck-on spots, use a flat razor blade scraper at 45 degrees (never 90 degrees — that scratches)
For the outside glass: regular glass cleaner + microfiber.
For between-glass dirt (visible through the glass): the oven door usually disassembles with 2-6 screws (check the manual). Not recommended unless you’re confident — it’s easy to misalign the glass on reassembly.
Step 8: Reinstall Racks
After overnight soak, most rack grease wipes off with a scrub pad. For stubborn spots, steel wool (only on racks — never the oven interior) handles it. Rinse thoroughly, dry completely before reinstalling.
Wet racks cause rust over time.
Commercial Oven Cleaner: The Fast-Track
If you don’t have time for overnight soak and your oven is filthy, commercial oven cleaner is the shortcut.
Easy-Off Heavy Duty (cold formula) — spray, wait 20-30 minutes, wipe. Works at room temperature.
Easy-Off Fume Free (gentler) — no harsh fumes but requires 2-4 hour dwell.
Zep Oven Cleaner — similar to Easy-Off Heavy Duty. Commercial-grade strength.
Application:
- Cover the floor in front of the oven with newspaper or plastic
- Apply cleaner liberally to all interior surfaces (gloves, ventilation, eye protection)
- Avoid heating elements and door gasket
- Follow label dwell time (usually 20 minutes for heavy duty)
- Wipe with damp cloth — it foams and runs, so wipe carefully
Cautions:
- Manufacturers of self-cleaning ovens say NOT to use commercial oven cleaner on the interior — the special coating can be damaged
- Never use during a self-clean cycle
- Ventilate heavily — fumes are strong
For non-self-cleaning or older ovens, commercial cleaners are acceptable and effective.
The Self-Cleaning Method (If You Must)
- Remove everything from the oven — racks, side guides, foil on oven floor
- Wipe out loose debris
- Run the exhaust hood on HIGH
- Open windows
- Keep pets and kids out of the kitchen for the duration
- Press Self-Clean (typically 3-5 hours)
- Lock the door (many ovens do this automatically)
- Do NOT open the door during the cycle
- Wait for it to finish AND cool to room temp (another 1-2 hours)
- Wipe out the ash residue with a damp cloth
The door will be locked until the oven cools. Trying to force it open can break the lock mechanism.
Between-Clean Prevention
The best oven cleaning is the one you don’t have to do. Habits:
Line the oven floor with a reusable mat — PTFE-free silicone oven mats ($10-$20) catch drips and clean in the dishwasher.
Wipe spills as they happen — fresh grease wipes in 30 seconds; burned grease takes 30 minutes of scrubbing.
Use a sheet pan under anything that bubbles over — pies, casseroles, lasagna. Saves the oven floor.
Don’t run the self-cleaning cycle as routine maintenance — it’s a wear event, not maintenance. Use for deep cleans only.
Run the range hood during cooking — vents grease and particles out instead of letting them settle in the oven.
When to Hire a Pro (or Replace)
Hire a pro oven cleaner if:
- Oven is filthy beyond what manual methods can handle
- You physically can’t do the overnight soak process
- You have a double oven or wall oven (harder access)
- You’re preparing a rental for sale or move-out
Cost: $75-$200 per oven for professional cleaning services.
Replace the oven if:
- Control board has failed twice
- Heating elements fail repeatedly
- Door glass cracked
- Interior enamel is chipping (nothing to clean)
- It’s 15+ years old and cleaning no longer restores appearance
Related Reading
- How to Clean a Dishwasher — kitchen appliance maintenance companion
- How to Clean a Garbage Disposal — the disposal in the sink next to the oven
- How to Clean a Washing Machine — the laundry-room version of the same cleaning routine
- How to Clean Grout — bathroom and backsplash equivalent
- How Long Do Home Appliances Last — when to replace vs clean
- Annual Home Maintenance Schedule — where oven cleaning fits in the year
- How to Fix a Gas Stove Igniter That Keeps Clicking — fix the clicking igniter while the oven is already apart for cleaning
- Kitchen Remodel Cost Breakdown — when cleaning isn’t enough and you want a refresh
- How to Fix a Broken Kitchen Exhaust Hood Filter — clean or replace range hood grease filters as part of your deep kitchen clean
- Remove racks and loose debris
Pull out the racks, side guides, and any other removable parts. Place them in a bathtub or large sink for separate cleaning. Use a shop vac or dry paper towels to remove loose crumbs, charred bits, and food particles from the oven floor. Don't skip this step — loose debris turns into mud when mixed with cleaner.
- Mix baking soda paste
In a bowl, mix 1/2 cup baking soda with 3 tablespoons water until you get a spreadable paste. Adjust consistency as needed — too thin and it drips, too thick and it won't spread. For a whole oven, you may need a double batch.
- Coat the interior
Using gloved hands or a sponge, spread the paste over all interior surfaces — back wall, sides, floor, ceiling, interior of the door (not the heating elements). Focus thicker layers on stained or heavily soiled areas. Avoid the heating elements and the fan cover if you have a convection oven.
- Let it sit overnight (or at least 12 hours)
The long dwell time is what makes baking soda work. Leave the paste on for 12-24 hours. Most ovens benefit from a full overnight application. Don't shortcut this to 1-2 hours — baking soda needs time to react with carbonized grease.
- Soak racks separately
Line a bathtub or utility sink with old towels (protects the tub from rack bars). Fill with very hot water + 1/2 cup dish soap + 1/2 cup baking soda. Submerge the racks. Let soak for 8-12 hours. Alternatively, wrap racks in trash bags with 1/4 cup ammonia poured in and seal — 12 hours and most residue wipes off.
- Spray with vinegar and wipe
In the morning, spray all baking soda surfaces with distilled white vinegar. The vinegar reacts with the baking soda and foams — this is normal and desirable, it lifts stuck residue. Wait 5-10 minutes. Wipe everything out with a damp microfiber cloth, rinsing the cloth often. Use a plastic scraper or credit card for stubborn spots.
- Clean the door glass
For the inside glass, apply baking soda paste, wait 10-15 minutes, wipe with microfiber. For stuck-on spots, use a razor blade scraper at 45 degrees. For the outside, use regular glass cleaner. For between-glass dirt (visible through the glass but unreachable), check the manual — most oven doors disassemble with a few screws. Not recommended unless you've done it before.
- Clean racks and reinstall
After overnight soak, most rack grease wipes off with a scrub pad. For stubborn spots, a [nylon scrub brush](https://www.amazon.com/s?k=heavy+duty+nylon+scrub+brush&tag=fixupfirst-20) or steel wool (only on racks, not the oven interior) handles it. Rinse thoroughly, dry, reinstall. Don't skip drying — wet racks can cause rust over time.
Free: 10-Point Home Maintenance Checklist
Prevent costly repairs with this seasonal checklist. Save hundreds every year by catching problems early.
Your checklist is ready!
Open Checklist →Something went wrong. View the checklist here.