Bathroom Exhaust Fan Installation Cost 2026: $150–$400 Installed
Bathroom exhaust fan installation costs $150–$400 for a standard replacement. New installation with wiring runs $200–$500. Combo units (fan + light + heat) cost $250–$600 installed.
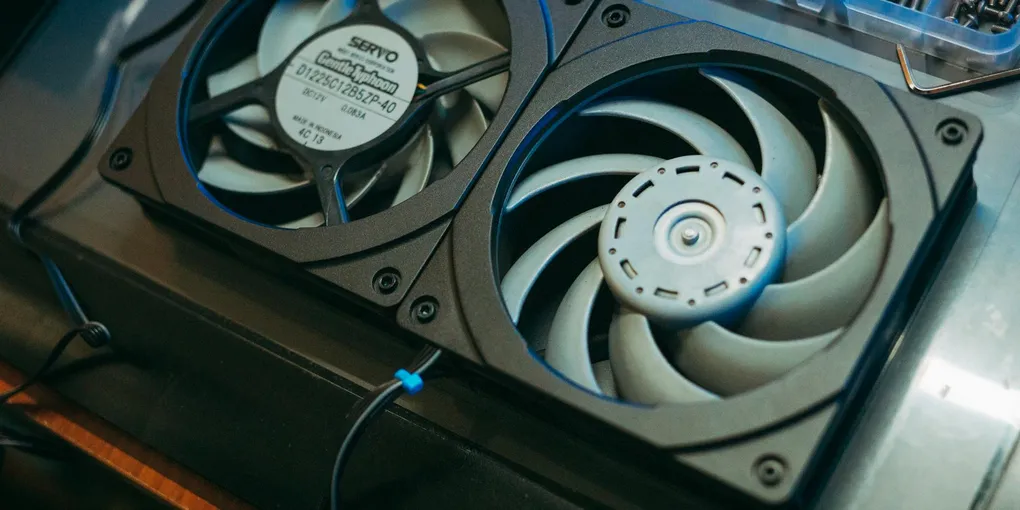
Bathroom exhaust fan installation costs $150–$400 for a standard replacement (same location, existing wiring and duct). New installation requiring duct routing costs $300–$700. Upgrading to a combination unit (fan + light + heat) or humidity-sensing fan runs $400–$900 installed. The exhaust fan unit itself costs $20–$300 depending on CFM rating, noise level, and features.
Frequently Asked Questions
How much does bathroom exhaust fan installation cost?
A standard exhaust fan replacement (same location, using existing duct and wiring) costs $150–$350 in labor from an electrician or handyman. New installation in a bathroom that lacks one requires duct routing to the exterior — adding $150–$300 for ductwork — totaling $300–$700. Upgrading to a combination fan+light+heat unit or a humidity-sensing fan runs $400–$900 installed. The fan unit adds $20–$300 depending on CFM and features.
Does a bathroom exhaust fan need to be vented outside?
Yes — always. Bathroom fans must vent to the exterior (through the roof, soffit, or exterior wall), never into the attic, wall cavity, or crawlspace. Venting into unconditioned spaces dumps warm, humid air there, causing mold, wood rot, and insulation damage within months. Some older homes have fans vented into the attic — this is an installation defect. If yours does this, rerouting the duct to the exterior is required and adds $150–$400 to the project.
What size exhaust fan do I need?
The standard rule: 1 CFM per square foot of bathroom floor area, minimum 50 CFM. An 8×10 bathroom (80 sq ft) needs an 80 CFM fan. HVI (Home Ventilating Institute) recommends higher capacity for jetted tubs (add 100 CFM), separate toilet rooms (add 50 CFM), and high-ceiling bathrooms. Most standard bathrooms use 50–110 CFM fans. Bigger is better for noise and moisture control — choose the highest CFM that fits the space and budget.
What is a sone rating for exhaust fans?
Sones measure fan noise (1 sone = a quiet refrigerator hum). Below 1.0 sone is whisper-quiet (you may forget it's on); 1–2 sones is quiet; 2–3 sones is noticeable but not disruptive; 4+ sones is the noisy builder-grade hum most people associate with bathroom fans. When replacing a loud fan, choose a model rated ≤1.5 sones. The Panasonic WhisperCeiling series (0.3 sones) is the gold standard for silent operation.
Can I replace a bathroom exhaust fan myself?
If the new fan matches the existing duct opening size and you're comfortable working in an attic or from a ceiling, yes — a replacement is a DIY project. Turn off the breaker, remove the old fan housing, connect the new fan's wiring (same connections), and attach to the existing duct. If the new fan is a different size than the old duct, or if you're adding a new fan where none existed, the duct routing and any wiring changes require a licensed electrician and may require a permit.
How much does it cost to add an exhaust fan to a bathroom without one?
Adding an exhaust fan to a bathroom with no existing ventilation costs $300–$700 total. This includes: the fan unit ($30–$150), duct materials ($50–$150), and labor to cut the ceiling opening, route duct to the exterior, and connect wiring. Routing duct through a finished ceiling/wall adds cost vs. open attic access. An electrician may be needed if the circuit capacity needs to be assessed or a new switch circuit is required.
Bathroom exhaust fan installation costs $150–$550 hired out, or $40–$120 in materials if you DIY. A straightforward swap (same location, existing wiring) takes 1–2 hours. New installation with ductwork to the exterior runs $200–$550. Size the fan to 1 CFM per square foot of bathroom — a 50 sq ft bathroom needs 50 CFM minimum. For bathrooms with showers and no windows, upgrade to 110+ CFM.
A properly installed bathroom exhaust fan prevents the two biggest sources of bathroom damage: mold and paint failure. Most builder-grade fans installed in homes built before 2010 are undersized, underpowered, and vented incorrectly. Replacement is one of the highest-ROI bathroom upgrades available.
Exhaust Fan Installation Cost by Scenario
| Scenario | Total Cost |
|---|---|
| Standard replacement (same location, same duct) | $150–$350 |
| Silent fan upgrade (Panasonic, Delta Breez) | $250–$500 |
| Humidity-sensing fan installation | $300–$600 |
| Combination fan + light + heat | $400–$900 |
| New installation (duct routing required) | $300–$700 |
| Attic duct rerouting (incorrectly vented to attic) | $200–$500 |
Fan Unit Cost by Type
| Type | CFM | Sones | Unit Cost |
|---|---|---|---|
| Basic builder-grade | 50–70 | 3–4 | $20–$50 |
| Standard upgrade | 80–110 | 1.5–2.5 | $40–$100 |
| Quiet upgrade (Panasonic WhisperCeiling) | 80–150 | 0.3–0.8 | $80–$160 |
| Humidity-sensing (Delta Breez, Broan QTXE) | 80–110 | 1.0–1.5 | $90–$200 |
| Combination fan + light + heat | 70–110 | 1.5–2.5 | $100–$300 |
The Duct Problem: Why Replacement Often Costs More Than Expected
50% of older bathroom fans have one or more of these duct issues:
-
Vented into the attic (not exterior) — a major defect. Humid air dumps directly into insulation, causing mold and wood rot. Requires rerouting to exterior exit: $200–$500.
-
3-inch flex duct — undersized and restrictive. 4-inch rigid duct delivers 30–40% more airflow at the same fan speed. Replace during any fan work: $50–$150 in materials.
-
No exterior damper — allows cold air and insects to enter in winter. Replace or add a damper-equipped cap: $15–$40.
-
Duct joints taped with cloth tape — cloth duct tape delaminates in attic heat within 2–3 years. All joints should be sealed with foil HVAC tape or mastic.
Any of these issues, found during a fan replacement, adds cost. Get a visual assessment of the duct path before getting quotes.
Humidity-Sensing vs. Standard Fan: Is It Worth It?
A humidity-sensing fan ($90–$200 unit, $50–$100 more than a standard fan) automatically turns on when humidity rises during a shower and turns off when humidity drops back to baseline — typically 20–30 minutes after you leave.
The benefit: most people forget to run fans long enough. Proper moisture removal takes 15–20 minutes after a shower. A humidity sensor ensures the fan runs exactly as long as needed, every time, without relying on anyone to flip a switch.
Payback: prevents one moderate mold remediation event ($1,000–$3,000) over the life of the bathroom. Worth the $100 premium in virtually any bathroom.
Recommended: Delta Breez Slim Series (70–80 CFM, 0.7 sones, built-in humidity sensor, $100–$130). Quietest sensor fan on the market at the price.
Regional Cost Variations
Labor rates for electricians and handymen drive most of the regional price differences:
| Region | Standard Replacement | New Installation (with duct) |
|---|---|---|
| Northeast (NY, MA, NJ) | $225–$450 | $450–$900 |
| Mid-Atlantic (DC, MD, VA) | $200–$400 | $400–$800 |
| Southeast (FL, GA, TX) | $150–$300 | $300–$600 |
| Midwest | $150–$325 | $300–$650 |
| Pacific (CA, WA, OR) | $200–$450 | $400–$850 |
Higher-humidity climates (Southeast, Pacific Northwest) see more duct problems from improper installation — more experienced contractors and more competitive pricing than lower-demand markets.
Brand Comparison: Top Bathroom Exhaust Fan Brands
| Brand | Best Model | CFM | Sones | Unit Price | Strength |
|---|---|---|---|---|---|
| Panasonic | WhisperCeiling FV-0811VFL | 80–110 | 0.3 | $80–$160 | Quietest on the market |
| Delta Breez | Slim Series VFB25AEH | 80 | 0.7 | $100–$130 | Best humidity-sensing value |
| Broan-NuTone | QTXE Series | 110 | 1.0 | $60–$100 | Widely available, solid reliability |
| Broan 688 | Builder-grade | 50 | 4.0 | $20–$35 | Most common builder-grade unit |
| Hunter | Sona Series | 70–110 | 1.0–1.5 | $50–$90 | Good mid-range option |
| Air King | BFQ90 | 90 | 1.5 | $55–$85 | Energy Star certified, quiet |
The upgrade that matters most: replacing any 4.0-sone builder-grade fan with a Panasonic WhisperCeiling (0.3 sones) or Delta Breez (0.7 sones) is the single most noticeable bathroom comfort upgrade available for $100–$150. The fan will actually be used because it’s not obnoxious.
CFM Selection Guide by Bathroom Size
| Bathroom Size | Recommended CFM | Suggested Model |
|---|---|---|
| Small (under 50 sq ft) | 50–60 CFM | Panasonic FV-0510VS |
| Standard (50–100 sq ft) | 80–110 CFM | Panasonic FV-0811VFL |
| Large (100–150 sq ft) | 110–150 CFM | Broan QTXE Series |
| Master bath (150+ sq ft) | 150–200+ CFM | Two units or Broan 793 |
| Bathroom with jetted tub | Add 100 CFM | Panasonic FV-15VQ5 |
Add the toilet room CFM (50) and jetted tub CFM (100) to the base calculation for combination bathrooms.
Questions to Ask Before Hiring
- Will you check where the existing duct terminates? — any contractor replacing a fan should confirm it exits to the exterior, not the attic; this should be part of every assessment
- Will you replace flex duct with rigid? — ask specifically; rigid 4-inch duct improves airflow 30–40% over flex
- Is this an electrical permit job in my jurisdiction? — new fan installations or circuit modifications typically require permits
- What fan brand and model are you installing? — insist on knowing; some contractors substitute cheap builder-grade units on jobs quoted for quality upgrades
- Do you test it before leaving? — a tissue test (held near the grille) and exterior cap check should be done before the contractor considers the job complete
DIY supplies (if you tackle it yourself)
Related Reading
- How to Install a Bathroom Exhaust Fan
- How to Replace a Bathroom Exhaust Fan
- How to Fix a Broken Bathroom Exhaust Fan — diagnose and repair a fan that has stopped working or runs noisy before replacing it
- How to Fix a Noisy Bathroom Exhaust Fan
- Mold Remediation Cost
- Bathroom Remodel Cost
- Electrician Cost
- How Much Does a Handyman Cost?
- How to Fix a Broken Exhaust Fan — repair a dead or noisy fan before budgeting for full replacement
- Choose the right CFM and sone rating before buying anything
Calculate your required CFM: measure bathroom floor area in square feet — that's your minimum CFM (50 CFM minimum for any bathroom). For jetted tubs, add 100 CFM. For separated toilet rooms, add 50 CFM. Check HVI's certified products directory for tested CFM and sone ratings — manufacturer labels are not always accurate. For a noise upgrade, filter by ≤1.5 sones. Panasonic, Delta Breez, and Broan are the most reliable brands. Avoid uncertified no-name units — they typically underperform advertised CFM.
- Check the duct exit point before buying — it determines everything
Before purchasing, go into the attic (or wall cavity) to see where the existing duct exits. Note: duct diameter (3-inch vs 4-inch — 4-inch is preferred), duct material (rigid vs flex — rigid is always better), and where it terminates (exterior wall cap, roof jack, or incorrectly into the attic). If it terminates in the attic, you must reroute it regardless of what fan you buy. If the duct is 3-inch flex (common in older installs), budget to replace it with 4-inch rigid during the fan swap — this alone often improves airflow 30–40%.
- Understand the four upgrade categories and price them accurately
Category 1: Basic replacement fan ($20–$80 for unit, $150–$300 labor) — same CFM, same duct, same switch. Category 2: Silent upgrade (Panasonic WhisperCeiling FV-0811VFL, $80–$150 unit) — higher sones pay for themselves in daily livability. Category 3: Humidity-sensing fan (Delta Breez Slim, Broan QTXE Series, $90–$200) — turns on automatically when humidity rises, turns off when it drops below threshold. Category 4: Combination unit (fan + light + heat lamp, $100–$300) — ideal for cold-climate bathrooms. Each category step up adds $50–$150 in unit cost but the labor is the same.
- Turn off the breaker — not just the switch — before any work
Bathroom fans are often wired to the same circuit as the bathroom outlet (GFI circuit) or on a separate switch circuit. The wall switch disconnects the fan but leaves the supply wire in the fan housing energized. Turn off the circuit breaker and confirm dead with a non-contact voltage tester before touching any wiring. Some fans have a light on the same circuit as the fan — if so, both go dead when the breaker trips. In older homes, bathroom fans may be on an unsweathed wire — if you see cloth-insulated wiring, call an electrician instead of proceeding.
- Verify the duct is fully connected end-to-end after installation
The most common fan installation failure: the duct connection at the exterior cap or roof jack is loose. After installing the new fan, tape all duct joints with foil HVAC tape (not duct tape — cloth duct tape fails in attic temperatures within 2 years). Test by turning the fan on and holding a piece of tissue or thin plastic near the grille — it should be pulled firmly against the grille. Then check the exterior cap to confirm air is blowing out. A disconnected duct joint in the attic will silently dump bathroom humidity into the insulation for years before mold damage is discovered.
Free: 10-Point Home Maintenance Checklist
Prevent costly repairs with this seasonal checklist. Save hundreds every year by catching problems early.
Your checklist is ready!
Open Checklist →Something went wrong. View the checklist here.