How to Replace a Garbage Disposal: A Complete DIY Guide
Replace a garbage disposal in under 2 hours — step-by-step DIY guide covering mounting assembly, electrical, drain connections, dishwasher hookup, and leak testing.
Replacing a garbage disposal takes 1–2 hours and requires basic tools plus the new disposal. Shut off power at the breaker, disconnect the drain and dishwasher line, twist off the old disposal, attach the new mounting ring if the brand differs, wire the new unit (black-to-black, white-to-white, green to ground), mount it with a 1/4 turn clockwise, reconnect drain and dishwasher line, and test. Most homeowners can finish in one afternoon.
Frequently Asked Questions
Do I need to replace the mounting assembly when replacing a garbage disposal?
It depends on the brand. InSinkErator uses a proprietary 3-bolt mounting ring that works across most of their models — you can usually keep the existing ring when replacing one InSinkErator with another. Waste King, Moen, and GE use a different mounting style. If you're switching brands, you must replace the mounting ring, which means pulling the old one out of the sink. If you're replacing an InSinkErator with an InSinkErator, the existing ring saves you 20-30 minutes.
What size garbage disposal should I buy?
1/3 HP: apartments, light use, 1-2 people. 1/2 HP: most homeowner use, small families. 3/4 HP: standard family use, standard pick for remodels. 1 HP: large households, heavy use, well water. Most American homes benefit from a 3/4 HP unit — it handles vegetables, chicken bones, and fruit pits without jamming. 1/2 HP is the minimum for households with a dishwasher (the disposal doubles as the dishwasher's drain path).
How long do garbage disposals last?
Entry-level ($80-$130) disposals last 5-8 years. Mid-range ($150-$250) last 8-12 years. Premium ($300-$500) last 10-15 years. The biggest failure mode is rust — cheap disposals have painted steel grinding chambers that corrode; premium disposals have stainless steel. Signs you need to replace: persistent leaks from the disposal body (not the connections), frequent jams, constant tripping of the reset button, or a burnt motor smell.
Do I need to be an electrician to wire a garbage disposal?
No — disposal wiring is one of the simplest electrical connections in the kitchen. Most disposals come with a power cord that plugs into a standard outlet under the sink. Hardwired installations have three wires: black (hot), white (neutral), and green or bare (ground). Always turn off the breaker before wiring. If you don't know which breaker feeds the disposal, use a circuit tester.
How do I connect the dishwasher drain line to a new disposal?
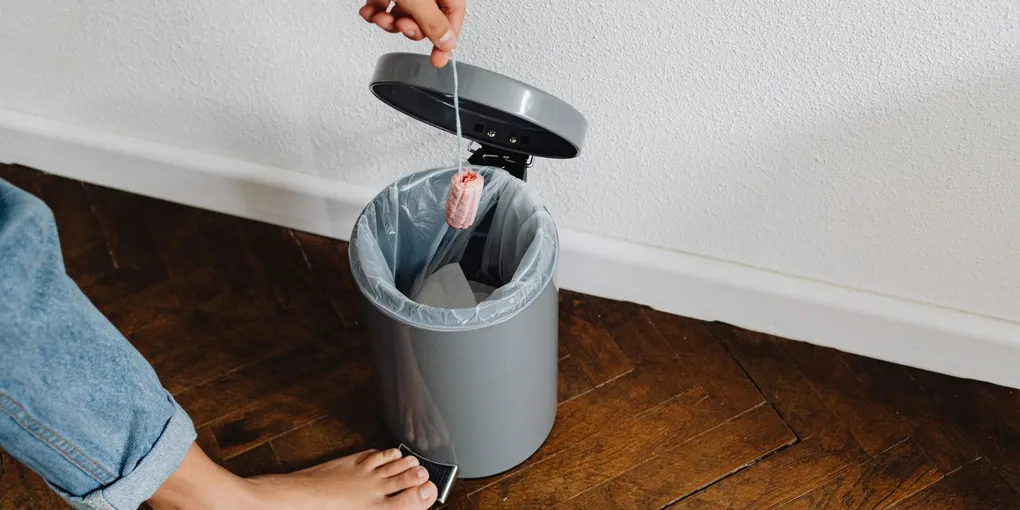
New disposals ship with a plugged dishwasher inlet — a plastic knockout that seals the inlet. If you have a dishwasher, remove the knockout before installing the disposal: insert a screwdriver into the inlet, tap it with a hammer until the plug falls out, then fish the loose plug out of the disposal with pliers. Connect the dishwasher drain hose to the inlet with a hose clamp. If you skip the knockout, the disposal floods when the dishwasher drains.
Replacing a garbage disposal takes 1–2 hours and requires basic tools plus the new disposal.
A garbage disposal replacement is one of the easier DIY plumbing projects in a house. The whole job — old unit out, new unit in, drain reconnected, dishwasher tied back in — takes most homeowners 1 to 2 hours and saves $150 to $400 in plumber labor.
This guide covers the full replacement, with attention to the things that trip up first-timers: the mounting ring decision, the dishwasher knockout, and the leak-test that you must not skip.
When to Replace (vs. Repair)
Replace if:
- Water leaks from the disposal body itself (not a connection)
- The unit hums but doesn’t grind (jammed beyond self-help)
- The reset button trips constantly
- Burning smell during operation
- Grinding noises, even when empty
- Unit is 10+ years old and anything goes wrong
- Rust visible on the outside of the housing
Repair if:
- Simple jam (fix with the supplied hex wrench or see our how to fix a stuck garbage disposal guide)
- Leak from a P-trap or dishwasher connection (not the disposal)
- Slow drain (likely a clog, not the disposal)
- Won’t turn on (could be the wall switch — test the breaker and wiring first)
See our how to fix a garbage disposal guide for the full repair path.
Picking the Right New Disposal
Horsepower:
- 1/3 HP ($60–$100): too weak for most family kitchens
- 1/2 HP ($90–$150): entry tier, OK for light use
- 3/4 HP ($150–$250): the sweet spot for most homes — handles vegetables, bones, and pits without drama
- 1 HP ($250–$450): large households, heavy cooking, well water
Grinding chamber:
- Galvanized steel: cheap, rusts in 5-7 years
- Stainless steel: premium, lasts 10-15 years
- Buy stainless unless the unit is for a rental
Sound insulation:
- Basic units: loud (80+ dB)
- Sound-reducing (SoundSeal, QuietCollar): noticeably quieter (60-70 dB)
- Most premium tier
Continuous vs. batch feed:
- Continuous feed (wall switch): standard, used in 95% of American kitchens
- Batch feed: activated by a cover; safer for households with kids but slower to use
Recommended picks by budget:
- Under $150: Waste King L-2600 Legend Series 1/2 HP — good entry unit
- $150–$250: InSinkErator Badger 5XP 3/4 HP — most popular homeowner pick
- $250–$400: InSinkErator Evolution Essential 3/4 HP — quieter, stainless steel chamber
- Premium: InSinkErator Evolution Excel 1 HP — top-tier sound reduction and power
Tools and Materials
- New garbage disposal (with all included hardware)
- Bucket (for draining water during disconnect)
- Flashlight or headlamp
- Screwdriver (Phillips and flathead)
- Channel-lock pliers
- Adjustable wrench
- Hammer
- Plumber’s putty (some disposals ship without)
- Stainless steel hose clamp for dishwasher line (buy a fresh one)
- Rags
- Circuit tester (to verify power is off)
- Optional: disposal wrench (hex shape, often included with new unit)
Cordless drill not required. See our best cordless drills for homeowners roundup if you don’t have one yet.
The Brand-Compatibility Decision
The single biggest time-saver: keeping the existing mounting ring if possible.
InSinkErator to InSinkErator: Most InSinkErator models (Badger, Evolution, Garbage) use the same 3-bolt mounting system. If you’re staying in the InSinkErator family, the old ring stays and you save 30-40 minutes.
InSinkErator to anything else: Waste King, Moen, KitchenAid, and GE all use different mounting systems. You must replace the sink flange and ring. This adds 20-30 minutes and requires removing the old plumber’s putty (which is more work than it sounds if the original install used too much).
Anything to InSinkErator: Same story — replace the ring.
Takeaway: If your old disposal is an InSinkErator and working fine other than end-of-life, buy another InSinkErator. You’ll save time. If you hate the noise, upgrade to the Evolution Essential or Excel — same mounting, much quieter.
Step-by-Step Walkthrough
Step 1: Cut Power (Really)
At the breaker panel, switch off the breaker labeled “disposal” or “kitchen.” If you’re not sure, flip off the kitchen circuit. Test that power is off by flipping the wall switch — the old disposal should not run.
Plug-in disposals should also be unplugged. Hardwired disposals still have live wires until the breaker is off.
Step 2: Clear the Cabinet
Empty everything from the under-sink cabinet. Lay down a towel or plastic sheet to catch drips. Position a bucket under the disposal.
Step 3: Disconnect the Drain
Loosen the hose clamp on the dishwasher drain hose (if present) and pull the hose off the disposal’s inlet fitting. Water will drip — the bucket catches it.
Loosen the slip nut connecting the disposal’s discharge tube to the P-trap. The discharge tube either stays with the disposal or can be unbolted from the disposal body (two bolts, depending on brand).
Step 4: Disconnect Electrical
For plug-in disposals: Unplug from the outlet.
For hardwired disposals: Unscrew the plastic cover plate on the bottom of the disposal. Pull out the wires inside. Disconnect black, white, and green/bare. Unscrew the strain relief where the cable enters the disposal and pull the cable free.
Cap the house wires with wire nuts until you’re ready to connect the new unit.
Step 5: Remove the Old Disposal
Support the disposal’s weight with one hand. With the other, stick the disposal wrench (or a screwdriver) into one of the mounting lugs on the ring above the disposal. Turn counterclockwise about 1/4 turn. The disposal drops free from the mounting ring.
If the disposal is stuck: Years of grime can fuse the mounting. Tap the ring gently with a rubber mallet or a block of wood. Avoid sharp strikes.
Step 6: Decide on the Mounting Ring
Inspect the new disposal’s mounting system.
- Same as existing: Skip to Step 9 (mounting the new disposal).
- Different: Continue to Step 7.
Step 7: Remove the Old Mounting Ring (Only If Switching Brands)
From below, loosen the three bolts on the old mounting ring. Once loose, the ring and backup flange drop off.
From above (inside the sink), push up on the sink flange. If it doesn’t come free, score the old plumber’s putty with a utility knife. Push again.
With the flange out, use a putty knife to scrape off all old putty from the sink’s drain hole. Clean the surface with denatured alcohol.
Step 8: Install the New Mounting Ring
Apply a rope of plumber’s putty around the underside of the new sink flange, about 1/4 inch thick. Or use the supplied gasket if the disposal comes with one.
From above, press the flange down into the sink drain hole. From below, slide on:
- Rubber gasket (wedge-shaped, seats under the sink)
- Backup flange (metal ring)
- Mounting ring
- Snap ring (C-clip that holds everything on the flange)
Tighten the three mounting screws evenly in a crisscross pattern until snug. The flange should sit flush in the sink with putty slightly squeezing out — wipe excess.
Step 9: Remove the Dishwasher Knockout
Lay the new disposal on its side. Look inside the dishwasher inlet (usually labeled). You’ll see a plastic plug blocking it.
Insert a flathead screwdriver into the inlet. Tap the end of the screwdriver with a hammer until the plug breaks loose and falls inside the disposal. Tilt the disposal to let the loose plug fall out — or fish it out with pliers.
Skipping this step traps dishwasher drain water behind the plug. The first time you run the dishwasher, water floods out of the disposal vent.
Step 10: Wire the New Disposal
For plug-in: Attach the supplied power cord per the disposal’s instructions (black to brass screw, white to silver screw, green to green ground). Secure the cord with the strain relief clamp. Replace the cover plate.
For hardwired: Thread the house cable through the strain relief on the disposal. Connect black-to-black, white-to-white, and green/bare to the green grounding screw. Tighten each wire nut. Tug-test each connection (a loose wire nut causes arcing). Replace the cover plate.
Step 11: Mount the Disposal
Lift the disposal up to the mounting ring. Align the three mounting lugs with the three slots on the ring. Twist clockwise 1/4 turn with firm pressure. Listen for the click that confirms it’s locked.
Hang a spring scale on the disposal body — if you have one — to confirm the mount is solid. A properly mounted disposal doesn’t wobble when you push it side to side.
Step 12: Reconnect the Drain
Attach the discharge tube to the disposal per the instructions. Some disposals have a pre-attached tube; others use a two-bolt flange connection.
Align the tube with the P-trap. If it doesn’t line up perfectly (common when switching disposal heights), you may need a new extension piece ($5 at any home center) or a flexible P-trap ($15).
Hand-tighten the slip nuts, then 1/4 turn with channel-locks.
Step 13: Reconnect the Dishwasher Hose
Push the dishwasher drain hose onto the disposal’s dishwasher inlet. Secure with a new stainless steel hose clamp — worm-drive style. Tighten with a screwdriver until the clamp grips firmly.
Run the dishwasher hose in a high loop — secured to the underside of the countertop at the highest point under the sink. This prevents sink drain water from siphoning back into the dishwasher.
Step 14: Restore Power and Test
Turn the breaker back on. Verify the disposal outlet is powered (for plug-in units) or the wall switch is functional.
Run cold water into the sink. Flip the wall switch — the disposal should start immediately and run smoothly. Listen for:
- Smooth motor sound (no grinding or knocking)
- Water flowing freely through the disposal
- No vibration in the sink
Shut off the disposal. Run water for another 30 seconds to flush the drain.
Step 15: Leak Test (Don’t Skip)
Plug the sink drain. Fill one basin to about 2 inches below the overflow. Pull the plug. While the water drains, watch every connection for drips:
- Sink flange around the disposal
- Discharge tube to disposal connection
- P-trap slip nuts
- Dishwasher hose clamp
- Supply line to disposal (if hardwired cable through the knockout — check for water sneaking through)
Come back in 10 minutes and check every connection again with a dry paper towel. Slow leaks show up as damp marks.
Common Mistakes
- Forgetting the dishwasher knockout — dishwasher floods on first run.
- Using too much plumber’s putty — excess squeezes into the disposal and fouls the grinder.
- Reusing the old hose clamp — they rust and fail within a year.
- Over-tightening slip nuts — crushes the washer, leaks later.
- Skipping the leak test — a slow leak destroys cabinet bottoms.
- Wiring without the breaker off — electrical burn risk.
- Not removing the loose knockout plug from inside the disposal — jams the blades.
Disposal Maintenance
To get the longest life out of a new disposal:
- Run cold water during and after use (solidifies grease for grinding vs. melting into drains)
- Never pour grease or oil down the disposal
- Grind ice cubes monthly — cleans the grinding chamber
- Citrus peels weekly — deodorizes
- Use the reset button — don’t force a jammed motor
Common things that shouldn’t go in:
- Coffee grounds (clog drains)
- Egg shells (membrane wraps around blades)
- Fibrous vegetables (celery, corn husks, artichokes)
- Pasta and rice (swells and clogs)
- Bones (small bones OK, large bones damage blades)
- Anything non-organic (glass, metal, paper)
When to Call a Plumber
- No existing outlet under the sink (requires electrical work)
- Sink flange leaks after installation (could be a damaged sink drain)
- Drain slope is wrong (requires wall plumbing modification)
- Electrical panel issues discovered during install
- You don’t feel comfortable with any step
Related Reading
- How to Clean a Garbage Disposal — maintain your new disposal so it lasts 10+ years
- How to fix a garbage disposal
- How to fix a stuck garbage disposal
- How to install a kitchen sink
- How to replace a kitchen faucet
- How to install a dishwasher
- How to unclog a drain without chemicals
- Garbage Disposal Installation Cost — what a plumber charges if you’d rather not DIY
- How to Fix a Kitchen Sink Sprayer — fix the sprayer while the cabinet is already open
- How to Remove a Stripped Screw — extract stripped mounting screws before they stall the installation
The Bottom Line
Replacing a garbage disposal is one of the most approachable DIY plumbing projects — 1 to 2 hours, $100–$400 in material (the disposal itself), and you save $150–$400 in plumber labor. The keys are: always cut power at the breaker, keep the mounting ring if you’re staying in the same brand family, remove the dishwasher knockout before installing, and leak-test every connection before calling it done. Follow those steps and you’ll have a working, leak-free disposal that runs smoothly for the next 8–15 years.
- Turn off power at the breaker
Find the breaker that powers the disposal and switch it off. Verify power is off by flipping the wall switch that controls the disposal — the disposal should not run. If unsure which breaker, use a plug-in circuit tester at the disposal outlet or turn off the main breaker. Never trust just the wall switch.
- Clear the cabinet and disconnect the drain
Empty the under-sink cabinet. Place a bucket under the disposal. Disconnect the dishwasher drain hose from the disposal's inlet fitting (loosen the hose clamp). Disconnect the drain pipe from the disposal's outlet (slip nut or clip). Disconnect the trap arm from the wall stub.
- Disconnect the power
For plug-in disposals: unplug from the outlet. For hardwired units: unscrew the electrical cover plate on the bottom of the disposal, disconnect the three wires (black, white, green/bare), and remove the cable from the disposal body. Cap the ends of the house wires with wire nuts until you're ready to connect the new unit.
- Twist off the old disposal
Support the disposal with one hand (it weighs 8-15 lbs). With the other hand, insert a screwdriver or disposal wrench into one of the lugs on the mounting ring. Turn counterclockwise 1/4 turn — the disposal drops free from the mounting ring. Set it aside.
- Decide whether to replace the mounting ring
Check the new disposal's mounting system. If it's compatible with your existing ring (InSinkErator-to-InSinkErator, for example), leave the existing ring in place. If not, you must remove the old ring: loosen the three bolts holding the sink flange, pry the old putty or gasket free, and pull the flange up through the sink.
- Install a new mounting ring if needed
Apply a rope of plumber's putty around the underside of the new sink flange (or use the supplied gasket). Press the flange through the sink drain hole. From below, slide on the backup flange, fiber gasket, mounting ring, and snap ring in that order per the new disposal's instructions. Tighten the three mounting screws evenly in a crisscross pattern until the flange is fully seated. Wipe excess putty.
- Remove the dishwasher knockout plug
If you have a dishwasher, use a screwdriver and hammer to tap out the knockout plug in the disposal's dishwasher inlet. Retrieve the loose plug from inside the disposal with pliers — leaving it inside jams the motor. Skip this step if you don't have a dishwasher.
- Wire the new disposal
If hardwired: remove the new disposal's electrical cover plate, thread the house cable through the strain relief, connect black-to-black, white-to-white, green (or bare) to the green grounding screw, and replace the cover. If plug-in: attach the supplied power cord per the instructions — same color-matching rules — then secure the cord with the supplied cord grip.
- Mount the new disposal to the ring
Lift the disposal up to the mounting ring, aligning the three lugs on the disposal with the three slots on the ring. Twist the disposal clockwise 1/4 turn with firm pressure. The disposal locks in place — you should hear or feel a distinct click.
- Connect the drain
Attach the discharge tube to the disposal's outlet per the instructions (usually two bolts and a flange gasket). Connect the trap arm and P-trap. Tighten slip nuts hand-tight plus 1/4 turn with channel-lock pliers. Do not over-tighten — crushed washers cause slow leaks.
- Connect the dishwasher drain hose
Push the dishwasher drain hose onto the disposal's dishwasher inlet. Secure with a new stainless steel hose clamp — do not reuse the old clamp. Route the hose in a high loop (attached to the underside of the countertop) to prevent backflow.
- Turn on power and test
Turn the breaker back on. Run water into the sink. Flip the wall switch — the disposal should run smoothly. Let it run for 30 seconds to verify no grinding or knocking. Shut off the disposal, fill one sink basin to the rim, pull the plug, and watch for leaks at every connection as the water drains.
Free: 10-Point Home Maintenance Checklist
Prevent costly repairs with this seasonal checklist. Save hundreds every year by catching problems early.
Your checklist is ready!
Open Checklist →Something went wrong. View the checklist here.