How to Paint a Fence: Prep, Primer, and Painting for Long-Lasting Results
A practical guide to painting a wood fence — covering how to clean and prep, choose the right paint or stain, and apply it with a sprayer or brush for results that last years.
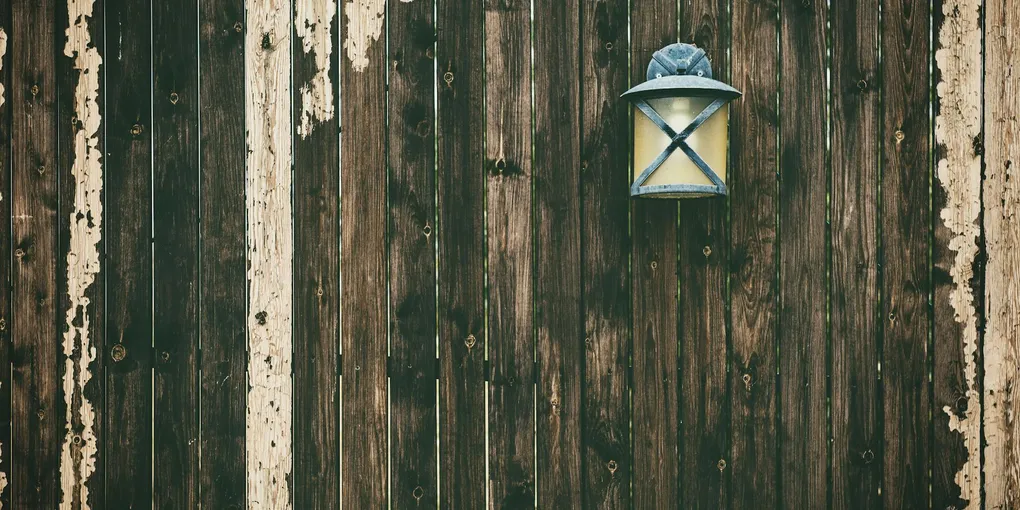
Painting a wood fence: (1) Clean first — power wash to remove dirt, mildew, and old paint flakes. Let dry 48 hours. (2) For bare wood: apply an exterior wood primer. For previously painted fences: scrape any peeling paint and spot-prime bare areas. (3) Choose paint or stain: solid-color exterior stain lasts longer than paint on fences (3 to 5 years vs 2 to 3) because it flexes as wood moves. Fence paint is thicker but peels sooner on rough-sawn boards. (4) Application: a pump sprayer is the fastest method for picket fences; back-brush immediately to work paint into crevices. Brush and roller work for flat boards. (5) Apply 2 coats. (6) Paint in mild temperatures (50 to 85 F), not in direct afternoon sun — paint dries too fast and fails to bond properly. Recoat every 2 to 3 years to protect the wood.
Frequently Asked Questions
What is the best paint for a wood fence?
Use an exterior acrylic latex paint rated for wood fences. Look for products labeled 'fence and barn paint' or 'exterior solid stain' — these are formulated to flex with wood movement and resist moisture better than standard interior or even standard exterior paint. Solid stain is often a better choice than paint for fences because it penetrates the wood grain rather than sitting on top, which reduces peeling over time. Brands like Behr Premium Plus Exterior, Sherwin-Williams SuperDeck, and Cabot Australian Timber Oil are all well-regarded for fence applications.
Do I need to prime a fence before painting?
Yes, on bare or new wood. Primer seals the wood grain, prevents tannin bleed-through, and gives paint something to bond to. Skip primer and you'll see early peeling within one to two seasons. New wood, any wood you've sanded to bare, or any spot where old paint was fully stripped all need primer. If you're recoating over existing paint in good condition, you can usually skip primer — but clean and lightly scuff the surface first.
Should I use a brush, roller, or sprayer to paint a fence?
An airless sprayer is by far the fastest method for a fence — it cuts time by 60 to 80 percent compared to brushing. The tradeoff is setup, masking, and cleanup. A brush gives you the most control and best penetration into gaps and grain, but it's slow. A 4-inch brush is the standard choice for back-brushing after spraying or for painting one board at a time. Rollers are rarely the right tool for fences — they can't get into the spaces between boards and don't work well on rough-sawn wood. Sprayer first, then back-brush if you want the best combination of speed and quality.
How often does a wood fence need to be repainted?
Every 2 to 5 years, depending on your climate, paint type, and fence exposure. Solid paint on a fence in a wet or very sunny climate will start showing wear in 2 to 3 years. A quality solid stain in a moderate climate can last 4 to 5 years. Signs it's time to repaint: peeling or flaking, visible bare wood, gray weathering, or water no longer beading on the surface. Don't wait until the wood is fully exposed — recoating over existing finish in decent condition is much faster and cheaper than stripping and starting over.
How do I prep a fence for painting?
Start with a power wash (1500 to 2000 PSI) to strip dirt, mildew, and loose paint. Let the wood dry completely — at least 48 hours in warm weather, longer if conditions are cool or humid. Sand any rough spots, splinters, or peeling paint areas with 80-grit sandpaper. Drive in or countersink any raised nails. Replace boards that are cracked, rotted, or soft to the touch. Apply primer to bare wood. A clean, dry, structurally sound fence is the foundation — skipping any of these steps shortens how long the paint lasts.
Can I paint a pressure-treated fence?
Yes, but timing matters. New pressure-treated wood is often too wet to accept paint or stain immediately after installation — the preservative chemicals and high moisture content prevent adhesion. Wait at least 6 months before painting, or until the wood passes the water bead test: sprinkle water on the surface, and if it beads up, the wood is still too wet. When ready, use an exterior acrylic latex paint and an oil-based or alkyd primer for best results. Solid stain is often a better choice than paint for pressure-treated wood because it penetrates rather than coats.
Painting a wood fence: (1) Clean first — power wash to remove dirt, mildew, and old paint flakes. Let dry 48 hours.
Painting a fence is mostly a prep job. The actual painting is fast — especially with a sprayer — but the results depend entirely on how clean, dry, and stable the wood is before you open the first can. This guide covers how to make the right decisions before you start and how to apply paint efficiently once you do.
Sprayer vs. Brush vs. Roller
Your application method determines how long the job takes more than any other factor.
Airless sprayer is the right tool for most fence projects. A sprayer covers 50 linear feet of fence in the time it takes to brush 5. Setup and masking take 30 to 60 minutes, but the payback is significant for any fence longer than 20 feet. Rental cost is $50 to $80 per day from a hardware store. Buying a homeowner-grade airless paint sprayer runs $100 to $300 and pays for itself if you have multiple projects.
4-inch brush is the right tool for small repairs, tight spaces, back-brushing over sprayed areas, and fences with fewer than 10 panels. It’s also the tool to use on individual pickets or split-rail fences where you can reach every surface easily. A quality 4-inch exterior brush holds more paint and cuts faster than a cheap one.
Roller is rarely a good choice for fences. Rollers can’t reach the spaces between boards, don’t penetrate rough-sawn grain well, and fling paint in all directions. Use it only on a solid-panel fence with a flat surface — and even then, a brush or sprayer works better.
Best combination: Spray first, back-brush immediately after. The sprayer deposits paint fast; the brush works it into the grain and gaps before it dries. This method gets sprayer speed with brush penetration.
Choosing Paint
Paint vs. stain: Solid exterior stain is often a better choice than paint for wood fences. Paint forms a film on top of the wood that eventually peels as the wood expands and contracts. Solid stain penetrates the grain, which means it wears rather than peels — and re-coating is easier because you’re not dealing with flaking edges. For picket fences and weathered wood especially, solid stain is the more durable long-term option.
Solid vs. semi-transparent: Solid stain or opaque paint covers existing color and grain — use it if you want a specific color or to cover weathered wood. Semi-transparent stain lets the wood grain show through and requires cleaner, more uniform-looking wood underneath. Semi-transparent also needs to be reapplied more frequently (every 2 to 3 years vs. every 4 to 5 for solid).
Exterior rating is not optional. Never use interior paint on a fence. Interior paint has no UV inhibitors, no mildewcide, and no flexibility — it will crack and peel within one season outdoors.
Look for exterior fence paint labeled for wood, with built-in mildew resistance. Barn and fence paint formulations are designed for high-exposure applications like fences.
What You Need
- Exterior fence paint or solid stain
- Exterior wood primer (oil-based)
- Airless paint sprayer (or 4-inch brushes for small fences)
- Power washer or garden hose with pressure nozzle
- 4-inch exterior brush for back-brushing and edges
- Drop cloths or plastic sheeting to protect plants, grass, and pavement
- 80-grit sandpaper or palm sander
- Hammer or nail gun to countersink raised nails
- Painter’s tape for post tops and hardware
Step 1: Clean and Prep the Fence
Prep determines how long the paint lasts. Do not skip steps here.
Power wash first. Use 1500 to 2000 PSI to remove dirt, mildew, algae, and loose paint. Hold the nozzle 12 to 18 inches from the surface. Too close and you’ll raise the grain or blast away soft wood. A pressure washer in the 1600 to 2000 PSI range is appropriate for wood fences. For a small fence, a garden hose with a high-pressure nozzle can work, but a pressure washer is faster and more effective.
Let the wood dry fully. At least 48 hours in warm weather. More in cool or humid conditions. Painting wet wood is the number one cause of early paint failure — moisture trapped under the film causes bubbling and peeling within weeks.
Sand rough spots and raised grain. After washing, the grain on rough-sawn wood will raise. Lightly sand with 80-grit. Knock down splinters, sand peeling edges on any areas with existing paint, and feather edges where old paint meets bare wood.
Fix structural problems. Drive in or countersink nails that have backed out. Replace boards that are soft, cracked through, or rotting — paint over rotted wood doesn’t hold, it just conceals a problem that gets worse.
Protect the surrounding area. Lay plastic sheeting or drop cloths on the ground along both sides of the fence. Cover nearby plants — sprayer overspray travels farther than you expect, especially on a light breeze.
Step 2: Prime
When to prime:
- All bare or new wood
- Any area sanded down to bare wood during prep
- New fence boards used to replace damaged ones
- Pressure-treated wood (see special notes below)
When you can skip primer:
- Recoating over existing paint or stain that’s still adhering well
- Fence was cleaned and lightly scuffed, with no bare spots
Use an oil-based exterior primer on bare wood. Oil-based primer penetrates deeper than latex, seals tannins that bleed through paint, and bonds more aggressively to raw wood. Apply with a brush to bare areas, or spray if you’re priming the whole fence. One coat is sufficient.
Let primer dry per the label — typically 4 to 8 hours before top-coating.
Step 3: Spray or Brush the First Coat
If Using a Sprayer
Set up before you start painting:
- Read the sprayer manual and set tip size per the paint manufacturer’s recommendation (typically .015 to .017 for fence paint)
- Thin paint if required — some fence paints need 5 to 10% water added for sprayer use; check the label
- Do a test spray on cardboard to check pattern and consistency
- Mask off post tops, hinges, latches, and any hardware you don’t want coated
- Have a brush ready for back-brushing immediately behind the sprayer
Spraying technique:
- Hold the gun 10 to 12 inches from the fence surface
- Move in steady, horizontal passes at consistent speed
- Overlap each pass by 50%
- Keep the gun perpendicular to the surface — angling causes uneven coverage
- Spray one side, move to the other side and spray the back faces the same day
Back-brush immediately after spraying each section to work the paint into the grain and fill any gaps or runs.
If Using a Brush
Work top to bottom, one board or panel at a time. Load the brush fully but not dripping. Work paint into the grain with short strokes, then finish with long vertical strokes following the wood grain. Get into the gaps between boards — this is where water collects and paint fails first.
A 4-inch brush moves faster than a smaller one. Use the full width on flat faces and tilt it on edge to cut into tight spaces.
Step 4: Second Coat
Let the first coat dry per the manufacturer’s recommendation — typically 2 to 4 hours for latex, longer in humid conditions. Check by pressing firmly with your thumb: if there’s any tack, wait longer.
Apply the second coat using the same technique as the first. The second coat is thinner and faster — you’re evening out coverage, not building a film. Two thin coats bond better than one thick coat.
On rough or weathered wood that’s absorbing paint heavily, a third coat may be needed — apply it the same way.
Let the final coat cure for 24 to 48 hours before exposing the fence to rain or contact. Full hardness takes about 30 days for most latex paints.
Pressure-Treated Wood Special Notes
Pressure-treated wood is treated with preservative chemicals and is often very high in moisture content at the time of purchase. Both factors prevent paint from bonding properly when the wood is new.
The water bead test: Sprinkle a few drops of water on the surface. If they bead up, the wood is still too wet or the preservative surface is still active. If the water soaks in within 30 seconds, it’s ready.
For new pressure-treated wood: wait at least 6 months before painting. Some lumber is kiln-dried after treatment (look for “KDAT” on the label) and can be painted sooner.
When ready:
- Use an oil-based exterior primer — it penetrates better than latex on treated wood
- Top-coat with exterior acrylic latex or a solid stain formulated for treated wood
- Solid stain is often the better long-term option on treated wood because it doesn’t peel
Do not use oil-based paint as your top coat. It gets brittle over time, cracks, and is harder to maintain. Primer oil-based, top coat water-based latex is the standard approach.
Maintenance
Painted and stained fences need attention every few years to stay in good condition. Neglected fences end up requiring a full strip and redo, which is far more labor-intensive than simple maintenance recoating.
Signs you need to repaint:
- Paint is peeling or flaking off in sheets
- Bare wood is visible
- Water doesn’t bead on the surface
- Wood has gone gray and weathered
Maintenance recoat (every 3 to 5 years):
- Pressure wash the fence
- Let dry 48 hours
- Spot-prime any bare areas
- Apply one coat of the same or compatible paint
A light maintenance coat every 3 to 5 years extends fence life significantly and is far faster than a full repaint from bare wood.
Related Reading
- How to Build a Fence
- How to Stain a Deck
- How to Paint Exterior House
- How to Fix a Fence
- Clean and Prep the Fence
Prep determines how long the paint lasts. Do not skip steps here.
- Prime
Any area sanded down to bare wood during prep
- Second Coat
Let the first coat dry per the manufacturer's recommendation — typically 2 to 4 hours for latex, longer in humid conditions. Check by pressing firmly with your thumb: if there's any tack, wait longer.
Free: 10-Point Home Maintenance Checklist
Prevent costly repairs with this seasonal checklist. Save hundreds every year by catching problems early.
Your checklist is ready!
Open Checklist →Something went wrong. View the checklist here.