How to Install Wainscoting: Beadboard and Panel-and-Rail Styles (2026)
Wainscoting adds architectural detail to dining rooms, hallways, and bathrooms. This guide covers the two main DIY styles — beadboard and raised panel — with layout, cutting, and installation steps.
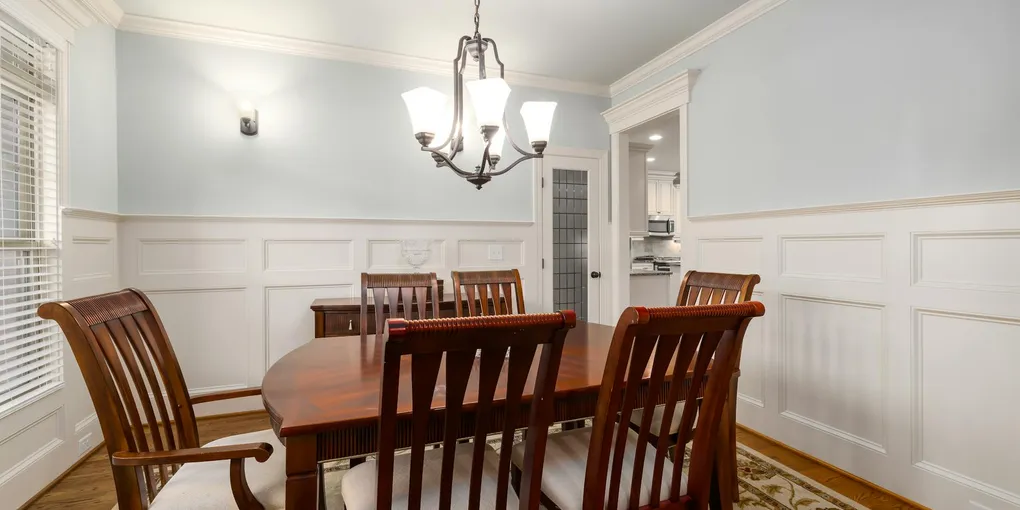
Beadboard wainscoting is the simplest DIY approach: tongue-and-groove boards or beadboard paneling applied directly to the wall, capped with a chair rail at the top and finished with base molding at the bottom. The standard height is 32–36 inches from the floor (chair rail height). For a panel-and-rail look with MDF flat panels and stile-and-rail framing, the complexity increases but the result looks more traditional. Beadboard takes a weekend; a full stile-and-rail panel system takes 2–3 weekends.
Frequently Asked Questions
What is the standard height for wainscoting?
Chair rail height: 32–36 inches from the floor is the traditional standard. In rooms with 9-foot or higher ceilings, some designers go to 40–48 inches (1/3 of the wall height). Lower wainscoting (24–28 inches) works in small bathrooms or powder rooms. The chair rail cap should align with the back of a chair seat when chairs are at the table — hence the name. For visual proportion, keep wainscoting height between 1/3 and 1/2 the wall height.
What materials should I use for wainscoting?
Solid wood (pine, poplar): most traditional, takes paint and stain well, heavier and more expensive. Paintable MDF (medium-density fiberboard): the most common DIY material — flat, smooth, holds paint beautifully, resists warping, cheaper than solid wood. Not suitable for wet areas (swells when wet). PVC beadboard: waterproof, used in bathrooms, laundry rooms, and exterior applications. Pre-primed MDF panels are available at home centers and are the easiest starting point for a painted finish.
Do I need to find studs for wainscoting installation?
For beadboard panels: nail through the panel face into studs using a finish nailer. Find studs with a stud finder before starting. If the panel spans areas between studs (which it usually does), also apply construction adhesive to the back of each panel to bond it to the wall between nail points. For stile-and-rail systems: nail the horizontal rails (top and bottom) into studs; nail the vertical stiles into the rails or directly into studs where they align.
How do I handle corners with wainscoting?
Inside corners (two walls meeting): cope the base molding and chair rail. For beadboard panels: run one panel tight to the wall in the corner; overlap the adjacent panel's edge over it. Some installers prefer pre-made inside corner molding strips. Outside corners (projecting corner): use a router or table saw to cut a 45-degree miter on the beadboard panel edges. Pre-made outside corner molding is also available and easier.
How do I install wainscoting in a bathroom around the toilet and sink?
Plumbing penetrations require notching the beadboard around the pipes. Mark the pipe location on the panel, measure carefully, and cut with a jigsaw. For toilet: run the wainscoting behind the toilet tank (not in front — it's a pain to remove the toilet later for plumbing access). Use moisture-resistant primer and paint in bathrooms. In wet areas near the tub or shower: don't use standard MDF beadboard — use PVC beadboard or tile instead.
Beadboard wainscoting is the simplest DIY approach: tongue-and-groove boards or beadboard paneling applied directly to the wall, capped with a chair rail at the top and finished with base molding at the bottom. The standard height is 32–36 inches from the floor (chair rail height).
Wainscoting transforms flat, plain walls into architectural spaces. Here is the beadboard installation process.
What you need
- Beadboard panels (4x8 sheets, pre-primed MDF) or tongue-and-groove beadboard boards
- Chair rail molding
- Base molding or base shoe (to cover bottom edge of panel)
- Construction adhesive (liquid nails for panels)
- Finish nail gun (or hammer and finish nails)
- 2-inch finish nails
- Stud finder
- Circular saw or jigsaw (for cuts)
- Miter saw (for molding angle cuts)
- Level, tape measure, pencil
- Wood filler, sandpaper
- Primer and paint
Step 1: Plan the layout
Measure the room perimeter. Calculate how many 4x8 panels you need — each sheet covers 32 square feet at full height, less once cut to wainscoting height.
Decide on height: 32–36 inches from finished floor is standard.
Mark a level line around the entire room at the wainscoting top height. Use a laser level or a long level and snap a chalk line. This is your reference — not the floor (floors aren’t level).
Step 2: Locate and mark studs
Mark stud locations with painter’s tape on the floor (visible during panel installation) or mark lightly on the wall above the wainscoting height line.
Step 3: Cut panels to height
Cut 4x8 sheets down to your wainscoting height (e.g., 33 inches) using a circular saw with a guide. Pre-primed MDF cuts cleanly with a sharp carbide blade.
Step 4: Install panels
Start at an inside corner. Apply construction adhesive in an S-pattern on the back of the first panel. Press firmly to the wall, aligning the top edge with your level line.
Nail through the panel face into each stud with finish nails. Space nails 12–16 inches vertically per stud.
Continue around the room, butting panels tightly together. At outlets: mark the outlet location on the panel, cut with a jigsaw.
Step 5: Install chair rail
The chair rail caps the top of the wainscoting and covers the panel top edge.
Cut outside corners at 45 degrees (miter). Cope inside corners (cut one piece square to the corner, cope the mating piece to fit over the profile of the first).
Nail chair rail into studs with 2-inch finish nails. The chair rail should cover the top edge of the beadboard by at least 1/4 inch.
Step 6: Install base molding
If the original base molding was removed: reinstall it against the bottom of the beadboard panels. If original base stays: the beadboard panels should sit on top of the base shoe (easiest) or the old base is scribed and the panels go behind it (more professional).
Add a base shoe (small quarter-round or ogee shoe molding) against the bottom of the panels to close the gap and add detail.
Step 7: Fill, prime, and paint
Fill all nail holes with wood filler. Sand smooth. Apply primer to any cut MDF edges (MDF edges absorb paint heavily without primer).
Apply 2 coats of latex paint in a satin or semi-gloss finish.
Related guides
- How to Install Crown Molding — finish the room with upper molding
- How to Patch Drywall — repair the wall above the wainscoting if needed
- How to Paint a Room — paint the upper wall after wainscoting is done
- Plan layout and mark a level line
Decide on wainscoting height — 32–36 inches from the floor is standard (chair rail height). Use a laser level or long spirit level to draw a level reference line at this height around the entire room — not based on the floor, which is rarely perfectly level. Calculate how many 4x8 MDF panels you need at the cut height. Mark stud locations with painter's tape on the floor for reference during installation.
- Cut panels and locate studs
Cut 4x8 pre-primed MDF sheets to the wainscoting height using a circular saw with a straightedge guide. Sharp carbide blades give clean cuts on MDF. Mark stud positions lightly on the wall above the level line where they'll be visible during panel installation — panels will be nailed into each stud.
- Install panels with adhesive and finish nails
Start at an inside corner. Apply construction adhesive in an S-pattern on the back of the first panel. Press firmly against the wall with the top edge aligned to the level line. Nail through the panel face into each stud with 2-inch finish nails, spaced 12–16 inches vertically per stud. Continue around the room butting panels tightly together. At electrical outlets: mark the outlet location on the panel back, cut with a jigsaw, and press the panel into place.
- Install chair rail molding
The chair rail caps the top edge of the wainscoting panels. Cut outside corners at 45-degree miters with a miter saw. For inside corners: cut one piece square to the wall, and cope the mating piece (cut along the profile with a coping saw so it overlaps the first piece's face). Nail the chair rail into studs with 2-inch finish nails. The chair rail should overlap the top edge of the beadboard panels by at least 1/4 inch.
- Install base molding, fill, prime, and paint
Add a base shoe (small quarter-round or ogee molding) along the bottom of the panels to cover the gap between the panel base and the floor. Nail only into the baseboard or wall, not into the floor. Fill all nail holes with wood filler and sand smooth. Apply primer to all cut MDF edges — MDF edges absorb paint heavily without it. Apply 2 coats of latex paint in satin or semi-gloss for durability.
Free: 10-Point Home Maintenance Checklist
Prevent costly repairs with this seasonal checklist. Save hundreds every year by catching problems early.
Your checklist is ready!
Open Checklist →Something went wrong. View the checklist here.