How to Install a Kitchen Faucet: New Installation from Scratch
Learn how to install a kitchen faucet from scratch — from choosing the right faucet for your sink holes to connecting supply lines and testing for leaks.
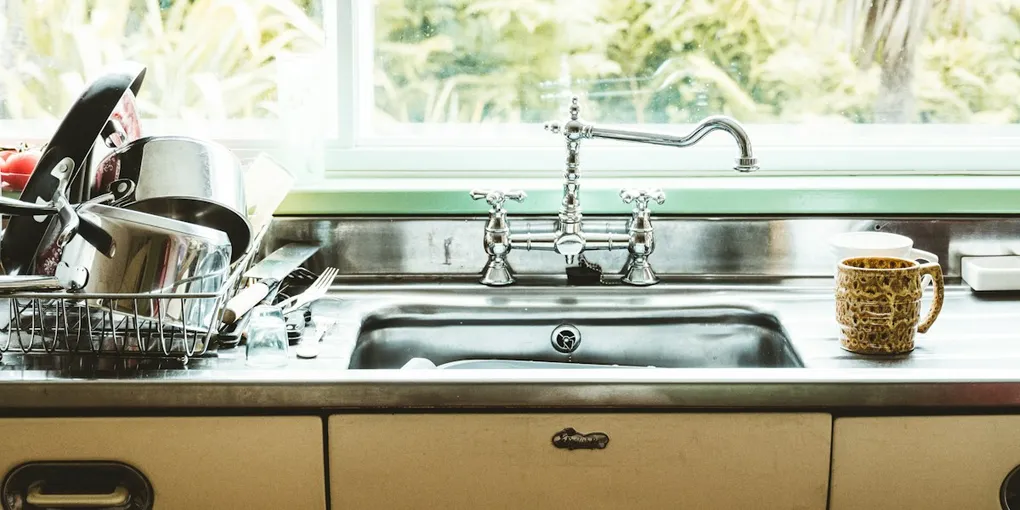
Installing a kitchen faucet: (1) Turn off the hot and cold supply valves under the sink. Open the faucet to release pressure. (2) Disconnect supply lines and remove the old faucet — the mounting nut is usually underneath the sink, often requiring a basin wrench to reach. (3) Clean the sink surface. (4) Feed the new faucet through the sink holes (most single-handle faucets need one 1-3/8 inch hole; check your faucet specs). Tighten the mounting hardware from below. (5) Connect the supply lines — hand tighten, then 1/4 turn with pliers. Do not over-tighten. (6) If the faucet has a sprayer, connect that line too. (7) Turn on the supply valves slowly and check for leaks. Run water for 2 minutes and inspect all connections. Time: 30–60 minutes.
Frequently Asked Questions
What is the difference between a single-hole and three-hole kitchen faucet?
A single-hole faucet requires one hole in the sink or countertop and typically combines the handle and spout into one unit. A three-hole faucet uses three holes spaced 4 inches apart (center-to-center) — one for each handle and one for the spout. Some single-handle faucets can also be installed in a three-hole sink using a deck plate that covers the extra holes.
Do I need a plumber to install a kitchen faucet?
Most homeowners can install a kitchen faucet without a plumber. The process involves shutting off the water supply, connecting supply lines, and tightening a mounting nut — no soldering or special licenses required. You may want to hire a plumber if you're dealing with corroded shut-off valves, unusual pipe configurations, or are not comfortable working under the sink.
How do I know what size faucet will fit my sink?
Check the number of pre-drilled holes in your sink and their spacing. Most standard sinks have either one hole or three holes on 4-inch centers. Measure the hole diameter — typically 1-3/8 inches. Your faucet packaging will specify compatibility. If your sink has more holes than the faucet needs, choose a faucet that includes a deck plate to cover unused holes.
What type of supply lines should I use for a kitchen faucet?
Braided stainless steel supply lines are the best choice for kitchen faucets. They are more durable and burst-resistant than plastic or rubber lines, and they resist corrosion. Make sure the supply lines match your shut-off valve and faucet connections — typically 3/8-inch compression on the valve end and either 1/2-inch FIP or a faucet-specific fitting on the faucet end. Match the length to your under-sink clearance, usually 12–20 inches.
How long does it take to install a kitchen faucet?
A new faucet installation typically takes 1 to 2 hours for a DIYer. If you are working in a tight cabinet space or need to install new shut-off valves, add an extra 30–60 minutes. Having all your tools and materials ready before you start will significantly cut down on time.
How do I stop my new kitchen faucet from leaking?
The most common causes of leaks after a new installation are loose supply line connections and an improperly seated faucet base. Hand-tighten all connections first, then snug them with a wrench — but avoid over-tightening, which can crack fittings. Wrap threaded connections with Teflon tape before connecting. Make sure the faucet mounting nut is tight and the base gasket or plumber's putty forms a complete seal. Run water and inspect all connections carefully before considering the job done.
Installing a kitchen faucet: (1) Turn off the hot and cold supply valves under the sink. Open the faucet to release pressure.
Installing a kitchen faucet from scratch — on a sink that has never had a faucet — is one of the most satisfying plumbing projects a homeowner can take on. There is no old faucet to wrestle out, no corroded nuts to battle, and no mystery about what you started with. You get to choose your faucet, set it up right the first time, and end up with a kitchen fixture that works exactly the way it should.
This guide walks you through the entire process: selecting the right faucet for your sink’s hole configuration, gathering the right tools and materials, and completing a clean installation with supply lines that won’t leak. If you already have an old faucet to remove first, see our companion guide: How to Replace a Kitchen Faucet.
Choosing the Right Faucet for Your Sink
Before you buy anything, look at your sink. Count the pre-drilled holes and measure the spacing between them — this is what determines which faucets will fit.
Single-Hole Faucets
A single-hole faucet uses one mounting hole and combines the spout and handle (or handles, using a knob on the spout body) into one unit. These are common in modern kitchens and tend to be easier to install because there is only one place to secure the faucet.
Browse single-hole options: Moen single hole kitchen faucets on Amazon
Best for: Sinks with one hole, minimalist aesthetics, simple installation.
Three-Hole Faucets
A three-hole sink has three holes spaced 4 inches on center — one for the spout and one for each handle. Some single-handle faucets also come with a deck plate that lets them mount in a three-hole sink, covering the two unused holes. Check your faucet’s box to confirm whether a deck plate is included.
Browse pull-down faucets for three-hole sinks: Delta pull down kitchen faucets on Amazon
Best for: Traditional sink configurations, separate hot and cold handles.
What to Confirm Before You Buy
- Number of holes in your sink or countertop
- Hole diameter — most are 1-3/8 inches, but verify
- Hole spacing if three-hole — should be 4 inches center-to-center for standard faucets
- Deck plate included if mounting a single-handle faucet in a three-hole sink
- Faucet height and spout reach — make sure the spout clears the sink basin and reach suits your sink width
What You’ll Need
Tools
- Basin wrench — essential for tightening the mounting nut in tight spaces under the sink. Find a basin wrench on Amazon
- Adjustable wrench or channel-lock pliers
- Bucket or towels to catch residual water
- Flashlight or headlamp
- Utility knife (for cutting old supply line packaging)
- Marker or tape (to label hot/cold supply lines)
Materials
- Braided stainless steel supply lines — buy two, one for hot and one for cold. Braided stainless supply lines on Amazon
- Teflon tape (PTFE tape) — for sealing threaded fittings. Teflon tape on Amazon
- Plumber’s putty — if your faucet does not have a rubber gasket for the base. Plumber’s putty on Amazon
- The faucet itself (with all included hardware)
- Silicone sealant (optional, for extra base sealing on stone or composite sinks)
Note: Many modern faucets include a rubber or plastic gasket on the base plate. If your faucet includes one, skip the plumber’s putty — using both can prevent the gasket from seating properly.
Step-by-Step Installation
Step 1: Shut Off the Water Supply
Locate the shut-off valves under the sink — one for hot water (typically on the left) and one for cold (typically on the right). Turn them clockwise until they stop. If your sink does not have dedicated shut-off valves, shut off the main water supply to the house.
Open the faucet (if there’s one on the counter already) or have a helper run the kitchen tap in another part of the house to release pressure. Place a bucket or towels under the work area to catch any drips.
Step 2: Dry-Fit the Faucet
Before applying any putty or sealant, do a dry-fit to make sure everything lines up. Thread the supply lines and mounting hardware through the hole(s) in the sink from above, just resting the faucet in position. Check that:
- The faucet base sits flat on the sink surface
- The supply lines reach the shut-off valves with some slack
- The spout is centered over the basin
This is the time to identify any surprises — not after the putty is applied.
Step 3: Apply Plumber’s Putty or Prepare the Gasket
If your faucet has a rubber base gasket: Simply position it under the faucet base. No putty needed.
If your faucet does not have a gasket: Roll a rope of plumber’s putty about 3/4 inch thick and press it around the underside of the faucet base plate, creating a complete ring. This creates a watertight seal between the faucet and the sink surface.
For granite, quartz, or composite sinks, use silicone sealant instead of plumber’s putty, which can stain some materials. Check your sink manufacturer’s recommendation.
Step 4: Feed the Faucet Through the Sink Hole(s)
Lower the faucet into position from above, pressing it firmly so the putty (if used) makes full contact with the sink surface. Have a helper hold it steady from above if you are working alone and the faucet won’t stay in place.
Step 5: Secure the Mounting Hardware from Below
Climb under the sink. You should see the threaded shank of the faucet (or shanks if it’s a three-hole model) sticking down through the hole(s).
- Slide the mounting plate or bracket (supplied with the faucet) onto the shank.
- Thread the mounting nut onto the shank by hand.
- Use your basin wrench to tighten the nut. The basin wrench’s long handle lets you reach up into the tight cabinet space to turn the nut without contorting yourself.
- Tighten until the faucet is snug and will not rotate. Do not overtighten — you can crack the sink or mounting hardware.
- For three-hole faucets, repeat for each shank. If using a deck plate, make sure it is flush before fully tightening.
Wipe away any excess putty that squeezed out from around the base plate on top of the sink.
Step 6: Wrap the Supply Line Threads with Teflon Tape
Before connecting supply lines, wrap the threaded ends with 2–3 layers of Teflon tape. Wind the tape clockwise (in the same direction as the threads) so it doesn’t unwrap when you screw the fitting on. This helps create a leak-free seal.
Apply tape to:
- The threads on the faucet inlet shanks
- The threads on the shut-off valve outlets
Step 7: Connect the Supply Lines
Your faucet should have two inlets on the bottom — one for hot and one for cold. Most faucets label them, or the supply lines may be color-coded (red for hot, blue for cold). If not, label them with tape before connecting.
- Thread the faucet end of each supply line onto the corresponding faucet inlet. Hand-tighten first.
- Connect the valve end of each supply line to the corresponding shut-off valve.
- Use an adjustable wrench to snug all four connections — about a half-turn past hand-tight. Do not over-tighten; brass fittings can crack.
Keep supply lines from kinking. If they need to curve to reach the valves, make sure the bend is gentle. Kinked supply lines restrict water flow and can eventually fail.
Step 8: Install the Sprayer or Soap Dispenser (If Included)
If your faucet came with a side sprayer, soap dispenser, or separate handle component that mounts in a second or third hole, install it now following the same mounting process: feed it through the hole, add the mounting hardware below, and tighten.
Connect the sprayer hose to the faucet body if required (the faucet instructions will show the attachment point).
Step 9: Turn the Water Back On
With all connections hand-checked and snugged:
- Slowly open the cold shut-off valve — turn it counterclockwise about a quarter-turn, then pause and look for drips.
- If no drips, continue opening it fully.
- Repeat for the hot shut-off valve.
- Turn on the faucet and let the water run for 30 seconds to flush any debris or air from the lines.
Leak Testing
After the water is back on, do a thorough leak inspection. Do not skip this step — a small drip today is water damage tomorrow.
Check these points:
- Where each supply line meets the faucet inlets
- Where each supply line meets the shut-off valves
- Around the base of the faucet at the sink surface
- Around the spray head connection (if applicable)
Run both hot and cold water fully. Press your finger around each fitting — even a slow drip will wet your finger. Use a dry paper towel under connections to spot any moisture.
If you find a drip at a threaded connection: Turn off the water, disassemble that connection, add another wrap of Teflon tape, and reconnect. Most first-time leaks are from undertightened or improperly taped threads.
If the base is leaking: The faucet may not be fully seated against the putty or gasket. Tighten the mounting nut a bit more, or if using putty, you may need to remove the faucet and reapply.
If you smell solder or notice valve issues: The shut-off valves themselves may be faulty. In that case, stop and consult a plumber.
Once everything is dry after 24 hours, the installation is complete.
Finishing Up
Clean the sink surface with a damp cloth to remove any fingerprints, putty residue, or flux. Run the faucet a few more times over the next day and re-check your connections — this is especially important during the first few uses.
Some faucets include an aerator screen at the spout tip. If water pressure seems low after installation, unscrew the aerator and rinse it under water to clear any debris from the lines.
Related Reading
Getting your kitchen plumbing set up right involves more than just the faucet. Here are two related guides to help:
- How to Replace a Kitchen Faucet — If you’re swapping an old faucet rather than doing a new installation, this guide covers removing the existing faucet and handles the steps specific to replacement.
- How to Install a Kitchen Sink — Setting up a new sink from scratch? This companion guide walks through mounting the sink basin before the faucet goes in.
- What You'll Need
Basin wrench — essential for tightening the mounting nut in tight spaces under the sink. Find a basin wrench on Amazon Adjustable wrench or channel-lock pliers
- Step-by-Step Installation
The faucet base sits flat on the sink surface The supply lines reach the shut-off valves with some slack
- Leak Testing
After the water is back on, do a thorough leak inspection. Do not skip this step — a small drip today is water damage tomorrow.
- Finishing Up
Clean the sink surface with a damp cloth to remove any fingerprints, putty residue, or flux. Run the faucet a few more times over the next day and re-check your connections — this is especially important during the first few uses.
Free: 10-Point Home Maintenance Checklist
Prevent costly repairs with this seasonal checklist. Save hundreds every year by catching problems early.
Your checklist is ready!
Open Checklist →Something went wrong. View the checklist here.