How to Fix Sweating Pipes: Pipe Insulation for Condensation and Cold Water Lines
Stop cold water pipes from sweating by insulating them with foam pipe wrap and reducing basement humidity — complete guide to sizing, installation, and protecting fittings.
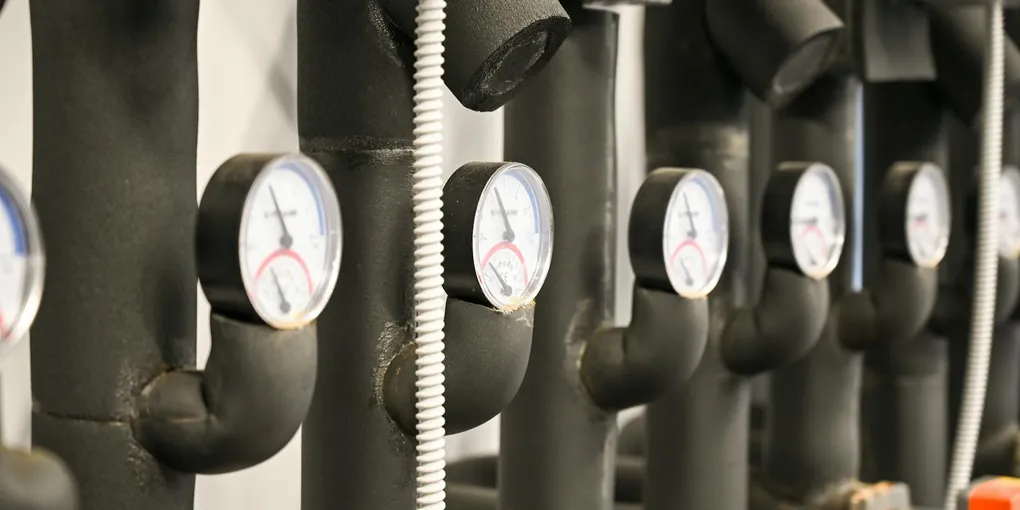
Sweating pipes are common in basements and crawl spaces during warm, humid months. The water dripping from cold supply lines is not a plumbing leak — it is condensation from the air.
Sweating pipes are common in basements and crawl spaces during warm, humid months. The water dripping from cold supply lines is not a plumbing leak — it is condensation from the air. But the dripping water causes real damage to framing, subfloor, and finished materials over time. The fix is straightforward: insulate the pipes and reduce the basement’s ambient humidity.
What You Need
- Foam pipe insulation 3/4 inch — pre-slit tubes that slip over existing pipes without cutting the pipe
- Self-adhesive pipe insulation tape — closes seams and wraps irregular shapes where tube insulation does not fit
- 70-pint basement dehumidifier — removes moisture from air to reduce condensation on all surfaces
- Self-sealing pipe wrap insulation — spiral-wrap style for pipes in tight spaces or irregular layouts
- Vapor barrier basement walls — reduces moisture migration through foundation walls into basement air
- Foam pipe wrap for elbows and fittings — pre-formed elbow covers and tee covers for complete coverage
Why Cold Pipes Sweat
Cold water supply pipes typically carry water at 50 to 60 degrees Fahrenheit. In summer, basement air may have a relative humidity of 60 to 80 percent and a temperature of 70 to 80 degrees. At these conditions, the dew point of the air is between 55 and 65 degrees — meaning any surface cooler than that temperature will collect condensation.
Cold water pipes fall squarely in that range. The pipe surface is cold enough to chill the air directly around it below its dew point. Moisture drops out of the air and forms water droplets on the pipe exterior. These run down the pipe and drip onto whatever is below — framing, insulation, or a finished ceiling.
The condensation is most severe during the first few minutes after a cold water fixture is used, when the coolest water is flowing through the pipe. Long showers, filling a bathtub, or running a washing machine can cause significant dripping from uninsulated supply lines.
Condensation vs Actual Leak
Before insulating pipes, confirm the water is condensation and not a plumbing leak.
- Dry the pipe and all nearby surfaces completely with rags.
- Wrap the dry pipe tightly in several layers of paper towel or toilet paper.
- Wait 30 minutes.
- Check the paper. Condensation produces even dampness along the pipe length. A leak produces soaking at one spot — typically at a joint, fitting, or valve.
If the paper is soaked at a specific point, you have a leak that requires a different repair. If the paper is evenly damp along the pipe, it is condensation — proceed with insulation.
Fix 1: Foam Pipe Insulation
Pre-slit foam tube insulation is the standard fix. It slips over existing pipes without any cutting and requires only scissors and tape to install.
Sizing: Match the inside diameter of the foam tube to the outside diameter of the pipe. Common matches:
- 1/2-inch copper pipe → 1/2-inch ID foam tube
- 3/4-inch copper pipe → 3/4-inch ID foam tube
- 1-inch copper pipe → 1-inch ID foam tube
Measure the pipe outside diameter with calipers if unsure of the pipe size.
Installation:
- Open the pre-slit along the foam tube’s length.
- Press the foam over the pipe — it snaps shut around the pipe.
- At each end of a section, push the foam up against the fitting or wall it abuts.
- Seal the slit along the length with self-adhesive pipe insulation tape or a strip of foil HVAC tape. The seal is critical — an open slit allows humid air to contact the cold pipe inside.
- At joints between sections, butt the ends tightly and tape the seam.
Work in long runs where possible. Shorter pieces with more seams have more potential gap points.
Fix 2: Reduce Ambient Humidity
Insulation stops condensation on the pipe surface by eliminating direct contact with humid air. But if the foam has any gaps — at fittings, elbows, or where insulation ends — the uncovered pipe will still sweat in very humid conditions.
A dehumidifier reduces the dew point of the basement air so that even surfaces that are not perfectly insulated stay above it.
- Place the dehumidifier in a central location in the basement, away from walls.
- Set the target humidity to 45 to 50 percent relative humidity.
- Route the drain hose to a floor drain if the dehumidifier has a gravity drain port — this eliminates the need to empty the collection bucket daily.
- Run the dehumidifier continuously during summer months. Check the filter every two weeks and clean as needed.
- Keep basement windows closed during humid weather. Opening windows to “air out” a basement during a humid summer day brings in more moisture than it removes.
Protecting Fittings and Elbows
Straight pipe insulation does not cover elbows, tee fittings, shutoff valves, and other connections. These are the spots where condensation continues after the straight runs are insulated.
Options for fittings:
- Pre-formed elbow covers: Foam covers molded to fit 90-degree and 45-degree elbows in standard pipe diameters. Snap onto the fitting and tape the edges to adjacent straight insulation.
- Self-adhesive insulation tape: Wrap valves, tees, and irregular connections with foam insulation tape in overlapping spiral wraps, covering the full surface.
- Foam putty: Acoustic foam sealant can fill odd-shaped gaps around valve bodies and union fittings. Let it cure, then wrap with tape for a neat finish.
After insulating the full run including fittings, run the cold water for 5 minutes and check every connection for remaining condensation. Touch up any spots that are still cold to the bare touch.
Related Reading
- How to Fix Noisy Pipes
- How to Fix Frozen Pipes
- How to Waterproof a Basement
- Annual Home Maintenance Schedule
- Condensation vs Actual Leak
Before insulating pipes, confirm the water is condensation and not a plumbing leak.
- Fix 1: Foam Pipe Insulation
Pre-slit foam tube insulation is the standard fix. It slips over existing pipes without any cutting and requires only scissors and tape to install.
- Fix 2: Reduce Ambient Humidity
Insulation stops condensation on the pipe surface by eliminating direct contact with humid air. But if the foam has any gaps — at fittings, elbows, or where insulation ends — the uncovered pipe will still sweat in very humid conditions.
- Protecting Fittings and Elbows
Straight pipe insulation does not cover elbows, tee fittings, shutoff valves, and other connections. These are the spots where condensation continues after the straight runs are insulated.
Free: 10-Point Home Maintenance Checklist
Prevent costly repairs with this seasonal checklist. Save hundreds every year by catching problems early.
Your checklist is ready!
Open Checklist →Something went wrong. View the checklist here.