How to Fix a Squeaky Staircase: Screws, Shims, and Under-Stair Repairs
Silence squeaky stairs by identifying whether the noise comes from the tread rubbing the riser or stringer, then fixing it with screws, shims, or glue blocks from above or below.
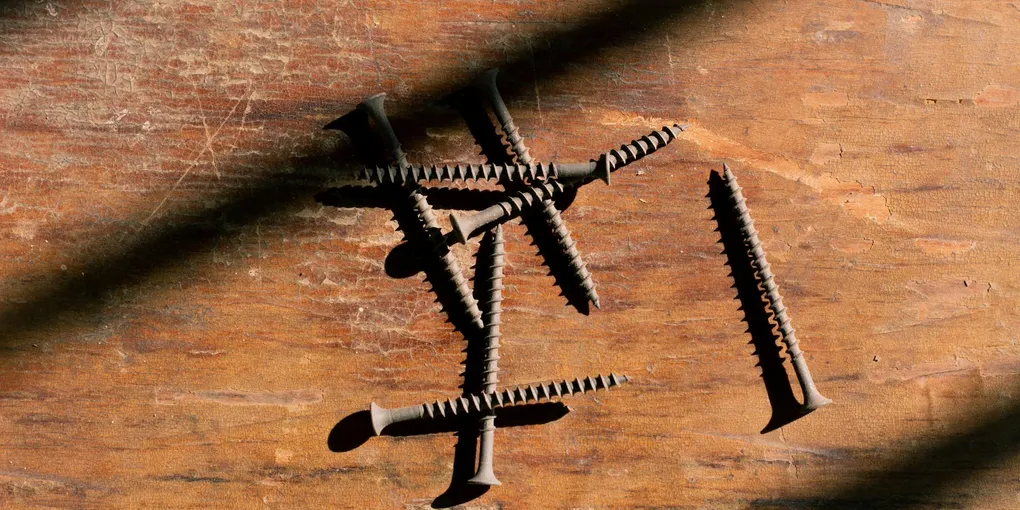
A squeaky staircase is one of the most fixable problems in a house, and one of the most irritating to live with.
A squeaky staircase is one of the most fixable problems in a house, and one of the most irritating to live with. The good news: most stair squeaks come from a single loose joint between the tread and the riser or stringer, and that joint can be tightened in 20–30 minutes with screws, shims, or glue — without pulling up a single tread.
The approach depends on whether you have access from below the stairs (open basement or under-stair storage) or only from above. Both work well. This guide covers all the methods so you can choose what fits your situation.
What You Need
- 2-inch trim-head screws — the primary above-stair fix
- Wood shims — fills gaps between tread and stringer from below
- Construction adhesive — glues shims and glue blocks in place
- Countersink drill bit set — seats screw heads below the surface
- Wood filler/putty — fills screw holes flush
- Powdered graphite — quick lubricating fix for minor squeaks
Step 1: Locate the Squeak Precisely
The most important step is finding exactly which joint is moving. Walk the stairs slowly, placing your foot on the front third, then middle, then back third of each tread. Listen and feel for where the squeak originates.
- Front edge of tread squeaks — the tread is rubbing against the top of the riser below it, or the tread-riser joint at the front has separated.
- Back edge of tread squeaks — the back of the tread is rubbing against the face of the riser behind it, or the tread has pulled away from the back edge of the riser.
- Side of tread squeaks — the tread is rubbing against the stringer (the diagonal side board). The tread may have shrunk away from the stringer notch.
Also check whether the squeak is in the tread only, or if the whole step flexes under load. A flexing step usually means loose fastening at the stringer, while an isolated squeak at a specific spot usually means a tread-riser joint issue.
Having a helper watch from below while you step on the stair is invaluable — they can often see exactly which joint is moving and even touch it to feel the movement.
Step 2: Quick Fix — Powdered Graphite or Talcum Powder
For minor squeaks where the joint is just slightly loose, lubricating the rubbing surfaces is the fastest fix and requires no tools or drilling.
Squeeze powdered graphite or talcum powder into the joint between the tread and riser — use a flexible straw or fold a piece of paper into a funnel to direct the powder into the crack. Apply on both the front edge (where the tread meets the top of the riser below) and the back edge (where the tread meets the riser behind it).
Walk on the step to work the powder into the joint. This suppresses the squeak by lubricating the surfaces that are rubbing. The fix is temporary — 6–18 months typically — but it is instant and costs almost nothing.
For a permanent fix, continue to the steps below.
Step 3: Fix from Above — Screws Through the Tread
This is the most permanent above-stair repair and works on both painted and stained stairs (with wood filler touch-up).
For a front-edge squeak (tread rubbing the riser below):
- Drill two countersink pilot holes through the tread, angled slightly toward the front, about 1 inch back from the front edge of the tread. Space them approximately 6 inches from each side of the tread. The pilot holes should go through the tread and into the top edge of the riser below.
- Drive 2-inch trim-head or finish screws into the pilot holes. Drive them until the screw head is about 1/8 inch below the tread surface.
- Fill the countersink holes with color-matched wood putty. Let dry, sand lightly with 120-grit sandpaper, and touch up with stain or paint as needed.
For a back-edge squeak (tread rubbing the riser behind it):
- Drill countersink pilot holes through the back of the tread, angling down into the face of the riser behind the tread. You are essentially pulling the tread back against the riser face.
- Drive 2-inch trim-head screws and fill as above.
For a side squeak (tread rubbing the stringer):
- Drive a screw through the side of the tread (into the face of the stringer) if the stringer is accessible from the side. Countersink and fill.
- Alternatively, add a wood shim from below (see Step 5).
Step 4: Fix from Above — Screws Through the Riser
If the squeak is at the joint between the riser and the tread below it (the riser is pulling away from the back edge of the lower tread), you can fix it by driving screws through the face of the riser into the back edge of the tread below.
- Locate the back edge of the lower tread by measuring — typically the top of the riser overlaps the tread by about 1 inch.
- Drill 2 or 3 countersink pilot holes through the face of the riser, aimed at the tread below.
- Drive 1.5-inch trim-head screws through the riser into the tread edge. Fill the holes with putty.
This fix is very effective for stairs where the riser is loose and rocks against the tread below when you step near the back of the tread.
Step 5: Fix from Below — Shims and Glue Blocks
If your staircase is open underneath — common in basements, under landings, or with open-riser designs — fixing from below is the most thorough and cleanest method because the repairs are completely invisible from above.
Shim method for tread-stringer gap:
- Look under the stair from below. You will see the treads resting in notches cut in the stringers. Check whether there is a visible gap between the underside of the tread and the stringer notch — this gap is often the squeak source.
- Apply a thin bead of construction adhesive to the taper end of a cedar shim.
- Tap the shim gently into the gap with a hammer until it is snug. Do not overtighten — you want it snug, not prying the joint open.
- Trim the protruding end of the shim with a utility knife or oscillating tool once the adhesive has cured.
Glue block method for tread-riser joint:
- Cut a 1.5-inch x 1.5-inch x 6-inch block of wood (often from scrap lumber or a piece of 2x4).
- Apply construction adhesive to two adjacent faces of the block (the two faces that will contact the tread and the riser).
- Press the block firmly into the inside corner where the tread and riser meet, from underneath. Hold for 30–60 seconds.
- Drive two screws — one up through the block into the tread, and one horizontally through the block into the riser — to clamp the joint while the adhesive cures. These screws provide clamping pressure during cure; the adhesive provides the long-term strength.
- Install a block on each side of the tread for full-width support. For squeaks in the middle of the tread, add a center block as well.
Glue blocks installed properly are a permanent fix that lasts decades. This is the same method used in quality stair construction from the start.
Step 6: Fix Loose Wedges on Older Staircases
Older staircases (pre-1950s especially) often used wooden wedges to hold treads and risers tight in the stringer mortises. Over time, these wedges dry out, shrink, and loosen, allowing the tread to move.
From below the stair:
- Locate the existing wedge (it will be a tapered piece of wood driven in from below between the tread and the stringer groove).
- If the wedge is loose, tap it back into place with a hammer and apply construction adhesive or wood glue to lock it.
- If the wedge has fallen out, cut a replacement from a piece of scrap hardwood or use a cedar shim cut to fit. Apply adhesive and drive it firmly into place.
Step 7: Fix a Squeaky Baluster or Newel Post
If the squeak seems to come from the side of the stair rather than the tread itself, the baluster (the vertical spindles) or the newel post (the main post at the base) may be loose.
For a loose baluster: apply wood glue in any visible gap at the base where the baluster meets the tread. Clamp if possible, or drive a small finish nail at an angle through the baluster into the tread.
For a loose newel post: the post is usually mortised into the base stringer or bolted to the floor. Access the base from below if possible and check whether the mounting hardware has loosened. Tighten any bolts. If the post is simply loose at the floor level, inject construction adhesive into the joint and use a ratchet strap around the post base and a floor anchor to clamp it while the adhesive cures.
Refinishing the Repaired Area
After screw repairs, the small filled holes are usually invisible once the putty is sanded and painted or stained. For stained wood stairs:
- Fill screw holes with a color-matched wood putty (Minwax and DAP make stain-compatible fillers in most wood tones).
- Let dry completely and sand flush with 120-grit, then 150-grit.
- Apply one coat of matching stain with a small brush, feathering it into the surrounding surface.
- Once the stain dries, apply a coat of finish (polyurethane or whatever finish is on the stairs) to match the sheen.
For painted stairs, standard spackle or wood filler works fine — prime and paint over.
When to Call a Professional
Most stair squeaks are a DIY fix. Call a professional when:
- Multiple treads flex or bounce significantly under load — this suggests loose stringers or stringer damage that requires structural repair.
- You see visible cracks or splits in the stringer.
- The newel post or railing system is seriously loose (a falling rail is a safety hazard).
- The staircase is covered in carpet and you are not comfortable with the Squeak-Ender method.
A carpenter or handyman typically charges $100–$300 to fix a squeaky staircase. Structural stair repair (replacing a stringer) is a larger project that can run $500–$1,500 depending on access and extent.
Related Reading
- How to Fix Squeaky Floors
- How to Install Hardwood Floors
- How to Repair Laminate Flooring
- How Much Does a Handyman Cost?
- New Homeowner Toolkit
- Locate the Squeak Precisely
The most important step is finding exactly which joint is moving. Walk the stairs slowly, placing your foot on the front third, then middle, then back third of each tread. Listen and feel for where the squeak originates.
- Quick Fix — Powdered Graphite or Talcum Powder
For minor squeaks where the joint is just slightly loose, lubricating the rubbing surfaces is the fastest fix and requires no tools or drilling.
- Fix from Above — Screws Through the Tread
This is the most permanent above-stair repair and works on both painted and stained stairs (with wood filler touch-up).
- Fix from Above — Screws Through the Riser
If the squeak is at the joint between the riser and the tread below it (the riser is pulling away from the back edge of the lower tread), you can fix it by driving screws through the face of the riser into the back edge of the tread below.
- Fix from Below — Shims and Glue Blocks
If your staircase is open underneath — common in basements, under landings, or with open-riser designs — fixing from below is the most thorough and cleanest method because the repairs are completely invisible from above.
- Fix Loose Wedges on Older Staircases
Older staircases (pre-1950s especially) often used wooden wedges to hold treads and risers tight in the stringer mortises. Over time, these wedges dry out, shrink, and loosen, allowing the tread to move.
Free: 10-Point Home Maintenance Checklist
Prevent costly repairs with this seasonal checklist. Save hundreds every year by catching problems early.
Your checklist is ready!
Open Checklist →Something went wrong. View the checklist here.