How to Fix a Shower Door Seal: Replacing Bottom Sweeps and Frame Gaskets (2026)
A leaking shower door is usually caused by a worn bottom seal sweep, a damaged side frame gasket, or a misaligned door. This guide covers replacing shower door seals on framed, frameless, and sliding glass shower doors.
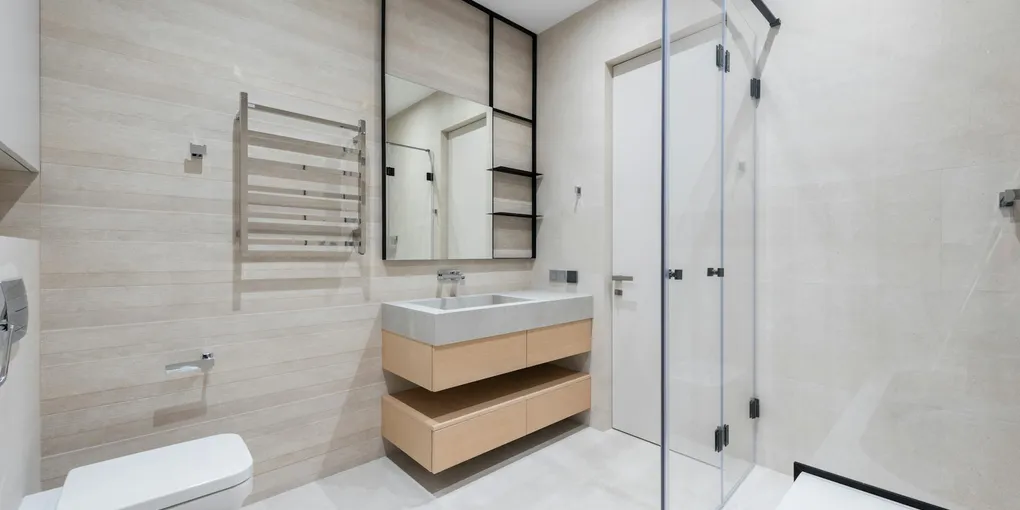
Shower door seal replacement: (1) Bottom seal (drip rail): most shower doors have a U-shaped vinyl strip that slides over the door bottom edge. Pull the old strip off and press the new one on. Measure the door width and bring the old strip to the hardware store to match the profile. (2) Side seals (door to wall gasket): a magnetic strip or vinyl wiper gasket runs along the strike side of the door. Peel the old gasket off the door edge and press the replacement on. (3) If the door leaks despite good seals: check alignment — the door bottom may not be parallel to the shower threshold.
Frequently Asked Questions
How do I replace the bottom seal on a shower door?
Shower door bottom seal replacement: (1) The bottom seal is a U-channel vinyl or rubber strip that slides over the bottom edge of the glass door. Grip the old strip and pull firmly — it slides off. (2) Measure the door width. Bring the old strip to a home center or order by the door manufacturer and door width. Common profiles: flat U-channel (1/4 inch glass), angled drip edge, or a wider U with an integrated wiper blade. (3) Wipe the door bottom edge with isopropyl alcohol and let dry. (4) Slide the new seal over the door bottom edge starting at one end. Press evenly along the length. The seal should grip the glass snugly without gaps. (5) Trim any excess length with scissors. (6) Test: close the door and pour water along the door bottom from inside — watch for water reaching the floor outside. If still leaking: adjust the door alignment (most shower door frames have hinge adjustment screws at the door top and bottom).
How do I replace the side seal on a frameless shower door?
Frameless shower door side seals: (1) Frameless shower doors use vinyl wiper seals (also called door wipe seals or strike seals) on the fixed glass panel side and/or the door edge that swings closed. The seal runs vertically and compresses against the fixed panel or the wall when the door closes. (2) Peel or pull the old wiper seal off. On most frameless doors it is held in a small aluminum channel or just pressed onto the glass edge. (3) Measure the length. Order a replacement seal by the inch or by the door brand — frameless door seals are manufacturer-specific more often than framed door seals. Search by the glass thickness (usually 3/8 inch or 1/2 inch) and the door model. (4) Press the new seal into the channel or onto the glass edge. If the seal attaches to the fixed panel: press along the full height, aligning the wiper blade to contact the door glass evenly when closed. (5) Magnetic shower door seals (where two magnetic strips attract when the door closes) require ordering the exact magnetic seal profile — check the door brand and model number on the hardware.
My sliding shower door leaks water past the side. How do I fix that?
Sliding shower door leak at the sides: (1) The bottom track collects debris and allows water to pool, then escape past the side jambs. Remove the door panels and clean the bottom track thoroughly. Use a toothbrush to clear all track slots. (2) The side jamb seals (vertical vinyl strips on each side of the frame) may be worn or compressed. These pull out of a channel — pull out, measure length, and press in a replacement. (3) The door panel that slides closest to the wall may have shifted on its rollers so the side gap is uneven. Lift the panel and rehook onto the top rail rollers — adjust the roller height with the set screw on each roller to level the panel. (4) Check the bottom side sweep on the bypass door (the panel that slides over the front of the track) — it should overlap the fixed panel by at least 3/4 inch. If the overlap is minimal, the door position needs adjustment. (5) Apply a thin bead of silicone caulk to the wall-to-frame joint on both sides of the shower frame if water is escaping at that joint.
Can I use silicone caulk instead of a door seal?
Silicone caulk is not a substitute for a door seal: (1) A door that swings or slides requires a flexible seal that can be compressed and released with each use. Caulk is rigid after cure and will tear within days of door movement. (2) Caulk is appropriate for the static joints in a shower: the frame-to-wall joint, the frame-to-threshold joint, and the frame-to-glass joint on a framed door. These do not move with door operation. (3) The correct approach: install the proper door seal (bottom sweep and side wiper) for the moving parts, and use 100% silicone caulk for all static frame-to-wall and frame-to-threshold seams. (4) If you cannot find the correct replacement seal: as a temporary fix, adhesive-backed weatherstrip foam can be applied to the door frame to fill the gap, but it compresses and fails within a few weeks.
The shower door seal is fine but water still leaks at the bottom. What else should I check?
Water escaping past a good seal: (1) Shower threshold height — if the shower threshold (the bottom sill of the door opening) sits lower than the shower floor, water flows directly out. Check the threshold is level and slopes slightly toward the drain side. (2) Shower pan slope — a poorly sloped shower pan allows water to pool at the door end rather than draining toward the center. This is a construction defect, not a seal problem. (3) Grout and caulk at the door frame base — if the caulk at the bottom of the door frame has failed, water migrates under the frame before escaping. Remove and replace the caulk at the frame base with 100% silicone. (4) Door swing alignment — if a frameless pivot door swings outward slightly at the bottom, water from the shower floor flows under the door gap even with a good seal. Adjust the pivot hinge to bring the door base inward.
Shower door seal replacement: (1) Bottom seal (drip rail): most shower doors have a U-shaped vinyl strip that slides over the door bottom edge. Pull the old strip off and press the new one on.
Match the seal profile exactly — universal seals rarely seal as well as brand-specific replacements.
What you need
- Replacement bottom door sweep (match profile and door width)
- Replacement side wiper seal (match glass thickness and door brand)
- Isopropyl alcohol (for surface prep)
- Scissors (to trim seal length)
- 100% silicone caulk (for static frame joints)
Step 1: Remove the old seals
Pull the bottom U-channel sweep off the door bottom edge. Pull the side wiper seal out of its channel or off the door edge. Bring old seals to a home center to match profiles.
Step 2: Clean the door edges
Wipe the door bottom and side edges with isopropyl alcohol. Remove all old silicone residue from the metal channels.
Step 3: Install the new bottom sweep
Slide the new U-channel seal over the door bottom edge starting at one end. Press evenly along the full length. Trim excess.
Step 4: Install the side wiper seal
Press the new side seal into its channel from top to bottom. Confirm the wiper blade contacts the fixed panel or wall evenly along its full height when the door is closed.
Step 5: Caulk static frame joints
Apply 100% silicone caulk to the frame-to-wall and frame-to-threshold seams. These static joints are common secondary leak points.
Related guides
- How to Fix a Shower Door — hinge adjustment, roller repair, and alignment
- How to Caulk a Bathtub — bathtub perimeter caulk for adjacent tile and fixtures
- How to Repair a Fiberglass Shower — crack repair on fiberglass shower bases and walls
- Identify which seal is failing
Watch where water escapes during a shower: water pooling at the threshold directly below the door = bottom sweep worn or missing. Water running down the outside of the door frame or between the door and a fixed panel = side frame gasket or magnetic strip. Water at the wall where the frame meets the tile = caulk failure, not a door seal problem. For sliding doors: check both the front and rear tracks — debris in the track lifts the door out of alignment and defeats any seal.
- Replace the bottom sweep on a framed door
The bottom sweep is a rubber or vinyl strip that clips or slides into a channel on the bottom of the door. Remove the door by lifting it off the hinges or sliding it out of the track (lift up and swing the bottom out for pivot doors). Slide the old sweep out of the channel — some are held by clips, others by a friction fit. Take the old sweep to a hardware store to match the profile and width, or order by door model. Slide the new sweep in from one end and press it into the channel the full length of the door.
- Replace side frame gaskets
Side gaskets are the vinyl or rubber strips running vertically along the door frame edges where the door panel meets the fixed frame or wall jamb. Pull the old gasket out of the aluminum channel (it is usually friction-fit or has a small bead that presses into a slot). Cut the new gasket to length. Press the bead edge firmly into the channel from top to bottom — use a wooden dowel or blunt tool to seat it evenly. On magnetic strip doors: the magnetic strip on the free edge of the door must make full contact with the metal strike — if the door sags and gaps exist, adjust the hinge or pivot to realign.
- Recaulk the wall frame joint
If water escapes where the door frame meets the tile or fiberglass: this is a caulk joint failure, not a door seal. Scrape out all old caulk from the joint with a utility knife. Clean the surfaces with rubbing alcohol. Apply 100% silicone caulk (mold-resistant, bathroom-grade) in a continuous bead along the joint where the frame meets the wall. Tool smooth with a wet finger. Allow 24 hours to cure before running water.
- Test and adjust
After replacing seals: run the shower at full pressure for 5 minutes and watch for water exit paths. The bottom sweep should make consistent contact with the threshold across the full width of the door. For sliding doors: check that the door tracks smoothly without lifting above the sweep — clean any debris from the track and lubricate the rollers with silicone spray. If water still escapes after new seals: the door frame is out of plumb, causing a gap at one corner — adjust the hinge or pivot to level the door.
Free: 10-Point Home Maintenance Checklist
Prevent costly repairs with this seasonal checklist. Save hundreds every year by catching problems early.
Your checklist is ready!
Open Checklist →Something went wrong. View the checklist here.