How to Fix a Loose Toilet Tank Lid (And Repair a Cracked Tank)
A rocking toilet tank lid is a noise and breakage hazard — here's how to stabilize or replace the lid, tighten loose tank bolts, repair hairline cracks, and secure the water supply connection.
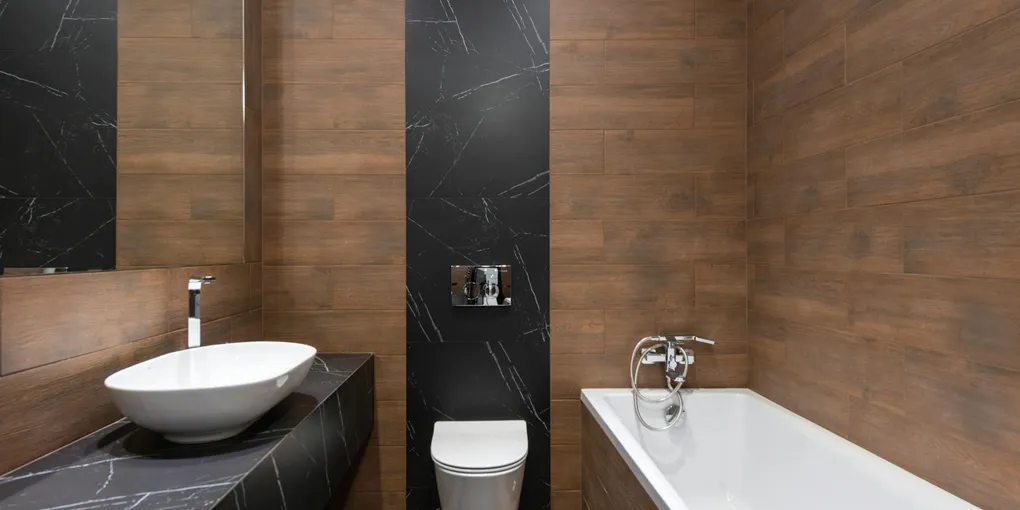
The toilet tank lid is easy to overlook until it starts rocking, chips on the tank rim, or a crack appears in the porcelain. What seems cosmetic can become structural — a cracked tank can fail suddenly and flood a bathroom floor.
The toilet tank lid is easy to overlook until it starts rocking, chips on the tank rim, or a crack appears in the porcelain. What seems cosmetic can become structural — a cracked tank can fail suddenly and flood a bathroom floor. The good news is that most tank lid and tank repairs are well within DIY capability, requiring only basic tools and inexpensive parts.
This guide covers everything from securing a wobbling lid to tightening tank-to-bowl bolts, repairing hairline cracks, and replacing the water supply connection.
What You Need
- Replacement toilet tank lid — match to your toilet manufacturer and model number
- Tank-to-bowl gasket and bolt kit — includes spud washer and mounting hardware
- Toilet supply line braided stainless — replace if the existing line is plastic or over 5 years old
- Two-part plumber’s epoxy putty — for sealing hairline cracks in porcelain
- Adjustable wrench — for tank bolt nuts and supply line connections
- Sponge and bucket — for removing remaining water when the tank is drained
Fix 1: Stabilize a Rocking Lid
A rocking lid is usually caused by an uneven contact surface — either the lid or the tank rim has a chip or slight irregularity. Start with a diagnosis before buying a replacement.
Check the lid underside. Remove the lid and flip it over. Run your fingers along the rim and look for chips, cracks, or rough spots. Even a small chip can create enough of a gap that one corner of the lid rocks.
Check the tank rim. Look for chips or irregularities on the top edge of the tank. Also look inside the tank for anything that could be raising the lid — some fill valves have a tall float arm or a cap that protrudes high enough to contact the lid and push it up unevenly.
Temporary fixes for minor rocking. If the lid has a small chip on the underside, you can apply a thin strip of clear rubber weatherstripping foam to the rim area near the chip. This fills the gap and stabilizes the lid without replacing it. Not elegant, but functional. Another option: clear non-slip furniture pads on the tank rim corners — these also cushion the lid and reduce vibration noise.
If the lid is cracked or badly chipped: Replace it. A cracked lid will continue to break and eventually become a safety hazard — porcelain fragments are sharp.
Fix 2: Replace the Tank Lid
Finding a matching toilet tank lid requires identifying your toilet’s manufacturer and model number.
Locate the model number. Lift the lid and look at the inside back wall of the tank, just above the waterline. Most manufacturers stamp or emboss the model number here. Common locations: American Standard has a four-digit number, Kohler lids often have “K-” followed by a number, TOTO marks are usually on the tank base inside.
Search the manufacturer’s website with that model number. Many toilet manufacturers sell replacement lids directly. Plumbing supply houses (not just big-box stores) often carry a wider range of OEM replacement lids.
If you can’t find the OEM lid: Measure your tank — length from left to right (outside edge to outside edge) and front to back. Bring these measurements when shopping for an aftermarket replacement. Note that tank lids vary in shape (some are contoured, some perfectly flat, some have rounded front edges) — measurements alone may not capture shape differences.
Color matching. Toilet manufacturers used proprietary colors beyond standard white — “bone,” “almond,” “linen,” “biscuit,” “sand,” and others vary between manufacturers and eras. An aftermarket “almond” lid may not match your original “almond” toilet exactly. If color matters, buy from the original manufacturer.
Fix 3: Tighten Loose Tank-to-Bowl Bolts
A toilet tank that shifts or rocks when you lift the lid (not the lid itself rocking, but the whole tank wobbling) has loose tank-to-bowl mounting bolts.
Locate the bolts. There are typically two bolts running down through the tank floor, one on each side of the large central opening (where the flush valve is). They’re underneath the tank, with a rubber washer and nut visible on the underside of the tank bolts — accessible from below or from the side of the bowl.
Tighten with a screwdriver and wrench. From inside the tank, hold the bolt head with a flathead screwdriver. From underneath, use an adjustable wrench or channel-lock pliers on the nut. Turn the nut clockwise to tighten. Move in small increments (quarter turns), alternating between both bolts. Check the tank for wobble and repeat until it’s stable.
Important: Porcelain cracks from overtightening. Stop when the tank feels solid — you should not be applying significant force. If the bolt spins freely and the nut doesn’t tighten, the rubber washer inside the tank has compressed flat or deteriorated. You’ll need to replace the bolt assembly.
Replacing tank bolts. Turn off the water supply valve at the wall. Flush to empty the tank. Sponge out remaining water. Unscrew and remove the old bolts. The new bolt kit includes bolts, rubber washers for inside the tank, flat washers, and nuts. Install from inside the tank down through the hole, rubber washer inside, then washer and nut underneath. Snug them down alternately.
Fix 4: Repair a Hairline Crack in the Tank
Hairline cracks in toilet porcelain are common and don’t always leak immediately — but they will eventually. If you can see a crack but it’s not yet leaking, you have a window to stabilize it.
Dry the surface thoroughly. Turn off the water supply and flush to empty the tank. Sponge out all remaining water. Use a hair dryer on low heat to dry the crack area completely — epoxy doesn’t bond well to wet porcelain. Allow at least an hour of air drying.
Apply waterproof epoxy. Two-part epoxy putty (the type sold for plumbing repairs) works well for exterior cracks. Knead the two components together until uniform in color, then press firmly into the crack. Smooth with a wet finger. Let it cure fully per the package instructions — usually 24 hours before contact with water.
Limitations. Epoxy stabilizes hairline cracks on the exterior tank surface but cannot reliably seal a crack that passes through the tank wall where water pressure pushes against it. Monitor the repair closely for the first week after restoring water. If any seepage appears at the crack, the tank needs replacement.
Tank replacement vs. full toilet replacement. A replacement tank for a popular toilet model may be available from the manufacturer. However, installing a replacement tank is essentially the same work as the full disassembly described in Fix 3 above, plus selecting a matching tank. If the toilet is old and showing other wear, this is a good time to evaluate whether full replacement makes sense.
Fix 5: Secure the Water Supply Connection
The supply line connects the shutoff valve at the wall to the bottom of the toilet fill valve. Leaks here show up as water pooling under the toilet or a slow drip that stains the floor.
Check both ends of the supply line. The supply line has two connections: the threaded coupling at the shutoff valve, and the coupling at the fill valve on the tank underside. Hand-tighten each connection, then use an adjustable wrench for a quarter to half turn past hand-tight. Don’t overtighten — plastic supply lines crack, and the fill valve inlet is plastic on most modern toilets.
Replace an old plastic supply line. Braided stainless steel supply lines are far more reliable than the corrugated plastic lines found on older toilets. Plastic lines become brittle with age and can fail catastrophically. Replacing a supply line takes five minutes: turn off the shutoff valve, flush to empty the tank, place a towel under the connection, unscrew both ends, install the new braided line. Standard toilet supply lines are 12 inches for close-coupled valves and 20 inches when there’s more distance.
If the shutoff valve leaks. A small drip from the valve’s packing nut (where the valve stem enters the valve body) can usually be stopped by tightening the packing nut a quarter turn with an adjustable wrench. If the valve itself leaks from the body or connection, or if the valve is stuck and can’t be operated, replace the angle stop. This requires shutting off the main water supply to the house — locate your main shutoff before starting this repair.
When to Call a Plumber
Most toilet tank repairs are manageable for a confident DIYer, but call a plumber if:
- The tank has a crack that passes through the wall and is actively leaking — the tank needs replacing
- The shutoff valve is stuck or broken at the wall connection — the main needs to be shut off and the valve replaced
- The toilet is rocking at the floor (not at the tank) — a rocking toilet at the floor indicates a wax ring failure or a damaged floor flange, a separate and more involved repair
Related Reading
- Fix 1: Stabilize a Rocking Lid
A rocking lid is usually caused by an uneven contact surface — either the lid or the tank rim has a chip or slight irregularity. Start with a diagnosis before buying a replacement.
- Fix 2: Replace the Tank Lid
Finding a matching toilet tank lid requires identifying your toilet's manufacturer and model number.
- Fix 3: Tighten Loose Tank-to-Bowl Bolts
A toilet tank that shifts or rocks when you lift the lid (not the lid itself rocking, but the whole tank wobbling) has loose tank-to-bowl mounting bolts.
- Fix 4: Repair a Hairline Crack in the Tank
Hairline cracks in toilet porcelain are common and don't always leak immediately — but they will eventually. If you can see a crack but it's not yet leaking, you have a window to stabilize it.
- Fix 5: Secure the Water Supply Connection
The supply line connects the shutoff valve at the wall to the bottom of the toilet fill valve. Leaks here show up as water pooling under the toilet or a slow drip that stains the floor.
Free: 10-Point Home Maintenance Checklist
Prevent costly repairs with this seasonal checklist. Save hundreds every year by catching problems early.
Your checklist is ready!
Open Checklist →Something went wrong. View the checklist here.