How to Fix a Leaking Roof: Finding the Source and Making Temporary and Permanent Repairs
Learn how to find where your roof is leaking, stop the damage with temporary patches, and make lasting repairs to shingles, flashing, and roof valleys.
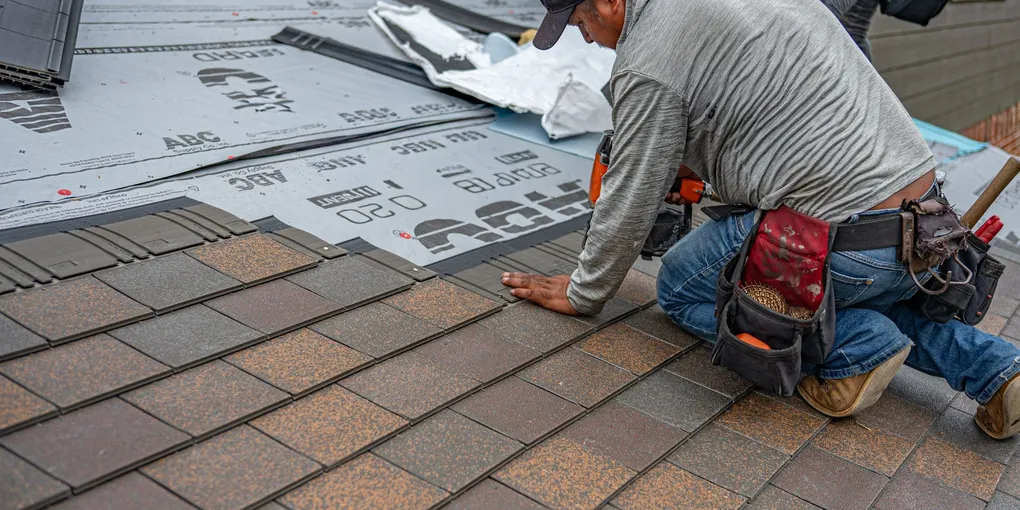
Most roof leaks do not enter your home directly above where you notice the water. The entry point on the roof surface and the drip point on your ceiling are often 6 feet or more apart, because water runs along rafters and sheathing before it finds a low spot to drip from.
Most roof leaks do not enter your home directly above where you notice the water. The entry point on the roof surface and the drip point on your ceiling are often 6 feet or more apart, because water runs along rafters and sheathing before it finds a low spot to drip from. That gap is what makes roof leaks frustrating to diagnose — and why methodical inspection beats random guessing every time.
This guide covers how to find a roof leak, stop active water intrusion with a temporary fix, and make permanent repairs to the most common problem areas: shingles, flashing around chimneys and vents, and roof valleys.
How to Find the Source of a Roof Leak
Attic Inspection First
Before getting on the roof, check the attic. Bring a flashlight and look for:
- Water stains or dark streaks on rafters, ridge board, and sheathing
- Wet or discolored insulation
- Daylight visible through the roof deck
- Mold or mildew on wood surfaces
When you find wet areas, trace the moisture uphill (toward the ridge). Water runs downhill on sloped surfaces, so the leak entry point is above where things look wet. Mark what you find with chalk or tape so you can correlate it to the roof surface when you go up.
If the attic is dry but you know you have a leak, check pipe boots, recessed light fixtures, and HVAC penetrations that terminate in the attic — these are common sources that are easy to miss.
Garden Hose Test
If you cannot find the source during or after rain, run a garden hose test on a dry day. Have a helper inside the attic with a flashlight while you work on the roof.
Start low on the roof and soak each section for 5–10 minutes before moving up. Work systematically:
- Soak the area just above your suspected interior wet spot
- If nothing appears inside, move up one section and soak again
- When your helper calls out that they see water, stop — you have found the zone
The entry point will be somewhere in the last section you soaked. Go up to that area and look closely at shingles, flashing, and penetrations.
Common Entry Points
| Location | What to Look For |
|---|---|
| Shingles | Cracked, curled, missing, or blistered shingles; exposed nail heads |
| Chimney flashing | Gaps between counter-flashing and masonry; cracked sealant; missing step flashing |
| Vent pipe boots | Cracked rubber collar around the pipe; separated seam on the metal base |
| Skylight perimeter | Failed sealant at the frame edges; damaged or missing step flashing |
| Roof valleys | Gaps or cracks in valley flashing; shingle edges lifted or deteriorated |
| Ridge cap | Missing or cracked ridge shingles; exposed ridge board |
| Nails and fasteners | Exposed or backed-out nails in shingles or flashing |
Temporary Fixes
Use these to stop active water intrusion immediately. They are not permanent solutions, but they buy you time to make a proper repair or wait for a roofer.
Poly tarp. The most versatile temporary fix for large damage areas. Lay a heavy-duty poly tarp over the damaged section and run it up past the ridge. Sandwich the edges under 2x4 boards, not over — boards on top concentrate weight and can cause more damage. Secure the 2x4s with screws driven into themselves at the corners, not into the roof. A properly installed tarp can hold through multiple storms.
Roof repair tape. Self-adhesive butyl or bitumen tape works well on small cracks, lifted shingle edges, and gaps around flashing. Clean the surface with a wire brush, dry it thoroughly, and press the tape firmly in place, working out air bubbles from center to edge. It bonds directly to shingles, metal, and most roofing materials. Look for products rated for your climate.
Roof cement. Also called roofing tar or plastic cement, this is a thick black compound applied with a putty knife or caulk gun. It is best for sealing gaps around flashing, filling nail holes, and bedding down lifted shingles. Apply it when the surface is dry and the temperature is above 40°F for best adhesion. It remains flexible after curing, which helps it handle thermal movement.
Flex Seal spray. A rubber sealant in a spray can, useful for sealing small cracks and pinholes quickly. Best for bridging gaps in metal flashing or coating small punctures in roofing membranes. Not a substitute for structural repairs on shingles.
Permanent Repairs
Replacing a Damaged Shingle
A single cracked or missing shingle is a straightforward DIY repair on most asphalt shingle roofs.
What you need:
- Replacement shingles (match the style and color as closely as possible)
- Roofing nails (galvanized)
- Flat pry bar
- Utility knife
- Roof cement or sealant
- Safety harness
-
Lift the tabs. Use a flat pry bar to carefully lift the tabs of the shingles in the row above the damaged one. You need to access the nails holding the damaged shingle in place without cracking the surrounding shingles. Work slowly in warm weather when shingles are more pliable.
-
Remove the nails. Slide the pry bar under the damaged shingle and pry out the nails, typically four per shingle. A shingle has nails holding its own top edge and is also held down by the nails in the row above it.
-
Slide out the old shingle. Once all nails are removed, slide the old shingle out. If it is bonded down by sealant, work a putty knife or pry bar under it carefully.
-
Slide in the new shingle. Position the replacement shingle so its top edge aligns with the top edges of the surrounding shingles. The tab pattern should match.
-
Nail it down. Drive four galvanized roofing nails through the top edge of the new shingle, just above the adhesive strip line. Nails should sit flush — not driven so deep they punch through the shingle.
-
Reseal the tabs above. Apply a dab of roof cement under each lifted tab to re-bond the adhesive strip, and press them down firmly.
Re-Flashing Around a Chimney or Vent
Failed flashing is the leading cause of chimney and vent leaks. The repair depends on what has failed.
For cracked or missing sealant only: Clean the joint thoroughly, removing all old caulk with a putty knife and wire brush. Apply a thick bead of polyurethane roofing sealant (not silicone — it does not bond well to masonry) in the joint between the counter-flashing and the step flashing below. Tool it smooth and let it cure fully before the next rain.
For corroded or improperly installed flashing: This is a larger job. The shingles immediately surrounding the chimney must be carefully lifted, the old flashing removed, and new step flashing and counter-flashing installed correctly. Step flashing is woven between courses of shingles (L-shaped pieces, one per shingle course), and counter-flashing is embedded or caulked into the chimney mortar joints above. If the mortar joints themselves are deteriorating, they need to be repointed first.
For vent pipes, inspect the rubber boot around the pipe. If it is cracked or torn, a replacement boot can often be slid over the existing pipe without removing the surrounding shingles. Remove the nails at the base of the boot, slide it up off the pipe, slide the new one on, re-nail the base, and seal with roof cement.
Sealing a Roof Valley
Valleys handle heavy water flow from two adjoining roof planes, making them a common leak source.
Open metal valleys (where the metal flashing is visible) can be re-sealed along their edges if the shingles have lifted or separated. Apply roof cement under the shingle edges and press them down. If the metal itself is cracked or heavily corroded, valley flashing replacement is needed — typically a job for a roofer due to the shingle removal involved.
Closed or woven valleys (where shingles overlap in the valley) can develop cracks in the shingles themselves. Inspect closely for splits or open seams. Apply roof cement along any open joints, working it well under the overlapping shingles with a putty knife.
When to Call a Roofer
Some situations clearly require a professional:
Structural damage. If your roof deck (the plywood or OSB sheathing below the shingles) feels spongy, bouncy, or shows visible rot or delamination, the structure has been compromised. Replacing damaged decking, sistering rafters, or addressing sagging ridge boards is not a DIY project.
Multiple leak points. If you find more than two or three separate leak sources during your inspection, the roof covering itself may be at or near end of life. Fixing individual spots when the whole surface is failing is an expensive way to delay the inevitable. Get a full roof assessment before spending money on piecemeal repairs. See our guide on signs you need a new roof to evaluate where yours stands.
Low-slope roofs. Flat or nearly flat roofs use different materials and installation methods than steep-slope asphalt shingle roofs. EPDM, TPO, modified bitumen, and built-up roofing systems require specialized knowledge and tools. Do not attempt repairs on these surfaces without understanding the system you are working with.
Safety concerns. Any roof repair requires working at height. If the pitch is steep (over 6:12), the surface is wet, or you are not comfortable with heights, hire a roofer. Falls from roofs are a leading cause of DIY home repair injuries. Always use a safety harness and rope system regardless of roof pitch.
Related Reading
- How to Replace a Roof Shingle
- How Much Does Roof Replacement Cost
- How to Fix Chimney Flashing
- How to Fix a Ceiling Water Stain
- How to Find the Source of a Roof Leak
Water stains or dark streaks on rafters, ridge board, and sheathing Wet or discolored insulation
- Temporary Fixes
Use these to stop active water intrusion immediately. They are not permanent solutions, but they buy you time to make a proper repair or wait for a roofer.
- Permanent Repairs
Replacement shingles (match the style and color as closely as possible) Roofing nails (galvanized)
Free: 10-Point Home Maintenance Checklist
Prevent costly repairs with this seasonal checklist. Save hundreds every year by catching problems early.
Your checklist is ready!
Open Checklist →Something went wrong. View the checklist here.