How to Fix a Leaking Outdoor Faucet: Packing Nut, Stem Washer, and Frost-Free Cartridge
Stop an outdoor hose bib from dripping by tightening the packing nut, replacing the stem washer, or swapping the cartridge in a frost-free faucet — all fixable in under an hour.
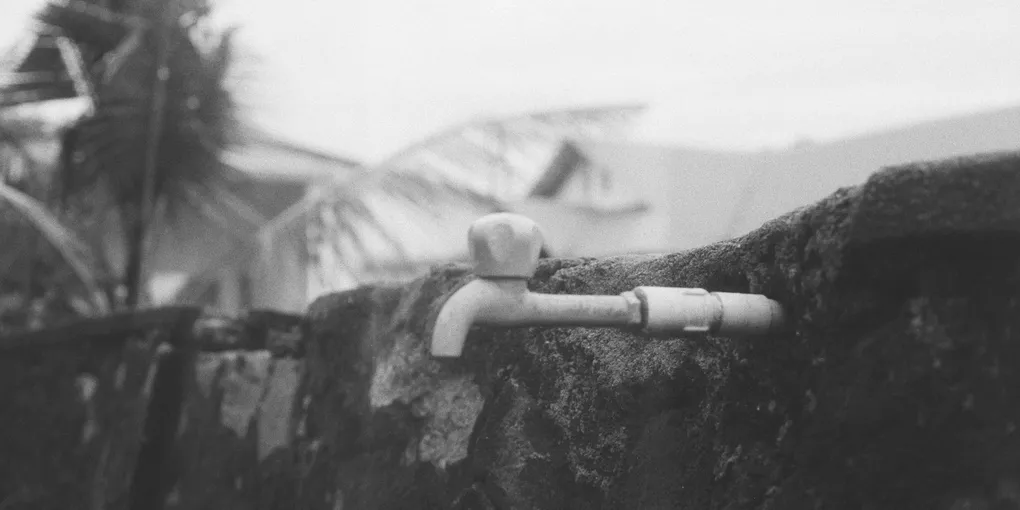
A leaking outdoor faucet is one of the most common — and most wasteful — plumbing problems in a home. Even a slow drip wastes thousands of gallons of water per year, and an outdoor faucet that weeps around the handle can rot the siding and framing around the penetration if left unaddressed.
A leaking outdoor faucet is one of the most common — and most wasteful — plumbing problems in a home. Even a slow drip wastes thousands of gallons of water per year, and an outdoor faucet that weeps around the handle can rot the siding and framing around the penetration if left unaddressed. The good news: outdoor faucet repairs require no special skills and only basic tools, and the most common failures (a worn stem washer or loose packing nut) take about 20 minutes to fix.
This guide covers every type of outdoor faucet leak: drips from the spout, leaks around the handle, frost-free faucet cartridge replacement, and winterizing so you do not repeat the cycle next fall.
What You Need
- Adjustable wrench — for the packing nut and stem
- Replacement stem washer kit — assorted rubber washers for standard faucet spout drips
- Frost-free faucet stem replacement — full stem assembly for frost-free faucet drips
- Packing cord or graphite packing — for handle leaks after packing nut tightening fails
- Teflon tape (PTFE tape) — seals threads on reassembly
- Outdoor faucet cover — winterizing protection for cold climates
Step 1: Identify Where the Leak Is Coming From
Outdoor faucet leaks fall into three categories, each with a different fix:
Drip from the spout when the faucet is turned off — the rubber washer or cartridge inside the faucet is worn and not sealing. This is the most common outdoor faucet problem. Fix: replace the stem washer (standard faucet) or the stem cartridge (frost-free faucet).
Leak around the handle/stem — water appears at the base of the handle or around the stem where it enters the faucet body. This is a packing leak. Fix: tighten the packing nut or replace the packing material.
Drip from the connection point where the faucet screws into the pipe — the threaded connection has loosened or the pipe thread tape has failed. Fix: wrap threads with fresh PTFE tape and reassemble.
Identifying the exact location before you begin saves you from unnecessary disassembly. Watch the faucet with water on and off — the leak location tells you exactly what to do.
Step 2: Shut Off the Water Supply
Find the interior shut-off valve for the outdoor faucet. It is typically on the supply pipe inside the house, near the point where the pipe exits through the wall to the outdoor faucet. Common locations: basement ceiling, crawl space, utility room, or behind an access panel.
Turn the valve clockwise to close. Then open the outdoor faucet to relieve pressure and drain the remaining water in the pipe. Leave the faucet open while you work.
If you cannot find a dedicated shut-off valve, turn off the main house water supply at the meter.
Step 3: Fix a Leaking Packing Nut (Handle Leak)
Try this before disassembly — it often solves the problem in 30 seconds.
With the water still on (or after turning it back on for this test), locate the packing nut: it is the hexagonal nut directly behind the handle where the stem enters the faucet body. Using an adjustable wrench, turn it clockwise one quarter turn. Check whether the leak has stopped. If it has, you are done.
If tightening does not stop the leak, the packing material inside the nut has failed and needs replacement:
- Shut off the water supply and drain as in Step 2.
- Remove the handle (usually one screw at the top of the handle, then the handle pulls off).
- Use an adjustable wrench to unscrew the packing nut counterclockwise. Keep turning until it comes off the stem.
- Slide the packing nut off the stem. Inside, you will find either a rubber packing washer or wrapped graphite packing cord.
- If it is a rubber washer: take it to the hardware store and match it, or use a universal outdoor faucet packing kit. Press the new washer into the nut.
- If it is graphite packing: wrap 2–3 turns of new graphite packing cord around the stem at the location where it seats inside the nut.
- Reassemble: slide the packing nut back on the stem and tighten clockwise. Do not overtighten — snug plus one quarter turn.
- Replace the handle and turn the water back on. Check for leaks.
Step 4: Fix a Dripping Spout on a Standard Faucet
A drip from the spout when the faucet is off means the rubber seat washer at the tip of the stem is worn flat and no longer seals against the brass seat inside the faucet body.
- Remove the handle (one screw at the top).
- Unscrew the packing nut counterclockwise and slide it back on the stem.
- Pull the entire stem assembly out of the faucet body — it unscrews counterclockwise. Turn it until it comes free.
- At the tip of the stem (the end that was inside the faucet), you will find a rubber washer held by a brass screw. Use a flat-head screwdriver to remove the screw and take out the old washer.
- Bring the old washer to the hardware store and match the size, or use a washer from an assorted kit. The washer should be flat on standard faucets (not beveled). Replace the washer and reinstall the screw.
- Inspect the brass seat inside the faucet body (where the washer presses against). It should feel smooth. If it is pitted, rough, or has a groove worn into it, use a seat wrench to remove it and replace it, or use a seat grinder to resurface it. A damaged seat will destroy the new washer quickly.
- Thread the stem back into the faucet body clockwise. Snug the packing nut. Replace the handle.
- Turn the water back on and check for drips.
Step 5: Fix a Dripping Frost-Free Faucet
Frost-free faucets have a long stem that extends 8–12 inches back into the house. The shut-off washer is at the interior end of the stem. When the washer wears out, the faucet drips at the spout.
The repair is to replace the entire stem assembly rather than just the washer at the tip (the stem is long and the washer at the end is not easily accessed separately).
- Look at the faucet and note the brand name (usually stamped on the body — Woodford, Watts, Mansfield, Moen, and BrassCraft are common). Measure the length of the stem: to do this, remove the handle and turn the stem counterclockwise until it comes out, then measure its length with a tape measure. The stem length ranges from 4–12 inches.
- Purchase a replacement stem for your brand and length at the hardware store or online. Have the faucet body brand and stem length ready when you shop.
- With the water shut off and the outdoor faucet open: remove the handle (one screw). Use an adjustable wrench on the packing nut to loosen it, then continue turning the stem counterclockwise until the entire stem assembly pulls out through the front of the faucet.
- Install the new stem: insert it into the faucet body and thread it clockwise until hand-tight, then use the wrench to snug the packing nut. Do not overtighten.
- Replace the handle and turn the water back on. Check for drips at the spout and at the packing nut.
If the stem replacement does not stop the drip, the brass seat inside the faucet body is damaged. At this point, replacing the entire faucet is usually more cost-effective than a seat repair — a new frost-free faucet costs $20–$50 and is a straightforward installation.
Step 6: Replace the Entire Faucet (When Repair Is Not Enough)
If the faucet body is cracked, corroded, or the seat cannot be repaired, replacement is the right call. A new frost-free faucet costs $20–$50 and takes about 30–45 minutes to install.
- Shut off the water and open the faucet to drain it.
- Go inside the house and locate the pipe where the faucet connects. The faucet is typically connected by a soldered joint, a threaded connection, or a push-fit fitting.
- For a threaded connection: use two wrenches — one to hold the pipe still, one to unscrew the faucet counterclockwise.
- For a soldered connection: use a torch to heat the fitting until the solder melts, pull the faucet out, and clean the pipe end for resoldering. Or cut the pipe and use a push-fit fitting (SharkBite) to connect the new faucet — no soldering required.
- Wrap the new faucet threads with PTFE tape (3–4 wraps clockwise) and thread it into the pipe. Hold the pipe with one wrench and tighten the faucet with another.
- Secure the faucet flange to the exterior wall with the provided screws. Caulk around the flange with exterior silicone caulk.
- Turn the water back on and check for leaks at the connection and at the packing nut.
Step 7: Winterize Your Outdoor Faucets
Preventing the problem is always easier than fixing a cracked faucet in spring.
For frost-free faucets:
- Disconnect garden hoses before the first freeze — this is the single most important step. A connected hose prevents the faucet from draining and causes it to freeze exactly like a standard faucet.
- Close the interior shut-off valve as backup protection.
- Add a foam faucet cover over the exterior spout for very cold climates.
For standard faucets:
- Close the interior shut-off valve for the faucet.
- Open the outdoor faucet to drain any remaining water from the exterior pipe stub.
- Leave the faucet in the open position all winter so any residual moisture can drain.
- Add a foam insulating cover for additional protection.
A cracked outdoor faucet from freezing typically requires faucet replacement plus possible wall repair if the crack allowed water to enter the wall cavity — a much more expensive repair than $10 in preventive foam covers.
Cost Comparison
| Repair | DIY Material Cost | Time |
|---|---|---|
| Tighten packing nut | $0 | 5 minutes |
| Replace packing washer | $5–$10 | 20 minutes |
| Replace stem washer (standard faucet) | $5–$10 | 30 minutes |
| Replace frost-free faucet stem | $10–$25 | 45 minutes |
| Replace entire faucet | $20–$50 | 45–60 minutes |
| Professional plumber repair | $150–$300 | N/A |
Nearly every outdoor faucet repair is a DIY job. The only time a plumber is warranted is if the supply pipe inside the wall has cracked from freezing damage, which requires cutting into the wall and soldering or replacing a section of pipe.
Related Reading
- How to Shut Off Water to Your House
- How to Fix Low Water Pressure
- How to Fix a Leaking Water Heater
- Winterize Your Home Checklist
- Identify Where the Leak Is Coming From
Outdoor faucet leaks fall into three categories, each with a different fix:
- Shut Off the Water Supply
Find the interior shut-off valve for the outdoor faucet. It is typically on the supply pipe inside the house, near the point where the pipe exits through the wall to the outdoor faucet.
- Fix a Leaking Packing Nut (Handle Leak)
Try this before disassembly — it often solves the problem in 30 seconds.
- Fix a Dripping Spout on a Standard Faucet
A drip from the spout when the faucet is off means the rubber seat washer at the tip of the stem is worn flat and no longer seals against the brass seat inside the faucet body.
- Fix a Dripping Frost-Free Faucet
Frost-free faucets have a long stem that extends 8–12 inches back into the house. The shut-off washer is at the interior end of the stem. When the washer wears out, the faucet drips at the spout.
- Replace the Entire Faucet (When Repair Is Not Enough)
If the faucet body is cracked, corroded, or the seat cannot be repaired, replacement is the right call. A new frost-free faucet costs $20–$50 and takes about 30–45 minutes to install.
Free: 10-Point Home Maintenance Checklist
Prevent costly repairs with this seasonal checklist. Save hundreds every year by catching problems early.
Your checklist is ready!
Open Checklist →Something went wrong. View the checklist here.