How to Fix a Leaking Garden Hose Reel (2026)
A garden hose reel that drips or sprays water is usually caused by a failed O-ring at the inlet swivel, a cracked outlet fitting, a loose hose coupling, or a stuck internal valve. This guide walks through each leak point and how to fix it.
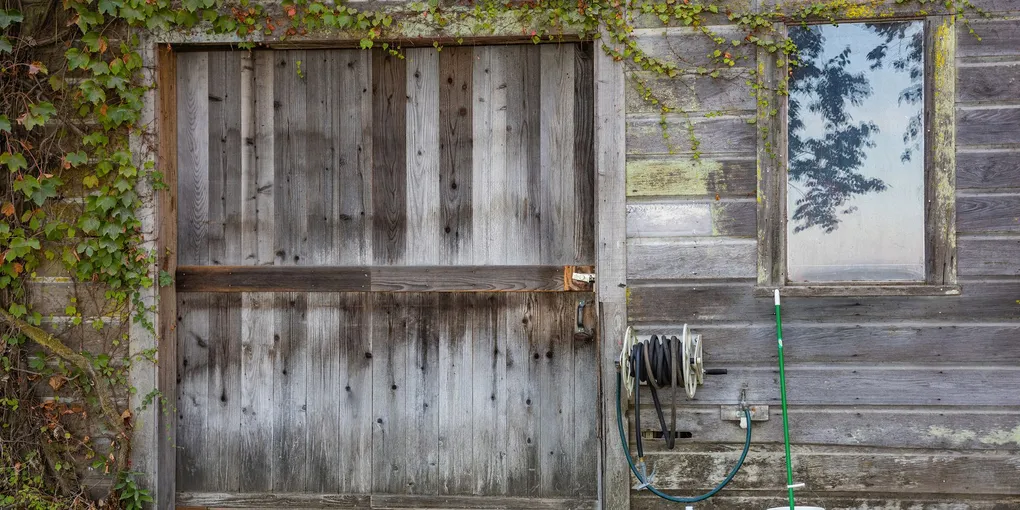
Hose reel leak fix: (1) Leak at the wall connection (inlet swivel): turn off the water, unscrew the swivel fitting from the hose bib, and replace the rubber O-ring or washer inside the swivel. This is the most common hose reel leak. (2) Leak where the hose exits the reel drum: tighten or replace the outlet hose coupling — most use a standard 3/4-inch garden hose thread fitting with a rubber washer. (3) Leak from the drum body itself: look for a cracked plastic fitting or a failed internal valve — the reel may need a replacement valve cartridge or full replacement.
Frequently Asked Questions
Why does my hose reel leak at the connection to the wall?
Inlet swivel leak: The inlet swivel is the rotating fitting that connects the fixed wall supply (hose bib) to the spinning drum. It allows the drum to rotate while keeping a water-tight seal. The swivel seal is a rubber O-ring or flat washer that compresses when the fitting is tightened. Over time, rubber hardens and cracks from UV exposure and temperature cycling. (1) Turn off the water supply at the hose bib. (2) Unscrew the swivel inlet fitting — it typically threads onto the hose bib just like a garden hose. Use pliers padded with a cloth to avoid scratching. (3) Inspect the rubber O-ring or flat washer at the end of the swivel fitting. If it is flattened, cracked, or missing, replace it. Bring the old washer to a hardware store to match the size, or buy an assorted rubber washer kit. (4) Wrap the hose bib threads with 2–3 wraps of PTFE thread tape before reconnecting. (5) Reconnect the swivel fitting hand-tight, then a half-turn with pliers. Turn the water on and check for leaks.
How do I fix a leak at the hose outlet coupling on my reel?
Outlet coupling leak repair: (1) The outlet coupling is the threaded fitting where the hose connects to the reel drum. It uses standard 3/4-inch garden hose threads (GHT). (2) Turn off water and fully unwind the hose. (3) Unscrew the hose from the outlet coupling. Inspect the rubber washer inside the coupling end of the hose. This washer is the sealing element — replace it if it is flat, torn, or missing. (4) Inspect the outlet coupling threads on the reel itself. Plastic threads can crack or strip, especially on lower-cost reels. If the coupling body is cracked, it needs to be replaced. Most reel manufacturers sell replacement couplings, or you can adapt a universal brass garden hose fitting to the outlet port. (5) When reconnecting, hand-tighten then snug with pliers — over-tightening cracks plastic fittings. Use PTFE tape on the threads if the leak persists after washer replacement.
Water leaks from the drum body or the side seam. What do I do?
Drum body leak: (1) A leak from the plastic drum body — not from a fitting or connection — indicates a crack in the drum housing or a failed internal valve housing. (2) Check the internal stop valve: many retractable and wall-mount hose reels have an internal shutoff valve that stops water flow when the hose is fully retracted. The valve sits inside the drum and connects to the swivel assembly. If the valve body cracks or the valve stem seal fails, water leaks from inside the drum. (3) Order a replacement valve cartridge from the reel manufacturer. The drum typically has 4–6 screws on the face plate — remove the face, pull out the old valve cartridge, and snap in the new one. (4) Epoxy repair for small cracks: drain the drum completely. Dry the cracked area for 24 hours. Apply two-part waterproof epoxy over the crack, working it into the crack edges. Let cure 48 hours before applying water pressure. This is a temporary fix — a cracked drum typically needs full replacement. (5) If the reel is under warranty (most reels carry 1–3 year warranties), contact the manufacturer before attempting repair.
How do I replace O-rings inside a hose reel swivel assembly?
Swivel O-ring replacement: (1) The swivel assembly may have multiple O-rings — one at the inlet (fixed side) and one or two at the outlet (rotating side). A complete O-ring replacement addresses all potential swivel leak points at once. (2) Turn off water and depressurize the hose by opening the nozzle. (3) Disconnect the swivel from the hose bib. On most reels, the swivel body is held together by a retaining nut or collar — unscrew it and the swivel separates into two halves. (4) Inside you will find one or more rubber O-rings seated in grooves. Pull them out with a pick or small flathead screwdriver. (5) Measure the O-ring inner diameter (ID) and cross-section diameter (thickness). Bring the old O-rings to a hardware store to match, or buy an O-ring assortment kit — these contain 50–100 O-rings in common sizes for under $10. (6) Coat the new O-rings lightly with plumber's grease (silicone grease) before installation. Press the O-rings into the grooves, reassemble the swivel, and reconnect. The grease keeps the rubber supple and improves sealing.
My retractable hose reel leaks only when the hose is partially retracted. Why?
Partial-retraction leak: This specific failure pattern points to the internal stop valve or a kink in the internal hose at a particular drum position. (1) Internal valve timing issue: retractable reels route water through a valve that closes when the hose is fully retracted and opens when extended. If the valve closes incorrectly at partial retraction, water may bypass the valve seat and leak around the stem. The valve cartridge likely needs replacement. (2) Hose kink inside the drum: the internal hose section that routes water from the swivel to the outlet port can kink when the drum is at a certain rotation. A kinked hose cracks under pressure and leaks from the crack. Disassemble the drum face to inspect the internal hose routing. (3) Internal hose coupling loose: the internal section connects to the outlet via a barbed fitting and clamp or a push-fit connector. If the clamp has loosened, water exits the drum at that partial retraction angle. Tighten the clamp or replace the push-fit connector.
Can I use plumber's putty or silicone caulk to stop a hose reel leak?
Sealant compatibility: (1) PTFE thread tape: appropriate for threaded fittings. Use 3/4-inch PTFE tape on garden hose threads. 2–3 wraps is sufficient. (2) Pipe thread compound (pipe dope): acceptable on threaded fittings. Apply a thin coat to male threads only. (3) Silicone caulk: useful for sealing cracks in the drum body on the outside only. Silicone does not adhere reliably to wet or damp plastic, so the surface must be bone dry before application. Not a substitute for O-ring or washer replacement. (4) Plumber's putty: NOT recommended for plastic fittings or hose threads. Plumber's putty contains oils that degrade some plastics. (5) Two-part epoxy: acceptable for bonding cracks in the drum body as a temporary measure. Use a waterproof epoxy rated for plastics. (6) The correct repair for every hose reel water-tight connection is the correct rubber sealing element — O-ring, washer, or valve cartridge. Sealants and tapes are supplements, not substitutes, for worn rubber seals.
Hose reel leak fix: (1) Leak at the wall connection (inlet swivel): turn off the water, unscrew the swivel fitting from the hose bib, and replace the rubber O-ring or washer inside the swivel. This is the most common hose reel leak.
Most garden hose reel leaks come from one worn rubber O-ring or washer — a $2 part that takes ten minutes to replace. Start at the inlet swivel and work your way toward the nozzle.
What You Need
Have these supplies ready before you start. Identifying the exact leak source first narrows down which parts you’ll actually use:
- O-ring assortment kit (rubber, 225-piece) — covers inlet swivel O-rings in all common sizes
- Garden hose rubber washers (10-pack) — for outlet coupling and hose end leaks
- PTFE thread tape (3/4-inch, plumber’s tape) — wrap on all threaded fittings before reassembly
- Silicone plumber’s grease — lubricates and preserves O-rings at reassembly
- Adjustable pliers (groove-joint) — for removing swivel fittings without damage
- Two-part waterproof epoxy — for sealing hairline cracks in the drum body
Find the Leak Source Before You Start
Diagnosing exactly where the water is coming from determines which repair you make. These are the four main leak points on a garden hose reel:
Inlet swivel (wall connection). Water appears at the back of the reel where it connects to the hose bib. This is the most common leak point. Cause: worn O-ring or washer inside the swivel fitting.
Outlet coupling (where hose exits the drum). Water drips from the threaded connection at the drum face where the hose attaches. Cause: worn rubber washer at the hose coupling.
Drum body. Water appears at the seam of the plastic drum housing or weeps from the drum face with no obvious fitting nearby. Cause: cracked housing, cracked internal fitting, or failed internal valve.
Hose itself. Small sprays or weeping along the length of the hose, not at fittings. Cause: the hose is cracked or abraded, not the reel — the hose needs replacement or a splice coupler at the damaged section.
Work through the fixes in this order: inlet swivel first, then outlet coupling, then drum body.
Fix 1: Replace the Inlet Swivel O-Ring
This repair fixes leaks at the wall connection and takes about 15 minutes.
Step 1: Shut off the water. Turn the hose bib handle to the closed position. Open the hose nozzle to release residual pressure in the line.
Step 2: Disconnect the swivel fitting. The inlet swivel threads onto the hose bib just like a garden hose. Grasp the swivel body with cloth-padded adjustable pliers and unscrew counterclockwise. Some reels have a nut or collar rather than the full swivel body that unscrews — turn just the nut.
Step 3: Inspect the sealing element. Look inside the open end of the swivel for a rubber flat washer or an O-ring seated in a groove. If the washer is flat, compressed to less than 1/16 inch thick, cracked, or missing, it needs replacement.
Step 4: Install the new O-ring or washer. Match the size from an assortment kit. Coat the replacement with a thin film of silicone grease. Press it firmly into the seat — it should sit flat and not protrude.
Step 5: Wrap the hose bib threads. Apply 2–3 wraps of PTFE tape to the male threads of the hose bib, wrapping in the direction of the threads (clockwise when looking at the end of the threads).
Step 6: Reconnect and test. Thread the swivel onto the hose bib hand-tight. Snug with pliers — one half-turn past hand-tight is sufficient for a rubber-washer connection. Turn on the water and inspect for drips.
Fix 2: Replace the Outlet Coupling Washer
This repair fixes leaks where the hose connects to the drum face.
Step 1: Shut off water and unwind the hose. Fully extend the hose to relieve drum tension. Turn off the water.
Step 2: Unscrew the hose from the outlet coupling. The hose uses standard 3/4-inch garden hose thread (GHT). Unscrew the hose end coupling counterclockwise.
Step 3: Inspect the rubber washer inside the hose end. The washer sits recessed inside the female coupling on the hose end. Replace it if it is flat, cracked, or missing. Garden hose washers are sold in 10-packs at hardware stores and home centers.
Step 4: Inspect the outlet coupling on the drum. Check the plastic threads for cracks or stripping. Plastic GHT threads crack if over-tightened. If the coupling body is cracked, order a replacement from the reel manufacturer or fit a brass GHT coupling adapter.
Step 5: Reconnect with PTFE tape. Wrap 2–3 layers of PTFE tape on the outlet coupling threads. Reconnect the hose end hand-tight and snug with pliers. Turn on water and check.
Fix 3: Repair or Replace the Internal Valve
Internal valve failure causes water to leak from the drum body with no obvious external source.
Step 1: Drain the reel completely. Turn off water, open the nozzle, and let all pressure escape.
Step 2: Remove the drum face plate. Most reel drums have 4–8 Phillips screws around the face plate perimeter. Remove them and carefully pry the face off. The internal hose and valve assembly will be visible.
Step 3: Locate the valve cartridge. The valve body is a cylindrical or block-shaped component connected to the swivel assembly. It may be held by a retaining clip or threads.
Step 4: Order and install the replacement cartridge. Search the reel brand and model number (usually stamped on the drum face or label on the back) for a replacement valve cartridge. Many brands — Liberty Garden, Eley, Suncast, Gardena — sell replacement parts. Install the new cartridge per the manufacturer’s instructions, which vary by model.
Step 5: Reassemble and test. Replace the face plate, reconnect water supply, and test for leaks before mounting the reel back in position.
Preventing Future Hose Reel Leaks
Hose reel leaks become chronic when the rubber sealing elements are ignored. Two habits extend the life of every sealing element:
Winterize every season. Disconnect the reel from the water supply each fall. Unwind the hose fully and allow it to drain. Rubber O-rings that freeze while under water pressure crack and fail. A $2 O-ring replaced at winterization prevents a mid-season leak the following summer.
Avoid over-tightening. Garden hose fittings seal on the rubber washer, not on thread tension. Over-tightening crushes the washer flat and reduces its service life. Hand-tight plus one quarter to one half turn with pliers is correct for all garden hose thread fittings.
Replace hose washers annually. A 10-pack of rubber hose washers costs under $4. Replace the washer at the inlet swivel and outlet coupling each spring before the season starts. Proactive replacement prevents leaks rather than reacting to them.
Related Reading
- How to Fix a Leaky Outdoor Faucet — hose bib packing, stem washer, and frost-free faucet repair
- How to Winterize Your Home — shutting off exterior water lines and protecting hose bibs from freeze damage
- Spring Home Maintenance Checklist — seasonal exterior tasks including hose reel inspection and irrigation system startup
- Find the leak source
Identify which of the four main leak points is failing: inlet swivel (water at the wall connection where the reel meets the hose bib — most common); outlet coupling (water at the drum face where the hose connects); drum body (water weeping from the drum seam or face with no nearby fitting); or the hose itself (spray or weeping along the hose length, not at fittings — replace the hose). Fix in order: inlet swivel first, then outlet coupling, then drum body.
- Replace the inlet swivel O-ring
Shut off water at the hose bib. Open the nozzle to release residual pressure. Unscrew the swivel inlet fitting from the hose bib counterclockwise using cloth-padded pliers. Inspect the rubber flat washer or O-ring inside the swivel — replace it if flattened, cracked, or missing. Coat the new O-ring with silicone grease. Wrap the hose bib threads with 2–3 wraps of PTFE tape. Reconnect the swivel hand-tight plus a half-turn with pliers. Turn water on and check.
- Replace the outlet coupling washer
Shut off water and fully unwind the hose. Unscrew the hose from the outlet coupling on the drum face (counterclockwise). Inspect the rubber washer inside the hose end — replace it if flat, cracked, or missing. Also inspect the outlet coupling threads for cracks — a cracked plastic coupling body needs replacement. Wrap the outlet coupling threads with PTFE tape. Reconnect the hose hand-tight plus a snug quarter-turn with pliers. Turn water on and check.
- Repair or replace the internal valve
For leaks from the drum body: drain the reel completely, then remove the face plate (4–8 Phillips screws around the perimeter). Locate the internal valve cartridge connected to the swivel assembly. Search the reel brand and model number (stamped on the drum face or label) for a replacement valve cartridge. Install the new cartridge per the manufacturer's instructions. Reassemble the face plate and test before re-mounting the reel. For a hairline crack in the drum: dry the area 24 hours and apply two-part waterproof epoxy as a temporary fix.
Free: 10-Point Home Maintenance Checklist
Prevent costly repairs with this seasonal checklist. Save hundreds every year by catching problems early.
Your checklist is ready!
Open Checklist →Something went wrong. View the checklist here.