How to Fix a Lawn Irrigation Zone Valve: Replace Solenoids, Diaphragms, and Full Valve Bodies
A zone valve that won't open, won't close, or leaks can be repaired in an afternoon — most fixes require only a solenoid swap or new diaphragm kit rather than a full valve replacement.
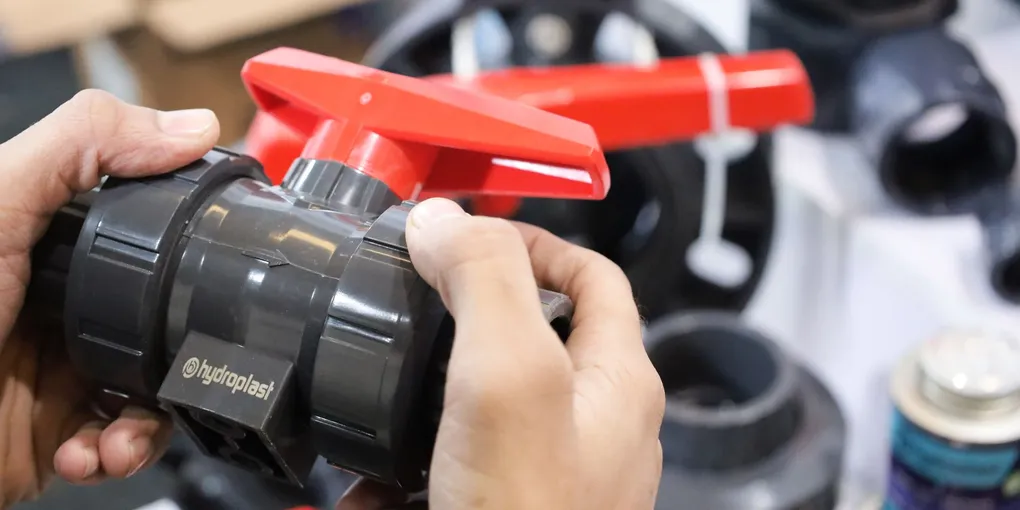
Irrigation zone valves are the workhorses of your sprinkler system. Each one opens and closes to control water flow to a specific zone of heads, doing this hundreds of times per season.
Irrigation zone valves are the workhorses of your sprinkler system. Each one opens and closes to control water flow to a specific zone of heads, doing this hundreds of times per season. When a zone stops working — running constantly, refusing to turn on, or leaking — the valve is usually to blame. The good news is that most valve problems are fixed with a solenoid swap or diaphragm replacement, both of which are inexpensive, 30-minute DIY jobs.
What You Need
- Replacement solenoid (match to your valve brand) ($8–$18) — Hunter, Rain Bird, Orbit, and Toro are the most common residential brands
- Diaphragm repair kit ($5–$15) — most valve brands sell kits that include the diaphragm, spring, and any O-rings
- Replacement zone valve (full body) ($15–$35) — for a full valve replacement if the body is cracked
- Teflon thread tape ($3–$6) — essential for leak-free fitting connections
- Multimeter ($15–$30) — for testing solenoid resistance and tracing wiring problems
- Flat-head screwdriver and needle-nose pliers ($10–$20) — for valve disassembly and diaphragm removal
Step 1: Locate the Problem Zone
Before opening any valve box, narrow down which zone and which valve is causing the issue. Run each zone from the controller one at a time and note which is behaving incorrectly — not running, running continuously, or running with poor pressure.
Most residential systems have 4–8 zones, each with a dedicated valve. Zones are typically numbered or lettered on the controller. If you have a wiring diagram from the original installation, it will show which valve corresponds to which zone.
Locate the valve box for the problem zone. In most systems, all valves are grouped in one or two valve manifolds — a cluster of valves in a single box. Open the valve box lid (it may be slightly buried — dig around the edges to find it). You will see the valve bodies with solenoids on top and two wires (one hot, one common) running to each solenoid.
Step 2: Test the Valve Manually
Before assuming the valve is bad, test it manually. Most zone valves have a manual bleed mechanism:
Screw-type bleed: A small screw on the solenoid body or valve top. Turn it counterclockwise 1/4 to 1/2 turn — you will hear water flow as the zone activates. Turn clockwise to shut off.
Lever-type: A small lever or knob on the valve body that you flip to the open position.
If the zone activates and runs normally when manually bled, the valve mechanism is fine — the problem is the controller, the solenoid, or the wiring connection between them. If the zone does not activate even with manual bleed (or if it won’t shut off when you close the bleed), the problem is inside the valve.
Step 3: Replace a Faulty Solenoid
The solenoid is the electrical actuator that opens the valve when the controller sends power. It is typically a cylindrical black or gray component on top of the valve, with two insulated wires.
Turn off the irrigation water supply at the main shutoff — usually a ball valve near the backflow preventer or at the house foundation. You do not need to turn off the house water, only the irrigation supply.
Disconnect the solenoid wires. The solenoid wires are typically spliced to the valve station wires using waterproof wire connectors (small plastic caps). Unscrew the connectors and separate the wires.
Unscrew the solenoid. Turn it counterclockwise — it threads directly into the valve top. Remove it and inspect the O-ring at the base. If the O-ring is cracked or deformed, it is likely causing a leak as well as potentially failing the seal.
Thread in the new solenoid. Hand-tighten until snug, plus about 1/4 turn — do not overtighten plastic threads. The solenoid should be firm but never forced.
Reconnect the wires. Polarity does not matter for solenoids — connect either wire to either terminal. Use fresh waterproof wire connectors; do not reuse ones that have been underground.
Restore water and test. Run the zone from the controller. If it activates and shuts off cleanly, the repair is complete.
Step 4: Rebuild the Valve Diaphragm
If the solenoid tests good but the valve still misbehaves (won’t open, won’t close, or has low pressure), the diaphragm is the culprit. The diaphragm is a flexible rubber disc inside the valve that controls water flow by opening and closing against a seat.
Turn off the irrigation water supply.
Unscrew the valve top. Most valves have 4–6 screws around the perimeter of the top cap. Remove all screws and lift the top off. Some valves have a solenoid integrated into the top — unscrew the solenoid first, then remove the top.
Remove the diaphragm. The diaphragm sits in a chamber below the top cap. It is usually held in place only by the pressure of the top cap — lift it out. Note its orientation (which side faces up) before removing.
Inspect the diaphragm. Check for: tears or holes (even tiny pinholes cause the valve to fail to close properly), cracks around the edges, or warping that prevents flat seating. Hold it up to light to find pinholes.
Clean the valve seat. The seat is the smooth ring at the bottom of the chamber that the diaphragm seals against. Use a cotton swab to clean any debris, sand, or grit from the seat surface. A single grain of sand can prevent full closure and cause the zone to run continuously.
Install the new diaphragm. Diaphragm kits ($5–$15) include the diaphragm, spring, and any O-rings needed. Place the new diaphragm with the correct side up (the kit instructions will specify), seat the spring per the instructions, and replace the top cap.
Reinstall the top cap screws. Tighten in a crossing pattern (like lug nuts on a wheel) to seat the top cap evenly. Snug, not overtightened.
Restore water and test. Run the zone. Check for leaks at the cap perimeter and verify the zone turns on and off cleanly.
Step 5: Replace the Full Valve Body
When the valve body itself is cracked, or when a rebuild does not solve the problem, replace the entire valve. A new valve of the same size (3/4 inch is standard for residential systems) costs $15–$35.
Turn off the irrigation supply. Mark or photograph the wiring connections so you know which wires go where.
Cut the old valve out. The valve is typically glued into PVC fittings on both the inlet and outlet sides. Use a PVC pipe cutter or hacksaw to cut the pipe on each side of the valve, leaving enough pipe length to glue in repair couplings.
Dry-fit the new valve. Verify the new valve fits between the cut pipe ends with a coupling on each side. PVC repair couplings (which have no stop in the middle, allowing them to slide over the existing pipe) are essential for this type of repair.
Glue the new valve in. Use PVC primer followed by PVC cement (two-step process). Apply primer to the outside of the pipe and inside the coupling, allow 15 seconds, then apply cement and immediately push together with a slight twist. Hold for 30 seconds. Repeat for both sides of the valve.
Allow the cement to cure. Most PVC cement requires 30 minutes before pressure testing and 2 hours before sustained pressure. Do not rush this step.
Reconnect the wires. Use waterproof wire connectors rated for direct burial.
Restore water and test. Check all connections for leaks and verify the zone operates correctly.
Preventing Future Valve Problems
Flush the system at the start of each irrigation season. Run each zone for 2–3 minutes before putting the system into regular operation — this clears any sediment or debris that has settled in the valves over winter.
If your water has high sediment, install a filter on the irrigation supply line upstream of the valves. A 150-mesh filter ($15–$30) catches particles that would otherwise foul diaphragms.
Protect valve boxes from lawn mowers — a cracked valve body is almost always caused by a mower running over a valve box that was not properly seated or was too close to grade. Make sure lids sit flush with the soil and are visible before mowing.
Related Reading
- Spring Home Maintenance Checklist — full irrigation system startup checklist for spring
- How to Fix a Broken Sprinkler Head — head replacement and nozzle cleaning
- How to Winterize Your Home — irrigation system blowout and winterization steps
- Locate the Problem Zone
Before opening any valve box, narrow down which zone and which valve is causing the issue. Run each zone from the controller one at a time and note which is behaving incorrectly — not running, running continuously, or running with poor pressure.
- Test the Valve Manually
Before assuming the valve is bad, test it manually. Most zone valves have a manual bleed mechanism:
- Replace a Faulty Solenoid
The solenoid is the electrical actuator that opens the valve when the controller sends power. It is typically a cylindrical black or gray component on top of the valve, with two insulated wires.
- Rebuild the Valve Diaphragm
If the solenoid tests good but the valve still misbehaves (won't open, won't close, or has low pressure), the diaphragm is the culprit.
- Replace the Full Valve Body
When the valve body itself is cracked, or when a rebuild does not solve the problem, replace the entire valve. A new valve of the same size (3/4 inch is standard for residential systems) costs $15–$35.
Free: 10-Point Home Maintenance Checklist
Prevent costly repairs with this seasonal checklist. Save hundreds every year by catching problems early.
Your checklist is ready!
Open Checklist →Something went wrong. View the checklist here.