How to Fix Cracked or Missing Grout in a Shower
Learn how to repair cracked shower grout by removing old grout, deciding between regrouting vs. caulking corners, and applying grout sealer for long-lasting results.
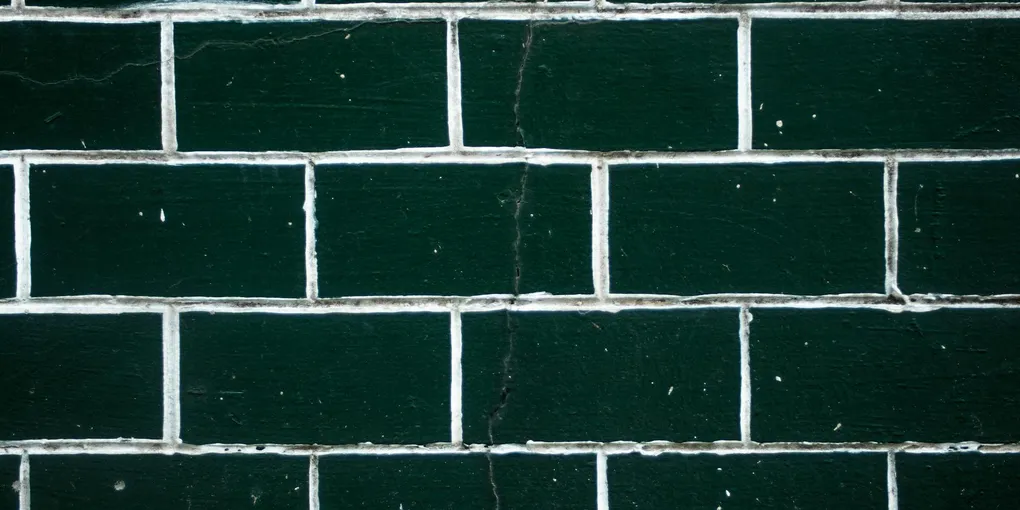
Fix cracked shower grout: use a grout saw or oscillating tool to remove loose grout (rake out at least 1/8 inch deep). Clean the joint with a dry brush. Apply sanded grout for joints over 1/8 inch, unsanded for smaller joints. Wet-cure for 72 hours, then seal with a grout sealer. Important: corners and edges where tile meets the tub or wall should ALWAYS use caulk, not grout — grout cracks there because the joint flexes. Use color-matched silicone caulk in those spots.
Frequently Asked Questions
Why does shower grout crack?
Three main causes: (1) Normal movement — shower walls and floors flex slightly with temperature and moisture changes; grout (being rigid) cracks under repeated flexing. (2) Improper installation — grout in corners and change-of-plane joints (where wall meets floor) always cracks because it can't flex. These spots require caulk, not grout. (3) Settlement — house movement over time causes stress cracks. The first sign is usually cracks radiating from corners.
Should I use grout or caulk to fix cracked shower grout?
Grout for field tile joints (middle of the wall or floor). Caulk for change-of-plane joints (wall meets floor, wall meets tub, inside corners, where tile meets a fixture). If you grout corners, the grout will crack again within 1-2 years — movement is inevitable there. Use color-matched silicone caulk in corners for a permanent fix.
How do I match grout color for a repair?
Bring a photo of your existing grout or a small sample (scrape some loose grout into a bag) to a tile supply store. Major brands (Mapei, Custom Building Products, LATICRETE) make 30-50 standard colors. Grout also darkens when sealed — test your color match on a piece of cardboard before committing. Old grout fades over time, so new grout in a repair will likely be slightly different unless you replace all the grout.
How long does shower grout repair last?
A properly done grout repair using cement-based grout with a silicone sealer should last 5-10 years in a typical shower. Epoxy grout lasts 10-20+ years and is stain-resistant, but is harder to work with and more expensive ($15-$25/lb vs $3-$6/lb for cement grout). Applying fresh sealer every 1-2 years extends both types significantly.
Fix cracked shower grout: use a grout saw or oscillating tool to remove loose grout (rake out at least 1/8 inch deep). Clean the joint with a dry brush.
Cracked and missing grout in a shower is more than cosmetic — it’s a water infiltration problem that silently destroys everything behind your tile. Water that seeps through a failed grout joint works its way into the substrate, breeds mold and mildew in the wall cavity, and eventually causes tile to pop off the wall, backer board to crumble, and in worst cases structural rot in the framing behind the shower. Catching and repairing grout failures early is one of the highest-value maintenance tasks in any bathroom.
The repair process is straightforward but requires patience and the right materials. This guide covers cleaning and preparing the damaged area, removing failed grout with a grout saw or oscillating tool, deciding when to regrout versus caulk, mixing and applying new grout, and sealing the finished repair so it holds up for years.
Understanding Why Shower Grout Cracks
Grout is a rigid material. Tile, backer board, and framing all move — seasonally with temperature and humidity, and with the normal flex of a building structure. When the substrate moves more than the grout can accommodate, the grout cracks. In showers, this problem is accelerated by:
Thermal cycling. Hot showers heat the tile and substrate, causing expansion. After the shower, everything cools and contracts. Over years, this micro-movement fatigues the grout joints.
Missing caulk in corners. The corners where two tiled planes meet (wall-to-wall, wall-to-floor) are change-of-plane joints. These must be filled with flexible silicone caulk, not rigid grout, because they experience the most movement. Many installers grout these corners because it’s faster — and within a few years, the grout cracks here first. This is almost always a maintenance issue, not a defect.
Sub-par installation. Grout that was mixed too wet, applied to a damp surface, or not sealed after installation has a shortened lifespan. Tile installed over a substrate that has too much flex also causes grout to crack faster than expected.
Age. Even well-installed grout eventually wears out. Ten to fifteen years is a reasonable lifespan before regrouting is worth considering, especially in a high-use shower.
What You Need
- QEP 10084Q Oscillating Multi-Tool Grout Removal Blade — fastest and most controlled method for removing damaged grout without chipping tile
- Custom Building Products Polyblend Plus Sanded Grout — for joints 1/8 inch and wider; matches most standard residential shower tile spacing
- Custom Building Products Polyblend Plus Unsanded Grout — for joints under 1/8 inch; sanded grout scratches polished tile and marble
- GE Sealants GE5020 Advanced Silicone 2 Kitchen and Bath Sealant — 100% silicone for all corner joints and wall-to-floor transitions; flexible, mold-resistant, and waterproof
- Miracle Sealants 511 Impregnator Grout Sealer — penetrating sealer that locks moisture out of grout pores without changing the color or sheen
- QEP 6-700 Soft Grout Float — rubber float for pressing grout into joints; the angled face keeps the body of the float from dragging grout back out
Step 1 — Assess the Damage
Before removing anything, walk the entire shower and press gently on each tile. Tiles that shift, click, or feel hollow have lost their adhesive bond and need more than grout repair — the tile itself needs to be reset. Make a note of any hollow tiles and address them before grouting.
For grout assessment, look for:
- Hairline cracks in otherwise solid grout — a surface sealant often resolves this without full removal
- Crumbling or cracked-through grout — the damaged section needs to be fully removed and replaced
- Discolored or black grout — may be mold staining, which can sometimes be cleaned, or may indicate grout that has absorbed water and needs replacement
- Missing grout sections — always replace these, not just fill over them
Step 2 — Remove Damaged Grout
Never apply new grout directly over old cracked grout. The fresh grout adheres to a thin, compromised layer rather than the tile edges, and it fails just as quickly. Remove all damaged material down to the substrate.
With an oscillating tool: Attach a grout removal blade (carbide-grit or diamond-edge) to an oscillating multi-tool. Set the blade depth to slightly shallower than the full grout joint depth — typically 3/16 to 1/4 inch for standard wall tile. Work the blade along the center of the grout joint without touching the tile edges. Move slowly and let the tool do the work; forcing it causes the blade to jump onto the tile face.
By hand: A manual grout saw (a handle with a carbide-grit rod) works for small areas. Score along the grout joint repeatedly until you’ve removed enough depth for the new grout to bond. This takes longer but is safer around delicate tile.
Finishing up: After removing the bulk of the grout, use a stiff brush or a shop vac to clear all dust and debris from the joints. Loose particles left in the joint will weaken the new grout bond.
Step 3 — Clean the Tile and Grout Lines
With the damaged grout removed, clean the entire shower surface before applying new grout. Soap scum, mold, and mineral deposits contaminate the joint and prevent proper adhesion.
Mold treatment: Spray a 10% bleach solution (1 part bleach to 9 parts water) on any mold-stained grout or substrate. Let it sit for 10 minutes, then scrub with a stiff brush and rinse thoroughly. Allow the area to dry completely — at least 24 hours, ideally 48.
Soap scum: A dedicated bathroom tile cleaner or diluted white vinegar works well for soap scum removal. Rinse and let dry.
Grease and silicone residue: If you’re removing old silicone caulk from corners, use a silicone remover solvent to break down the residue. Even a thin film of old silicone will prevent new silicone from bonding properly.
The surface must be completely dry before applying any new grout or caulk. Use a fan or leave the bathroom ventilated overnight.
Step 4 — Caulk Corners, Then Grout the Field
This is the most important concept in the entire repair: corners get caulk, not grout. Every inside corner in a tile shower is a change-of-plane joint. Grout is rigid; these joints must be flexible. Apply 100% silicone caulk in all wall-to-wall corners and the wall-to-floor joint before you begin grouting.
Applying silicone caulk:
- Cut the tip of the silicone tube at a 45-degree angle to create an opening slightly smaller than the joint width.
- Apply painter’s tape to both tiles flanking the corner joint for a clean edge.
- Run a smooth, continuous bead of silicone along the full length of the corner.
- Dip your finger in water (or use a caulk finishing tool) and smooth the bead with a single, continuous stroke. Wipe excess caulk off your finger frequently.
- Remove the tape immediately before the silicone skins over — usually within 5 to 10 minutes.
- Allow to cure per the product directions (typically 24 hours) before exposing to water.
Step 5 — Mix and Apply New Grout
Choosing sanded vs. unsanded grout: For joints 1/8 inch or wider, use sanded grout — the sand particles help bridge the gap and prevent shrinkage cracking. For joints narrower than 1/8 inch (common with rectified tile and marble), use unsanded grout. Using sanded grout in narrow joints scratches polished tile faces; using unsanded grout in wide joints leads to cracking.
Mixing grout: Add the grout powder to clean water (not the reverse — adding water to powder causes lumps). Mix to a peanut butter consistency — thick enough to hold its shape on the float without slumping. Let it slake (rest) for 10 minutes, then stir once more. Never add more water after mixing; it weakens the grout.
Applying grout:
- Load the rubber float with grout and press it diagonally across the joints, forcing grout into the voids.
- Work in small sections (2 to 3 square feet at a time) so you can clean the tile face before the grout hardens.
- After filling the joints, hold the float nearly vertical and sweep it diagonally across the joints to remove excess grout from the tile face. Sweeping parallel to the joints pulls grout back out.
- Allow the grout to firm up for 15 to 30 minutes (the haze will dull), then clean the tile face with a damp (not wet) sponge, wrung out thoroughly. Rinse the sponge frequently.
- Final cleanup: buff the remaining haze with a dry microfiber cloth.
Allow grout to cure for 24 to 72 hours before exposing to water. Full strength develops over 28 days.
Step 6 — Seal the Grout
Unglazed and cement-based grout is highly porous. Without sealer, water, soap, and oils penetrate the pores and cause staining, mold growth, and accelerated deterioration. Apply grout sealer after the grout has fully cured (at least 72 hours, preferably longer).
Applying sealer:
- Use the applicator brush or roller that comes with the sealer to saturate the grout lines. Work in manageable sections.
- Allow the sealer to penetrate for the time listed on the product (usually 5 to 10 minutes).
- Wipe any sealer off the tile face with a clean cloth before it dries — sealer haze on tile is difficult to remove once cured.
- Apply a second coat after the first has dried (typically 30 minutes).
Reapply sealer annually in a high-use shower. To test whether resealing is needed, sprinkle a few drops of water on the grout. If the water beads, the sealer is still working. If the water soaks in immediately, it’s time to reseal.
FAQ
-
question: “Should shower corners be caulked or grouted?” answer: “Shower corners must always be caulked with 100% silicone caulk, never grouted. Inside corners are change-of-plane joints that experience movement from thermal expansion and the natural flex of building structure. Rigid grout in these locations always cracks eventually. Flexible silicone caulk accommodates the movement and maintains a waterproof seal.”
-
question: “What is the difference between sanded and unsanded grout?” answer: “Sanded grout contains fine sand particles that prevent shrinkage and cracking in joints 1/8 inch and wider. Unsanded grout is smooth and used for narrow joints under 1/8 inch — the kind common with rectified tile and marble. Using sanded grout in narrow joints can scratch polished stone; using unsanded grout in wide joints causes it to crack as it shrinks.”
-
question: “How long should I wait before using the shower after regrouting?” answer: “Wait at least 24 to 72 hours before using the shower after applying grout, and follow the same timeline after applying silicone caulk. Full grout strength develops over 28 days. Using the shower too soon softens fresh grout, causes washout, and may prevent proper cure of the silicone caulk.”
-
question: “Can I apply new grout over old cracked grout?” answer: “No. Applying new grout over cracked grout creates a thin layer that bonds to a compromised surface rather than the tile edges. It will fail just as quickly — or faster — than the original. Always remove all damaged grout down to the substrate before applying new material.”
-
question: “How do I remove old silicone caulk from shower corners?” answer: “Score along both edges of the old silicone with a utility knife, then pull the bulk of it out by hand. Residue left behind can be softened with a commercial silicone remover solvent or with isopropyl alcohol, then scrubbed clean. All silicone residue must be removed before applying new caulk — new silicone will not bond properly over old silicone.”
-
question: “How often does shower grout need to be resealed?” answer: “In a high-use shower, reseal grout annually. In lower-use showers, every two years is sufficient. Test by sprinkling water on the grout — if it beads up, the sealer is intact. If water absorbs immediately, the grout needs resealing. Regular sealing is the single most effective way to extend the life of grout and prevent mold growth.”
Related Reading
- How to Recaulk a Bathtub
- How to Fix a Running Toilet
- Small Bathroom Remodel Ideas on a Budget
- How to Fix a Floor Tile That Is Loose — reattach a loose tile in the same repair session as regrouting
- Step 1 — Assess the Damage
Before removing anything, walk the entire shower and press gently on each tile. Tiles that shift, click, or feel hollow have lost their adhesive bond and need more than grout repair — the tile itself needs to be reset.
- Step 2 — Remove Damaged Grout
Never apply new grout directly over old cracked grout. The fresh grout adheres to a thin, compromised layer rather than the tile edges, and it fails just as quickly. Remove all damaged material down to the substrate.
- Step 3 — Clean the Tile and Grout Lines
With the damaged grout removed, clean the entire shower surface before applying new grout. Soap scum, mold, and mineral deposits contaminate the joint and prevent proper adhesion.
- Step 4 — Caulk Corners, Then Grout the Field
This is the most important concept in the entire repair: corners get caulk, not grout. Every inside corner in a tile shower is a change-of-plane joint. Grout is rigid; these joints must be flexible.
- Step 5 — Mix and Apply New Grout
Choosing sanded vs. unsanded grout: For joints 1/8 inch or wider, use sanded grout — the sand particles help bridge the gap and prevent shrinkage cracking.
- Step 6 — Seal the Grout
Unglazed and cement-based grout is highly porous. Without sealer, water, soap, and oils penetrate the pores and cause staining, mold growth, and accelerated deterioration.
Free: 10-Point Home Maintenance Checklist
Prevent costly repairs with this seasonal checklist. Save hundreds every year by catching problems early.
Your checklist is ready!
Open Checklist →Something went wrong. View the checklist here.