How to Fix a Cracked Drywall Corner Bead: Remove, Replace, and Finish
Repair a cracked or damaged drywall corner by removing the old corner bead, choosing between paper, metal, or vinyl bead, and finishing with joint compound for a flawless edge.
A cracked or banged-up drywall corner looks worse than it is. That white ragged line running down a wall edge where the corner bead has pulled away or cracked through isn’t a structural problem — it’s a cosmetic fix that any patient DIYer can complete over a weekend.
A cracked or banged-up drywall corner looks worse than it is. That white ragged line running down a wall edge where the corner bead has pulled away or cracked through isn’t a structural problem — it’s a cosmetic fix that any patient DIYer can complete over a weekend. The materials cost under twenty dollars, the tools are basic, and the finished result, done properly, is completely invisible. The key is understanding why corners fail, choosing the right bead for the application, and taking the time to apply compound in thin coats rather than trying to cover everything in one thick pass.
What You Need
Assemble everything before you start. Drywall work requires patience between coats, not complex tools:
- Corner bead (paper-faced or metal) — sized for 90-degree outside corners
- All-purpose joint compound — pre-mixed bucket is easiest for small repairs
- Drywall corner bead screws or crimper — for attaching metal bead securely
- 10-inch and 6-inch drywall knives — for applying and feathering compound
- Drywall sanding sponge and sandpaper — 120-grit for shaping, 220-grit for final smoothing
- Drywall primer sealer — essential before painting the repaired area
Understanding Corner Bead Types
Before buying materials, choose the right bead for your situation.
Metal corner bead (galvanized steel) is the original and still the most common type. It’s strong and holds a crisp, straight edge. Attach it with drywall screws through the flanges every 8 to 10 inches, or use a bead crimper tool. Metal bead works well in areas with no moisture and minimal house movement. Its weakness is that it can separate from the compound if the framing flexes, creating the same cracking you’re trying to repair.
Paper-faced metal corner bead combines a metal spine for straightness with paper flanges that are embedded in joint compound — essentially the same way drywall tape is embedded. Because the compound physically bonds to the paper fibers, this type resists cracking far better than plain metal bead in homes that settle or in areas prone to slight movement. No screws or crimper needed — it’s installed with compound alone.
Vinyl corner bead is flexible and rust-proof, making it the best choice for bathrooms, laundry rooms, or any corner in a humid area. It’s also the right choice for curved or non-90-degree corners. Attach with nails, screws, or compound depending on the product.
Bullnose bead creates a rounded rather than sharp corner and is used for decorative effect. If your home has rounded corners and one is damaged, match the existing radius when buying replacement bead.
For most interior wall corners in living areas, paper-faced metal bead is the best choice for a DIY repair — it’s easy to install, resists future cracking, and produces excellent results without specialized tools.
Step 1 — Remove the Damaged Corner Bead
Start by cutting through the paint line where the old compound meets the wall surface. Run a utility knife along both sides of the corner, a few inches out from the bead edge, to score through the paint and the compound without tearing the drywall paper on the wall surface.
For metal bead installed with screws or nails: grip the bead with locking pliers at the top and peel it away from the wall. Work down the length of the corner, pulling firmly. The bead should separate from the compound with some effort. Any nails that remain in the drywall can be pulled with a claw hammer.
For paper-faced bead or heavily mudded metal bead: score the compound flanges on both sides with the utility knife, then use a putty knife or a stiff 6-inch drywall knife to pry the bead away from the wall. Work in short sections if needed.
Once the bead is removed, use the 6-inch drywall knife to scrape away remaining compound from the corner. You don’t need to reach bare drywall everywhere — just remove any loose, crumbling material and get the surface as flat as you can. If the drywall paper was torn during removal, cut away loose paper with the utility knife and apply a thin coat of compound to seal the torn area. Let this tack coat dry completely before proceeding.
Step 2 — Inspect the Corner and the Framing
With the bead off and the old compound cleared, look at the condition of the corner itself. Is the corner stud straight? Is there any evidence of moisture damage (dark staining, soft drywall, crumbling paper)? Are the two sheets of drywall meeting tightly at the corner?
If the drywall is soft, swollen, or separating from the studs, address the underlying moisture issue before installing new bead — otherwise you’ll be doing this repair again in two years. If the drywall panels have separated from the framing, drive new drywall screws to re-secure them before proceeding.
A corner that was damaged by impact often has dented or crushed drywall along the edge. If the damage goes beyond the bead area and into the drywall panel itself, use a putty knife to apply a small amount of joint compound to fill any voids in the drywall surface. Feather it smooth and let it dry before installing the new bead.
Step 3 — Cut and Install the New Corner Bead
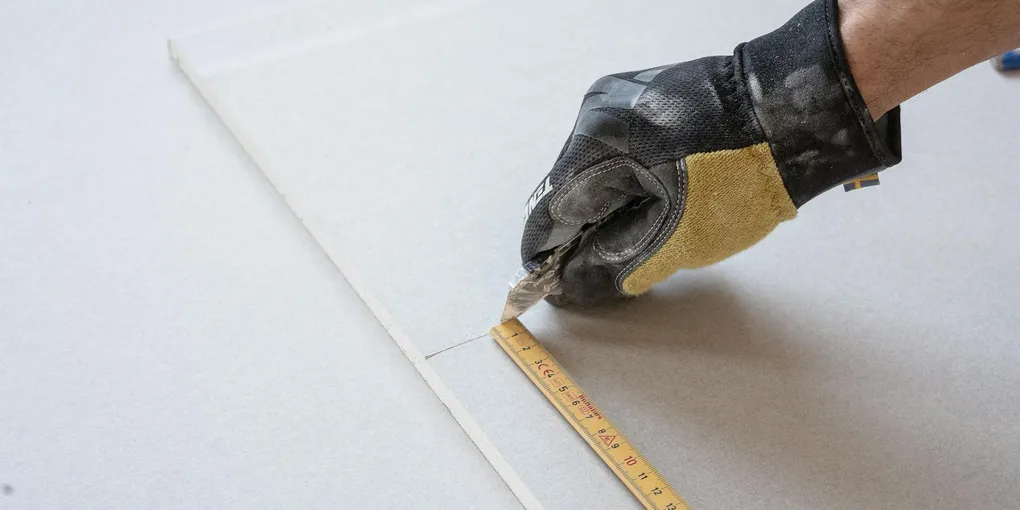
Measure the height of the corner from floor to ceiling and cut the new bead to length with aviation snips (for metal) or a utility knife (for paper-faced bead or vinyl). Cut cleanly and square — a crooked cut at the top of the bead creates a difficult finishing challenge.
For paper-faced metal bead:
- Mix a small amount of all-purpose joint compound to a peanut-butter consistency.
- Apply a thin layer of compound to both flanges of the corner using a 6-inch knife. The compound should cover the drywall surface where the bead flanges will sit.
- Press the bead firmly into the corner with the metal nose running straight up the center of the corner edge. Press both flanges into the wet compound.
- Run your drywall knife down each flange with firm pressure to embed the bead and squeeze out excess compound.
- Check that the bead nose is running straight by stepping back and sighting down the corner from floor level. Adjust immediately if it’s drifting — compound doesn’t set instantly.
- Apply a thin first coat of compound over both flanges, feathering out 4 to 6 inches from the corner edge on each side.
For metal bead with screws:
- Hold the bead in position and drive drywall screws through the flanges every 8 inches, alternating from side to side as you work down.
- Make sure screw heads are flush with or very slightly below the bead flange surface — not raised up, which would show through the compound.
- Apply the first coat of compound over the flanges.
Step 4 — Apply Three Coats of Joint Compound
This is the patience-requiring part. Do not rush between coats. Joint compound must be completely dry — not just surface-dry but dry all the way through — before the next coat goes on. Wet compound under dry compound will crack as it dries. In normal indoor conditions, 24 hours between coats is the reliable standard.
First coat: Embed the bead and cover the flanges. For paper-faced bead, you already applied this during installation. For metal bead, apply now. Use the 6-inch knife and work from top to bottom in smooth strokes. The goal is to fill the flanges flush with the wall surface. Don’t worry about perfection — this coat is about adhesion and build.
Second coat: Once the first coat is bone dry, lightly sand any ridges or tool marks with 120-grit sandpaper. Wipe the dust away with a barely damp cloth. Apply the second coat with the 10-inch knife, extending 8 to 10 inches out from the corner on each side. Use long, smooth strokes and feather the edges thin. This is the coat that begins to create the invisible transition to the wall surface.
Third coat (skim coat): Sand the second coat lightly after drying. The third coat goes on thin — almost translucent — using the widest knife you have. The goal is to fill any remaining imperfections and create a perfectly flat surface. Feather the edges out even further, 12 inches or more if the second coat edges are visible.
Step 5 — Sand, Prime, and Paint
Once the final coat is fully dry, sand the entire repair with 120-grit sanding paper on a pole sander for large areas or a hand sanding sponge for the compound close to the corner nose. Be gentle near the corner nose itself — metal bead can show through if you sand aggressively over it.
Follow with 220-grit for a final smoothing pass. The surface should feel perfectly flat when you run your hand along the wall, with no detectable ridges at the compound edges.
Wipe away all dust with a barely damp cloth and let the wall dry completely.
Apply one coat of drywall primer sealer. This seals the porous compound and prevents the paint from absorbing unevenly. Once the primer dries (typically 1 to 2 hours), apply your finish paint in the color and sheen that matches the surrounding wall. Two coats of paint after primer are usually required to fully blend the repair into the existing wall.
Related Reading
- How to Patch Drywall Holes
- How to Skim Coat a Wall
- How to Paint a Room Like a Pro
- Step 1 — Remove the Damaged Corner Bead
Start by cutting through the paint line where the old compound meets the wall surface. Run a utility knife along both sides of the corner, a few inches out from the bead edge, to score through the paint and the compound without tearing the drywall pa...
- Step 2 — Inspect the Corner and the Framing
With the bead off and the old compound cleared, look at the condition of the corner itself. Is the corner stud straight? Is there any evidence of moisture damage (dark staining, soft drywall, crumbling paper)? Are the two sheets of drywall meeting ti...
- Step 3 — Cut and Install the New Corner Bead
Measure the height of the corner from floor to ceiling and cut the new bead to length with aviation snips (for metal) or a utility knife (for paper-faced bead or vinyl).
- Step 4 — Apply Three Coats of Joint Compound
This is the patience-requiring part. Do not rush between coats. Joint compound must be completely dry — not just surface-dry but dry all the way through — before the next coat goes on. Wet compound under dry compound will crack as it dries.
- Step 5 — Sand, Prime, and Paint
Once the final coat is fully dry, sand the entire repair with 120-grit sanding paper on a pole sander for large areas or a hand sanding sponge for the compound close to the corner nose.
Free: 10-Point Home Maintenance Checklist
Prevent costly repairs with this seasonal checklist. Save hundreds every year by catching problems early.
Your checklist is ready!
Open Checklist →Something went wrong. View the checklist here.