How to Fix a Cracked or Chipped Bathroom Vanity Top (2026)
A cracked or chipped bathroom vanity top can often be repaired rather than replaced. This guide covers epoxy filler repair, color matching, refinishing kits for cultured marble and porcelain, and when full vanity top replacement makes more sense.
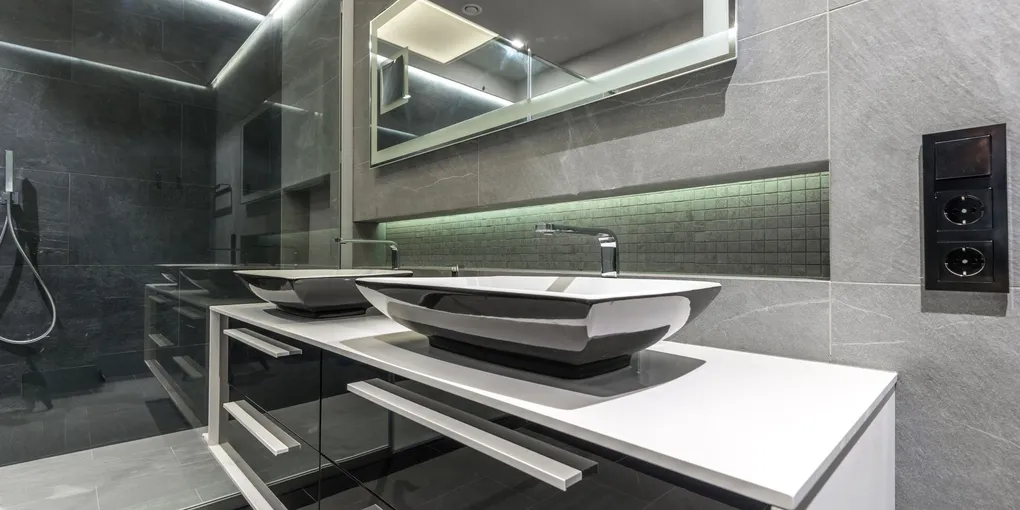
Cracked vanity top repairs: (1) Small chips and hairline cracks in cultured marble or solid surface: fill with a two-part epoxy filler, color match with pigment, sand flush, and polish. Total cost: $15–$40. (2) Porcelain or ceramic top chips: use a porcelain repair kit with color-matched enamel. (3) Structural cracks that have separated: epoxy the pieces together from underneath before filling the surface. (4) Deep cracks or a badly damaged top: replacement vanity tops start at $80–$200 and are a straightforward DIY swap.
Frequently Asked Questions
What type of material is my vanity top and how does it affect the repair?
Bathroom vanity tops are made from several different materials, and the correct repair method depends on which you have: (1) Cultured marble — a blend of marble dust and polyester resin with a gel coat surface. Very common in standard bathrooms. Chips are easily repaired with polyester or epoxy filler and can be polished to restore the gel coat sheen. (2) Solid surface (Corian, Swanstone) — solid acrylic or polyester material throughout. Chips and scratches are repaired with manufacturer-supplied repair kits or two-part epoxy; the material can be sanded and polished to near-original appearance. (3) Natural marble or granite — stone tops are harder to repair because the stone matrix cannot be fused back together. Small chips are filled with color-matched epoxy or stone filler. Cracks in stone often require professional repair or top replacement. (4) Porcelain or ceramic — vitreous material that chips cleanly. Porcelain repair enamel paints provide a good cosmetic fix for chips but do not perfectly replicate the glassy surface. (5) Engineered quartz — similar to solid surface; chips are filled with epoxy mixed to match the quartz pattern.
How do I fill and color-match a chip in a cultured marble vanity top?
Cultured marble chip repair step by step: (1) Clean the chipped area thoroughly with acetone or isopropyl alcohol to remove all soap scum, lotion, and residue. Any contamination prevents adhesion. (2) Purchase a two-part polyester or epoxy filler — available at hardware stores and online. Mix per the instructions (typically a small amount of hardener into the base compound). (3) Color matching: either purchase a kit with multiple pigment colors to mix to your vanity's shade, or take a photo to a paint store for tinting. Cultured marble is often white, off-white, almond, or grey with varying veining patterns. Start with a small amount of pigment and mix thoroughly — the color lightens slightly as the filler cures. Test on cardboard before applying. (4) Slightly overfill the chip — apply filler proud of the surface (slightly higher) because it will be sanded flush after curing. (5) Let cure fully per instructions (typically 1–4 hours). (6) Sand flush with 220-grit wet/dry sandpaper, working in concentric circles. Progress through 400-grit, then 600-grit for a smoother surface. (7) Polish with automotive rubbing compound, then polishing compound, to restore the gel coat sheen. A power buffer speeds this step significantly.
Can I repair a crack that has split a cultured marble top into two pieces?
Yes, structural cracks that have separated can often be repaired, though the result is rarely invisible — there will likely be a visible seam. The repair process: (1) Clean both mating surfaces thoroughly with acetone. (2) Apply two-part epoxy (not filler — use a structural bonding epoxy like JB Weld or a stone epoxy) to both mating surfaces. (3) Press the pieces together firmly. Tape them together and use clamps if accessible, or stack weight on top. (4) Wipe away any squeeze-out immediately with acetone before it cures. (5) Let the epoxy cure fully — at least 24 hours for full strength. (6) After the structural repair is solid, fill the surface seam with color-matched filler compound as described above. (7) Sand and polish. A hairline seam will remain visible in most cases, especially on vanity tops with veining or patterns. If the crack is in a visually prominent location, replacement may give a better result aesthetically even if the structural repair is sound.
What is a vanity top refinishing kit and when should I use one?
A refinishing kit (also called a reglazing or resurfacing kit) applies a new surface coating over the existing top. It is appropriate when: the existing surface has multiple small chips, widespread crazing (a network of fine surface cracks), or the color is outdated and you want to update it without full replacement. Refinishing kits include a bonding primer, finish coat (typically an epoxy or acrylic enamel), and application tools. The process: (1) Thoroughly clean and scuff the existing surface. (2) Repair any deep chips or cracks with filler before applying the kit coating. (3) Apply the bonding primer. (4) Apply 2–3 coats of the finish coat. A fully refinished vanity top looks like new and adds years of life. Limitations: refinished surfaces are more susceptible to scratching than the original gel coat; avoid abrasive cleaners. The refinish coating typically lasts 5–10 years with proper care. Refinishing kits cost $25–$60 for a DIY application.
When does it make more sense to replace the vanity top rather than repair it?
Replace rather than repair when: (1) The crack goes all the way through a sink-integrated top (one-piece top with integral bowl) and the bowl is structurally compromised — water will leak through and cause cabinet damage. (2) The damage is so extensive (multiple large cracks, half the top surface is missing or chipped) that the area of repair becomes larger than the area of intact material. (3) The top is so old that the color no longer matches available repair materials or replacement fixtures — an avocado-green or harvest-gold top is a style update opportunity. (4) You also need to replace the vanity cabinet — the top and cabinet are typically replaced together. (5) The cost of professional reglazing ($200–$400 for a technician visit) approaches or exceeds the cost of a replacement top ($80–$250 for a standard cultured marble top). DIY repair is almost always worth attempting first — the cost is low and the worst case is that the repair looks imperfect and you still decide to replace.
How do I replace a vanity top if repair isn't viable?
Replacing a vanity top is a manageable DIY project: (1) Shut off the water supply valves under the sink. Disconnect the drain (P-trap) and supply lines. (2) Remove the faucet (or plan to transfer it to the new top). (3) Cut the caulk line around the top with a utility knife. Use a putty knife to pry up the top — most tops are set in caulk and construction adhesive and need patient prying to release. (4) Clean the cabinet top surface of all old caulk and adhesive. (5) Measure the cabinet top dimensions carefully and purchase a replacement top (pre-drilled for one or three faucet holes, or a 4-inch spread or single-hole configuration). Standard vanity tops are 19 or 22 inches deep and come in widths from 24 to 72 inches. (6) Set the new top on the cabinet, connect the drain assembly and faucet, and connect the supply lines. (7) Caulk around the perimeter where the top meets the wall with 100% silicone caulk. (8) Restore water supply and check for leaks. The entire replacement can be done in 2–4 hours.
Cracked vanity top repairs: (1) Small chips and hairline cracks in cultured marble or solid surface: fill with a two-part epoxy filler, color match with pigment, sand flush, and polish. Total cost: $15–$40.
Before spending $150–$300 on a new vanity top, spend 30 minutes on a repair — most chips and even many cracks come out far better than expected.
What You Need
- Cultured marble repair kit with pigments — two-part filler with color additives for seamless chip repair
- Porcelain repair kit — color-matched enamel for porcelain or ceramic vanity tops
- Bathtub and tile refinishing kit — full surface coating kit for widespread crazing or color refresh
- Wet/dry sandpaper assortment 220-600 grit — for sanding the filler flush and polishing
- Automotive polishing compound — restores gel coat sheen after sanding the repair
- 100% silicone caulk white — for resealing the vanity top perimeter after repair or replacement
Step 1: Identify Your Vanity Top Material
The correct repair method depends on the material. Before purchasing any repair products, identify what you have.
Cultured marble: Smooth, slightly translucent surface that may have veining patterns. Taps with a slightly hollow sound compared to natural stone. The most common material in residential bathrooms built between 1970 and 2010. Repaired with polyester or epoxy filler and polished.
Solid surface (Corian, Swanstone, Wilsonart): Matte to satin finish, solid color or subtle pattern throughout — the color goes all the way through the material. Scratches and small chips are sanded out and the surface refinished with the manufacturer’s polishing system.
Natural marble or granite: Cold to the touch, heavy, with natural veining that continues through the material. More difficult to repair invisibly; stone filler is used for chips. Cracks in natural stone should be evaluated by a stone restoration professional.
Porcelain: Very hard, glassy, brittle surface. Chips tend to have sharp, clean edges. Repaired with porcelain repair enamel.
Step 2: Prepare the Damaged Area
Regardless of material type, preparation is the most critical step for an invisible repair.
- Clean the entire vanity top with an all-purpose cleaner to remove soap scum and residue.
- Clean the damaged area specifically with acetone or 91% isopropyl alcohol on a cotton ball. Scrub thoroughly — any oil, soap film, or wax prevents adhesion.
- Dry completely.
- For chips with loose or crumbled edges: use a hobby knife or dental pick to gently remove any completely loose material. Do not widen the chip unnecessarily, but any material that is barely attached will telegraph through the repair.
- Lightly scuff the inside of the chip with 220-grit sandpaper to give the filler mechanical adhesion.
Step 3: Mix and Apply the Filler
For cultured marble and solid surface tops:
Color matching:
Open your repair kit and lay the pigment vials next to your vanity top in good light. Most vanity tops are some variant of white, off-white, almond, biscuit, grey, or a combination. Mix small test amounts on cardboard until you achieve a close match — the filler will cure slightly lighter than it appears wet.
Mixing the filler:
Follow the kit instructions for the hardener-to-base ratio. Mix thoroughly for 60–90 seconds until the color is uniform. Work quickly — most two-part fillers begin setting within 5–10 minutes.
Application:
- Slightly overfill the chip — apply filler so it sits proud of the surrounding surface by 1/16 inch. You will sand it flush after curing.
- Smooth the surface of the filler with a plastic spreader or putty knife dampened with water (for water-based kits) or acetone (for solvent-based kits) to minimize air bubbles.
- Allow to cure fully — at minimum 2 hours, preferably overnight. Do not sand early or the filler will ball up rather than shave cleanly.
For porcelain chips: apply porcelain repair enamel with the included brush applicator in thin coats, building up to slightly proud of the surface. Allow each coat to dry per instructions.
Step 4: Sand and Level the Repair
Once the filler is fully cured:
- Start with 220-grit wet/dry sandpaper. Keep the area wet while sanding. Sand in small circular motions, checking frequently by running your finger across the surface — when you can no longer feel the edge between the filler and the original surface, you have sanded enough at this grit.
- Progress to 400-grit, repeating the same wet-sanding process.
- Finish with 600-grit for the smoothest possible surface before polishing.
Keep the sandpaper flat at all times — do not press the edges of the paper into the material, which creates a dish-shaped depression around the repair.
Step 5: Polish to Restore Sheen
Sanded surfaces are dull — polishing restores the gloss that makes the repair invisible.
- Apply a small amount of automotive rubbing compound to a clean microfiber cloth. Work it into the repaired area in circular motions for 2–3 minutes.
- Wipe clean and assess the gloss. The repair should be approaching the sheen of the surrounding surface.
- Apply polishing compound (finer than rubbing compound) with a clean cloth for the final gloss restoration.
- For cultured marble: follow with a dedicated marble polishing compound for the best result.
- If using a power buffer: use very light pressure — excessive heat from a buffer can damage cultured marble’s gel coat.
Step back and look at the repair under a light source at an angle. A good repair is difficult to spot. The remaining visible seam will diminish further over weeks as the surface is cleaned and polished with regular use.
Step 6: Refinishing the Full Surface (Optional)
If the vanity top has widespread crazing (a network of fine surface cracks across the gel coat), multiple chips, or an outdated color, full refinishing rather than spot repair gives the best result.
Refinishing kits ($25–$60) apply a new surface coating over the entire top:
- Repair all chips and cracks with filler and sand flush.
- Scuff the entire surface with 220-grit sandpaper to give the new coating mechanical adhesion.
- Clean with acetone.
- Apply the included bonding primer.
- Apply 2–3 thin coats of the topcoat, allowing each to dry per instructions.
- The result is a fresh, uniform surface that looks like a new top.
Avoid abrasive cleaners on refinished surfaces — use only non-abrasive liquid cleaners to preserve the new coating.
When to Replace the Vanity Top
Replace rather than repair when:
- The sink bowl is cracked through and leaks or is at risk of failing structurally
- The damage covers more than 30% of the surface area
- Multiple attempts at repair have left visible patches that are more distracting than the original damage
- You are already replacing the vanity cabinet
Replacement tops are available at home improvement stores in standard sizes for $80–$250 for cultured marble and solid surface. The installation involves shutting off water, disconnecting plumbing, prying up the old top, and setting the new one in a bead of silicone — a project most homeowners complete in a half day.
Related Reading
- How to Install a Bathroom Vanity — full vanity replacement if the cabinet also needs updating
- Small Bathroom Remodel Ideas — inspiration for a broader bathroom refresh
- How to Replace a Shower Head — other straightforward bathroom DIY upgrades to do at the same time
- Identify the vanity top material
Tap the surface: a slightly hollow sound = cultured marble (most common in homes built 1970-2010); solid, dense sound = natural stone or porcelain; a plastic-like tap = solid surface (Corian/Swanstone). Look at the chip: cultured marble shows a white or gray resin substrate; porcelain has a very hard glassy chip edge; solid surface has uniform color throughout. The repair kit you need depends on the material.
- Prepare the damaged area
Clean the entire damaged area with an all-purpose cleaner, then scrub specifically with acetone or 91% isopropyl alcohol on a cotton ball. Remove any completely loose chips with a hobby knife. Lightly scuff the inside of the chip with 220-grit sandpaper for mechanical adhesion. Let dry completely — any oil or moisture prevents adhesion.
- Mix and apply the filler
Mix pigment with the filler base until the color matches your vanity in good light — the filler cures slightly lighter than it looks wet. Mix the hardener per kit instructions (working time: 5-10 minutes). Apply filler slightly proud of the surrounding surface (1/16 inch above). Smooth with a dampened plastic spreader to minimize air bubbles. Cure fully — minimum 2 hours, preferably overnight.
- Sand and level the repair
Wet-sand with 220-grit wet/dry sandpaper in small circular motions, keeping the area wet. Check by running a finger across — stop when you can no longer feel the edge between filler and original surface. Progress to 400-grit, then 600-grit for the smoothest surface before polishing. Keep sandpaper flat to avoid creating a dished depression around the repair.
- Polish to restore sheen
Apply automotive rubbing compound to a clean microfiber cloth and work into the repaired area in circular motions for 2-3 minutes. Wipe clean and assess the gloss. Follow with polishing compound (finer grit) for final gloss restoration. A good repair is difficult to see in normal light — the remaining slight seam will diminish further with normal cleaning and use.
Free: 10-Point Home Maintenance Checklist
Prevent costly repairs with this seasonal checklist. Save hundreds every year by catching problems early.
Your checklist is ready!
Open Checklist →Something went wrong. View the checklist here.